
When you’re on the go, with the ability to see essential emails in your Apple Watch is superior. However there’s extra to the Mail app in your Apple Watch than simply studying your emails.
Listed below are a number of suggestions for taking advantage of the Mail app and managing your emails with ease on Apple Watch.
1. Choose the mailboxes to show
Simply because you have got a number of e mail accounts linked to the Mail app in your iPhone doesn’t imply you need to see all of them in your Watch. You’ll be able to choose and select which mailboxes to show so that you see crucial emails.
You’ll be able to choose the accounts utilizing the Mail app on Apple Watch or with the Watch app in your iPhone.
Select the e-mail accounts on Apple Watch
- To pick out the e-mail accounts on the Watch itself, begin by opening the Mail app.
- Go to the primary Mailboxes display screen.
When you’re viewing an inbox, faucet the arrow on the highest left to return to the Mailboxes display screen. - Scroll to the underside and choose Edit.
- While you see the record of accessible e mail accounts, faucet to put a checkmark subsequent to those you need to see.
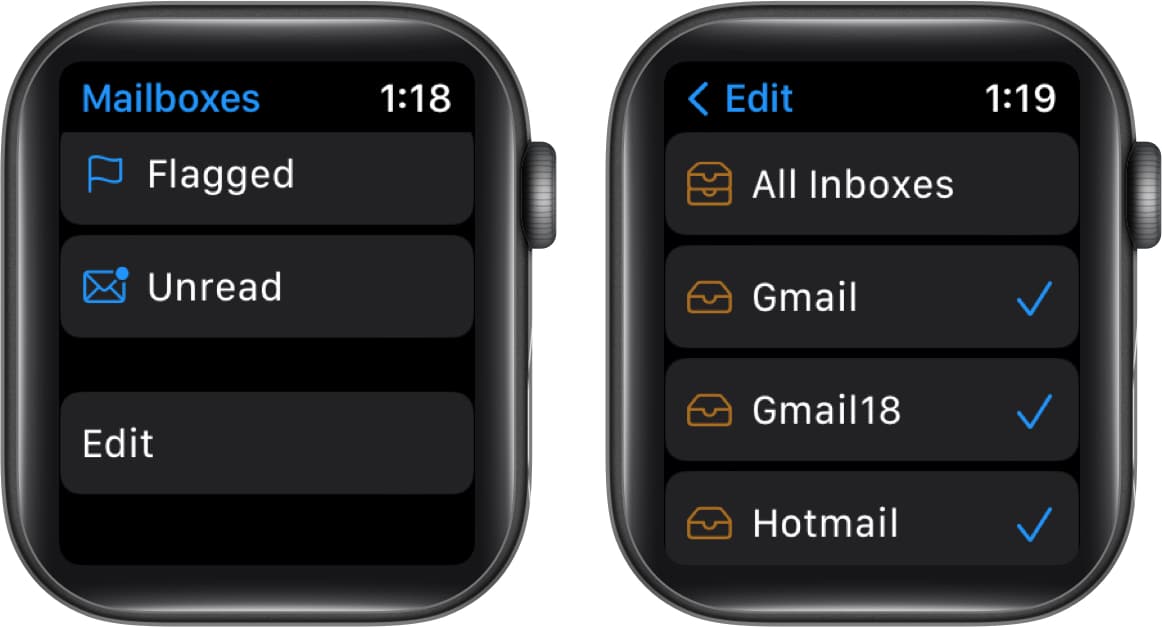
You’ll be able to then faucet the arrow to return to the Mailboxes display screen.
Select the e-mail accounts within the Watch app
- Launch the Watch app in your iPhone → go to the My Watch tab.
- Scroll right down to and choose Mail.
- Choose Embrace Mail within the Mail Settings part.
- Faucet to put a checkmark subsequent to the e-mail accounts you need to see.
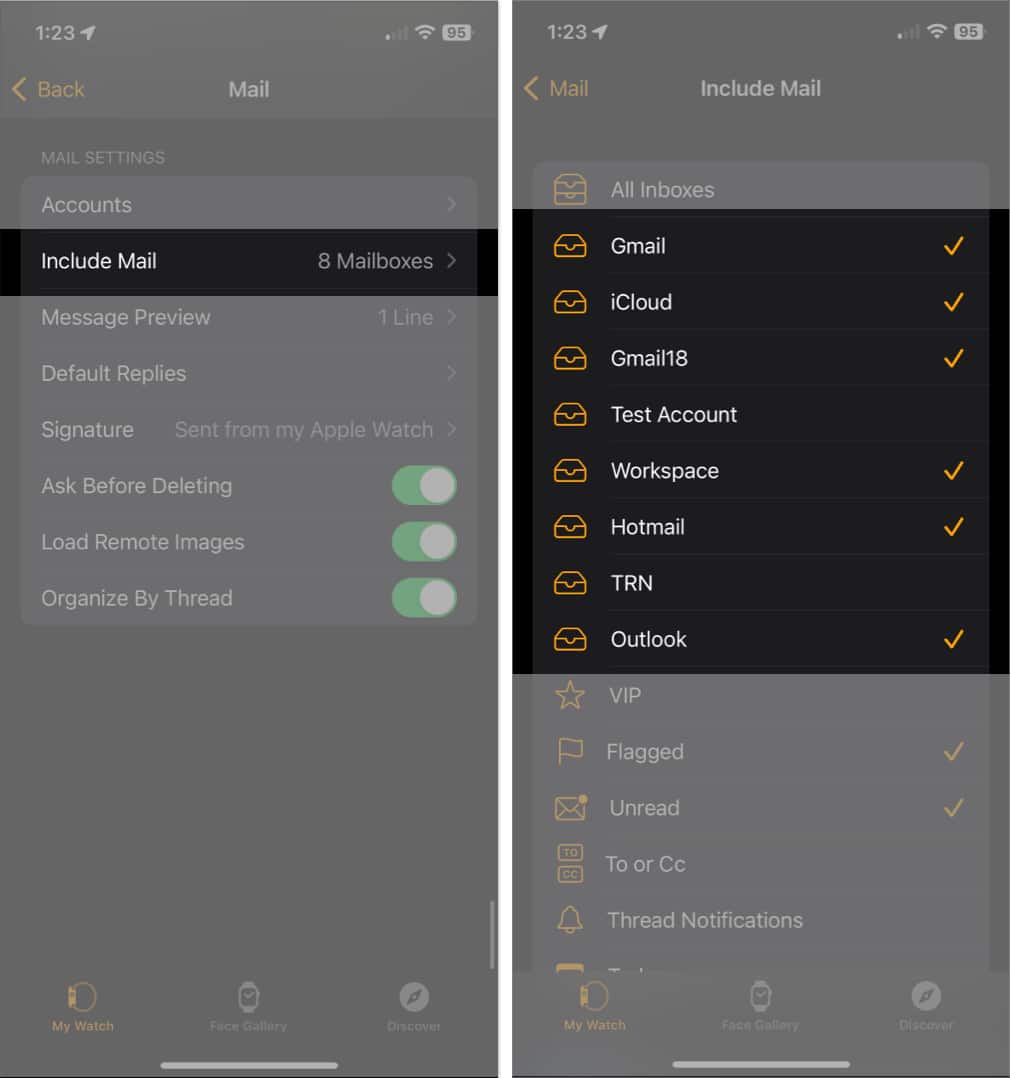
Then, use the arrow on the highest left to exit these settings.
2. View a selected account
Together with selecting particular e mail accounts to view in your Apple Watch, you’ll be able to leap on to a kind of inboxes everytime you like. So, in case you’re on the lookout for an e mail on your iCloud mail, you’ll be able to open that specific inbox.
- On the primary Mailboxes display screen within the Mail app on Apple Watch.
- Faucet on the mail service to open the corresponding mailbox.
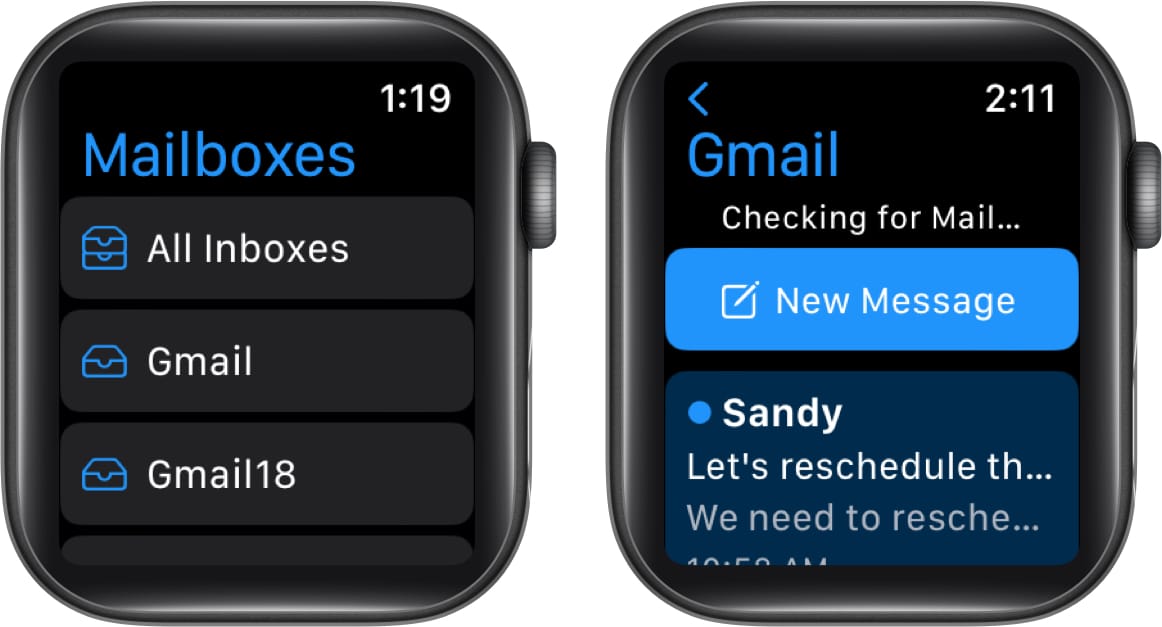
As a substitute, you’ll be able to view all emails you obtain from all displayed accounts by selecting the All Inboxes mailbox.
3. Archive, mark, or flag an e mail
While you need to take an motion on an e mail on Apple Watch, you are able to do so with out even opening the message. After all, you may as well take motion in case you’re studying an e mail.
- Go to the inbox or All Inboxes in case you want.
- To archive or flag an e mail, swipe it from proper to left. You’ll then see the Archive and Flag/Unflag choices. Simply faucet to pick one.
- To mark an e mail as learn or unread, swipe it from left to proper. When you’ve learn the e-mail, you’ll see an Unread icon, and in case you haven’t, you’ll see the Learn icon. Merely faucet to mark your choice.
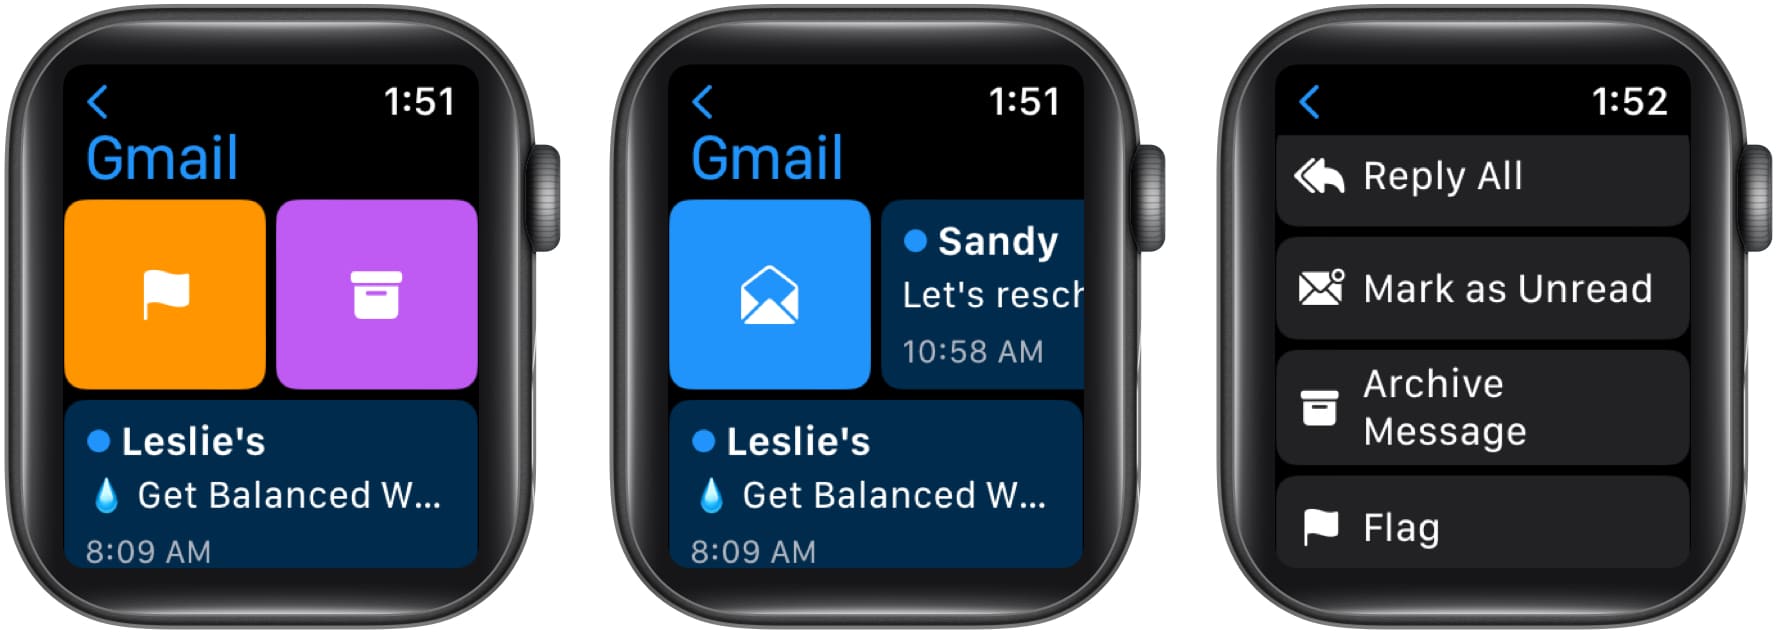
Together with utilizing the swipe actions to archive, mark, or flag emails, you may as well accomplish that from the e-mail itself. Open an e mail and scroll to the underside. Under Reply and Reply All, you’ll see Archive Message, Mark as Learn/Unread, and Flag/Unflag.
4. Affirm earlier than archiving or deleting emails
As a result of you’ll be able to archive (or delete) an e mail with a easy swipe, it may be straightforward to faucet this feature by mistake. To keep away from by accident archiving or deleting an e mail, you’ll be able to allow a characteristic to be requested first.
- Open the Watch app in your iPhone → go to My Watch tab.
- Choose Mail → then choose Customized on the prime.
This characteristic shouldn’t be out there in case you use the Mirror My iPhone choice. - Then scroll down and activate the toggle for Ask Earlier than Deleting.
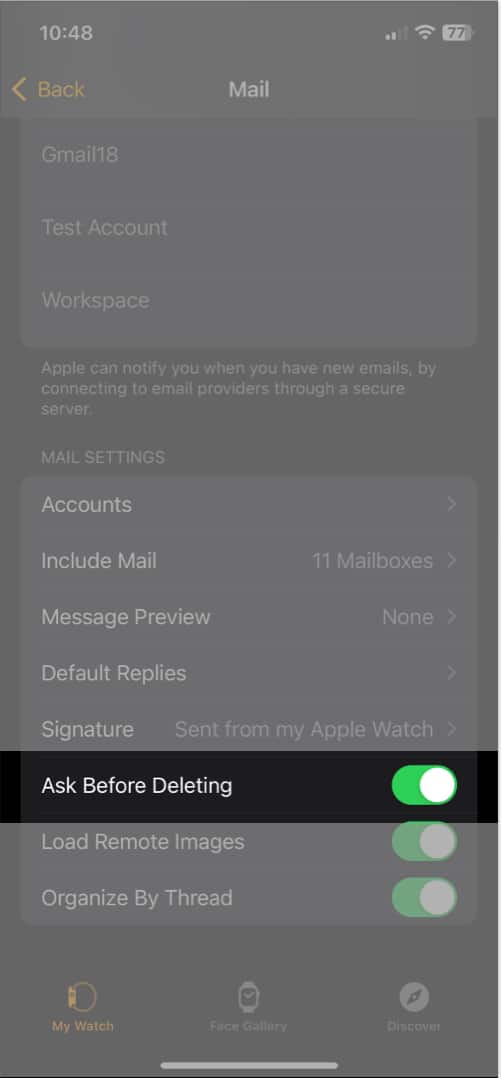
- Transferring ahead, in case you archive or delete an e mail, you’ll be prompted to substantiate by tapping Archive or Delete.

5. Customise the Mail notifications
You might have considered trying the flexibility to see the inboxes of your selection however solely obtain notifications for sure ones. You’ll be able to customise the alerts you obtain per account and decide to listen to a sound and obtain a haptic faucet on the identical time.
- Open the Watch app in your iPhone → go to the My Watch tab.
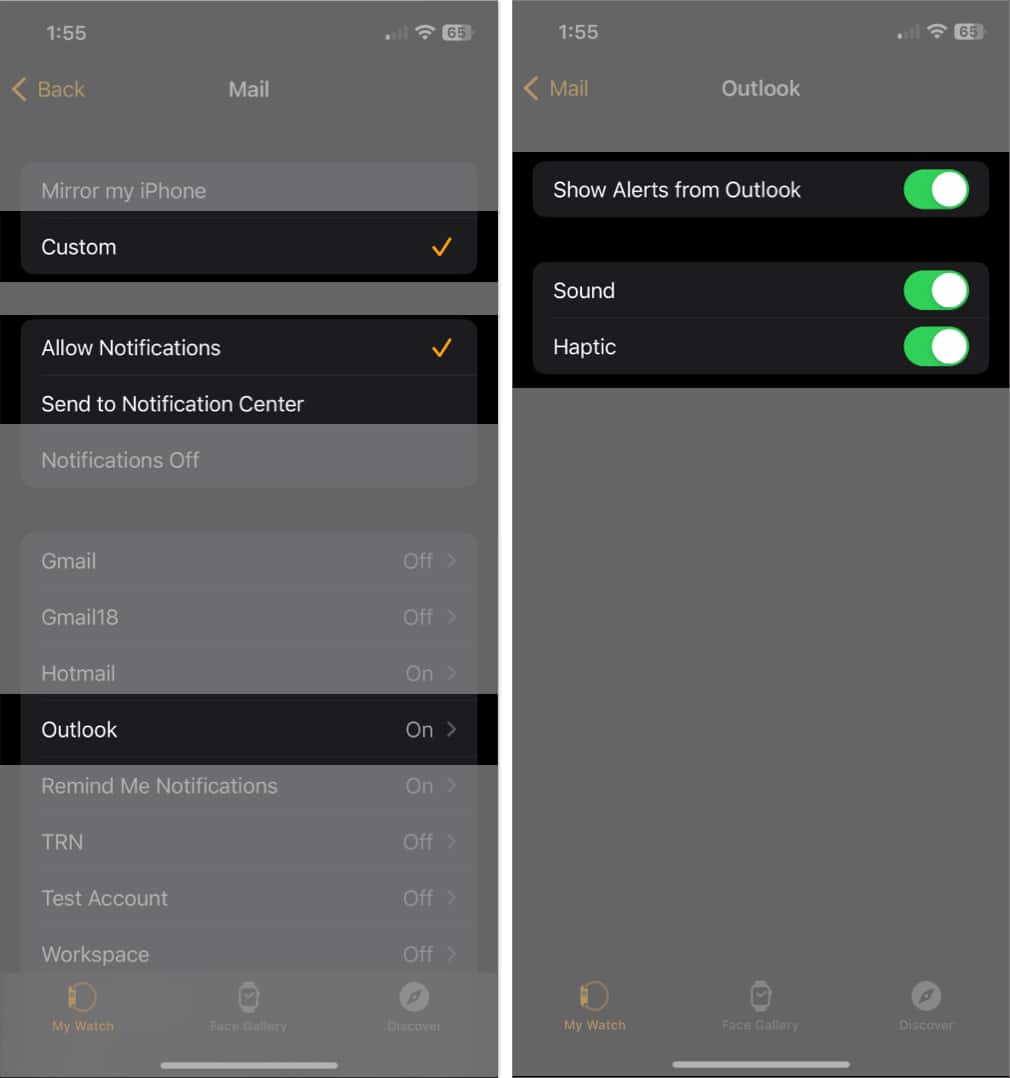
- Choose Mail → then choose Customized on the prime.
- Select both Enable Notifications to obtain alerts or Ship to Notification Middle to solely present alerts in that location.
- Choose the account within the record beneath → then allow the toggle for Present Alerts from [account].
- Optionally, allow the toggles for Sound and Haptic to listen to an audio alert and obtain a faucet.
- Use the Mail arrow on the highest left to return to the Mail settings.
6. Change the message preview
While you obtain an e mail, you mechanically see a preview, which incorporates the primary line or two. This helps you get a really feel for what the e-mail is about. However as a result of you have got restricted area in your Apple Watch display screen, you might need to shorten or take away the preview altogether, right here’s how.
- Open the Watch app in your iPhone → go to the My Watch tab.
- Choose Mail after which scroll right down to the Mail Settings part.
- Faucet Message Preview.
- Then, select None, 1 Line, or 2 Strains. When you choose None, you’ll solely see the sender and topic line.

Use the Mail arrow on the highest left to return to the Mail settings.
7. View distant content material
Many emails that you simply obtain might comprise photographs. In Mail on Apple Watch, these messages comprise hyperlinks that time to the pictures on-line. When you’d prefer to see these photographs within the emails, you’ll be able to load the content material mechanically.
Observe: Enabling this characteristic can decelerate the loading of emails.
- Open the Watch app in your iPhone → go to the My Watch tab.
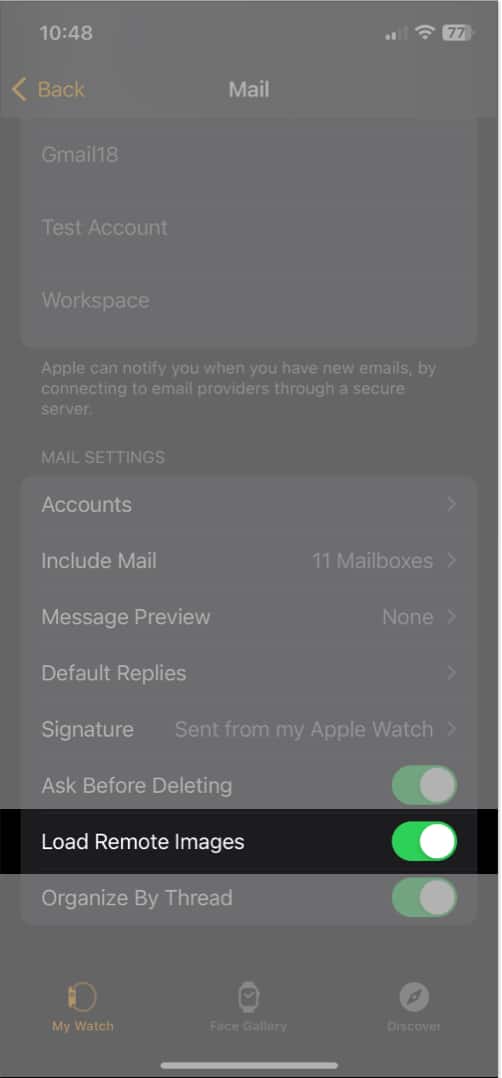
- Choose Mail and select Customized on the prime. If in case you have Mirror My iPhone chosen, you’ll see the beneath setting show as At all times Load Content material Immediately.
- Activate the toggle for Load Distant Photographs within the Mail Settings part.
When you flip off this characteristic later, you’ll see a immediate to load the distant content material if you open the e-mail.
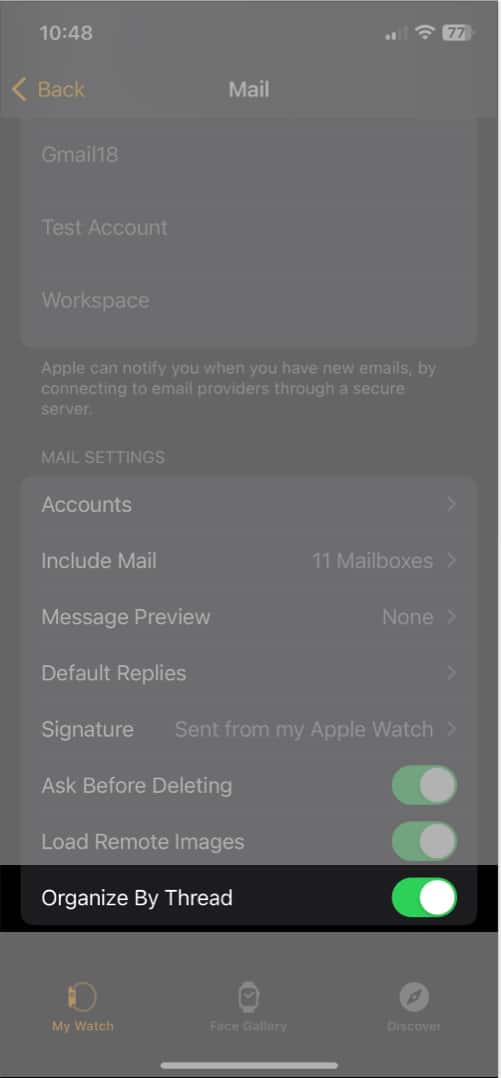
8. Set up emails by thread
Identical to in Mail in your iPhone, you’ll be able to set up your inbox by thread. That is useful for seeing these back-and-forth e mail communications grouped collectively.
- Open the Watch app in your iPhone → go to the My Watch tab.
- Choose Mail → then choose Customized on the prime. This characteristic shouldn’t be out there in case you use the Mirror My iPhone choice.
- Activate the toggle for Set up By Thread within the Mail Settings part.
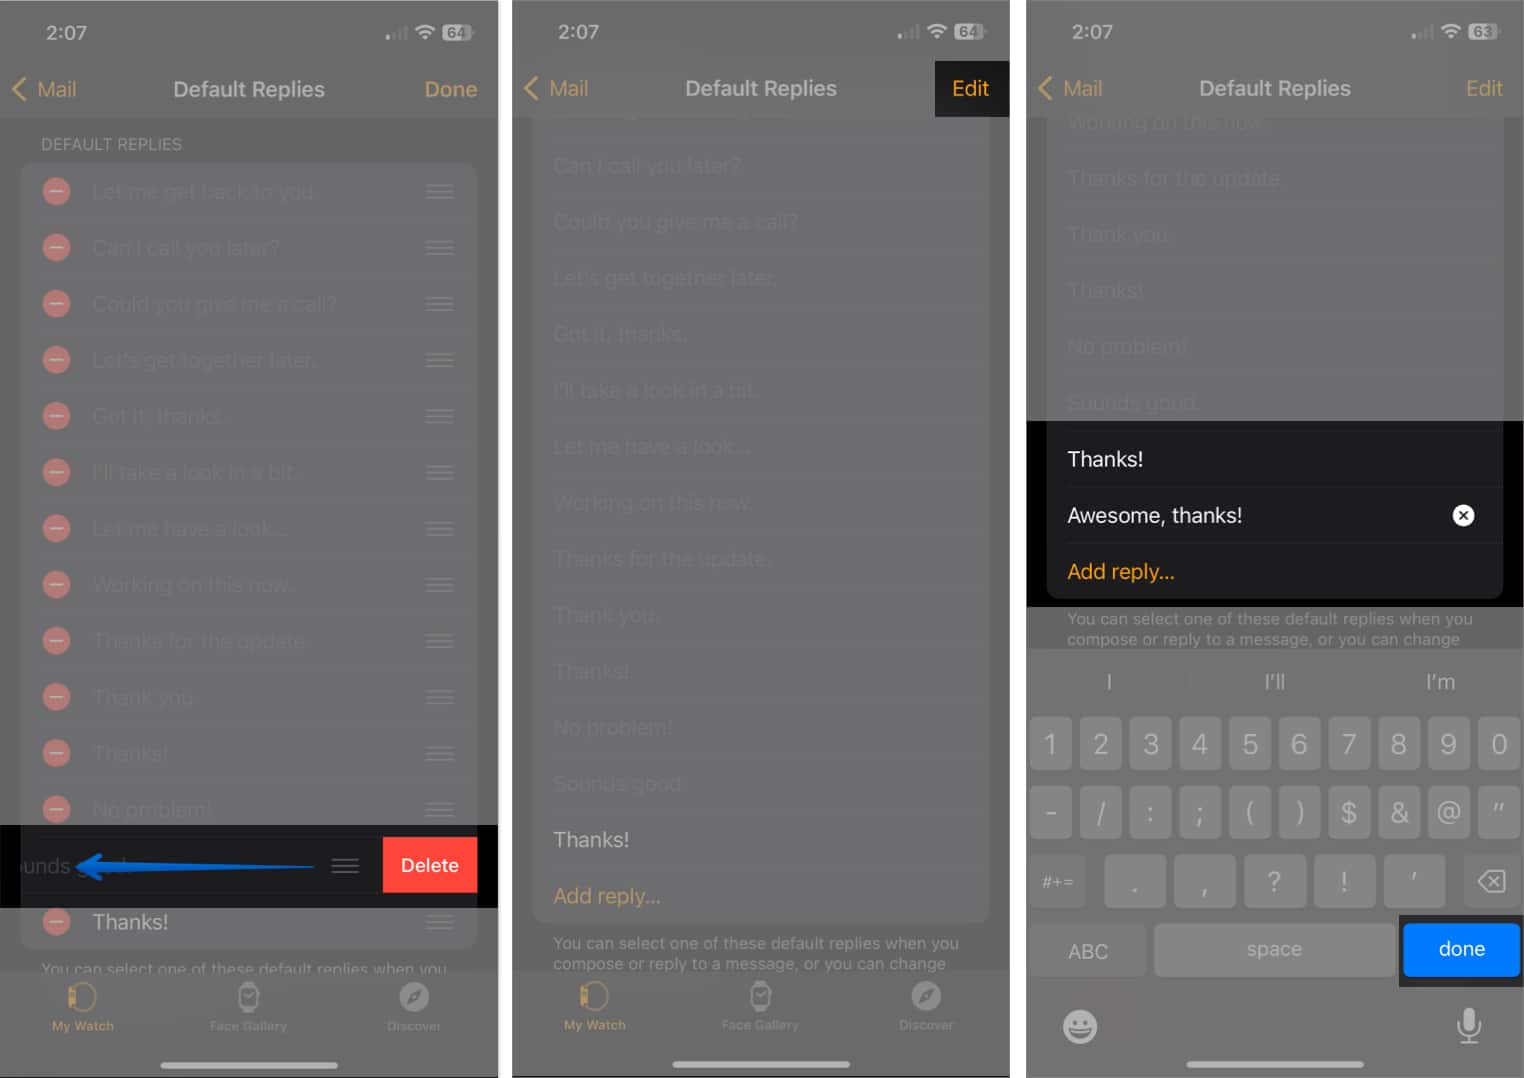
9. Arrange and use default replies
Default replies provide you with fast and straightforward methods so as to add messages to your emails. They’re particularly helpful on Apple Watch the place correct typing or dictating can take a little bit of time.
By organising default replies forward of time, you’ll be able to merely insert a premade message if you compose or reply to an e mail.
- Open the Watch app in your iPhone → go to the My Watch tab.
- Choose Mail → faucet Default Replies.
- You’ll see a number of replies supplied up by Apple, which you’ll take away in case you like. You can too add your individual.
- To take away a reply or rearrange the order through which they seem so that you can use, faucet Edit on the highest proper. Then, use the minus signal on the left to delete one or drag the three strains on the precise up or down to maneuver one.
- To create a reply, faucet Add Reply on the backside. Sort the response and faucet Executed on the keyboard if you end.
Use default replies
- To make use of a default response when replying, open the e mail on Apple Watch and scroll to the underside.
- Choose both Reply or Reply All per your choice.
- Faucet the Add Message discipline.
- You’ll then see your default replies beneath Solutions. Merely faucet to pick one and pop it into your response.

You’ll be able to then add to the reply, edit it, or ship the e-mail on its approach.
To make use of a default reply when composing an e mail, faucet the Create Message discipline after which choose a reply beneath Solutions.
10. Create and edit a signature
E mail signatures are helpful for mechanically signing your messages. Whether or not you embrace simply your identify or your identify together with one thing like your organization, web site, or telephone quantity, it can save you time and embrace priceless particulars on your recipient.
- Open the Watch app in your iPhone and go to the My Watch tab.
- Choose Mail → faucet Signature.
- Enter your signature within the field that seems. By default, it’s best to see “Despatched from my Apple Watch,” however you need to use something you want.

Your signature is then added to your outgoing emails mechanically.
When you’d prefer to edit the signature later, merely comply with the identical steps to make your modifications.
Take management of Mail on Apple Watch!
Having the ability to customise the Mail app on Apple Watch to suit your wants is a superb approach to profit from the app. Do you have got suggestions like this for Mail on Apple Watch that you simply’d prefer to share?
For extra, have a look at these suggestions and tips for Apple Mail in your iPhone and iPad too!
Learn extra: