
Whether or not you’re planning a weekend getaway or a prolonged trip, you doubtless need to discover locations to go to whilst you’re there. Utilizing Guides in Apple Maps, you cannot solely gather the places you need to see but additionally have the small print at your fingertips while you arrive.
What are Guides in Apple Maps?
Guides within the Apple Maps app are just like bodily or on-line guides you’ll discover for cities or areas you need to go to. A information usually contains places resembling landmarks, points of interest, eating places, theme parks, actions, and different locations of curiosity within the space.
In Maps, you could find curated Guides for locations you intend to journey that present lists of really useful or widespread spots. You’ll be able to then select a location to get further particulars on your go to.
Whereas the premade Guides in Maps are useful for locating new locations, you might need to create a Information of your individual on your subsequent journey. That is one other nice characteristic of Guides in Apple Maps.
Tips on how to create a brand new Information in Apple Maps
In the event you’re able to assemble a set of places you need to go to in your subsequent getaway, highway journey, or a household trip, right here’s the right way to create a Information of your individual in Maps.
On iPhone and iPad
- Launch the Maps app in your iPhone or iPad.
- Swipe the pop-up from the underside of your display screen.
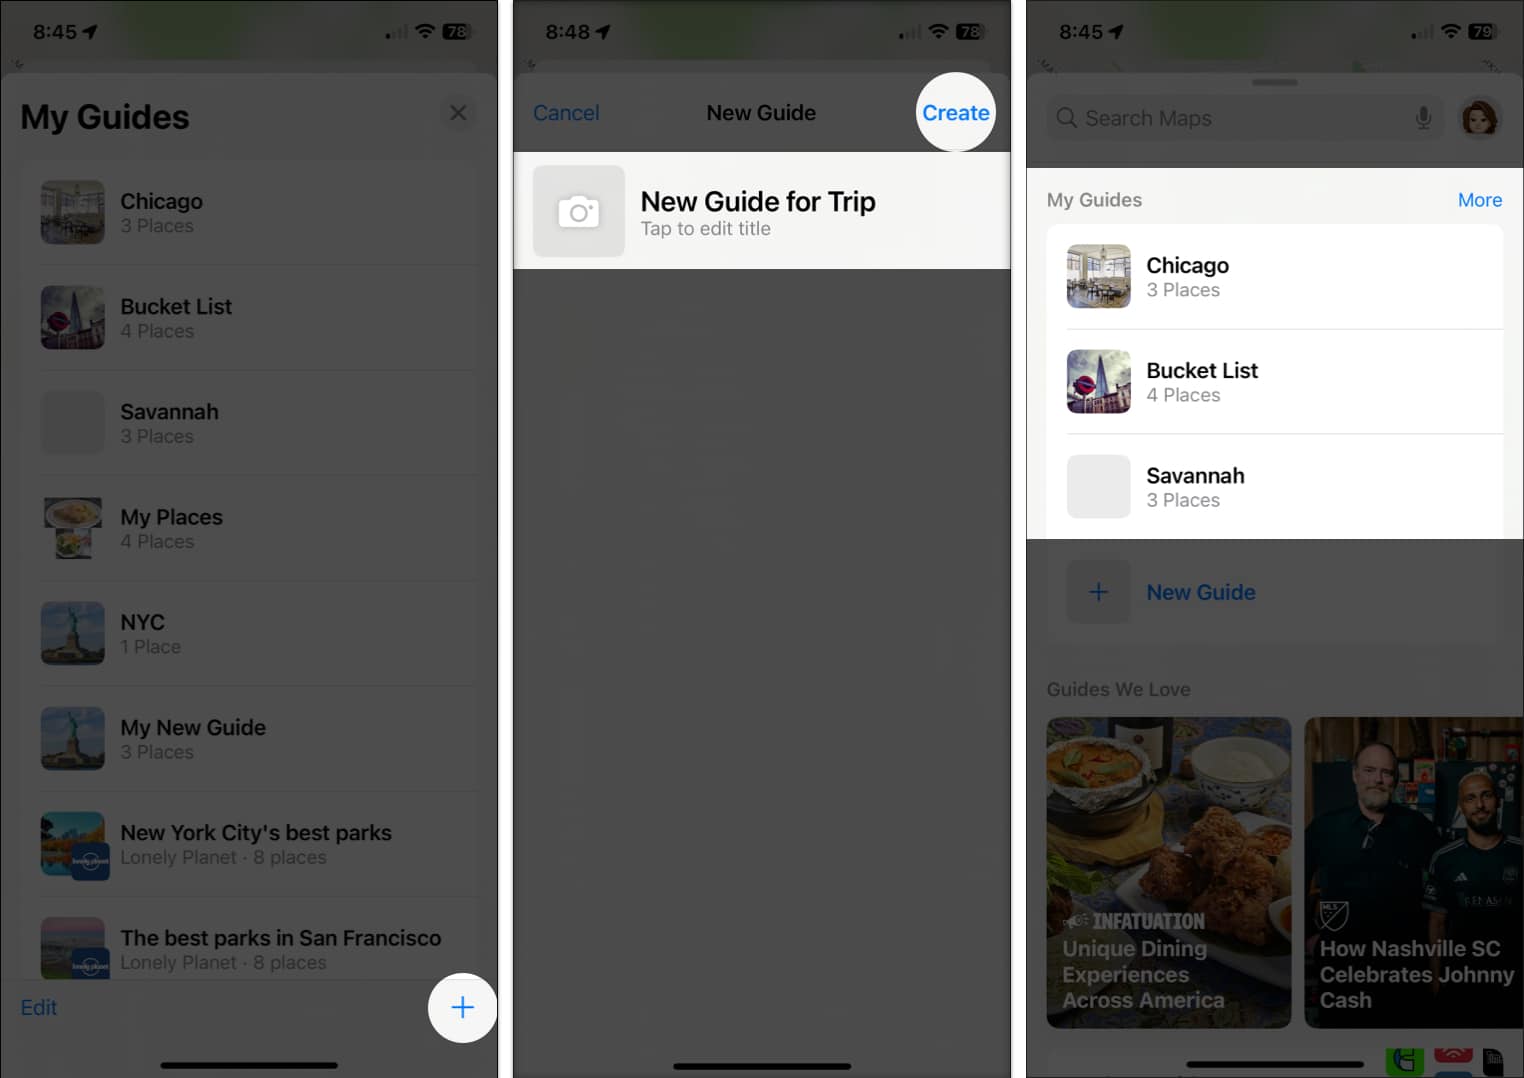
- Scroll all the way down to My Guides → faucet (+) New Information.
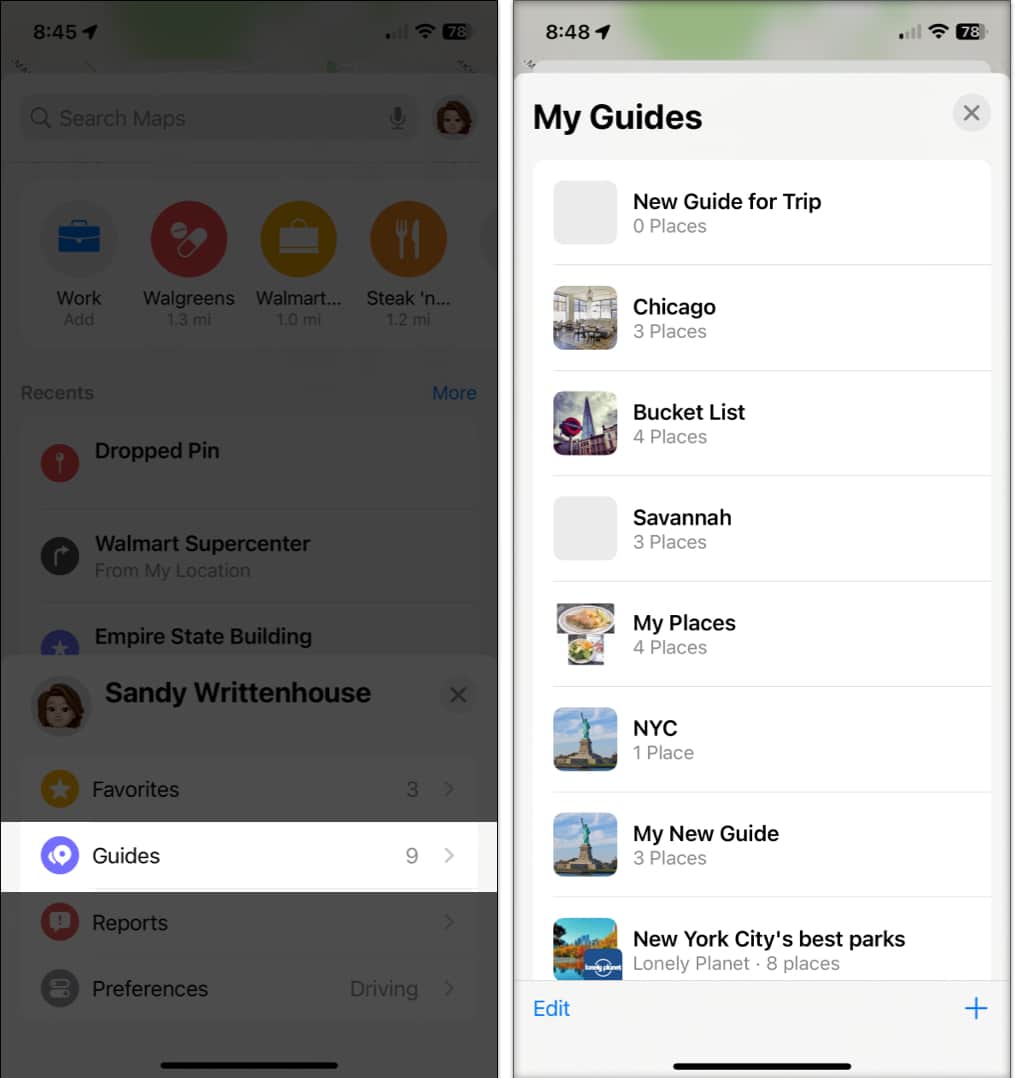
Alternatively, choose your profile icon, select Guides, and faucet the plus signal on the underside proper. - Enter a title on your Information and optionally faucet the digital camera icon so as to add a key picture.
In the event you don’t choose an image, you’ll see the principle picture show as a location you add to your information. - Faucet Create on the highest proper to save lots of your new Information.
- You’ll then see your Information within the My Guides checklist.
To entry it later, choose it from the My Guides checklist on the backside of the display screen or within the Guides part of your profile. You’ll be able to then choose a spot you’ve added to see it together with its particulars on the map.
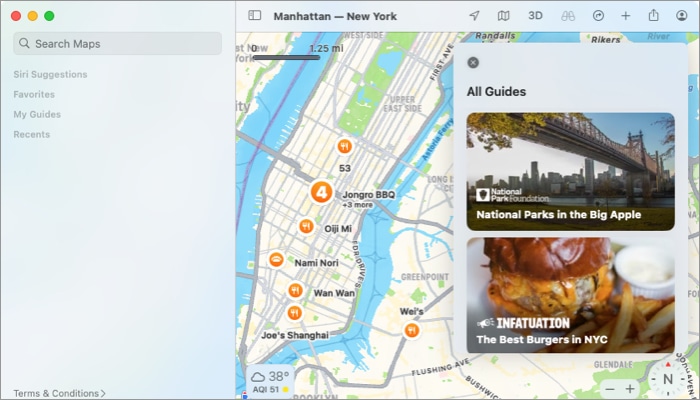
On Mac
- Open the Maps app on Mac.
- Click on the plus signal within the toolbar on the prime and choose Create New Information.
Alternatively, click on the plus signal subsequent to My Guides within the left-hand sidebar.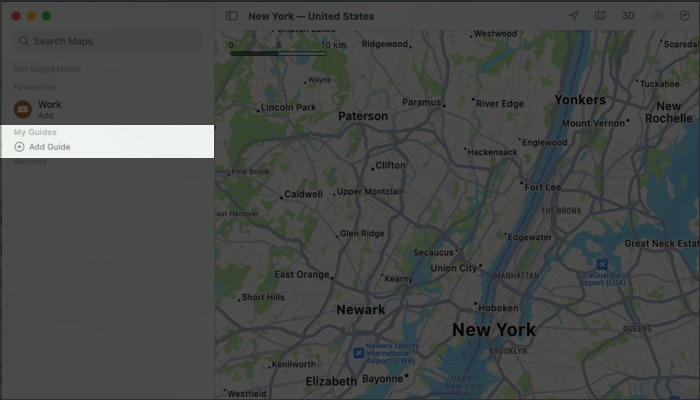
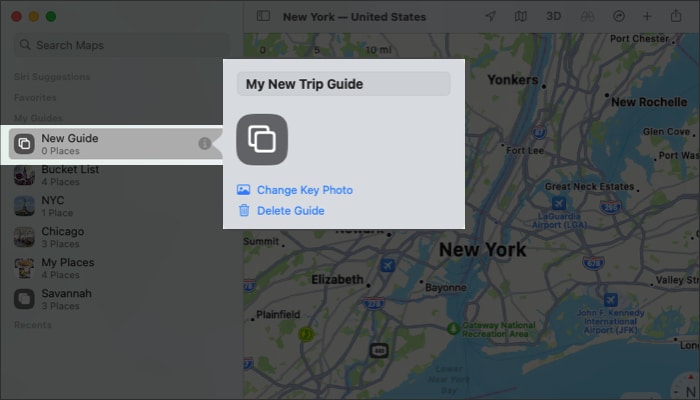
- Kind a title on your Information and press return.
- Optionally, choose Change Key Photograph to decide on an image out of your photographs or albums through the Photographs app.
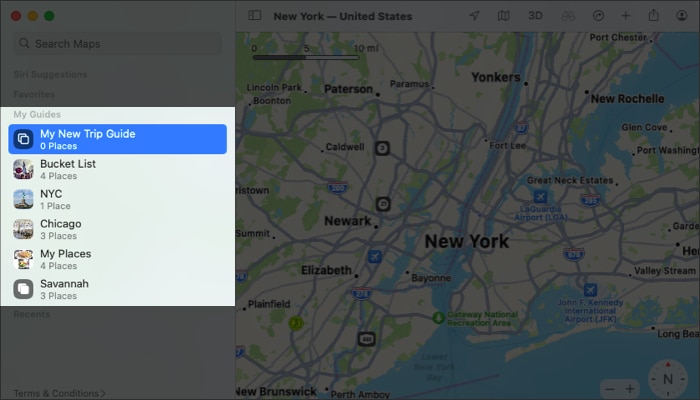
- You’ll be able to then entry your new Information within the My Guides part of the sidebar on the left. Choose it and choose a location you’ve added to see the spot on the map with its particulars.
Add places to a Information in Maps
You can begin from scratch by including places to your Information or together with one you already see on the map.
On iPhone and iPad
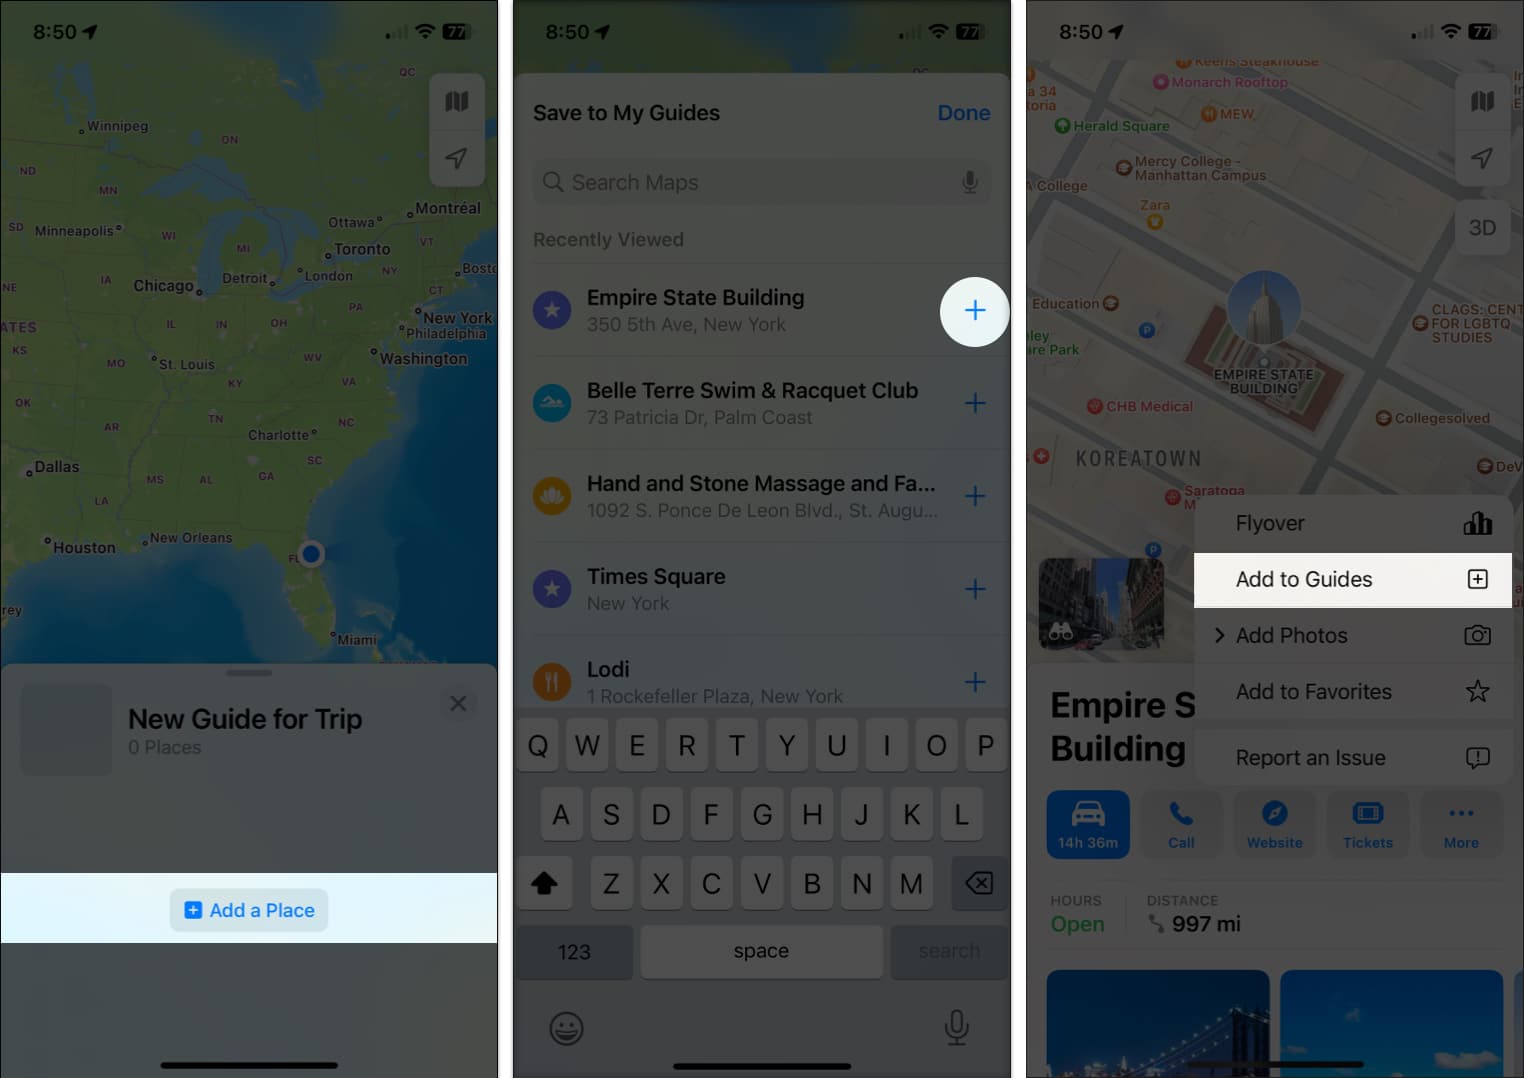
- To discover a location so as to add, open your Information and faucet Add a Place.
- Enter a search time period for the situation on the prime after which faucet the plus signal subsequent to it within the outcomes.
You can too faucet on the title of the situation so as to add it straight. - Title the situation → faucet Save.
- Repeat the method so as to add places, after which faucet Performed to finish creating the checklist.
On Mac
- Proper-click your Information and choose Add New Place.
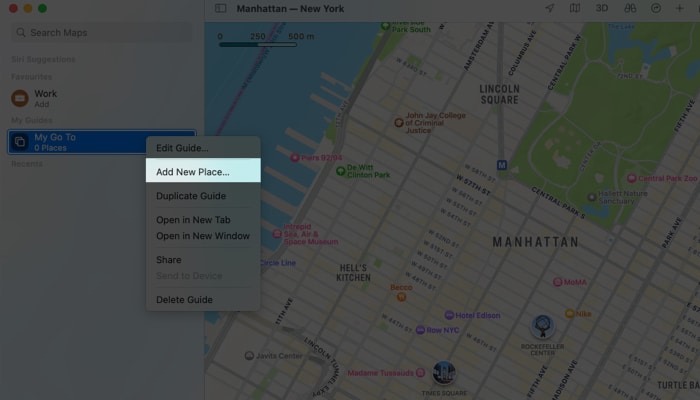
- Seek for a location to add.
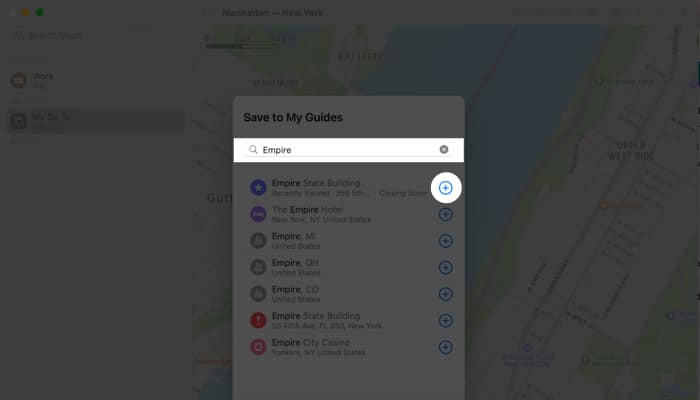
- Enter the search time period on the prime, and while you see the situation within the outcomes, click on the plus signal.
- Faucet Performed after including all places.

So as to add a location you see on the map, open its particulars. Choose the plus signal within the pop-up window and choose your Information within the checklist. Alternatively, you may drag the situation from the map to your Information within the sidebar.
Tips on how to edit your Information in Apple Maps
After you create a Information, you might need to rename it, take away locations from it, or change the type order for its places. You can too delete a Information you now not need.
On iPhone and iPad
Open the Information and swipe as much as view the small print to arrange locations in My Guides in Maps on iPhone and iPad.
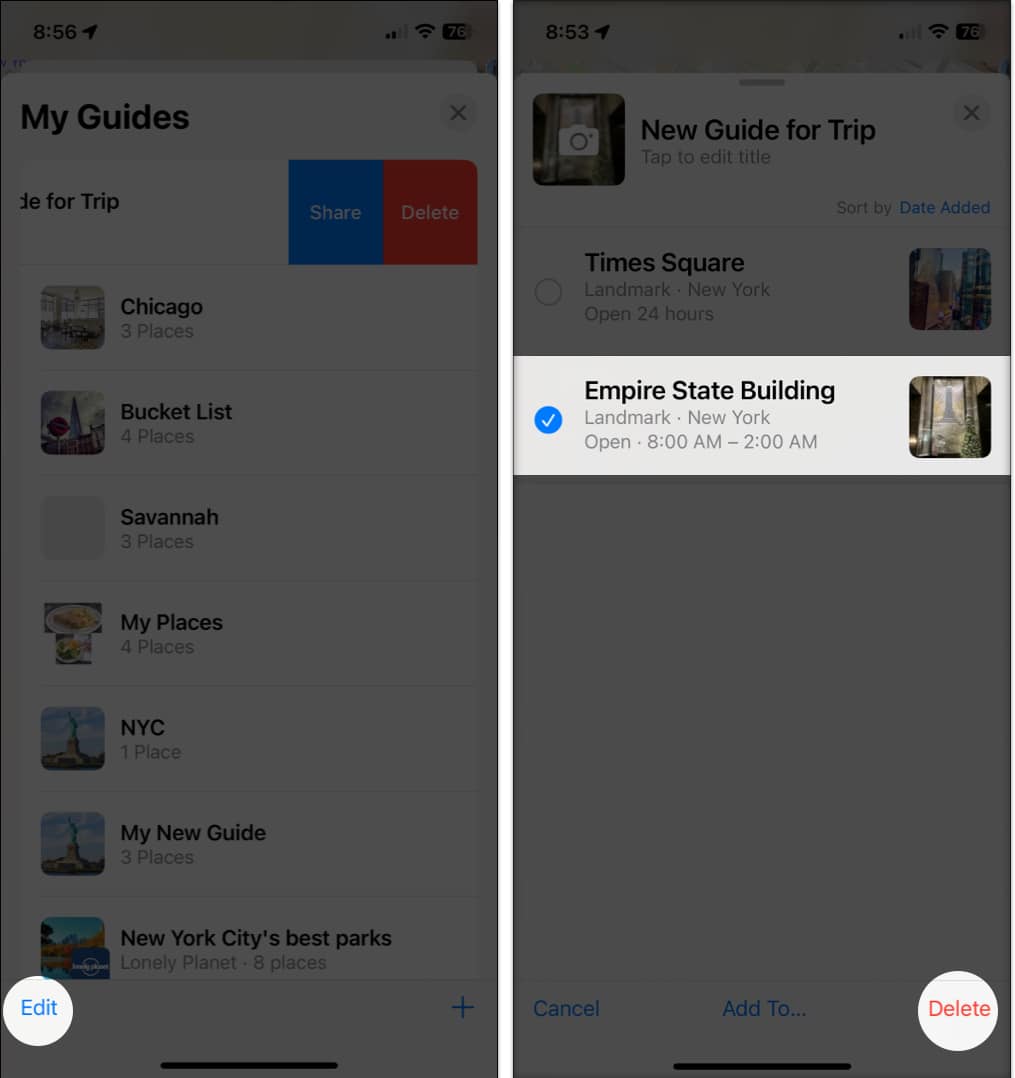
- To take away a location, swipe the situation from proper to left and choose Delete.
- To take away a number of places directly, faucet Edit on the underside left. Then, select Choose All or mark particular places and choose Delete.
- To rename the Information or change the important thing picture, faucet Edit → kind the brand new title on the prime → faucet the present picture to choose a brand new one.
- To alter the type order for the places in your Information, faucet the present choice subsequent to Kind By close to the highest. Then, choose Title, Distance, or Date Added.
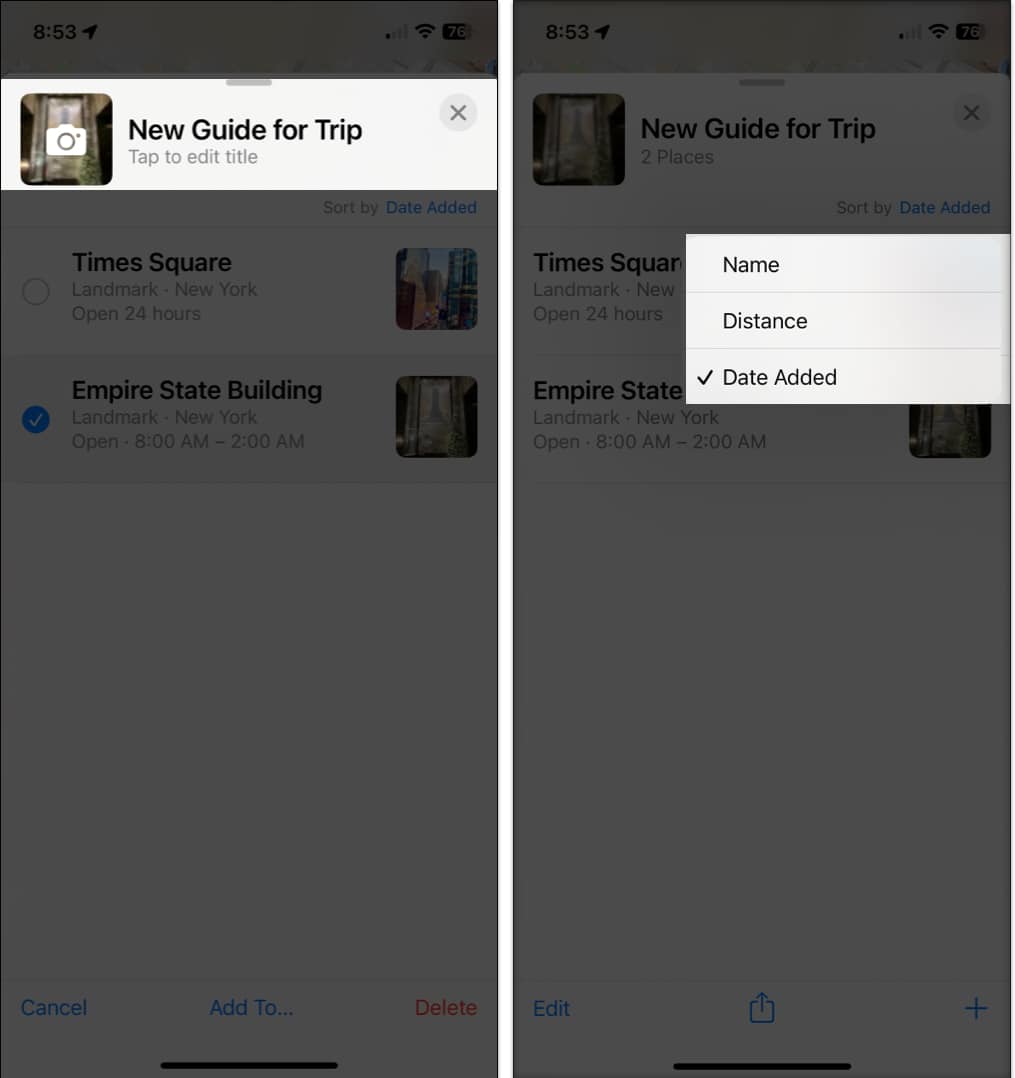
While you end, faucet the X on the highest proper to shut the Information.
On Mac
Choose the Information within the sidebar and increase it to view the places.
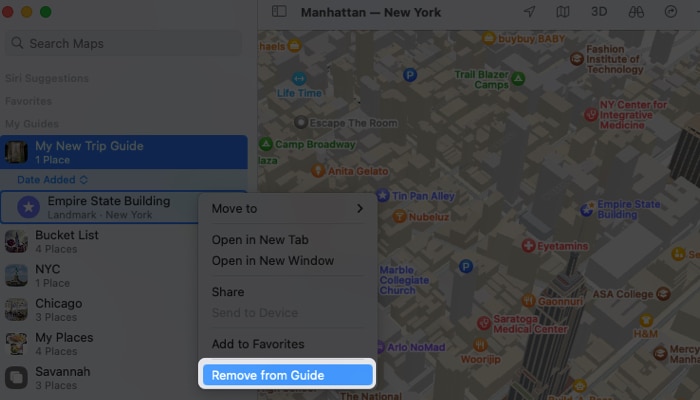
- To take away a location, right-click it and choose Take away From Information.
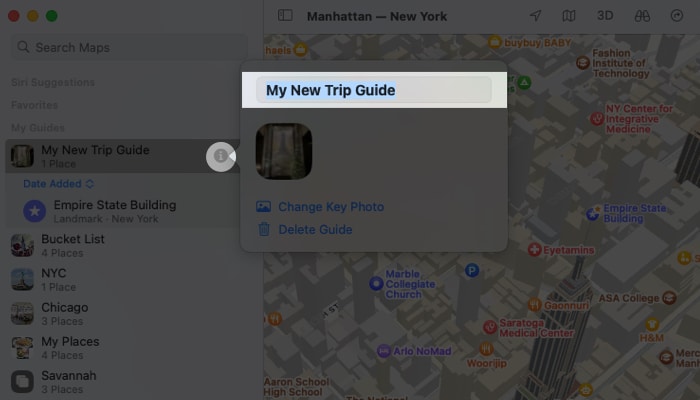
- To rename the Information or change the important thing picture, click on the Data icon (small letter “i”) to the appropriate of its title. Kind the brand new title and press Return, or click on the present picture to decide on a brand new one.
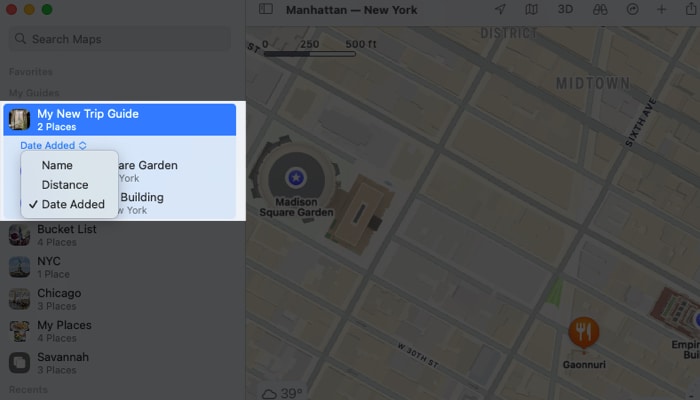
- To alter the type order for the places, increase the Information within the sidebar and click on the present order. Then, select Title, Distance, or Date Added.
Tips on how to share a My Information in Apple Maps
In the event you’re planning a visit with others, you may share your Information so others can see the place you’ll all be visiting. Your recipient can open the Information in Apple Maps on their very own system.
On iPhone and iPad
You’ll be able to share a Information in Maps on iPhone and iPad utilizing your share sheet.
- Swipe up from the underside of the principle Maps web page to the My Guides part.
- Swipe the Information from proper to left and choose Share.
Alternatively, you may open the Information and faucet the Share button on the backside.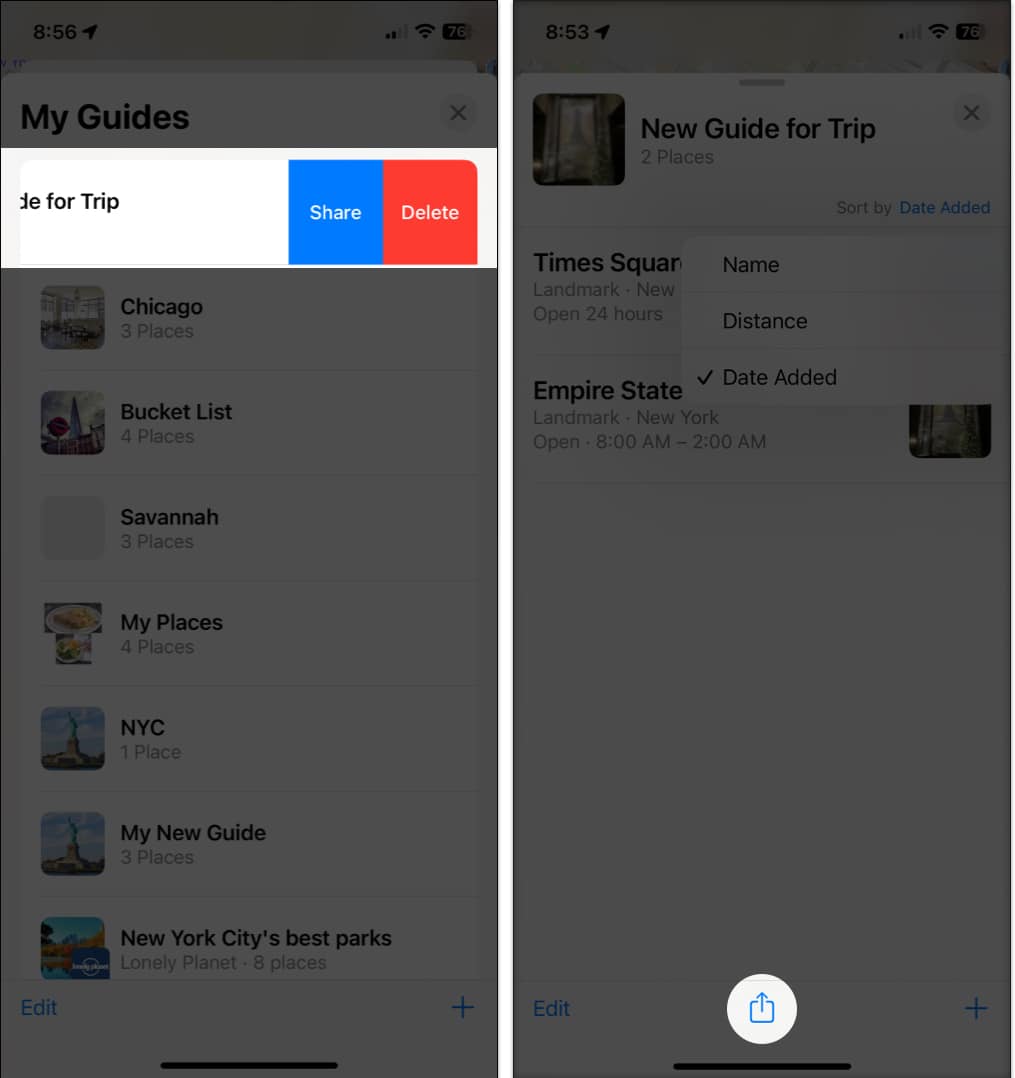
- Then, select an possibility like Messages, Mail, or a unique methodology in your share sheet.
On Mac
You’ll be able to share a Information in Maps utilizing your Mac’s share menu.
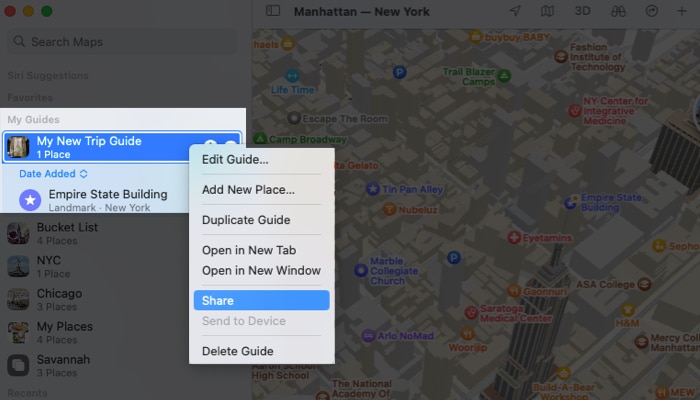
- Choose the Information within the sidebar and click on the Share icon within the toolbar on the prime or right-click the Information and choose Share.
- You’ll be able to then ship a hyperlink to the Information through Messages, Mail, AirDrop, or another choice in your share menu.
Tips on how to delete a Information in Apple Map
Deleting a Information is so simple as setting it up.
On iPhone and iPad
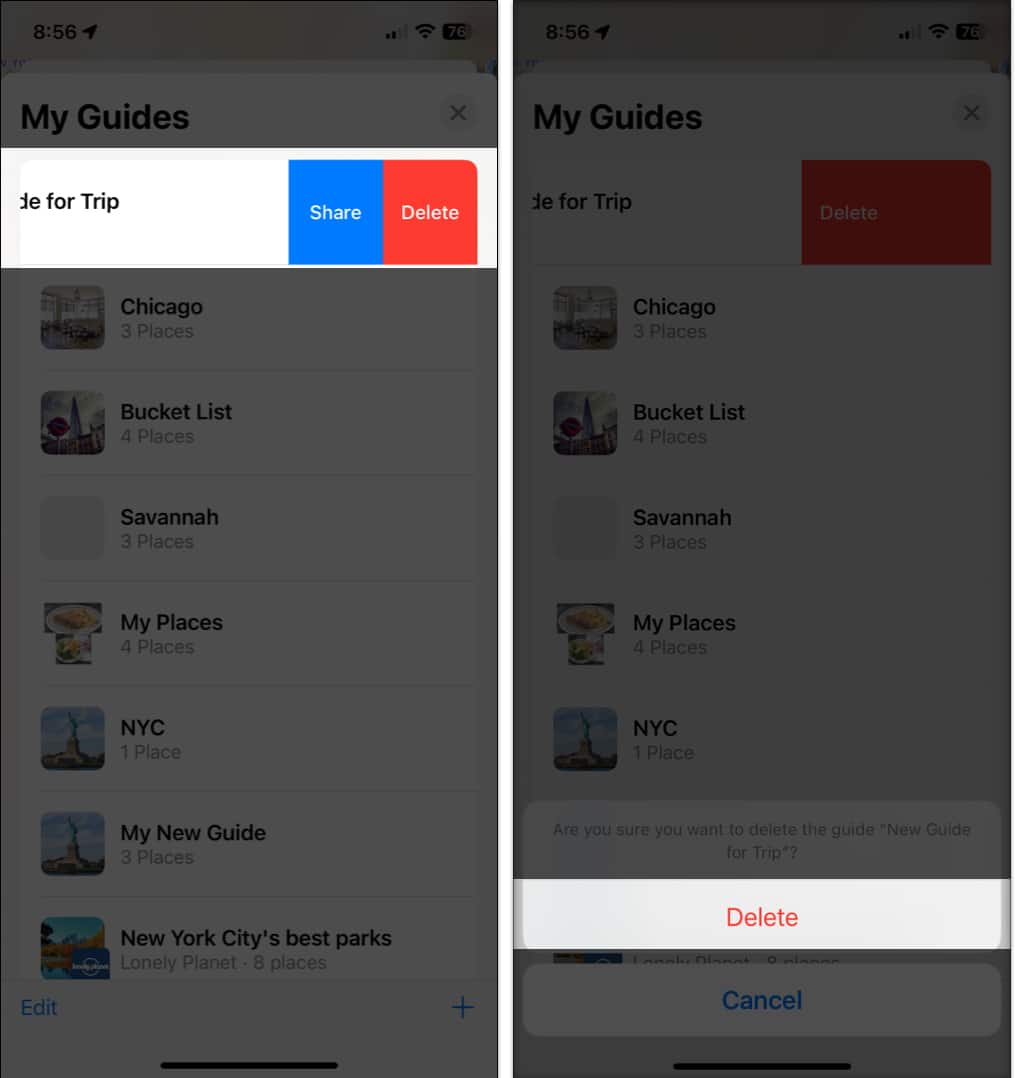
- Swipe the Information title from proper to left and choose Delete.
- Affirm that you simply need to take away it by selecting Delete within the pop-up window.
On Mac
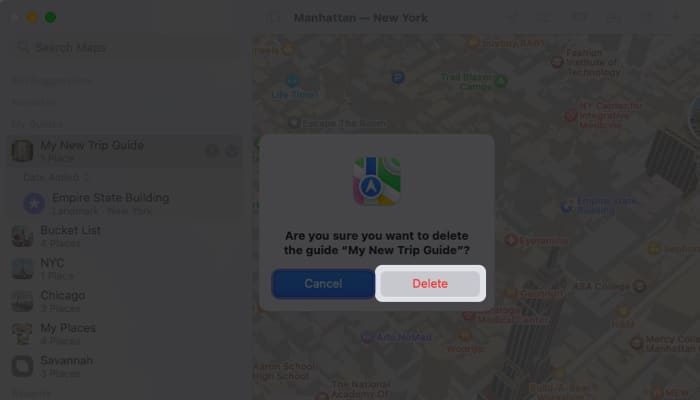
- To delete a Information and its contents, right-click the Information title within the sidebar and choose Delete Information.
- Then, affirm by selecting Delete within the pop-up window.
Use My Guides on Apple Maps!
While you’re planning a visit, whether or not lengthy or brief, for enterprise or pleasure, Guides within the Maps app helps you retain observe of the locations you need to go to. For extra, have a look at the right way to create a route in Apple Maps on your subsequent highway journey.
Learn extra: