

One of many neat issues about utilizing a Mac is that macOS options varied ranges of interplay and customization, however many people solely ever scratch the floor of what is doable. For those who recurrently carry out sure actions in your Mac, usually there’s one other method of doing it that is simpler, solely it isn’t so apparent until somebody factors it out to you.
With that in thoughts, listed below are 10 fast macOS suggestions that when you begin utilizing ought to make the time you spend in your Mac a extra easy expertise. The next assumes you are operating macOS Ventura, however most if not all of the following tips ought to work on earlier variations of Apple’s Mac working system.
1. Open a Copy of a File by Default
Stationery Pad is a useful option to nix a step in your workflow should you recurrently use doc templates in your Mac. The long-standing Finder characteristic primarily tells a file’s dad or mum utility to open a replica of it by default, making certain that the unique file stays unedited. Nearly any file kind might be outlined as a template with Stationery Pad – it could possibly be used to streamline widespread Photoshop jobs, create skeleton HTML/CSS information, or assist with Phrase doc invoicing.
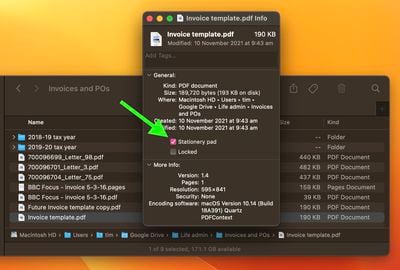
To benefit from it, right-click (Ctrl-click) the file that you just need to use as a template, choose Get Data, then examine the Stationery Pad checkbox underneath the Basic part. Lastly, click on the pink site visitors gentle button to shut the Get Data window. Subsequent time you double-click the template file, Finder will mechanically create and open a replica of it, leaving the unique untouched.
Stationery Pad would not get a lot consideration as of late, however it’s a neat various to repeatedly enhancing templates and utilizing the “Save As…” command, which may result in overwriting the unique file should you’re not too cautious.
2. Entry Extra Preview File Format Choices
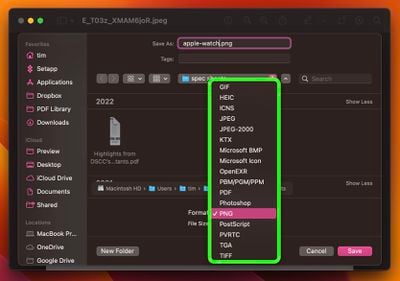
While you come to avoid wasting or export a file in Preview, Possibility-click the Format dropdown to get entry to a number of extra file varieties.
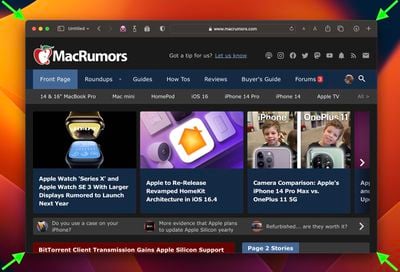
3. Snap Again to Your Safari Search Outcomes
Say you need to lookup a subject on-line, so that you kind a search phrase or phrase into Safari’s deal with bar. The primary hyperlink within the returned outcomes seems to be promising, so that you click on it. On the location you are despatched to, you see one other hyperlink a few associated matter, so that you click on that, too. Then one other hyperlink grabs your consideration, and also you resolve to test it out. Quickly you are distracted by another tangential topic, and earlier than you already know it you’ve got fallen down a rabbit gap of clicks and hyperlinks with out discovering out a lot about what you had been truly searching for within the first place.
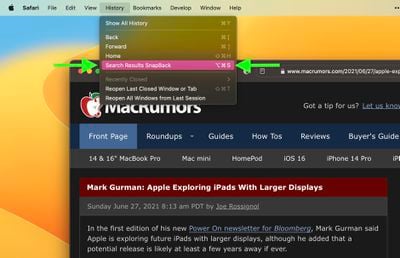
If that sounds acquainted, Safari SnapBack might help. It saves having to tediously click on the earlier web page button a number of instances to return to your authentic search outcomes, or begin rooting by way of your net historical past to find the place your newest on-line meander started. You could find it in Safari’s menu bar, underneath Historical past -> Search Outcomes SnapBack, and even higher, use its Command-Possibility-S keyboard shortcut.
Be aware that SnapBack solely works in case your wayward searching occurred in the identical tab that you just used to provoke the search, so if a hyperlink you clicked on opened a brand new tab and also you continued searching in that, the SnapBack menu choice can be grayed out. Additionally, the search must be carried out from Safari’s deal with bar or from the web site of the search engine that Safari is about to make use of.
4. Tame Scorching Corners With Modifier Keys
In macOS, the Scorching Corners characteristic turns every of the 4 corners of your display into a chosen motion, permitting you to shortly entry sure features constructed into the system, comparable to Mission Management, Notification Heart, the Display screen Saver, and extra. There’s one thing satisfying about mentioning these generally used features with a easy, swift cursor motion. What is not so satisfying is by chance triggering a Scorching Nook, which may result in varied sorts of unintended desktop habits, comparable to utility home windows flying in every single place. Fortunately, there is a option to tame Scorching Nook habits utilizing modifier keys.
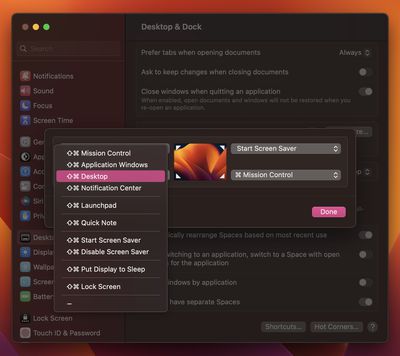
Open System Settings -> Desktop & Dock, scroll to the underside of the menu, and click on Scorching Corners…. Within the dialog field that seems, click on the dropdown menu comparable to the display nook that you just need to use as a Scorching Nook. Subsequent, maintain down a modifier key and choose a perform from the dropdown to assign to the Scorching Nook. We’re utilizing the Shift-Command in our instance. Now that is executed, the following time you come to make use of a Scorching Nook, maintain down the modifier key(s) as you progress the mouse cursor in direction of it, in any other case the motion you assigned to that nook will not work.
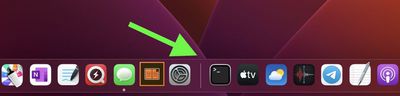
5. Present Extra Latest Purposes within the Dock
In macOS, a useful choice known as “Present current purposes in Dock” (present in System Settings -> Desktop & Dock) provides a divider to the right-hand aspect of your Mac’s Dock and after it shows any apps you lately used that are not completely docked. By default, this feature solely exhibits the three most not too long ago used apps which have since been closed. Nevertheless, there’s a option to make it present extra, which might be helpful in case your workflow includes utilizing numerous apps consecutively.
For those who’re snug pasting instructions into Terminal, it is completely doable to extend or lower the variety of not too long ago opened apps that present in your Dock. Open a Terminal window (the app might be present in /Purposes/Utilities/) and paste the next on the command immediate, then press Enter:
defaults write com.apple.dock show-recents -bool true;
defaults write com.apple.dock show-recent-count -int 10;
killall Dock
Be aware that the -int argument defines the variety of not too long ago opened apps that you just need to show within the Dock after the divider (10 on this instance). You may change the quantity to swimsuit, and you’ll revert again to displaying three apps anytime through the use of -int 3 within the second command.
6. Resize Home windows From the Heart
While you drag your mouse from one aspect or nook of a window to resize it, you may maintain the Possibility key to resize the size of the window from its heart level as a substitute.
7. Get Distinctive Alerts for New Emails From VIPs
In Apple Mail, you may decide to obtain notifications while you get new messages out of your VIPs (click on Mail -> Settings… within the menu bar, then click on the Basic tab and choose VIPs within the New message notifications dropdown record.) Organising VIP alerts on this method is all effectively and good, however it prevents you from receiving notifications for all different messages coming into your inbox. A greater answer is to arrange a rule in Mail that performs a selected sound or bounces the Dock icon when a message is acquired and the sender is in your VIP record.
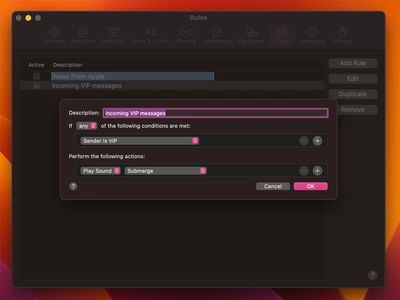
In Mail’s Settings, click on the Guidelines tab, then click on Add Rule. Give your rule a reputation within the Description subject, then for “If” select any from the dropdown. For the primary situation, choose Sender is VIP. (If it is a particular particular person you need alerts for, another choice right here is Account.)
Subsequent, underneath “Carry out the next actions:” choose Play Sound from the primary dropdown. (Another choice out there right here is Bounce Icon in Dock.) Then underneath “Carry out the next actions:” selected a sound to play from the second dropdown. Lastly, click on OK, then click on Apply. With the rule now arrange, you may get a singular alert for each VIP mail you obtain that you’ll distinguish from common new message notifications as they arrive by way of.
8. Float Notes Over App Home windows
Within the Notes app in macOS, it is doable to drift particular person notes over different home windows in order that they keep seen no matter which utility is lively. This makes for a handy option to reference an present word whereas writing an essay or report, for instance. It additionally is available in helpful if you wish to take notes when researching one thing on-line.
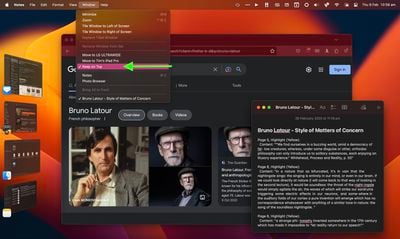
To drift a word within the Notes app, double-click the word to open it in a separate window, then choose Window -> Carry on High from the menu bar. The word will now stay above different open utility home windows, even should you swap between apps utilizing Stage Supervisor. Simply keep in mind that your floating notes cannot share the identical display as one other app that is in fullscreen mode.
9. Add App/File/Folder Shortcuts to Finder’s Toolbar
This is methods to add handy app, file, and folder shortcuts to the toolbar of Finder home windows: Merely start to pull the merchandise inside the Finder window, then maintain down the Command (⌘) key and drop it onto an out there house within the toolbar.

10. Shortly Entry Particular System Settings
In case your Mac’s keyboard has icons printed on among the features keys, you may press them to carry out particular options. For instance, urgent the F11/12 keys with speaker icons adjusts the amount.
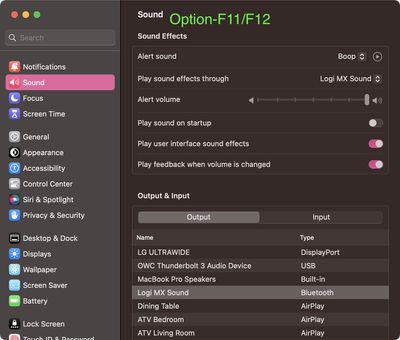
For those who maintain down Possibility while you press considered one of these keys, the precise preferences in System Settings which can be related to the characteristic will open immediately. Possibility-F11/12 opens the Sound pane, as an illustration.