

OpenVPN is an open-source, quick, common program for making a VPN (Digital Non-public Community). It makes use of each the TCP and UDP transmission protocols, and VPN tunnels are secured with OpenVPN protocol with SSL/TLS authentication, certificates, credentials, and optionally MAC tackle lock in addition to multi-factor authentication.
OpenVPN can be utilized on all kinds of gadgets and programs. Like most VPN protocols on the market, has a client-server structure. The OpenVPN entry server runs on a Linux system, and the purchasers may be put in on different Linux programs, Home windows, and macOS, in addition to cellular working programs reminiscent of Android, Home windows Cellular, and iOS.
The OpenVPN entry server accepts incoming VPN connections and OpenVPN Join purchasers or any open-source purchasers suitable with OpenVPN can provoke a connection to the server.
On this article, you’ll learn to arrange an OpenVPN entry server on Ubuntu 22.04/Ubuntu 20.04 and join VPN purchasers from different Linux programs.
Stipulations:
Step 1: Setting Up OpenVPN Server on Ubuntu
1. Putting in and configuring an OpenVPN server manually is just not a easy process from my expertise. That’s the rationale, we will likely be utilizing a script that permits you to arrange your personal safe OpenVPN server in a matter of seconds.
Earlier than downloading and working the script, word that the script will auto-detect your server’s personal IP tackle, however you want to be aware of your server’s public IP tackle particularly whether it is working behind NAT.
To seek out out your server’s public IP tackle, run the next wget command or dig command.
$ wget -qO - icanhazip.com
OR
$ dig +brief myip.opendns.com @resolver1.opendns.com

2. Now obtain the installer script utilizing the curl command-line instrument, then make it executable utilizing the chmod command as follows.
$ curl -O https://uncooked.githubusercontent.com/angristan/openvpn-install/grasp/openvpn-install.sh
$ chmod +x openvpn-install.sh
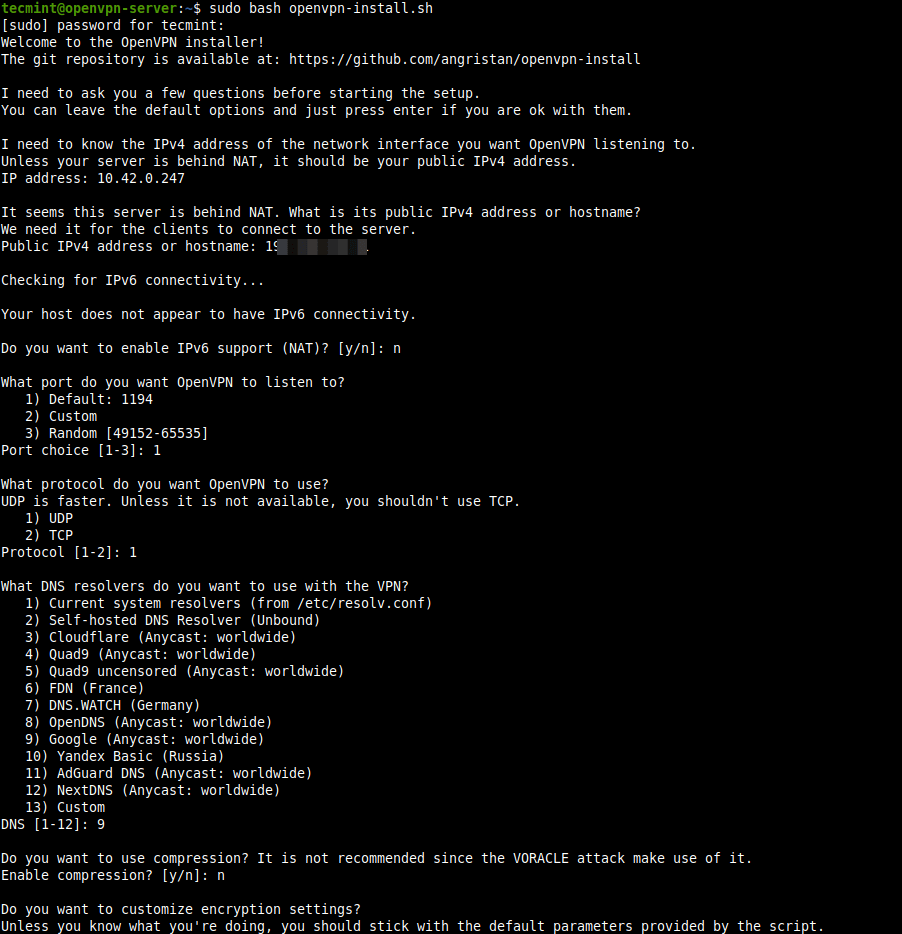
3. Subsequent, run the executable installer script as proven.
$ sudo bash openvpn-install.sh
When executed for the primary time, the script will ask you some questions, learn them rigorously, and supply solutions in response to your preferences, to arrange your OpenVPN server.
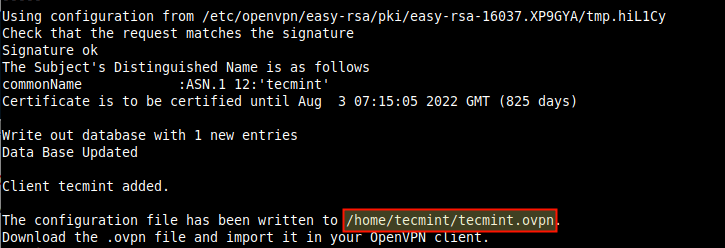
4. As soon as the VPN set up course of is full, a shopper configuration file will likely be written underneath the present working listing. That is the file you’ll use to configure your OpenVPN shopper as described within the subsequent part.
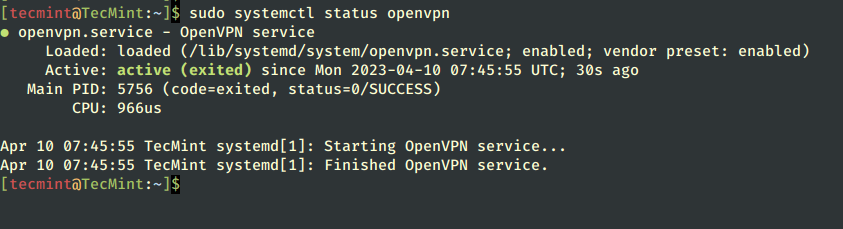
5. Subsequent, affirm that the OpenVPN service is up and working by checking its standing utilizing the next systemctl command.
$ sudo systemctl standing openvpn
6. Additionally, affirm that the OpenVPN daemon is listening on the port you instructed the script to make use of, utilizing the ss command as proven.
$ sudo ss -tupln | grep openvpn

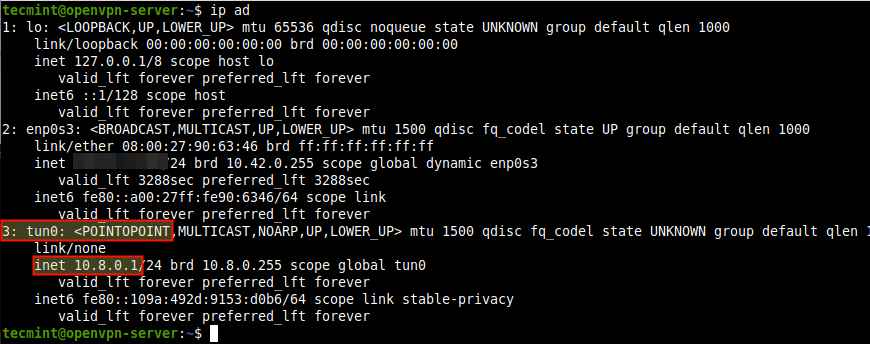
7. For those who examine your community interfaces, a brand new interface has been created for a VPN tunnel, you possibly can affirm this through the use of the IP command.
$ ip add
Step 2: Setup OpenVPN Shoppers in Ubuntu
8. Now it’s time to arrange your OpenVPN shopper and join it to the VPN server. First, set up the OpenVPN package deal within the shopper machine as follows.
$ sudo yum set up openvpn	#RHEL-based Techniques
$ sudo apt set up openvpn	#Debian-based Techniques
$ sudo dnf set up openvpn	#Fedora Linux
9. On a desktop system, you additionally want to put in the network-manager-openvpn package deal to make VPN settings from the graphical interface.
$ sudo yum set up network-manager-openvpn	#RHEL-based Techniques
$ sudo apt set up network-manager-openvpn	#Debian-based Techniques
$ sudo dnf set up network-manager-openvpn	#Fedora Linux
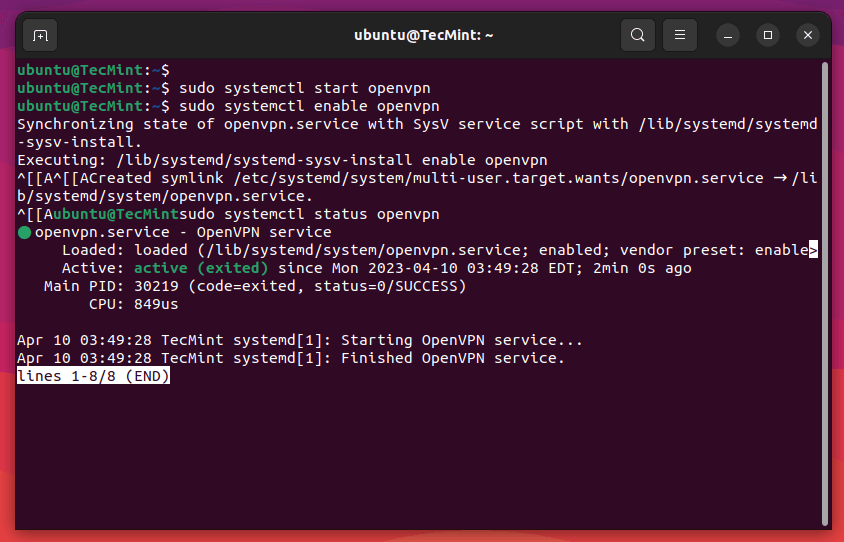
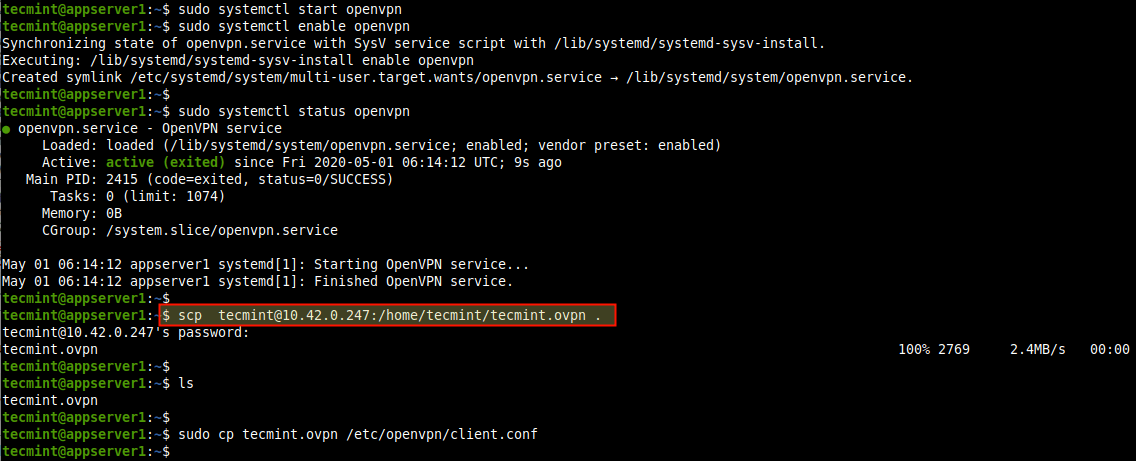
10. After putting in the above packages, begin the OpenVPN service, for now, allow it to robotically begin at system boot and examine its standing to substantiate that it’s up and working.
$ sudo systemctl begin openvpn
$ sudo systemctl allow openvpn
$ sudo systemctl standing openvpn
11. Now you want to import the OpenVPN shopper settings from the OpenVPN server. Open a terminal window and use the SCP command to seize the file as proven.
$ cd ~
$ scp [email protected]:/dwelling/tecmint/tecmint.ovpn .

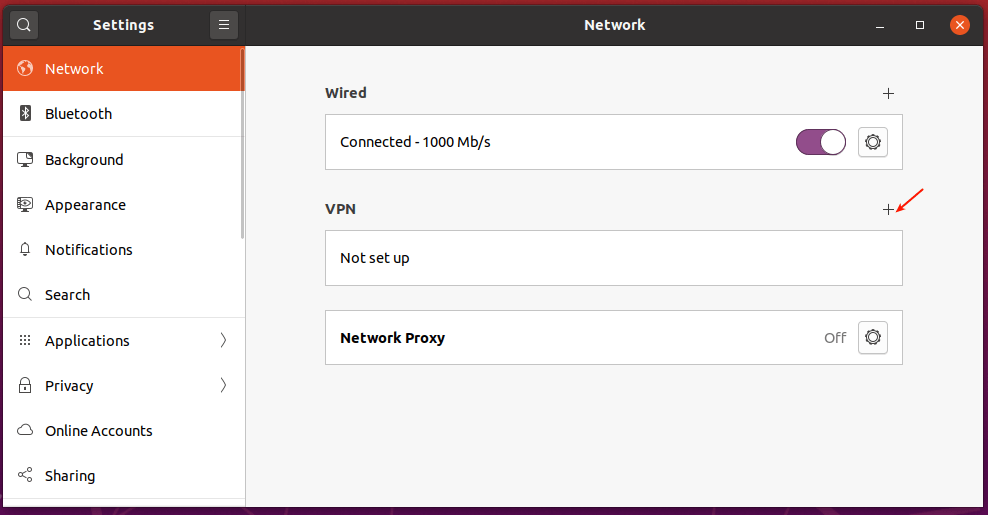
12. Open system Settings, then go to Networks. Below VPN, click on the add button to get the required choices.
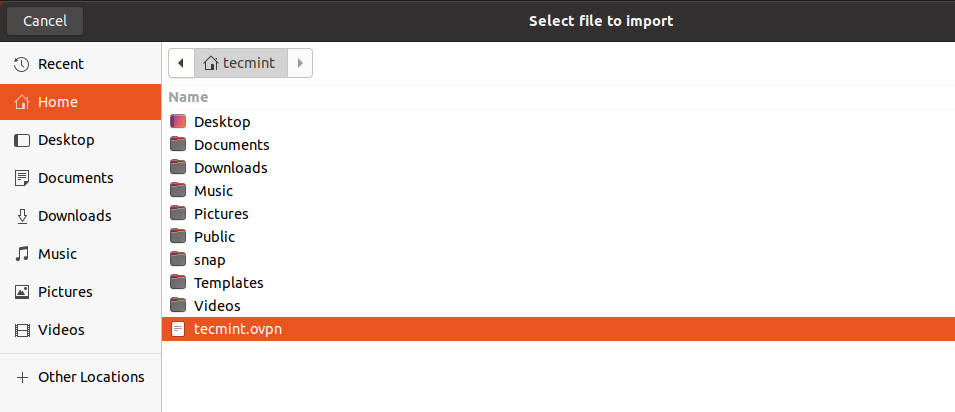
13. Within the pop-up window, select “Import from file” as highlighted within the following screenshot. Then browse your file supervisor and choose the .ovpn shopper config file you downloaded from the server.

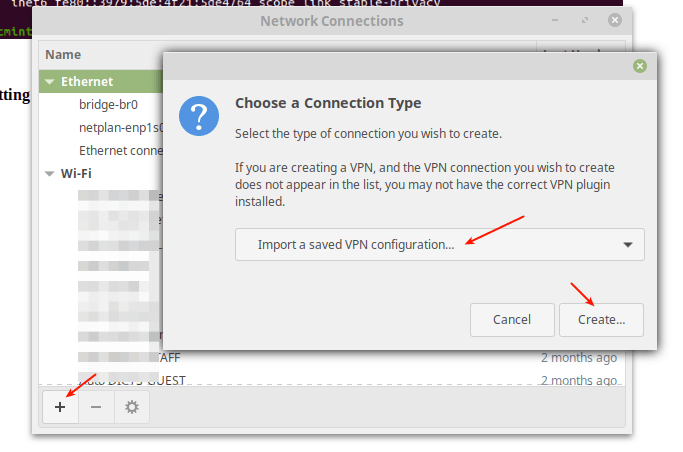
14. On different Linux desktop programs, click on on the community icon on the system panel, go to Community Connections. Then click on the plus button so as to add a brand new connection. From the drop, choose “Import a saved VPN configuration…” as highlighted within the following screenshot.
Create the connection and import the file.
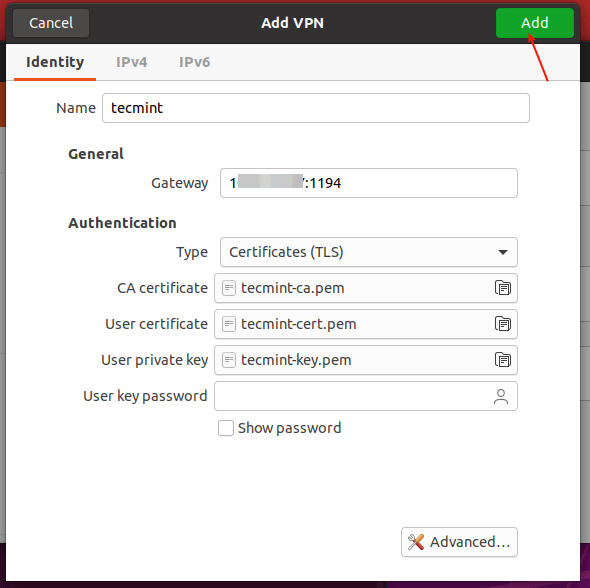
15. After importing the file, the VPN settings must be added as proven within the following screenshot. Then click on Add.
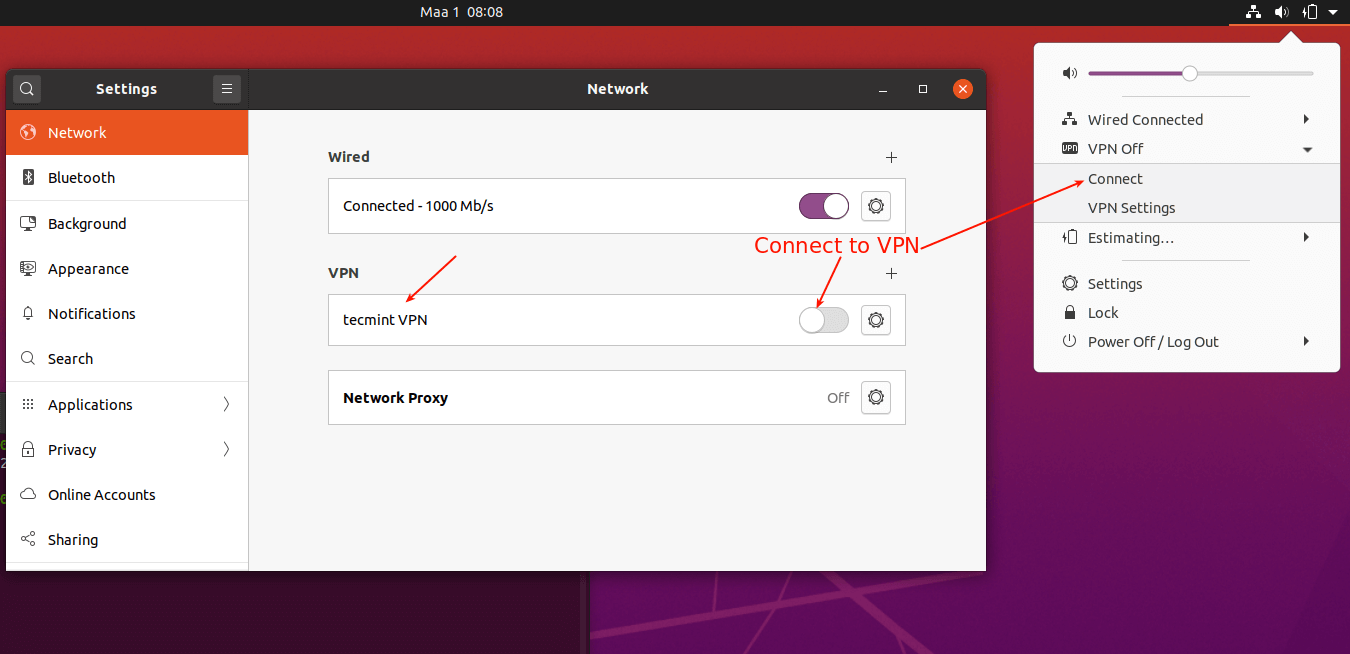
16. Your VPN shopper settings must be added efficiently. You may hook up with the OpenVPN server by turning on the VPN as highlighted within the following screenshot.
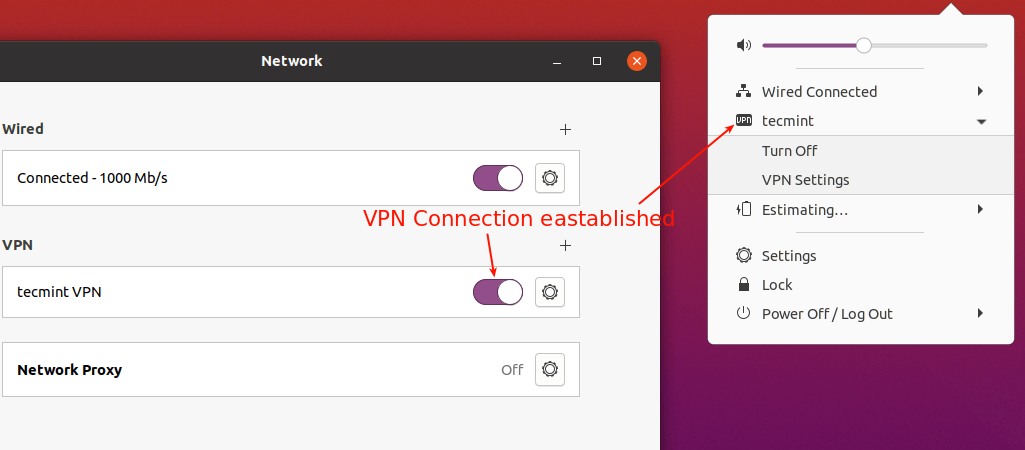
17. Now the VPN connection must be established efficiently as proven within the following screenshot.
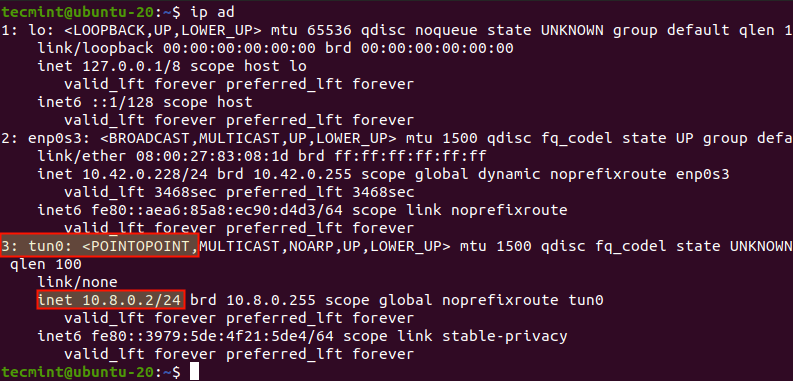
18. For those who examine your community interface connections utilizing the IP add command, there ought to now exist a VPN tunnel interface as highlighted within the following screenshot.
$ ip add
Step 3: Setup OpenVPN Consumer in Linux
19. To attach one other Linux server as a VPN shopper, guarantee that you’ve put in the OpenVPN package deal, and began, and enabled the OpenVPN service as described above.
Then obtain the .ovpn shopper file, and duplicate it to the /and so forth/openvpn/ listing as proven.
$ scp [email protected]:/dwelling/tecmint/tecmint.ovpn .
$ ls
$ sudo cp tecmint.ovpn /and so forth/openvpn/shopper.conf
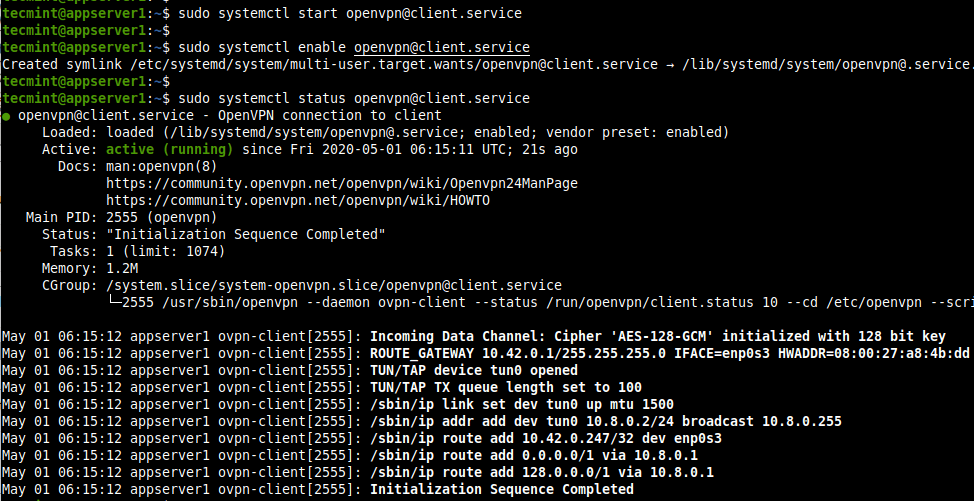
20. Subsequent, begin the VPN shopper service, allow it, and examine its standing with the next instructions.
$ sudo systemctl begin [email protected]
$ sudo systemctl allow [email protected]
$ sudo systemctl standing [email protected]
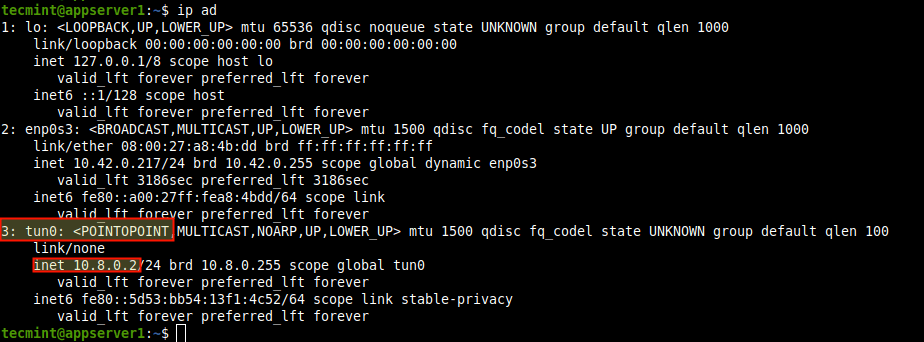
21. Then affirm {that a} VPN tunnel interface has been created utilizing the IP add command as proven.
$ ip add
22. To arrange different OpenVPN purchasers on working programs, use the next purchasers:
Step 4: Uninstall OpenVPN from Ubuntu
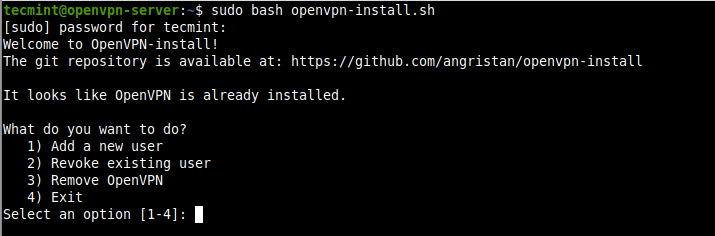
23. If you wish to add a brand new VN consumer or revoke an present consumer or take away the OpenVPN server out of your system, merely run the installer script once more. Then choose what you want to do from the record of choices and comply with the prompts.
$ sudo bash openvpn-install.sh
That brings us to the tip of this information. To share any ideas with us or ask questions, use the suggestions kind under. For extra data, go to the openvpn-install script Github repository.
If You Respect What We Do Right here On TecMint, You Ought to Contemplate:
TecMint is the quickest rising and most trusted neighborhood website for any sort of Linux Articles, Guides and Books on the internet. Hundreds of thousands of individuals go to TecMint! to look or browse the hundreds of printed articles out there FREELY to all.
For those who like what you’re studying, please contemplate shopping for us a espresso ( or 2 ) as a token of appreciation.

We’re grateful in your by no means ending help.