

Questioning how one can add one other Mac to Common Management in MacOS Ventura System Settings? It’s fairly simple, however enabling the characteristic and connecting a brand new Mac is a bit totally different than what you will have been accustomed to in prior MacOS variations.
Common Management is the unimaginable characteristic in MacOS that lets you management a number of Macs with a single keyboard and mouse, successfully linking a number of Macs collectively. You may even drag and drop recordsdata between them, and share the clipboard, making it a critical productiveness booster.
Let’s stroll by way of how one can add one other Mac to connect with Common Management, linking your keyboard and mouse to that different Mac.
Earlier than starting, be sure that any and all Macs operating MacOS Ventura are up to date to MacOS Ventura 13.3.1 or newer. You do not must replace Macs which might be operating MacOS Monterey to Ventura, nonetheless. Common Management works superb between a Mac operating MacOS Ventura and one other Mac operating MacOS Monterey. Common Management (and all different Continuity options) could not work for a lot of customers in Ventura 13.3 nonetheless, so keep away from that individual launch. The opposite Mac you want to hyperlink should be operating Monterey or newer, and be appropriate with Common Management.
The way to Join a Mac to Common Management in MacOS Ventura System Settings
From the Mac operating MacOS Ventura, do the next:
- Pull down the Apple menu, and select “System Settings”
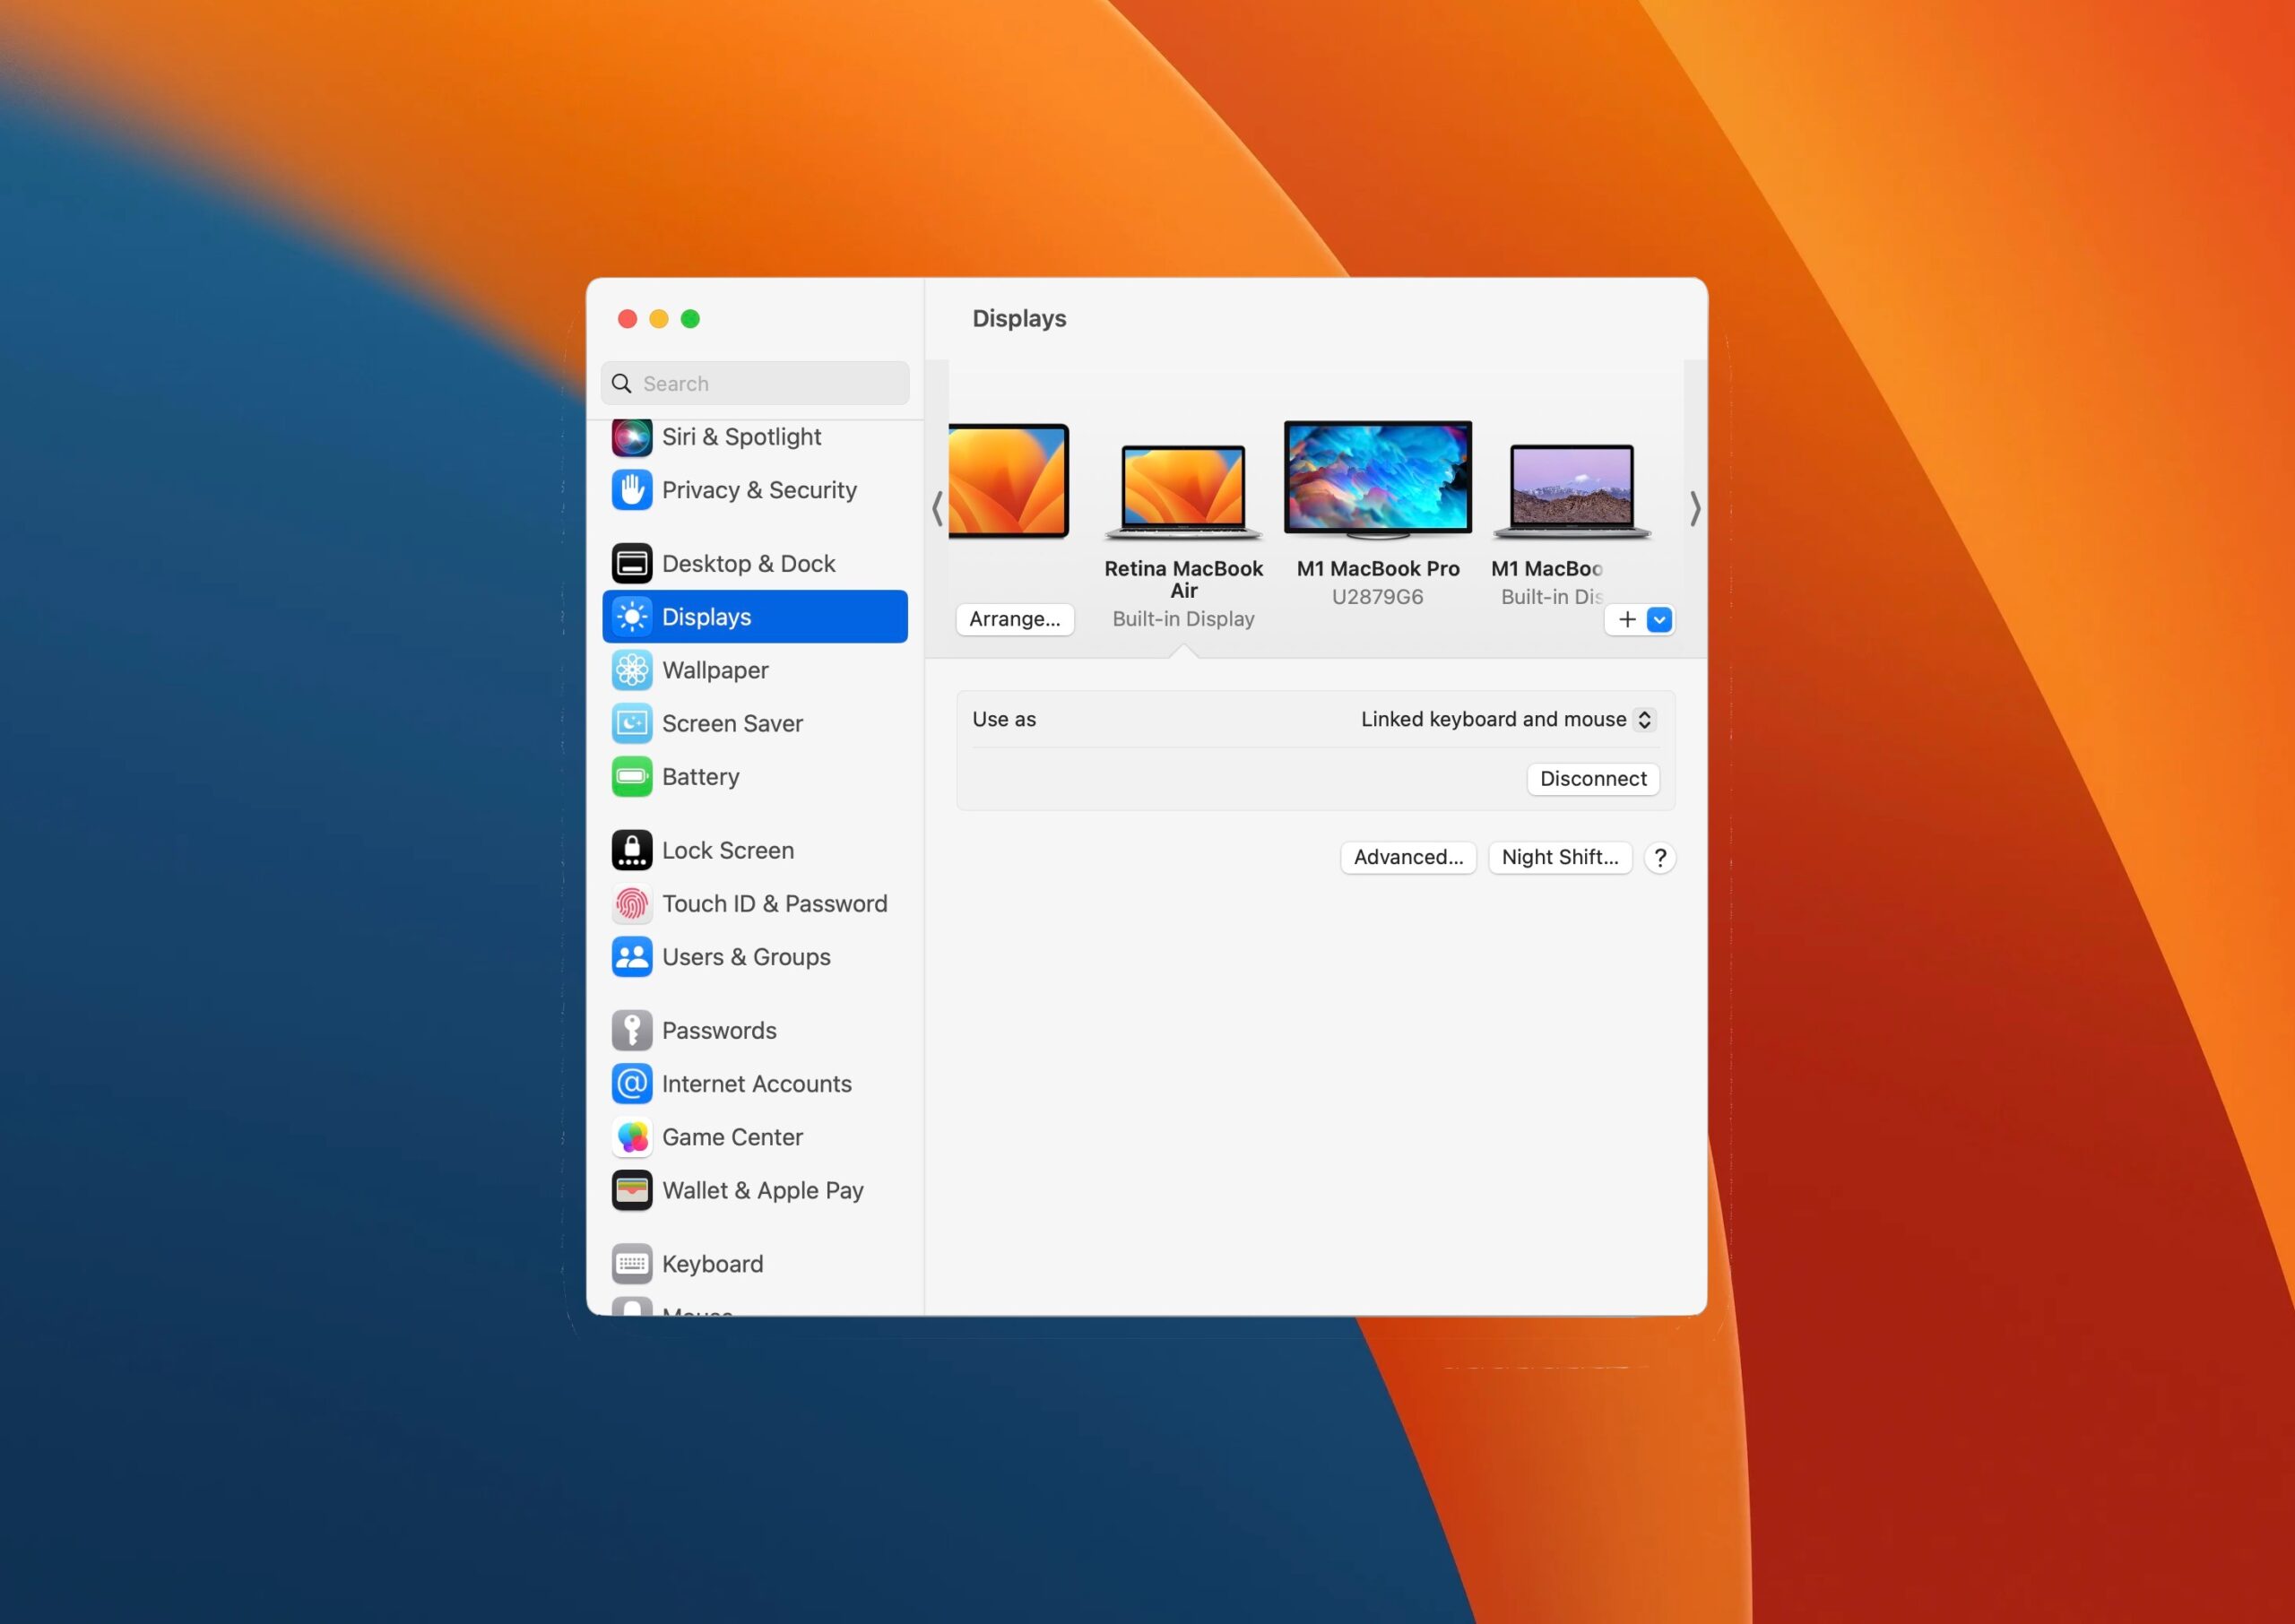
- Go to “Shows”
- Click on on “Superior” and toggle the switches ON for these three settings: “Permit your pointer and keyboard to maneuver between any close by Mac or iPad”, “Push by way of the sting of a show to attach a close-by Mac or iPad”, and “Routinely reconnect to any close by Mac or iPad” then click on Completed
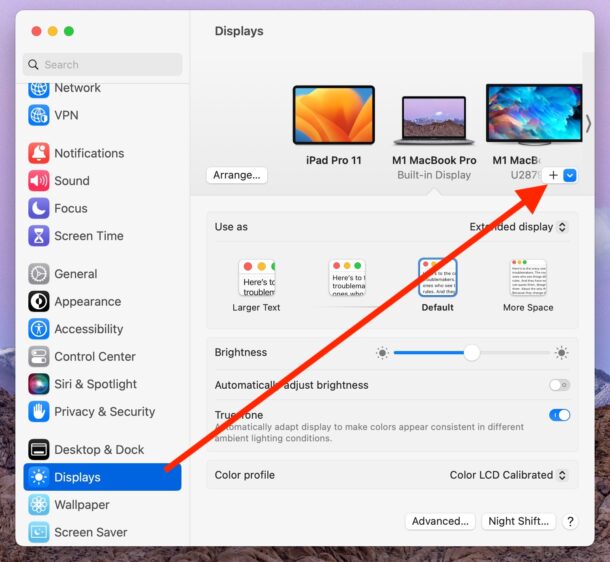
- Click on the + add button in Shows
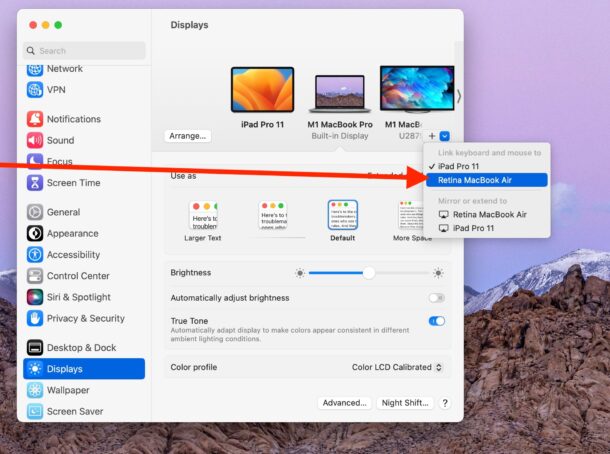
- Select the identify of the Mac from the dropdown checklist that you simply want to add below “Mirror or prolong to:”
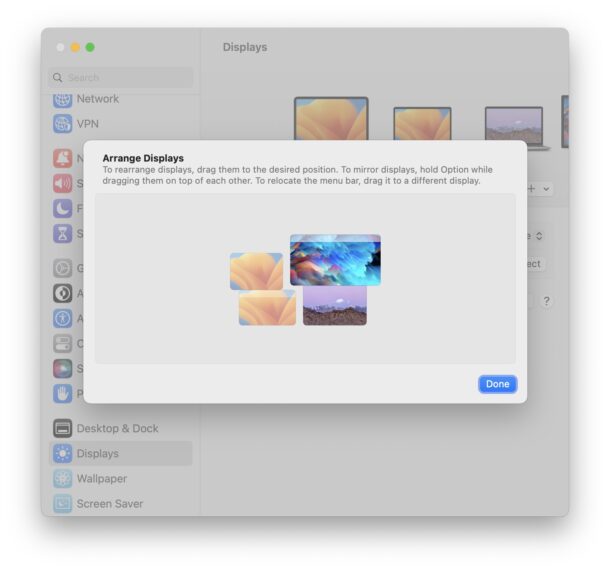
- Subsequent, click on on “Prepare” and select the association for the Mac(s) and shows you want to use
- Transfer the cursor to the opposite Mac display screen, it ought to work seamlessly

Common Management works greatest when there are principally the 2 (or extra) Macs on the identical desk, since you possibly can drag your cursor between them, share clipboards, drag and drop recordsdata, and seamlessly work on a number of Macs on the identical time with this characteristic.
Now that you simply’ve acquired that different Mac added to Common Management, be certain you learn the following tips for Common Management to get probably the most out of the characteristic.
Just like including a Mac to Common Management, you may as well add an iPad, as you will notice within the screenshots above. Similar to linking the keyboard and mouse to a different Mac, doing so will hyperlink the keyboard to that iPad as effectively, and it really works nice. An alternative choice is to use the iPad for Sidecar in MacOS, which turns the iPad show into one other Mac display screen as a substitute.
Do you utilize Common Management to hyperlink your keyboard and mouse between a number of Macs or iPads? What do you consider this characteristic? Tell us your ideas and experiences within the feedback.
Associated