

If you want to run Linux digital machines, Qemu is likely one of the quickest hypervisors on the market, if not the quickest.
Together with the velocity, you additionally get glorious configuration choices. Even in case you are not a sophisticated person, it offers you adequate room for tweaks.
On this tutorial, I’ll stroll you thru:
- Putting in Qemu and KVM on Ubuntu
- Putting in one other distro on Qemu
- Enabling shared folder, auto-resize, and copy-paste in Qemu (non-obligatory however makes your VM expertise smoother)
So let’s begin with the set up.
Putting in Qemu and KVM on Ubuntu
✋
Earlier than leaping to the set up, let’s test whether or not your machine helps the virtualization or not.
To take action, use the next command:
LC_ALL=C lscpu | grep VirtualizationYou probably have an intel processor, it ought to convey the next output:

And you probably have an AMD processor, it ought to get you the next output:
Virtualization: AMD-VAdditionally, be sure your system has a number of cores so that you could allocate some to your VM and nonetheless have sufficient to energy the host machine.
And if you happen to’re undecided, use the next command and the output ought to be greater than zero:
egrep -c '(vmx|svm)' /proc/cpuinfo
As soon as you might be all set, you possibly can set up Qemu and KVM on Ubuntu utilizing the next command:
sudo apt set up qemu qemu-kvm virt-manager bridge-utilsReboot your system as soon as the set up is over.
Add person to applicable teams
To make Qemu work, you’d should add your person to 2 teams: libvirt-kvm and libvirt.
To take action, use the next instructions one after the other:
sudo useradd -g $USER libvirtsudo useradd -g $USER libvirt-kvmSubsequent, allow and begin the libvirt service:
sudo systemctl allow libvirtd.service && sudo systemctl begin libvirtd.serviceThat is it! The set up of Qemu is finished.
Putting in one other Linux just about with Qemu
📋
Please obtain the ISO file of the Linux distro you wish to set up in Qemu VM.
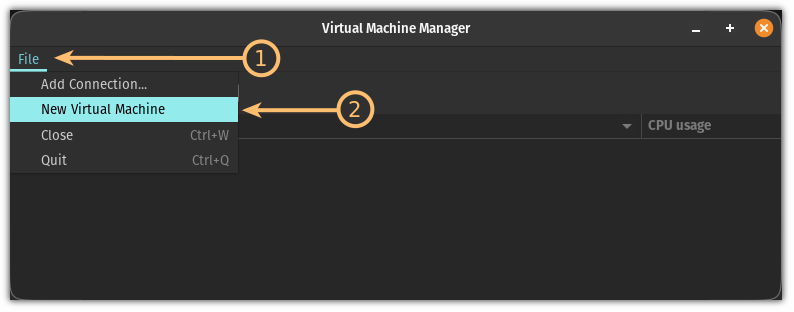
First, open the Digital Machine Supervisor from the system menu:

Subsequent, click on on the File menu and select the New Digital Machine possibility:
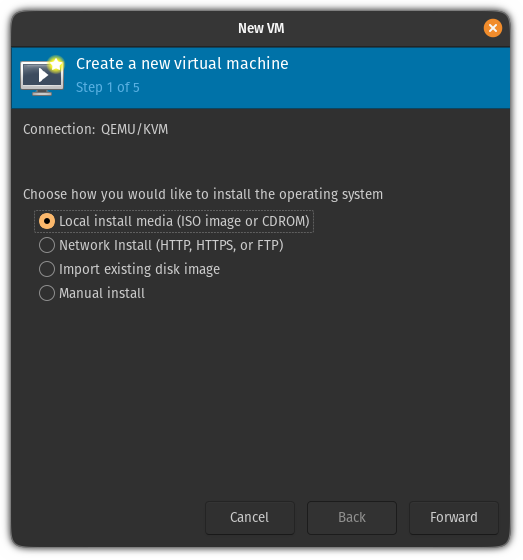
From right here, select the primary possibility Native set up media which can will let you select the ISO out of your file supervisor:
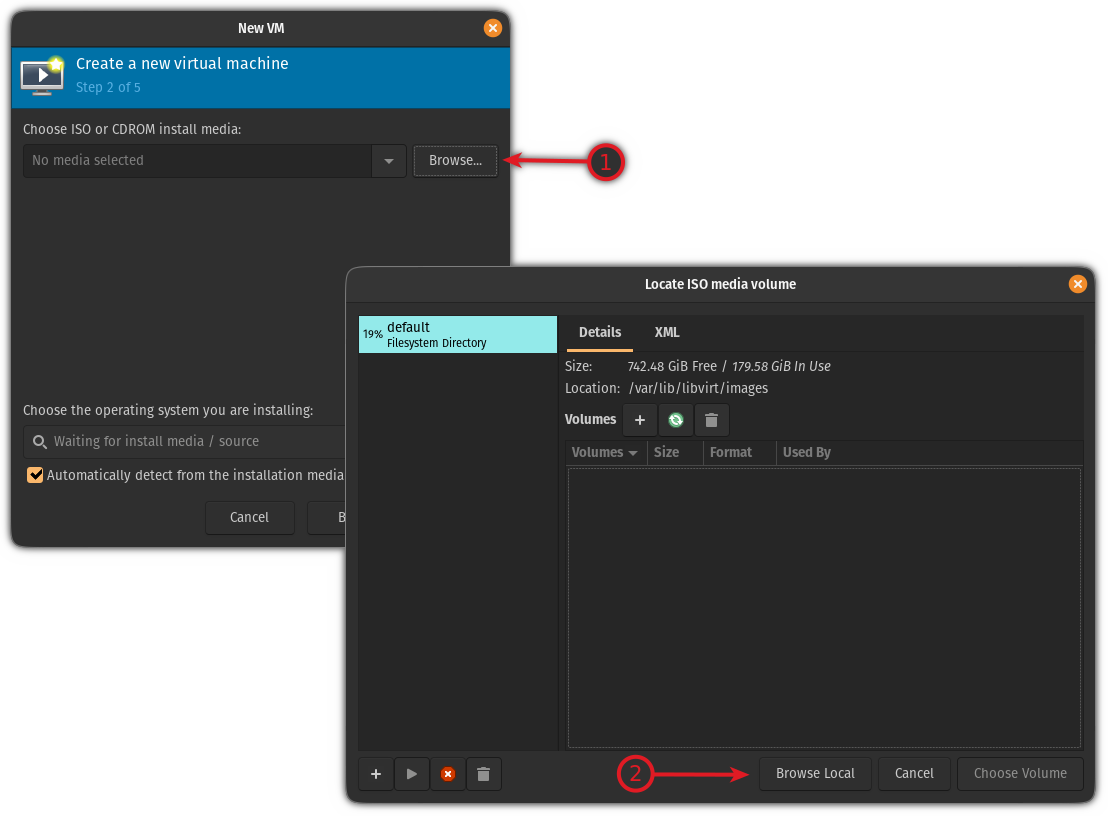
Subsequent, you may be requested so as to add the ISO file. Right here, click on on the Browse button; it will open a brand new immediate, and there, click on on the browse native.
It’s going to open the file supervisor and from there, choose the ISO file:
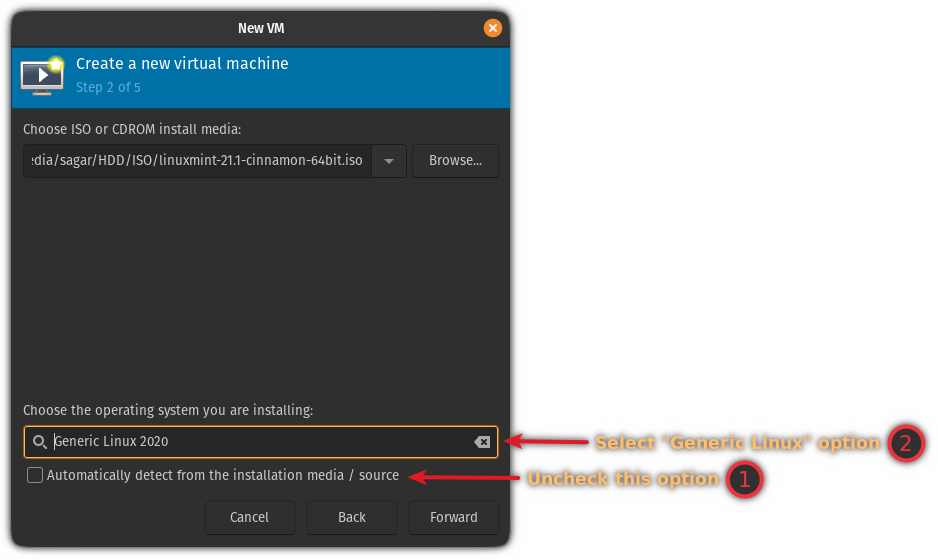
Generally, the ISO file might be detected however if you happen to discover a state of affairs the place it doesn’t detect it routinely, comply with the given steps:
- Uncheck the Mechanically detect from the supply possibility
- Select the
Generic Linuxpossibility
Subsequent, you may be requested to allocate reminiscence and storage as per your wants. I’d suggest going with a minimal of two cores, 4 GB of RAM, and 25 GB of storage for the desktop model:
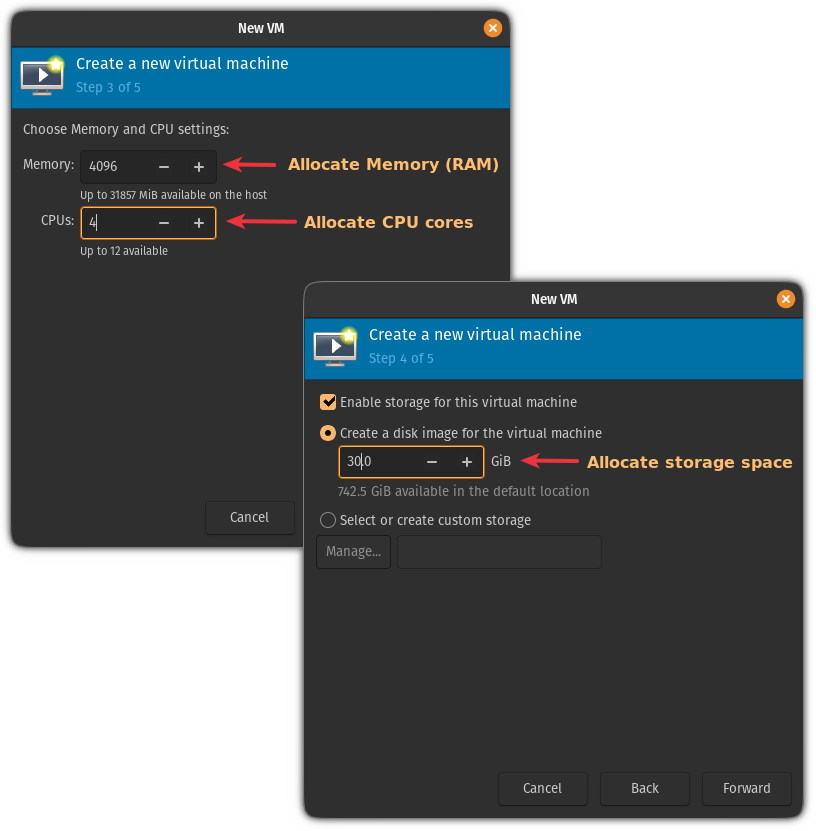
📋
Apart from the disk area, system assets like CPU and RAM are solely used when working the OS in VM.
And eventually, give the suitable title to your VM; as soon as finished, click on on the end button:
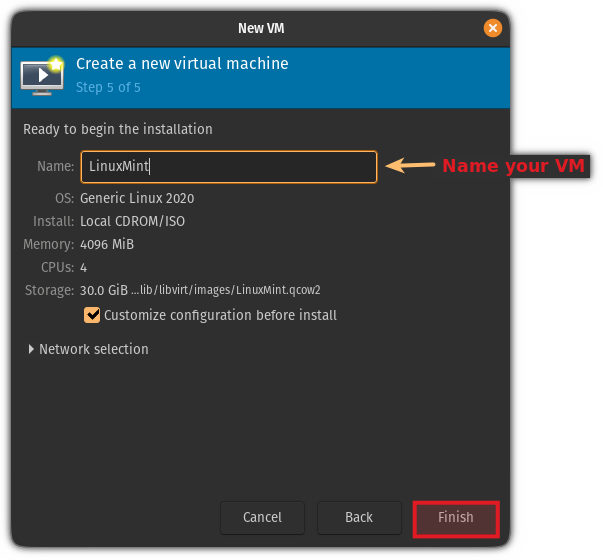
It’s going to load the ISO, so you can begin the set up from right here.
That is finished. You might get pleasure from your VM however you will even get pleasure from it higher if you happen to allow shared folder, clipboard sharing, and many others. The following couple of sections present how to try this.
Enabling shared folders in Qemu (non-obligatory)
On this part, I’ll present you how one can share the present listing of the host machine with the VM.
To take action, you’d should carry out the next:
- Including a shared filesystem by means of VM settings in Qemu
- Mounting the FS within the VM
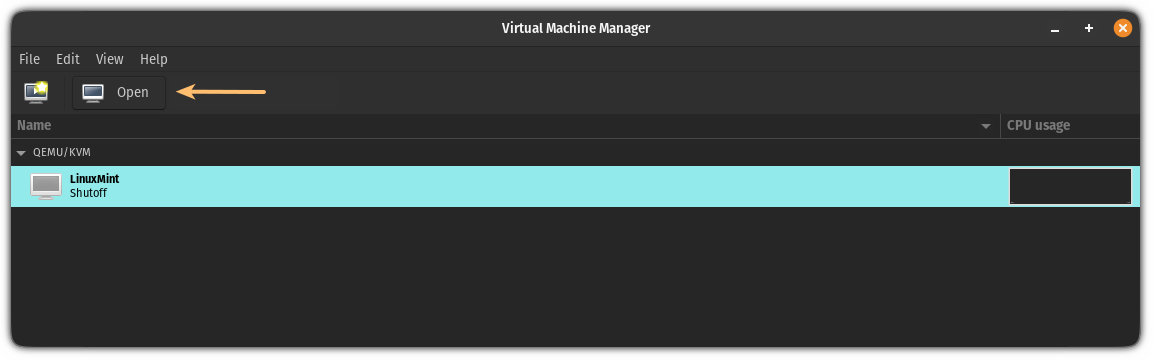
So first, open the Digital Machine Supervisor from the system menu, choose the VM, and click on the Open button to handle the console:
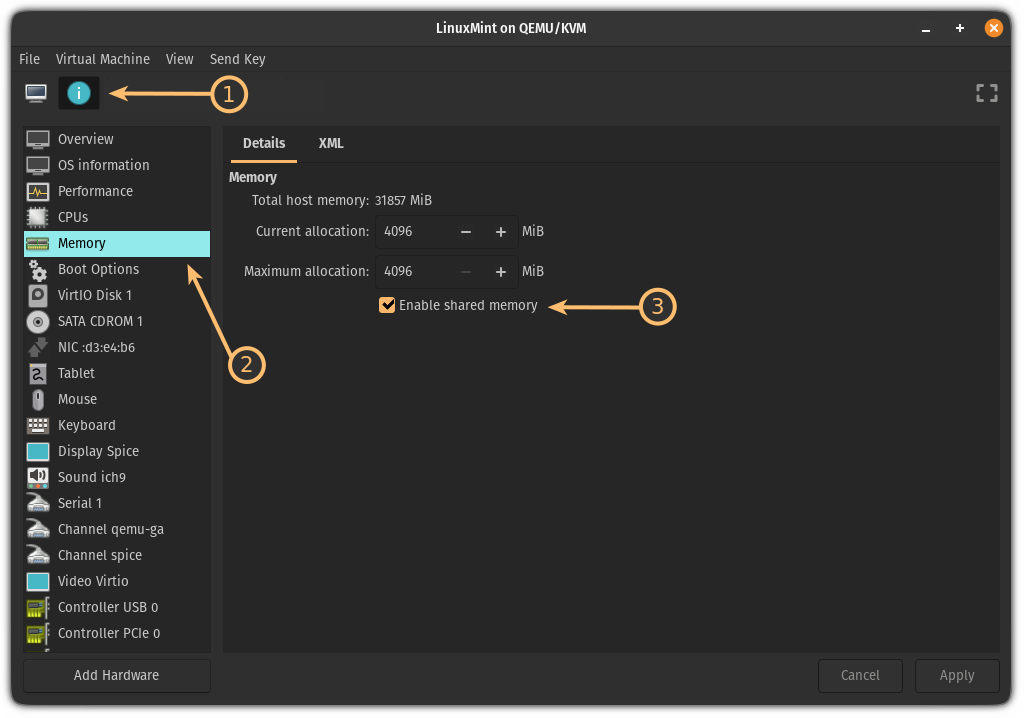
Now, click on on the data button, choose the Reminiscence and allow the shared reminiscence:
Subsequent, click on on the Add {Hardware} button, choose the Filesystem possibility.
Right here, you’d should do the next:
- Add a path to the listing you wish to share within the
Supply pathpart - Add the title of the listing within the
Goal pathpart
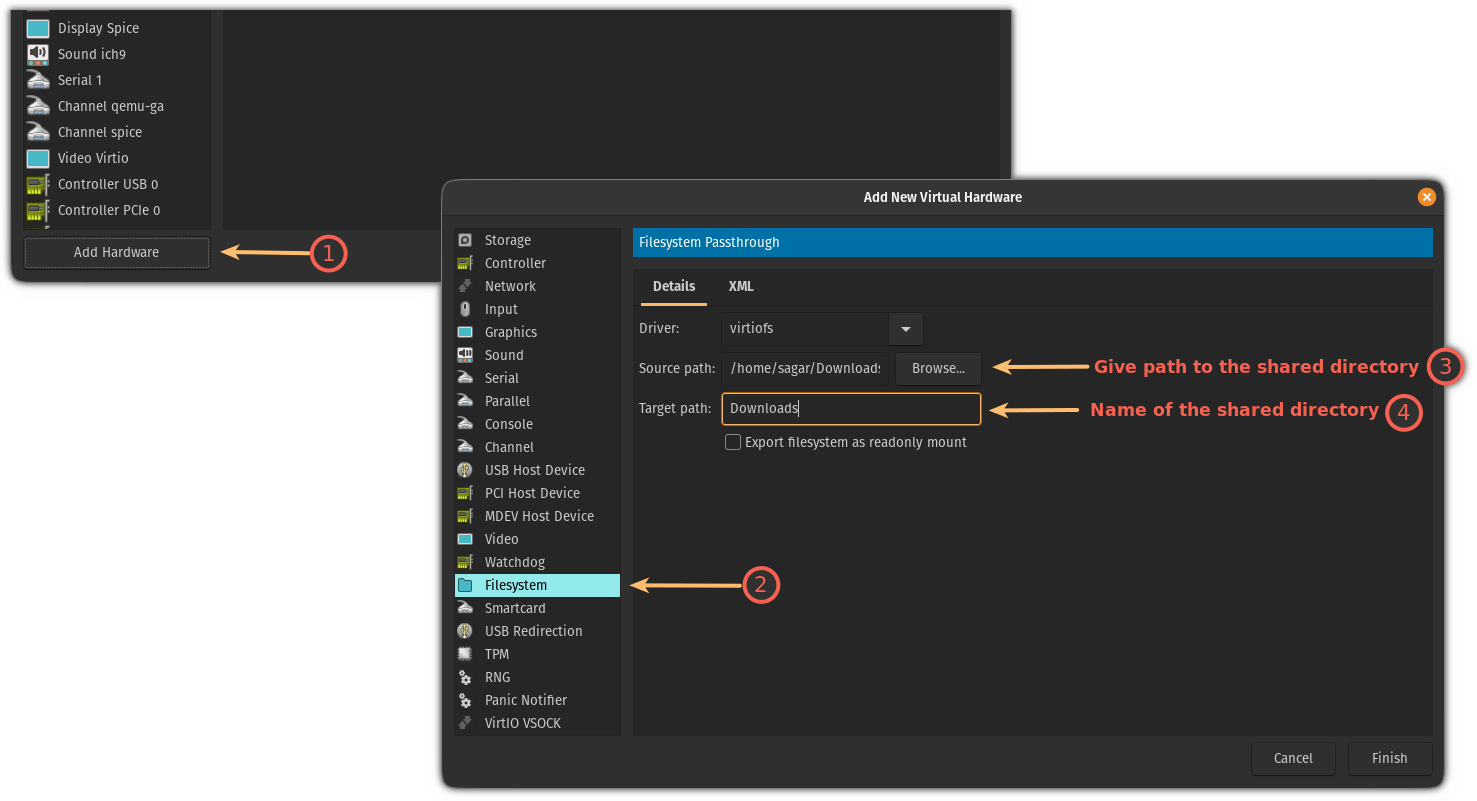
As soon as finished, click on on the End button and begin the VM.
In VM, open the terminal and use the next syntax to mount the shared listing:
sudo mount -t virtiofs sharename path/to/shared/listingIn my case, it was the Downloads listing, so I might be utilizing the next:
sudo mount -t virtiofs Downloads /house/sagar/Downloads
That is it!
However that is a brief resolution.
To make it everlasting, you’d should make create an entry in /and many others/fstab Within the VM.
To take action, first, open the /and many others/fstab config file utilizing the next:
sudo nano /and many others/fstabGo to the top of the file within the nano textual content editor utilizing Alt + / and use the next syntax to create an entry:
sharename path/to/shared/listing virtiofs defaults 0 0Here is what my config seems to be like:
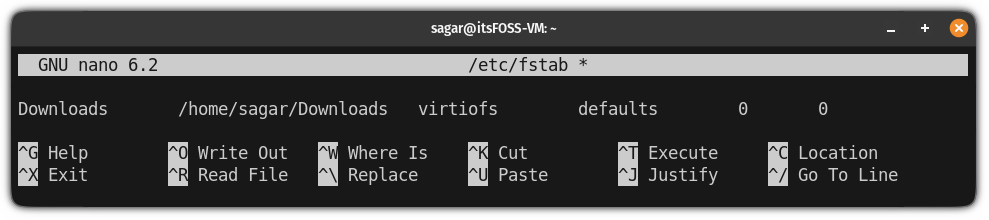
As soon as finished, save modifications and exit from the nano textual content editor.
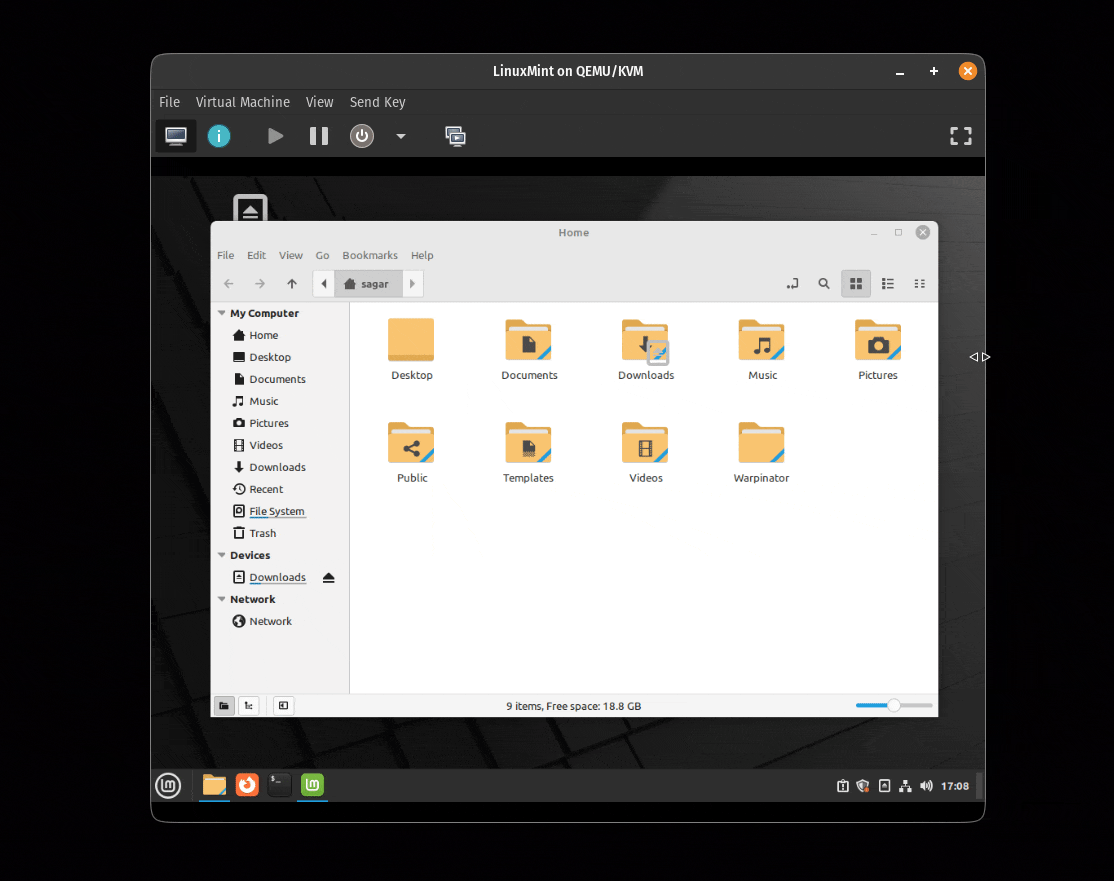
Right here I’ve proven how I created a brand new file in my host machine within the Downloads listing and the modifications had been mirrored in my VM:
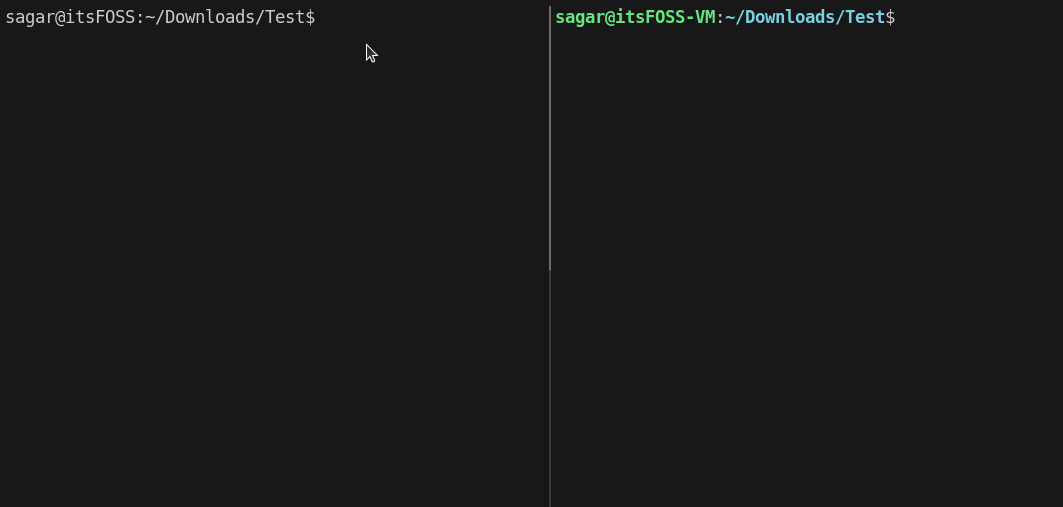
So now you need to use this shared folder to switch information between the host and VM with none points!
Enabling shared clipboard in Qemu (non-obligatory)
To allow the shared clipboard, all you need to do is set up the spice-vdagent utility within the VM.
So in case your VM is Ubuntu/Debian primarily based, you need to use the next:
sudo apt set up spice-vdagentFor Arch base:
sudo pacman -S spice-vdagentFor Fedora-based distros:
sudo yum set up spice-vdagentAs soon as you might be finished with the set up, reboot your VM, and the clipboard ought to work as meant!
Enabling auto-resize in Qemu (non-obligatory)
The auto-resize function is nothing however if you resize the VM window, the VM show will adapt to the change in measurement instantly:

To allow the auto-resize in Qemu, you’ll have to comply with 2 easy steps:
- Click on on the
View(from prime menubar) - Choose the
Scale Showpossibility and select theAt all timespossibility
That is it from my facet.
Need to use a plug-and-play model of Qemu?
On this tutorial, I went by means of how one can manually set up a VM in Qemu however what if I inform you that you could automate the entire course of like allocating storage, RAM, and many others?
Sure, it offers the identical effectivity however turns out to be useful if you wish to create a brand new VM ASAP! The instrument known as Quickgui and we’ve a devoted tutorial for the set up:
Create Digital Machines Simply With QEMU-based Quickgui
Quickgui goals to be an easier various to VirtualBox and assist create digital machines rapidly. Allow us to check out it.

I hope you can see this information useful. And you probably have any queries, be happy to ask within the feedback.