

Kali Linux is a well-liked alternative for penetration testing or moral hacking. It consists of a variety of instruments for testing your community’s vulnerabilities in addition to these of your computer systems and different gadgets. The Debian-based Linux distribution has lengthy been run on Macs, however has grow to be tougher in recent times. Let’s dive into how one can set up Kali Linux on an M1 Mac, or every other Apple Silicon-based pc.
The Hassle With M1 Macs and Alternate Working Techniques
You is likely to be questioning why you’ll be able to’t simply dual-boot Kali Linux, or substitute macOS with it altogether. On Intel-based Macs, this was fairly doable. Even on these, although, it started to be a bit troublesome as a result of the T2 Safety Chip makes this tough.
With the transition to Apple Silicon on Mac {hardware}, the issue is compounded even additional. Apple Silicon Macs, from the primary M1-based MacBooks to the most recent M2 Professional MacBook Professional, not utterly in another way from PCs.
To make a protracted story brief, booting alternate working programs on newer Mac {hardware} remains to be a piece in progress. The crew at Asahi Linux has made nice strides in bridging the hole, however it’s nonetheless bought a methods to go.
To run one thing like Kali Linux, then, we flip to a different methodology: a digital pc.
Getting Able to Set up Kali Linux On Your M1 Mac
The very first thing you could do to put in Kali is collect the required software program and installer pictures. For our digital PC, we’re going to decide on UTM. It’s bought the robustness we’d like, and is offered freed from cost.
Notice that I like to recommend downloading UTM straight from the web site. Sure, you should purchase it for $10 on the Mac App Retailer, however the one distinction right here is getting automated updates for UTM itself.
You’ll additionally want the Kali Linux installer picture. From the distribution’s net web page, click on Installer Photographs > Apple Silicon (ARM64. Click on your required choice for Installer, whether or not you need a direct obtain or a torrent.

It’s essential to notice that Kali Linux does supply prebuilt digital machine downloads for VMWare, VirtualBox and Qemu. I don’t advocate these, nevertheless, as a result of they’re constructed for Intel-based PCs.
Methods to Set up Kali Linux On Your M1 or M2 Mac
Now for the enjoyable half: establishing your digital PC and putting in Kali Linux. That is pretty simple, however you will want to set some uncommon choices alongside the best way.
Setting Up Your UTM Digital Machine for Set up
To put in Kali Linux in your Apple Silicon Mac, you’ll first arrange your UTM digital machine.
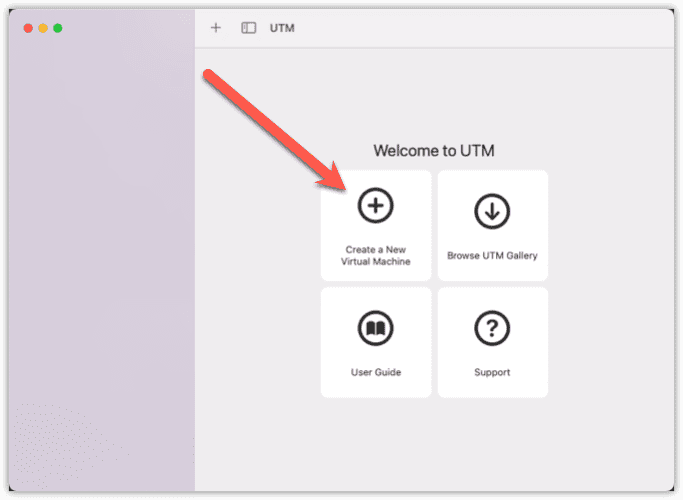
- Launch UTM and click on Create a New Digital Machine > Virtualize.
- Beneath Working System, select Different.

- Subsequent, click on Browse and select the Kali Linux installer picture you downloaded. Then, click on Proceed.
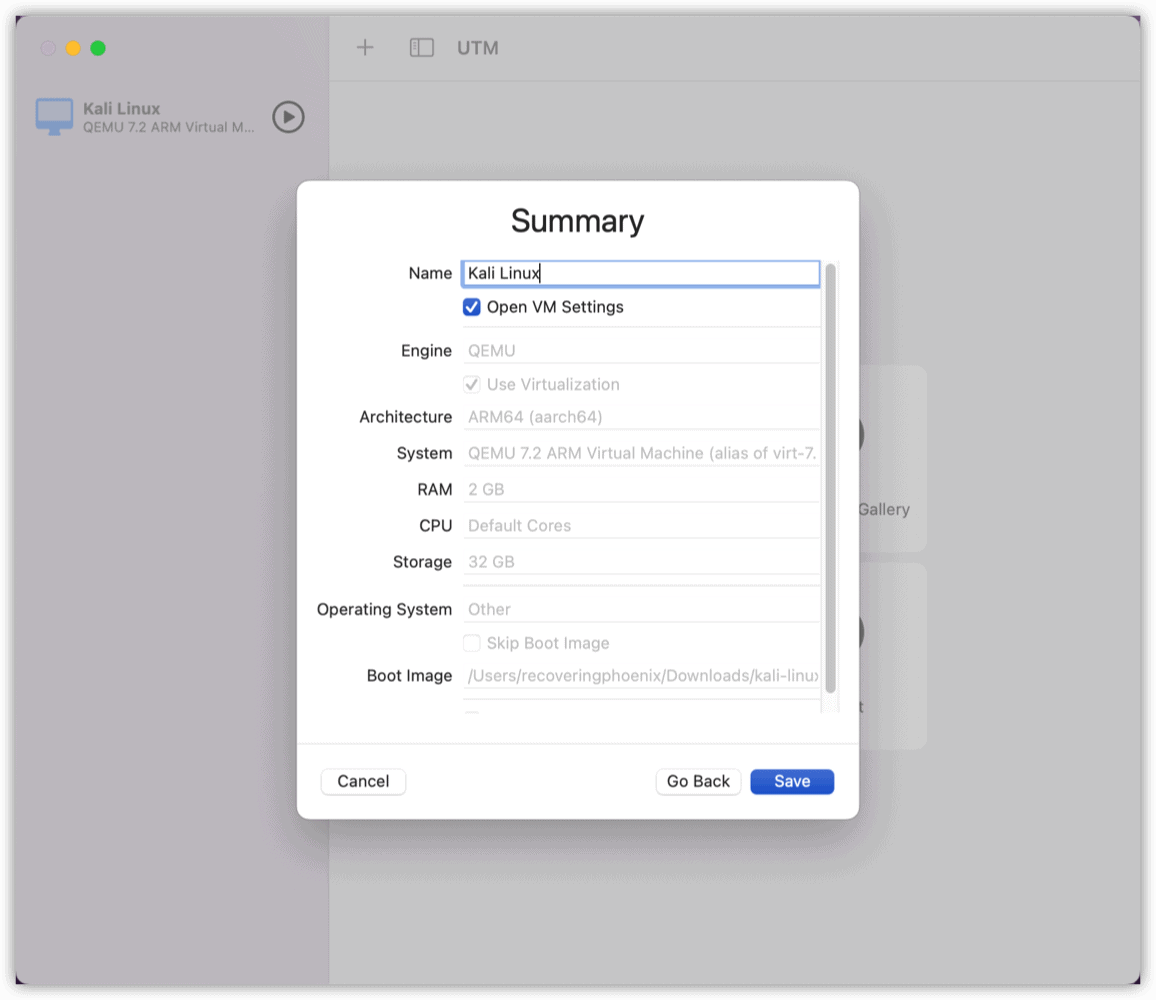
- You may set this how you want, however I’ve discovered that setting reminiscence to 2048MB and storage at 32GB was greater than enough.
- You may depart Shared Listing Path empty, except you want it for some motive.
- If you get to the abstract web page, give your digital pc a reputation and verify the field for Open VM Settings. Then, click on Save.
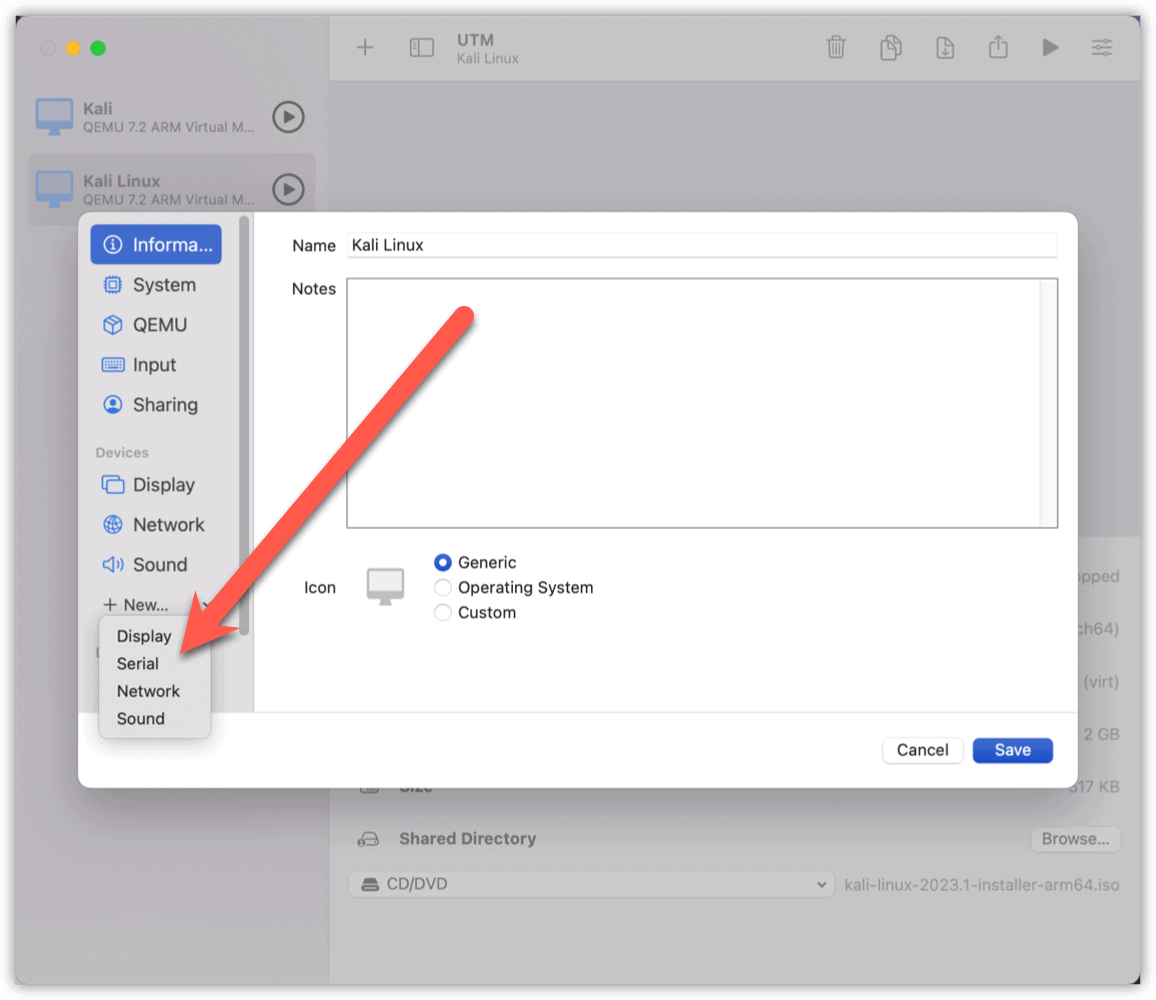
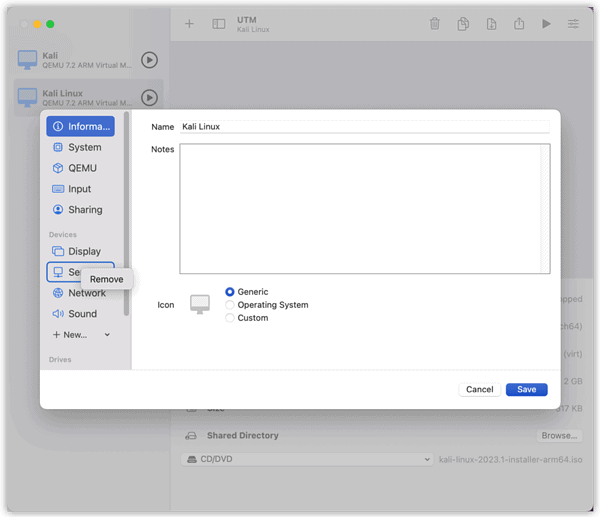
- Subsequent, we have to configure our VM to open a second terminal window throughout set up. For some motive, the first one goes darkish, tripping folks up. Within the sidebar underneath Gadgets, click on New > Serial.
As soon as that’s all configured, it’s time to maneuver on to set up.
Putting in Kali Linux in UTM On Your Mac
You’ll click on the big Play button to start the set up. You’ll see two home windows, however most of your work might be within the one labeled Terminal 1. As you’ll quickly see, the second window will go clean till all is finished.
Time wanted: 5 minutes.
To put in your Kali Linux digital machine, observe these steps.
- Choose Set up and the Kali Linux installer will start amassing data.
- You’ll need to choose the suitable language and keyboard structure on your wants.
- You could have to manually choose the precise time zone, because the installer doesn’t all the time correctly detect it.
- The installer will ask you to create a person, select what packages to put in, and so forth. The default choices will usually work finest for many.
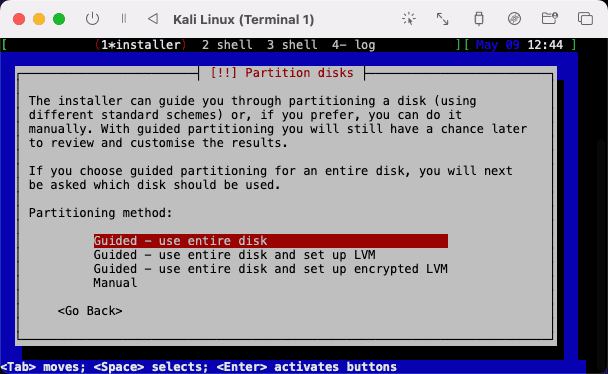
- On the Partition disks web page, simply select Guided – use whole disk.
- Choose the default choices till you attain the web page asking if you wish to write the partition information to disk. Right here, choose Sure and press Return.
- When the set up completes and asks to reboot, shut down the digital machine. There are a pair extra settings modifications we’ll have to make.
- Again within the UTM menu on your Kali Linux digital machine, right-click Serial, then click on Take away. Subsequent, click on Save.
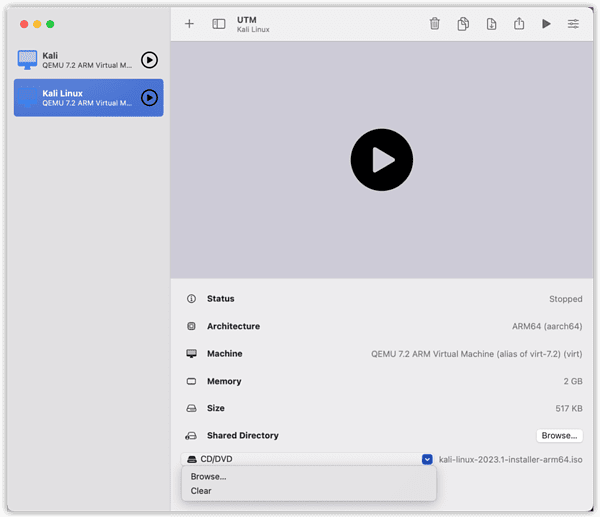
- Scroll down till you see CD/DVD. Click on the dropdown menu and click on Clear.
Getting Began With Your Safety Testing
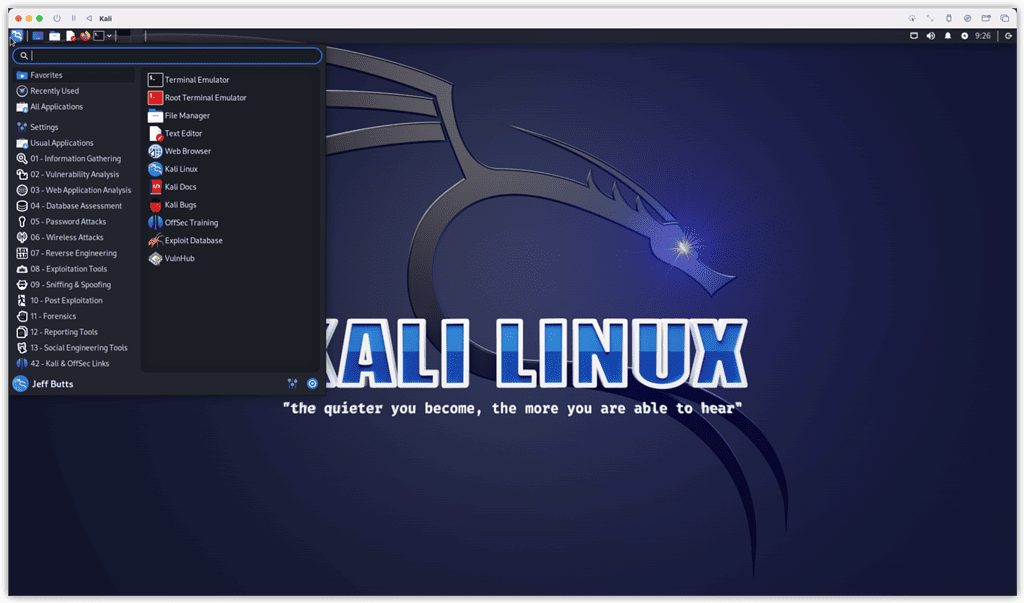
Now that the set up is full, you’ll be able to click on the Play button. Kali Linux ought to boot up and also you’ll be prepared to start your vulnerability testing, digital forensics, or no matter objective you keep in mind.
As you’re employed, listed below are some additional suggestions to remember concerning working in a UTM digital machine.
- In case your mouse will get caught within the VM, urgent Management + Choice will launch it.
- Seize Mouse Cursor Button generally is a actual game-changer, productivity-wise. If you press it, your mouse cursor robotically strikes out of your host working system to the place it must be within the VM.