

On this information, we’ll clarify set up and configure VNC Distant Entry in CentOS 7/8 and RHEL 9/8/7 desktop version through the tigervnc-server program to entry distant desktop machines.
VNC (Digital Community Computing) is a server-client protocol that permits consumer accounts to remotely join and management a distant system through the use of the assets offered by the Graphical Person Interface.
In contrast to different VNC servers obtainable which join on to the runtime desktop, corresponding to VNC X or Vino, tigervnc-vncserver makes use of a unique mechanism that configures a standalone digital desktop for every consumer.
Necessities
Step 1: Set up and Configure VNC on CentOS
1. Tigervnc-server is a program that executes an Xvnc server and begins parallel periods of Gnome or different desktop environments on the VNC desktop.
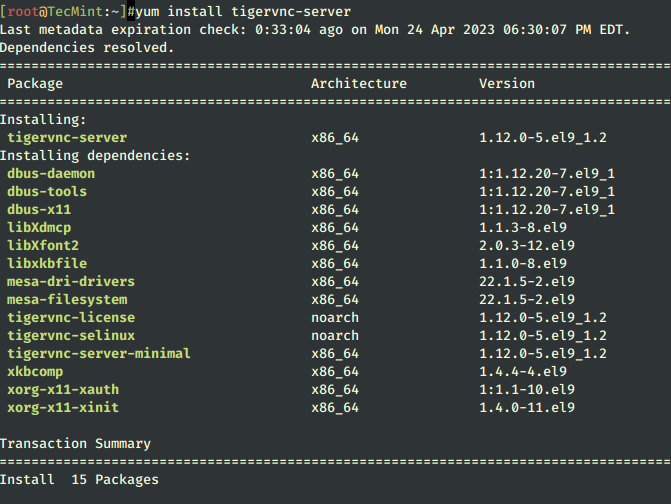
A began VNC consumer session could be accessed by the identical consumer from a number of VNC shoppers. With a purpose to set up the TigerVNC server in CentOS/RHEL, open a terminal session and challenge the next yum command with root privileges.
$ sudo yum set up tigervnc-server
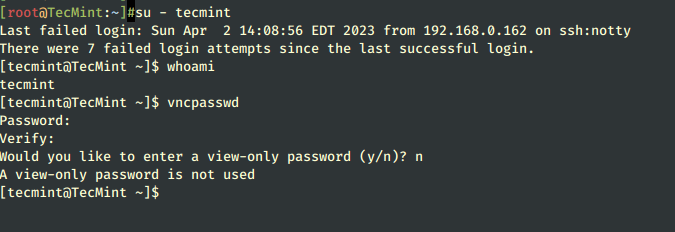
2. After, you’ve put in this system, log in with the consumer you need to run the VNC program and challenge the beneath command within the terminal with a purpose to configure a password for the VNC server.
Remember that the password have to be at the very least six characters lengthy.
$ su - your_user
$ vncpasswd
3. Subsequent, add a VNC service configuration file in your consumer through a daemon configuration file positioned within the systemd listing tree. With a purpose to copy the VNC template file you might want to run the next cp command with root privileges.
In case your consumer shouldn’t be granted sudo privileges, both change on to the foundation account or run the command from an account with root privileges.
# cp /lib/systemd/system/[email protected] /and so forth/systemd/system/[email protected]:1.service
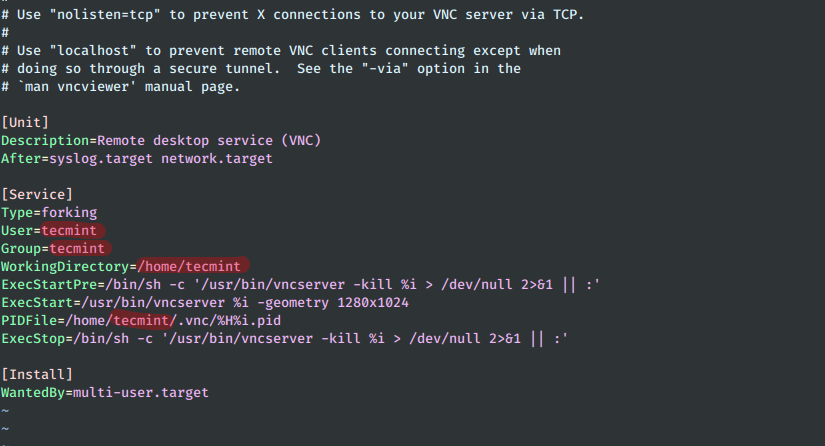
4. Within the subsequent step edit the copied VNC template configuration file from /and so forth/systemd/system/ listing and change the next values to mirror your consumer as proven within the beneath pattern.
The worth of 1 after @ signal represents the show quantity (port 5900+show). Additionally, for every began VNC server, port 5900 will likely be incremented by 1.
# vi /and so forth/systemd/system/[email protected]:1.service
Add the next strains to file [email protected]:1.service.
[Unit]
Description=Distant desktop service (VNC)
After=syslog.goal community.goal

[Service]
Sort=forking
Person=tecmint
Group=tecmint
WorkingDirectory=/house/tecmint
ExecStartPre=/bin/sh -c '/usr/bin/vncserver -kill %i > /dev/null 2>&1 || :'
ExecStart=/usr/bin/vncserver %i -geometry 1280x1024
PIDFile=/house/tecmint/.vnc/%Hpercenti.pid
ExecStop=/bin/sh -c '/usr/bin/vncserver -kill %i > /dev/null 2>&1 || :'

[Install]
WantedBy=multi-user.goal
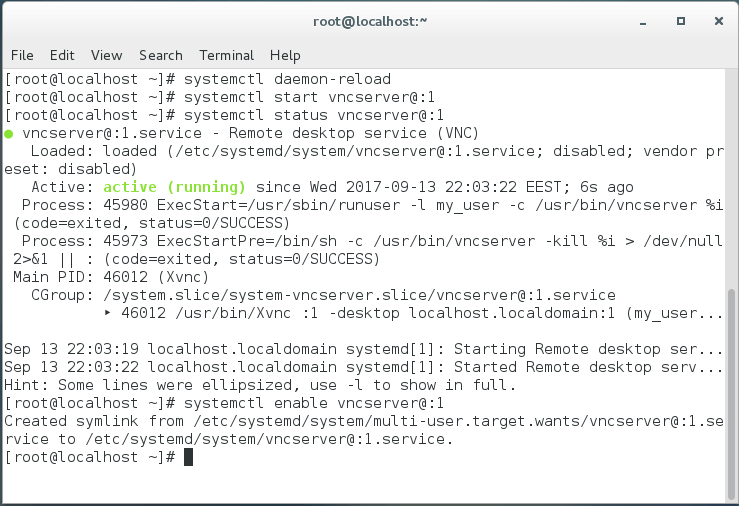
5. After you’ve made the correct adjustments to the VNC service file, reload the systemd system initialization program to choose up the brand new vnc configuration file and begin the TigerVNC server.
Additionally, examine the VNC service standing and allow the VNC daemon system-wide by issuing the beneath instructions.
# systemctl daemon-reload
# systemctl begin [email protected]:1
# systemctl standing [email protected]:1
# systemctl allow [email protected]:1
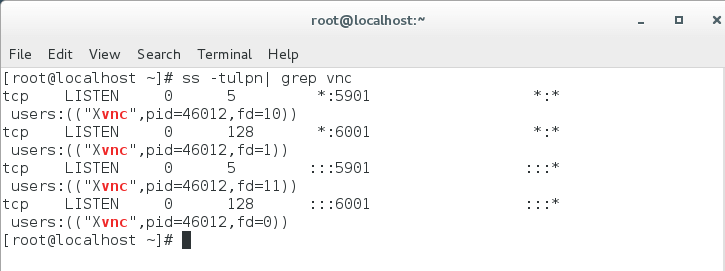
6. To record the opened ports within the listening state owned by the VNC server, run the ss command, which is used to show community sockets. Since you’ve solely began one occasion of the VNC server, the primary open port is 5901/TCP.
Once more, the ss command have to be executed with root privileges. In case you begin different VNC situations in parallel for various customers, the port worth will likely be 5902 for the second, 5903 for the third, and so forth. The ports 6000+ are used for permitting the X functions to hook up with the VNC server.
# ss -tulpn| grep vnc
7. With a purpose to enable exterior VNC shoppers to hook up with the VNC server, you might want to ensure the correct VNC open ports are allowed to cross by your firewall.
In case only one occasion of the VNC server is began, you solely must open the primary allotted VNC port: 5901/TCP by issuing the beneath instructions to use the firewall configuration at runtime.
# firewall-cmd --add-port=5901/tcp
# firewall-cmd --add-port=5901/tcp --permanent
Step 2: Connecting to CentOS Desktop through VNC Shopper
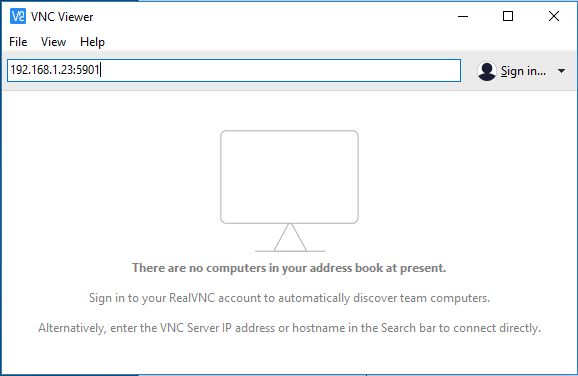
8. Being a platform-independent protocol, distant Graphical Person Interface VNC connections could be carried out from nearly any working system with a GUI and a specialised VNC shopper.
A preferred VNC shopper utilized in Microsoft-based working techniques, totally appropriate with Linux TigerVNC server, is the RealVNC VNC Viewer.
With a purpose to remotely connect with CentOS Desktop from a Microsoft OS through VNC protocol, open the VNC Viewer program, add the IP tackle and port variety of the CentOS VNC server, and hit the [enter] key.
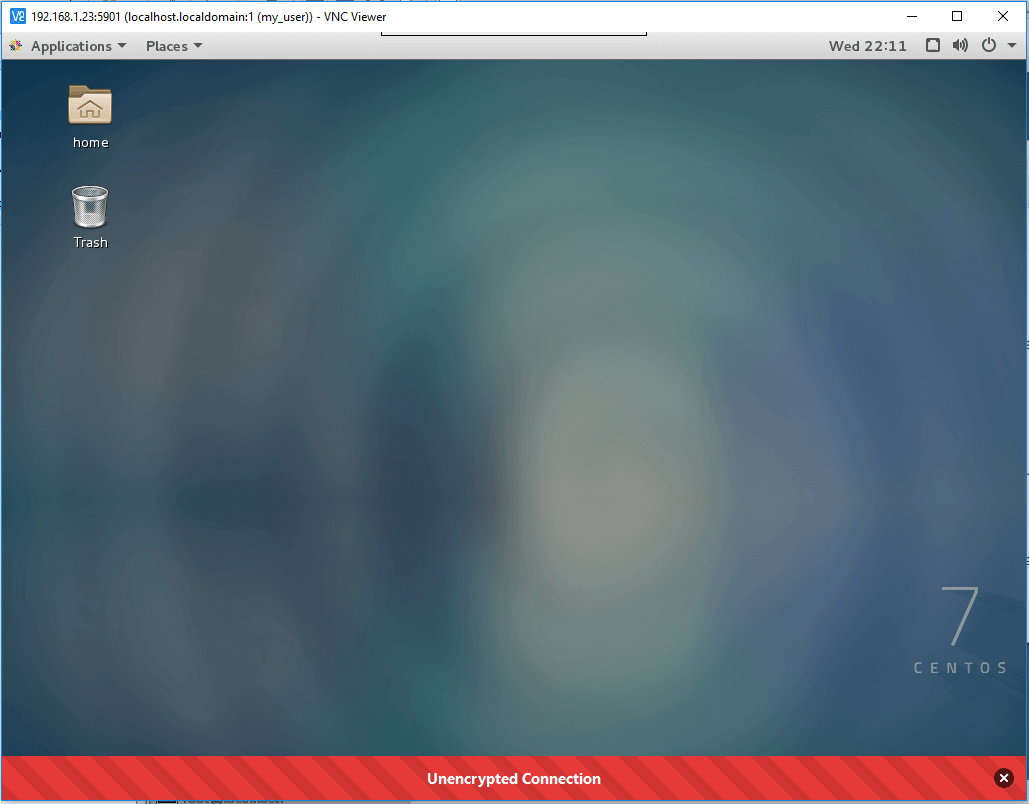
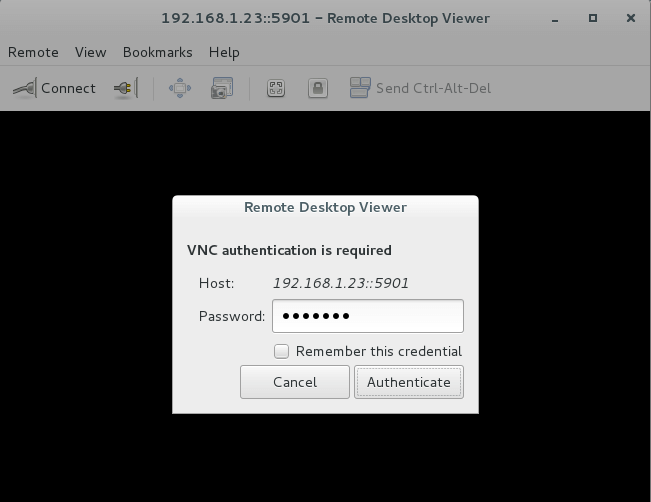
After the VNC connection has been established a warning saying that the connection shouldn’t be encrypted must be displayed in your display as illustrated within the beneath screenshots.
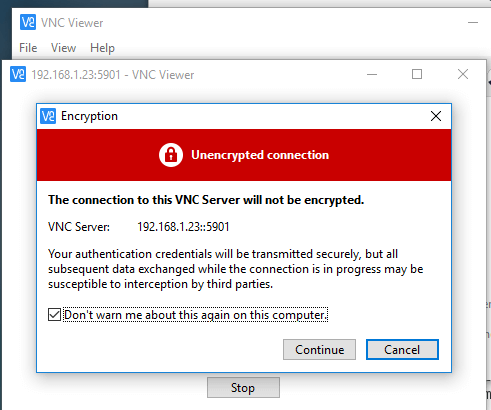
9. With a purpose to bypass the warning, hit on the Proceed button, add the password setup for the VNC server at level 2 and try to be remotely linked to CentOS Desktop with the consumer configured to run the VNC server occasion.
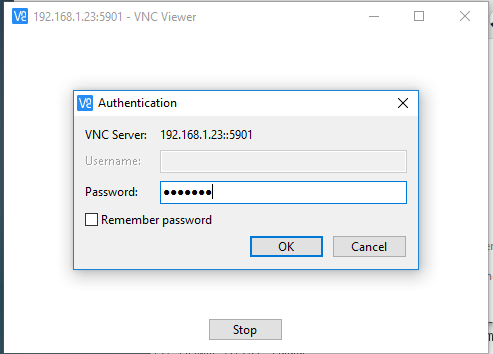
10. In case a brand new Authentication message seems in your display and your consumer has no root privileges, simply hit the Cancel button to proceed to CentOS Desktop, as proven within the beneath screenshot.
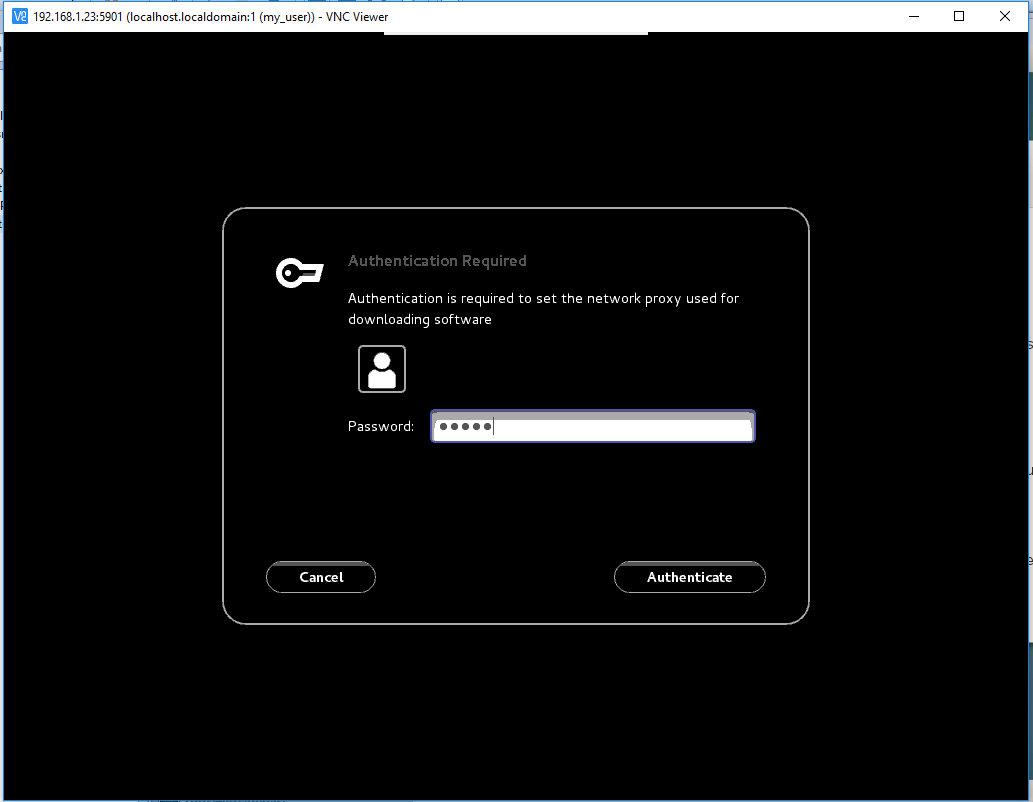
Remember that the established VNC communication between the server and shopper and any knowledge exchanged (besides the password) run over an unencrypted channel. With a purpose to encrypt and safe the VPN knowledge switch, first you might want to arrange a safe SSH tunnel and run any subsequent VPN site visitors over the SSH tunnel.
11. With a purpose to remotely connect with CentOS Desktop through VNC protocol from different CentOS Desktops, first guarantee that the vinagre package deal is put in in your system by issuing the beneath command.
$ sudo yum set up vinagre
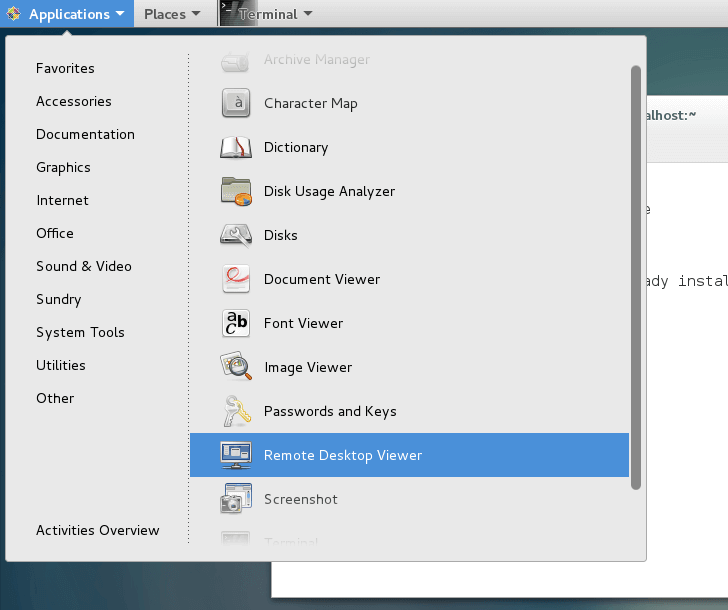
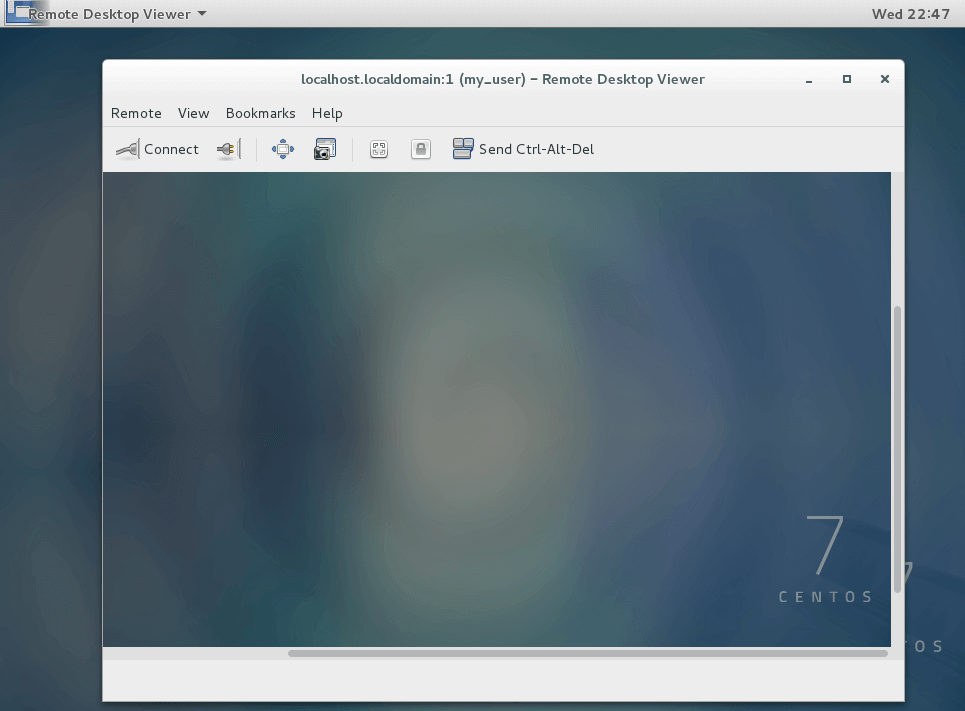
12. To open vinagre utility, go to Functions -> Utilities -> Distant Desktop Viewer as proven within the beneath screenshot.
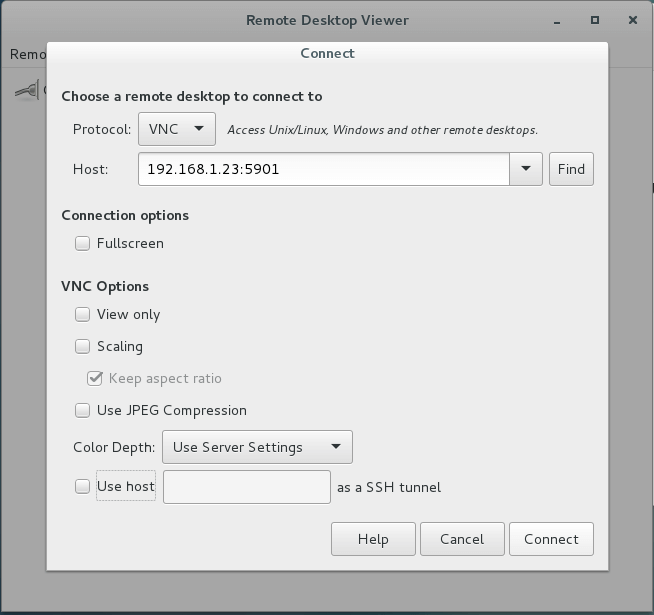
13. To remotely connect with a CentOS Desktop, hit on Join button, choose VNC protocol from the record and add the IP tackle and port (5900+show quantity) of the distant VNC server. Additionally, provide the password setup for the VNC consumer as illustrated within the following screenshots.
14. One other common VNC shopper for Linux-based platforms is Remmina, a distant desktop shopper that’s particularly utilized in Debian-based distributions that run the GNOME desktop surroundings.
To put in the Remmina Distant Desktop shopper in Debian-based distros challenge the next command.
$ sudo apt-get set up remmina
Step 3: Configure A number of VNC Periods on CentOS
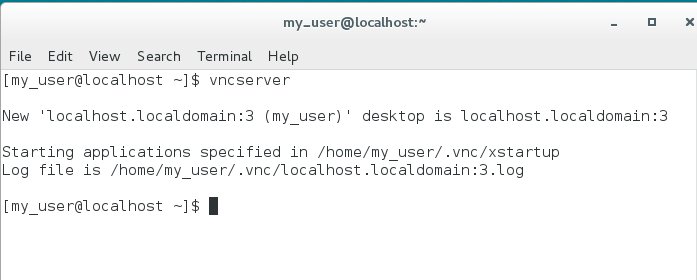
15. In case you might want to run a brand new parallel VNC session below the identical consumer, open a Terminal console, log in with the consumer you need to begin the brand new VNC session, and execute the beneath command.
If you first begin the server you may be requested to provide a brand new password for this session. Nevertheless, bear in mind that this session runs along with your logged-in consumer permissions and independently from the began systemd VNC server session.
$ vncserver
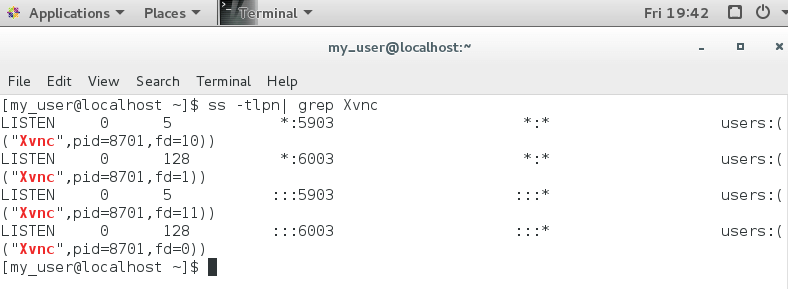
16. The brand new VNC periods will open the following obtainable VNC-based ports (5900+3 show on this instance). To show the opened ports, execute the ss command with out root privileges as illustrated within the beneath excerpt. It should record solely the began VNC periods owed by your consumer.
$ ss -tlpn| grep Xvnc
17. Now, remotely connect with CentOS Desktop utilizing this new VNC session, and provide the IP:port mixture (192.168.1.23:5903) within the VNC shopper as illustrated within the beneath picture.

With a purpose to cease the VNC server situations began with these logged-in consumer permissions, challenge the next command with none root privileges. This command will destroy all began VNC situations owned solely by the consumer who said them.
$ su - your_user
$ killall Xvnc
That’s all! Now you can entry your CentOS system and carry out administrative duties through the use of the graphical consumer interface offered by the working system.