
“Matplotlib” offers a variety of instruments and capabilities to create interesting graphs and charts. An vital software supplied by Matplotlib is the “colorbar”. The “colorbar” is a chart that exhibits the connection between the colours in a plot and their corresponding values. It’s a necessary software for visualizing knowledge with completely different colours.
This text introduces the Matplotlib “colorbar” and explores its options.
Learn how to Create a Python Colorbar in Matplotlib?
To create a “colorbar” in Matplotlib, the “plt.colorbar()” operate of the “Matplotlib” module is utilized in Python.
Instance 1: Including “Vertical” Colorbar
Let’s overview the next instance code to create a “colorbar” utilizing the mentioned operate:
import numpy
x = numpy.random.rand(50)
y = numpy.random.rand(50)
colours = numpy.random.rand(50)
plt.scatter(x, y, c=colours)
plt.colorbar()
plt.present()
Within the above code, the “plt.scatter()” operate is used to generate a scatter plot with random knowledge factors coloured with random colours. After that, the “plt.colorbar()” operate is utilized so as to add a “colorbar” to the proper of the scatter plot.
Output
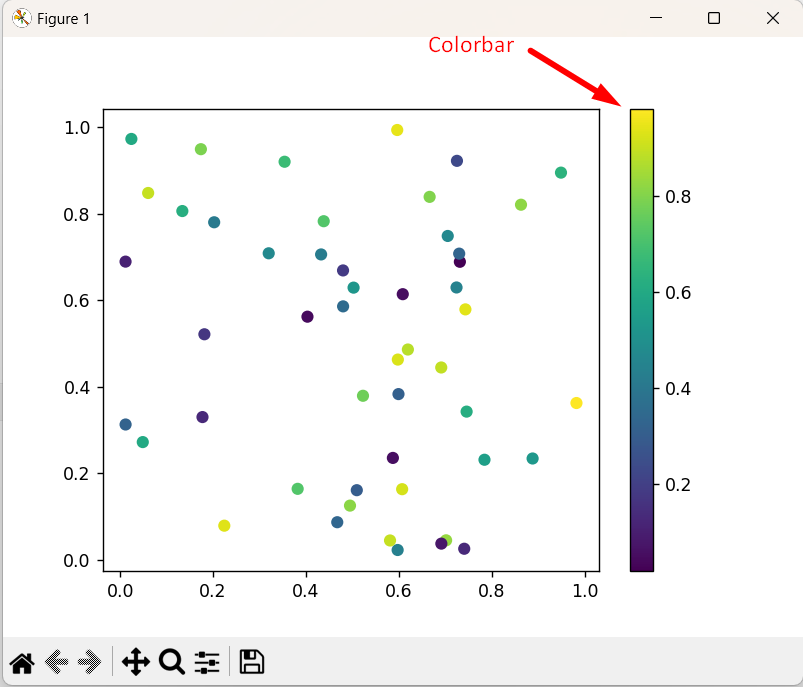
As seen, the “colorbar” has been added to the proper of the scatter plot within the above output.
Instance 2: Including “Horizontal” Colorbar
Within the beneath code, the horizontal colorbar is added to the created plot:
import matplotlib.pyplot as plt
new_x = np.random.rand(100)
new_y = np.random.rand(100)
new_colors = np.random.rand(100)
fig, ax = plt.subplots()
new_scatter = ax.scatter(new_x, new_y, c=new_colors)
new_cbar = fig.colorbar(new_scatter, orientation=‘horizontal’)
plt.present()
Within the above code snippet, the “plt.colorbar()” operate takes the plotted variable and “orientation=’horizontal’ attribute as an argument, respectively to create the horizontal colorbar as an alternative.
Output

The above output verifies that the horizontal colorbar has been added to the created plot.
Learn how to Customise Matplotlib Colorbar in Python?
Matplotlib “colorbar” may be custom-made in numerous methods in accordance with necessities. Just a few of the commonest customization choices are explored within the following sections.
Instance 1: Setting Colorbar Title
Within the beneath code, the “colorbar” title may be set:
import numpy
x = numpy.random.rand(50)
y = numpy.random.rand(50)
colours = numpy.random.rand(50)
plt.scatter(x, y, c=colours)
cb = plt.colorbar()
cb.set_label(‘Coloration Depth’)
plt.present()
In response to the above traces of code, the “set_label()” operate is used to set the colorbar title to “Coloration Depth“.
Output

Within the above end result, the “colorbar” title has been set accordingly.
Instance 2: Adjusting Colorbar Limits
The higher and decrease limits of the colorbar may be adjusted utilizing the “vmin” and “vmax” attributes within the scatter operate through the below-stated code:
import numpy
new_x = numpy.random.rand(50)
new_y = numpy.random.rand(50)
new_colors = numpy.random.rand(50)
plt.scatter(new_x, new_y, c=new_colors, vmin=0, vmax=1)
plt.colorbar()
plt.present()
Within the above code block, the “plt.scatter()” operate takes the minimal “vmin” and most “vmax” worth of the “colorbar” limits. After that, the “plt.colorbar()” operate is used so as to add the “colorbar” primarily based on the required “colorbar” limits.
Output
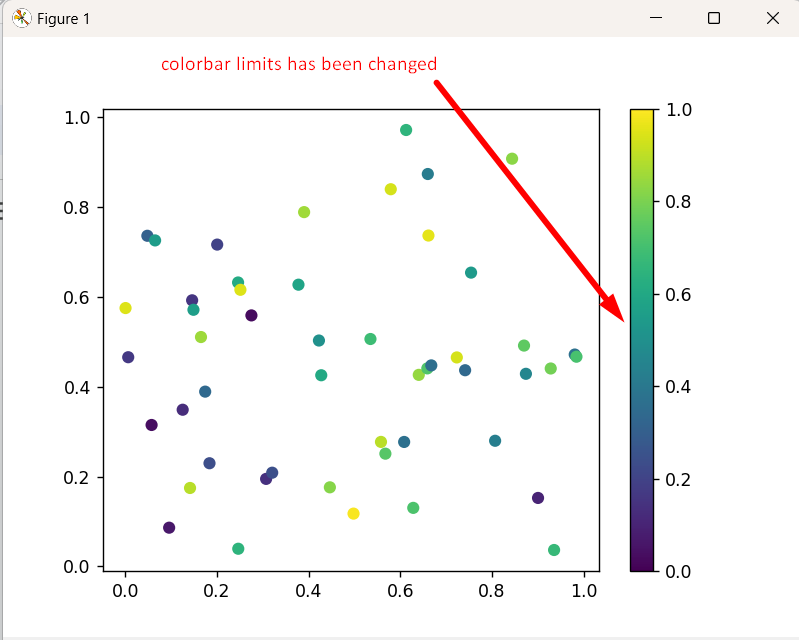
Primarily based on the above output, the colorbar limits have been efficiently modified.
Instance 3: Including Colorbar to Subplots
The “fig.colorbar()” operate is used so as to add a single “colorbar” to all of the subplots. Following is an instance code snippet:
import numpy as np
fig, subplots = plt.subplots(2, 2)
x_data = np.random.rand(50)
y_data = np.random.rand(50)
colours = np.random.rand(50)
subplots[0, 0].scatter(x_data, y_data, c=colours)
subplots[0, 1].scatter(x_data, y_data, c=colours)
subplots[1, 0].scatter(x_data, y_data, c=colours)
subplots[1, 1].scatter(x_data, y_data, c=colours)
fig.colorbar(subplots[0, 0].scatter(x_data, y_data, c=colours), ax=subplots, location=‘proper’)
plt.present()
On this code, the determine with “4” subplots is generated utilizing the identical random knowledge factors utilizing the “matplotlib” and “numpy” libraries. The “plt.colorbar()” operate is used so as to add a coloration bar to the primary subplot to point the colour mapping of the information factors.
Output
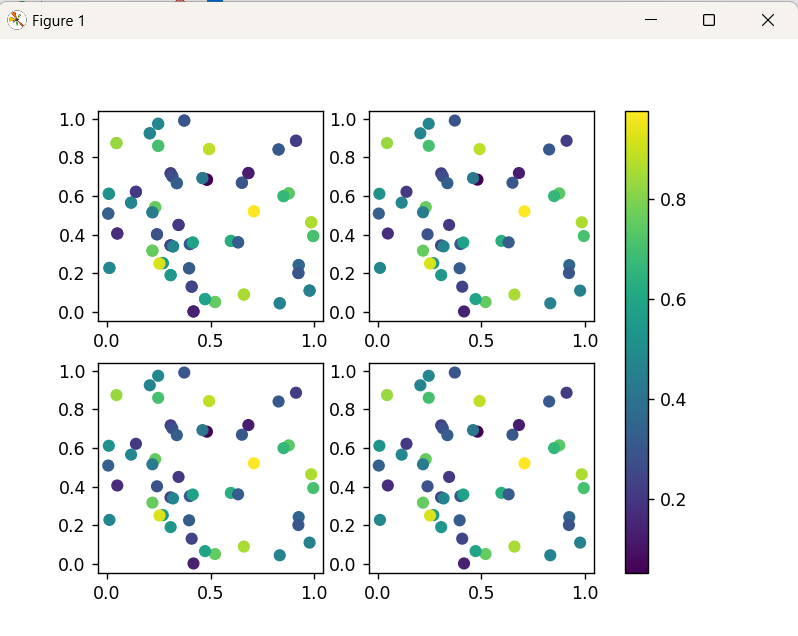
The only “colorbar” for the primary subplot has been proven within the above snippet.
Be aware: Within the above case the colorbar was plotted for all of the subplots primarily based on the vary supplied within the first subplot.
Conclusion
In Python, the “plt.colorbar()” operate of the “matplotlib” module is used so as to add the vertical or horizontal colorbar within the plot to visualise knowledge with completely different colours. Nonetheless, the “plt.colorbar()” operate can be utilized with a number of parameters/attributes to customise the colorbar of the required plot. This Python weblog illustrated a complete information on the right way to add a “colorbar” utilizing matplotlib in Python.