
Totally different programming languages in addition to file sorts might require completely different configurations for issues like indention and key phrase pairings. You would possibly want to change your template primarily based on what your shoppers need. Moreover, you would possibly need to change or add new instructions.
Vim is a command-line editor for Linux programs. It has a robust distinction for being essentially the most potent textual content editor accessible for Linux. The Vim textual content editor makes use of a file known as a VIMRC file as a configuration file. It saves the editor’s preferences that are loaded at any time when the editor is accessed. On condition that the VIMRC information are saved as plain textual content, any textual content editor will be employed to open and modify them. The VIMRC file permits the customers to alter the editor’s preferences.
On this article, we’ll be taught to customise Vim with the vimrc configuration file.
Creating the Vimrc File
You may make the most of all of Vim’s options by customizing your .vimrc file. To configure the vimrc file, we first must create it within the dwelling listing of our system.
Entry the terminal and use the next directions to generate your .vimrc file:
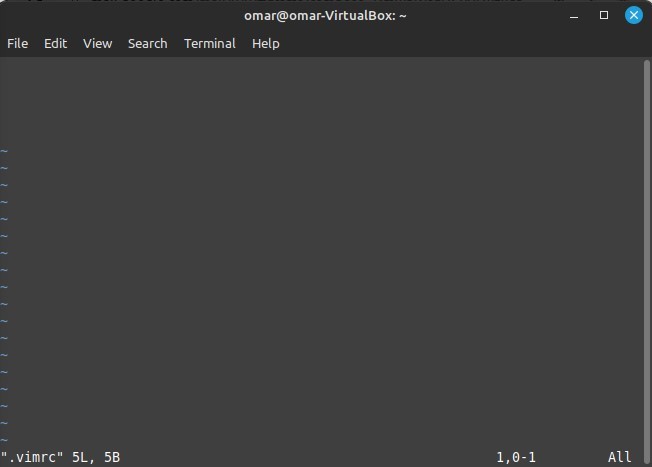
omar@omar-VirtualBox:~$ vim .vimrc
As you hit “Enter”, a Vim new display seems. You’d discover the “.vimrc” within the lower-left nook. That is our newly created vimrc file in Vim.
To avoid wasting and exit the file state, simply sort the “:wq” command. Urgent “Enter” brings you again to the terminal. Now that our vimrc configuration file is efficiently created, we search for its customization choices.
Enabling the Syntax Highlighting in Vim
To show the syntax highlighting function of Vim, we first create a file with some code in it.
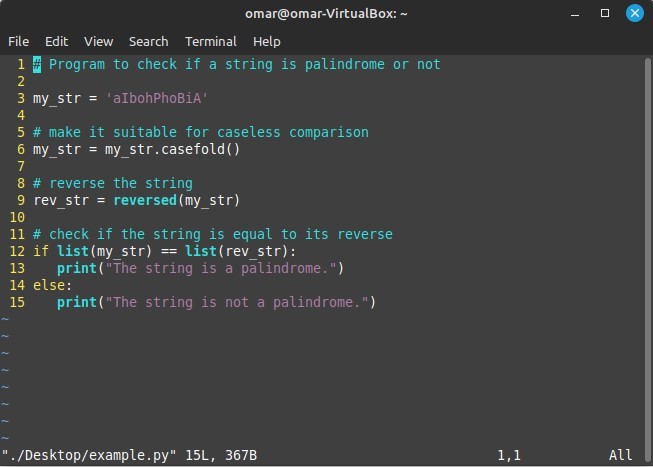
We create a “.py” Python file and clone some Python code into it as a dummy knowledge. We title the file as “instance.py” and reserve it within the “Desktop” listing.
Now, to edit this file within the Vim textual content editor, we have to open it in Vim. Launch the terminal and execute the next command:
omar@omar-VirtualBox:~$ vim ./Desktop/instance.py
Right here, the “vim” command signifies that the desired file is opened within the Vim editor. Then, we offer the trail of the file as “./Desktop/instance.py”.
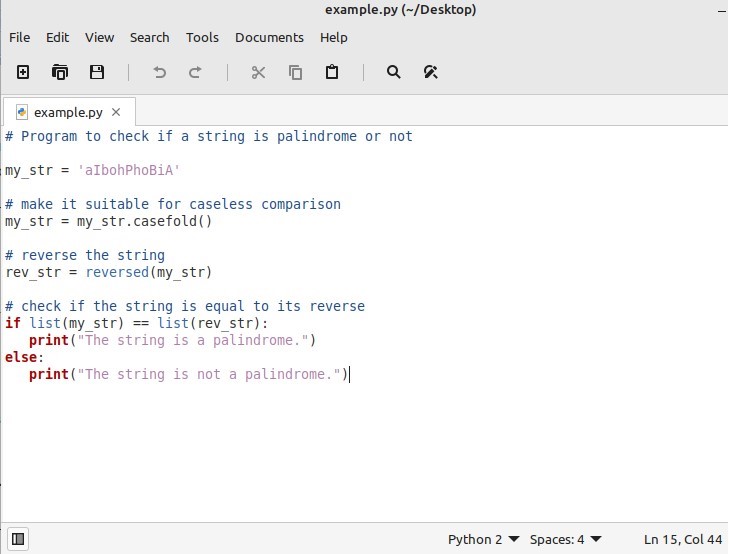
As we press “Enter”, the Vim editor opens the file.
The file content material is displayed within the fundamental format within the earlier screenshot. There isn’t any highlighting for the syntax on the code.
To allow the syntax highlighting function in Vim, we exit the file by typing “:wq” and open the .vimrc file once more from the terminal with the identical command:
omar@omar-VirtualBox:~$ vim .vimrc
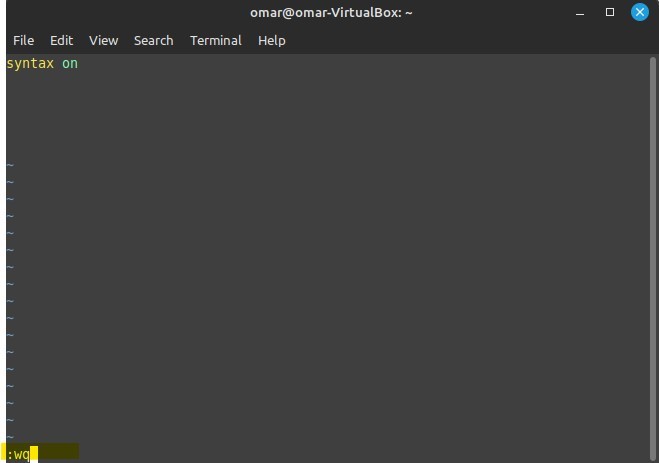
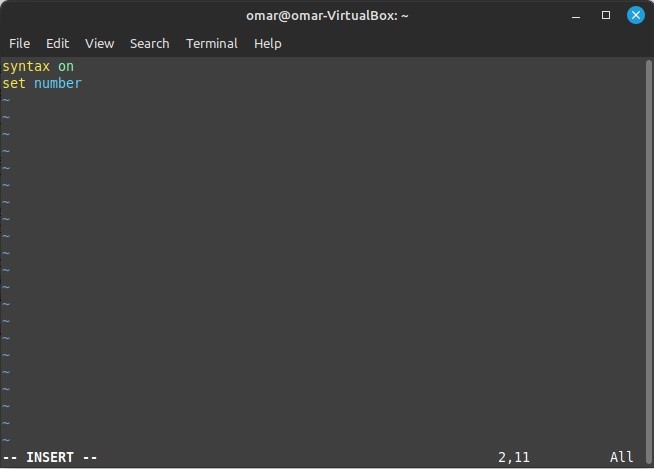
The .vimrc configuration file is opened. We swap the mode of operation to INSERT mode by merely hitting “i”. Now, sort “syntax on” and swap again to the command mode once more by urgent the “Esc” key. Kind the “:wq” command to avoid wasting the modifications which can be made within the .vimrc file and exit.
We efficiently enabled the syntax highlighting function in Vim. Now, to test whether it is enabled, we open the “instance.py” file once more from the terminal.
omar@omar-VirtualBox:~$ vim ./Desktop/instance.py
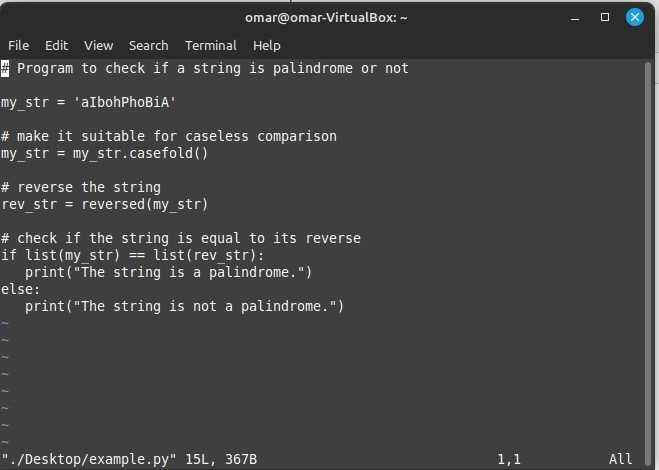
This opens the desired file and checks if the syntax highlighting is engaged on it.

The snapshot of the Vim window reveals the code with its syntax which is highlighted this time to indicate that the syntax highlighting function is presently enabled on Vim.
Setting the Line Numbers in Vim
When discovering some particular code line, we take a look at or ask somebody for it. It will get troublesome to rely the road quantity manually. Vim gives us with a function by which we are able to flip the road numbering on to simply navigate by way of the file. We allow this function within the .vimrc configuration file.
Let’s open the .vimrc file once more, swap to INSERT mode, and kind “set quantity”:
Save the modifications and exit the file.
Now, open the file from the terminal to see if the road numbering is activated or not.
Initially, the file doesn’t include the road numbers. However as we allow the quantity function on Vim, we are able to now simply navigate by way of the code strains.
Cursor Highlighting in Vim
One other performance that Vim gives us is highlighting the cursor line. When this function is enabled, we are able to instantly find the place the cursor is presently in. To activate this operate, open the .vimrc file and kind “set cursorline” in edit mode.
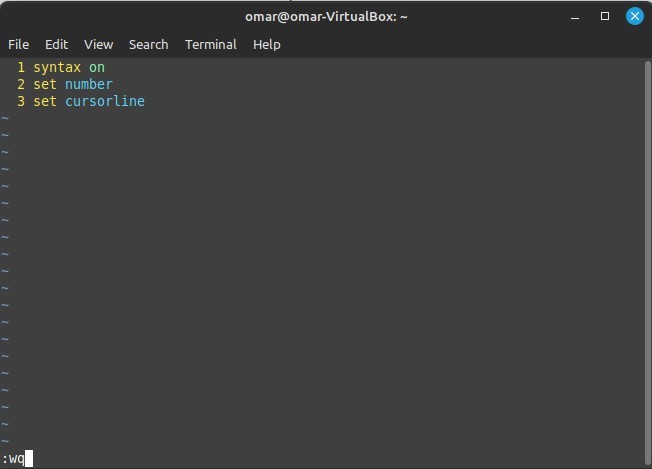
Save the modifications and give up the file by writing the “:wq” command.
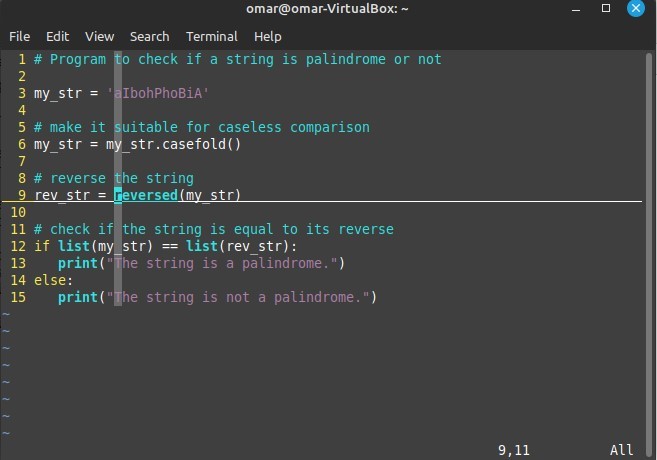
Once more, open the “instance.py” file to see if the modifications are applied.

Within the earlier picture, we are able to see that the cursor line is activated. This line is horizontal since we’re highlighting the cursor line. Right here, the cursor is on line quantity 9. So, a cursor line is drawn beneath it.
Together with a horizontal cursor line, we are able to additionally spotlight the cursor vertically. We uncover the cursor’s exact location regarding line and column. Open the .vimrc file and kind “set cursorcolumn”.

When making modifications to the .vimrc file, don’t overlook to avoid wasting them. Now, after quitting the file, open the “instance.py” file.
The cursor highlighting function is activated each horizontally and vertically on our Vim. The earlier picture reveals the precise place of the cursor within the file.
Looking in Vim
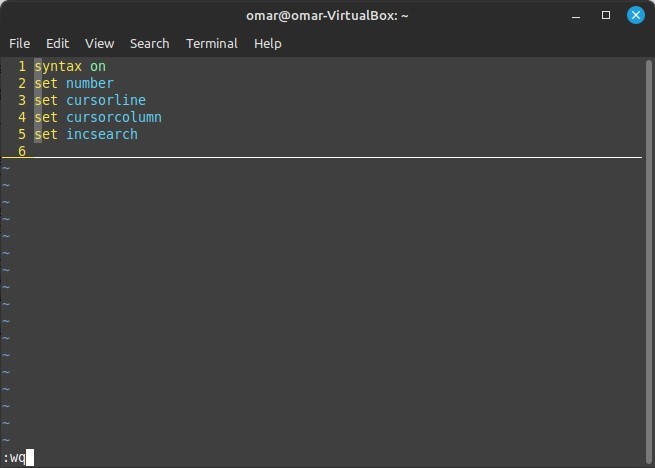
Vim permits us to look inside a textual content file in essentially the most environment friendly manner. The search function immediately begins highlighting the phrase on the very second that you simply sort it for search. Within the .vimrc file, sort “set incsearch” and save the modifications.
Other than the previously-elaborated options, Vim gives us with a protracted listing of nice functionalities. We are able to additionally set the shift width, tab width, nobackup, nowrap, and lots of extra in response to your want.
Conclusion
This text talks in regards to the customization of the Vim editor within the .vimrc configuration file. Totally different configuration settings are mentioned on this lesson. We initially outlined the .vimrc configuration file and applied the completely different instructions on it to customise our Vim editor. The creation of the vimrc file is defined. The enabling of various options in Vim like syntax highlighting, numbering strains, cursor line and cursor column highlighting, and setting the textual content search are applied virtually within the Vim textual content editor on this article.