

Constructing a high-quality app is just not solely about its options and appears but in addition about how accessible it’s to customers, together with individuals with incapacity.
On this tutorial, you’ll add accessibility options to a Flutter meals recipe app. Within the course of, you’ll:
- Find out about accessibility and its significance in cell apps.
- Differentiate between numerous accessibility wants.
- Perceive the built-in Flutter accessibility options.
- Run via an accessibility guidelines prompt by Flutter’s documentation.
- Add accessibility assist to a production-ready app known as Mealize.
Are you able to dive in?
Getting Began
Obtain the starter mission by clicking the Obtain Supplies button on the prime or backside of the tutorial.
Then, open the starter mission in VS Code 1.70 or later. You can too use Android Studio, however you’ll need to adapt the directions under.
Use Flutter model 3 or above. VS Code will immediate you to get dependencies. Click on to take action.
If VS Code doesn’t get the dependencies robotically, open pubspec.yaml and click on Get Packages within the prime proper nook or run flutter pub get from the built-in terminal.
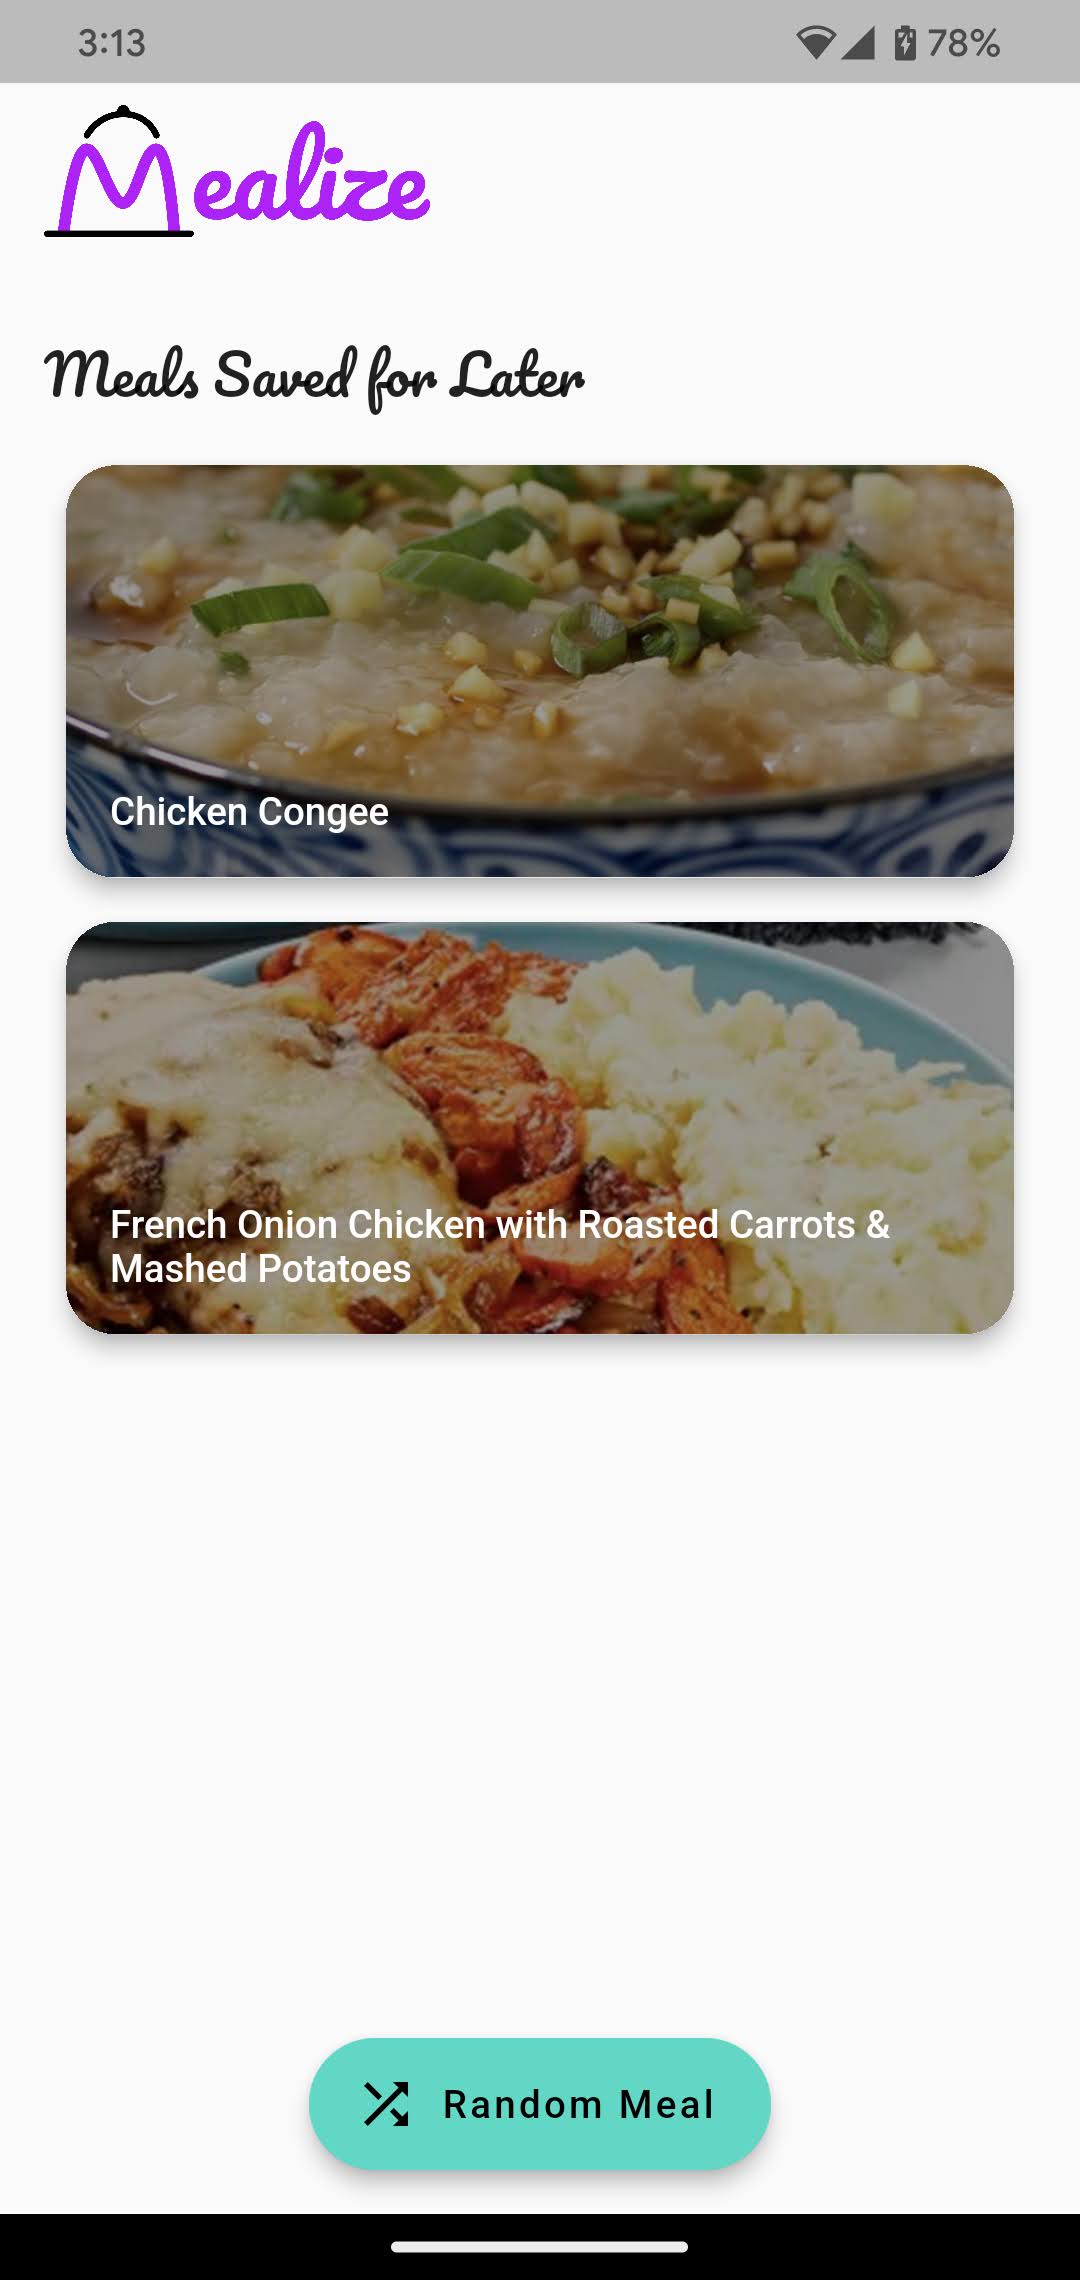
On this article, you’ll add accessibility options to Mealize, a Flutter app that permits you to get a random recipe for cooking. You can too save recipes for later.
Exploring the Starter Venture
Right here’s a fast rundown of the mission setup:
- important.dart: Normal important file required for Flutter initiatives.
- area.dart: Comprises the enterprise logic and corresponding class definitions.
- information.dart: Comprises the courses that work together with storage and permits for higher information dealing with.
- app: A folder with the app widget and in addition a helper file with colours outlined by the model tips.
-
presentation: Comprises totally different folders that construct the app’s UI:
- cubit defines a cubit that handles saved meals.
- pages incorporates the 2 pages — meal_detail_page.dart and saved_meals_page.dart.
- widgets incorporates customized widgets.
Construct and run the mission.
Right here’s what you’ll see:

Word: As a result of accessibility options are solely out there on bodily units, you’ll want to make use of a bodily Android or iOS gadget. The tutorial principally showcases a Pixel 4 Android cellphone.
As a result of Flutter has accessibility inbuilt, the app has some accessibility assist. However, there’s room for enchancment — and that’s what you’ll do on this tutorial.
However earlier than you begin your modifications, it’s vital to know why your Flutter app ought to be accessibile.
Why Accessibility is Necessary
Generally, it might sound inconvenient so as to add accessibility to your app. For instance, in case your app is already revealed, or if you wish to get it to market as quickly as doable, accessibility won’t be on the prime of your checklist.
However, there are a number of convincing causes for making your app accessible. Right here’s a brief checklist you possibly can consult with the subsequent time it’s a must to decide:
- Ethical causes: Growing apps with out accessibility limits your app to solely individuals with none type of incapacity. Meaning you’re excluding sure individuals out of your product despite the fact that your intentions won’t be malevolent. So, you will need to design and develop your apps in order that anybody can use them, no matter bodily or cognitive skills.
- Authorized causes: Because the United Nations established the Conference on the Rights of Individuals with Disabilities in 2007, a couple of international locations have put laws in place to make sure that people with disabilities have equal entry to infrastructure, jobs, training and digital companies. In Norway, as an illustration, business web sites can not deny these with impairments equal entry. Buyer safety legal guidelines requiring most public web sites to fulfill accessibility requirements had been implement in Austria in 2006. 10,982 ADA Title III lawsuits had been filed within the US in 2020 alone. So, it’s in all probability greatest to make sure your cell app is accessible to keep away from the chance of authorized motion.
- Enterprise causes: Greater than 1 billion individuals stay with some type of incapacity. Including accessibility assist to your app will improve your attain and enhance your model’s status. Additionally, there are about $6.9 trillion causes from a enterprise sense.
- High quality causes: Since common usability pertains to accessibility, you get extra human-centered, pure and contextual interactions together with your app. That ends in greater product high quality and a larger, a lot richer person expertise.
The Constructed-in Flutter Accessibility
Flutter has nice built-in accessibility assist. By making an app with Flutter, you get:
- Compatibility with giant fonts.
- Response to scale issue modifications.
- Assist for display readers.
- Nice shade distinction defaults: Each materials and cupertino have widgets with colours which have sufficient distinction when rendered.
As well as, the Flutter Crew compiled an accessibility launch guidelines so that you can contemplate as you put together your launch. Within the subsequent sections, you’ll assessment this guidelines for Mealize.
Making Interactions Seen
It’s time to begin including accessibility to Mealize.
Construct and run. Faucet Random Meal to open a meal. Then, faucet the Bookmark+ icon button to reserve it for later. Subsequent, faucet the Bookmark icon:

Did the actions full? In that case, when did every one end? Might you inform if an motion ended even if you happen to couldn’t see the display?
See the issue but?
A majority of these interactions could be invisible to individuals with visible issues. The truth is, the one strategy to discover that you just saved a meal for later is to pay shut consideration to the bookmark icons.
The app ought to inform the person what occurred after they tapped the button. You’ll work on this primary.
Open lib/presentation/widgets/meal_appbar.dart and change the code in _onSaveMealForLater with the next:
last messenger = ScaffoldMessenger.maybeOf(context);
// TODO add directionality and semanticsLabel fields
await context.learn<DetailCubit>().bookmarkMeal();

messenger?.clearSnackBars();
messenger?.showSnackBar(SnackBar(
  habits: SnackBarBehavior.floating,
  content material: Textual content('Saved $mealName for later.'),
));
// TODO: Add Semantics for iOS.
With the code above, you show a floating Snackbar when saving a meal for later. This improves the interplay for impaired customers and the person expertise.
You additionally added two TODO remarks you’ll handle later within the tutorial. For now, ignore them.
Now do the identical for _onRemoveMeal — change the code inside it with the next strains:
last messenger = ScaffoldMessenger.maybeOf(context);
// TODO add directionality and semanticsLabel fields
await context.learn<DetailCubit>().removeBookmark();

messenger?.clearSnackBars();
messenger?.showSnackBar(SnackBar(
  habits: SnackBarBehavior.floating,
  content material: Textual content('Eliminated $mealName from Saved Meals checklist.'),
// TODO: Add undo harmful actions.
));

// TODO: Add Semantics for iOS.
Just like the earlier code, the code reveals a snackbar once you take away a meal from the saved meals checklist.
Restart the app. Discover each snackbars once you save a meal for later or take away it from the saved checklist:

Nice job! You added your first little bit of accessibility options to your Flutter app.
Testing With a Display Reader
The subsequent step is to do display reader testing. To get an concept of how your app may really feel for somebody with imaginative and prescient impairments, it is advisable allow your cellphone’s accessibility options. If enabled, you’ll get spoken suggestions in regards to the display’s contents and work together with the UI by way of gestures.
Flutter takes care of the heavy load because it permits the display reader to know many of the widgets on the display. However, sure widgets want context so the display reader can precisely interpret them.
Introducing The Semantics Widget
The Semantics widget gives context to widgets and describes its little one widget tree. This lets you present descriptions of widgets in order that Flutter’s accessibility instruments can get the that means of your app.
The framework already implements Semantics within the materials and cupertino libraries. It additionally exposes properties you should use to offer customized semantics for a widget or a widget subtree.
However, there are occasions once you’ll want so as to add your personal semantics to offer the proper context for display readers. For instance, once you need to merge or exclude semantics in a widget subtree, or when the framework’s implementation isn’t sufficient.
Enabling the Display Reader
To allow your gadget’s display reader, go to your cellphone’s settings and navigate to Accessibility. Then, allow TalkBack or VoiceOver if you happen to’re utilizing an iOS gadget.
Give the display reader permission to take over the gadget’s display.
By enabling TalkBack/VoiceOver, your navigation and interplay with the cell phone will change. Right here’s a fast rundown of find out how to use the display reader:
- Faucet as soon as to pick out an merchandise.
- Double-tap to activate an merchandise.
- Drag with one finger to maneuver between objects.
- Drag with two fingers to scroll (use three fingers if you happen to’re utilizing VoiceOver).
Scorching reload the app. Strive utilizing the app by opening a random meal and saving a few meals for later. Shut your eyes if you wish to expertise complete blindness whereas utilizing the app. Right here’s a preview:
Right here’s what you will have skilled:
- When within the Saved Meals For Later display, it’s not clear what Random Meal does.
- When within the Meal Element display, the display reader refers to Save Meal for Later and Take away From Saved Checklist icons as button. That is complicated.
- When within the Meal Element display, after tapping the Save Meal for Later icon button, VoiceOver (iOS) doesn’t learn the snackbar.
- When in Meal Element display, after tapping the Take away From Saved Checklist icon button, VoiceOver (iOS) doesn’t learn the snackbar.
Including Assist for Display Readers
OK, it’s time so as to add some Semantics. Open lib/presentation/widgets/random_meal_button.dart and
in construct wrap FloatingActionButton in Semantics like under:
return Semantics(
  // 1
  button: true,
  enabled: true,
  // 2
  label: 'Random Meal',
  // 3
  onTapHint: 'View a random meal.',
  onTap: () => _openRandomMealDetail(context),
  // 4
  excludeSemantics: true,
  little one: FloatingActionButton.prolonged(
    onPressed: () => _openRandomMealDetail(context),
    icon: const Icon(Icons.shuffle),
    label: const Textual content(
      'Random Meal',
    ),
  ),
);
Right here’s what’s taking place within the code above:
- This tells display readers that the
little oneis a button and is enabled. -
labelis what display readers learn. -
onTapHintandonTappermits display readers to know what occurs once you faucet Random Meal. -
excludeSemanticsexcludes all semantics offered within thelittle onewidget.
Word: it’s a must to present onTap when implementing onTapHint. In any other case, the framework will ignore it.
For those who’re utilizing VoiceOver (iOS), you’ll discover there’s no change. That’s as a result of iOS doesn’t present a strategy to override these values and thus it’s ignored for iOS units. Additionally, onTap supersedes onPressed from FloatingActionButton. So, you don’t have to fret about _openRandomMealDetail executing twice.
Restart the app. Then, use the display reader to deal with Random Meal and spot how the display reader interprets the app:
You want to do one thing comparable with MealCard. See if you happen to can implement Semantics by your self this time. You’ll find MealCard in lib/presentation/widgets/meal_card.dart.
Need assistance? Open the spoiler under to learn how.
[spoiler title=”Solution”]
return Semantics(
  button: true,
  label: meal.title,
  onTapHint: 'View recipe.',
  onTap: onTap,
  excludeSemantics: true,
  little one: Materials(...),
);
[/spoiler]
Utilizing Semantics With Customized Widgets
Generally, you utilize Semantics to offer details about what function a widget performs, permitting display readers to know and behave accordingly.
You’ll use that for the meal heading. So, open lib/presentation/widgets/meal_header.dart, wrap Column with Semantics and set header to true like so:
return Semantics(
  header: true,
  little one: Column(
    ...
  ),
);
This tells display readers that the contents inside Column is a header.
Scorching reload. Navigate to MealDetailPage utilizing the display reader. Affirm that the display reader identifies it as a header. Right here’s how the app is coming collectively:
Word: Whilst you’re creating, it’s useful to activate Flutter’s Semantics Debugger. Set showSemanticsDebugger to true within the app’s top-level MaterialApp. Semantics Debugger reveals the display reader’s interpretation of your app.
Utilizing SemanticsService to Fill the Gaps
Now, to complete including display reader assist, open lib/presentation/widgets/meal_appbar.dart. Substitute // TODO: Add Tooltip for Take away Meal with this line of code:
tooltip: 'Take away from Saved Meals',
Do the identical with // TODO: Add Tooltip for Save Meal for Later — change it with this:
tooltip: 'Save for Later',
As you may’ve identified, tooltips in IconButtons function semantic labels for display readers. In addition they pop up when tapped or hovered over to provide a visible description of the icon button — considerably enhancing your app’s accessibility and person expertise.
Scorching reload. Navigate to a meal and choose the Save Meal for Later icon. Right here’s what you’ll expertise:
Now the display reader is aware of applicable labels for these buttons.
Making SnackBars Accessible on iOS
There’s nonetheless one concern it is advisable handle, and it’s a platform-specific downside. For VoiceOver customers, the snackbars aren’t learn after they seem on the display.
There may be a difficulty about this on Flutter’s Github explaining causes behind this habits for iOS units. For now, it’s secure to say you’ll want to make use of an alternate: SemanticsService.
SemanticsService belongs to Flutter’s semantics bundle, and also you’ll use it to entry the platform accessibility companies. You shouldn’t use this service on a regular basis as a result of Semantics is preferable, however for this particular case, it’s OK.
First, change // TODO add directionality and semanticsLabel fields in _onRemoveMeal with the next:
last textDirectionality = Directionality.of(context);
last semanticsLabel="Eliminated $mealName from Saved Meals checklist.";
Second, change // TODO add directionality and semanticsLabel fields in _onSaveMealForLater with:
last textDirectionality = Directionality.of(context);
last semanticsLabel="Saved $mealName for later.";
Don’t neglect so as to add the corresponding imports on the prime of the file:
import 'bundle:flutter/basis.dart';
import 'bundle:flutter/semantics.dart';
Flutter’s accessibility bridge wants context in regards to the gadget’s textDirectionality. That’s why you obtained it from the present context.
Subsequent, change Textual contents in each _onRemoveMeal and _onSaveMealForLater snackbars to the next, respectively:
Textual content(
  'Eliminated $mealName from Saved Meals checklist.',
  semanticsLabel: semanticsLabel,
),
and
Textual content(semanticsLabel),
Then, change // TODO: Add Semantics for iOS. on the backside of _onRemoveMeal with the code under:
if (defaultTargetPlatform == TargetPlatform.iOS) {
  SemanticsService.announce(
    semanticsLabel,
    textDirectionality,
  );
}
Lastly, do the identical with _onSaveMealForLater:
if (defaultTargetPlatform == TargetPlatform.iOS) {
  SemanticsService.announce(
    semanticsLabel,
    textDirectionality,
  );
}
SemanticsService.announce will use the platform-specific accessibility bridge in Flutter to learn out semanticsLabel. Then, you present the gadget’s textDirectionality to it because the bridge wants that. This ensures the display reader pronounces the snackbar message on iOS in each circumstances.
Scorching reload the app. For those who’re utilizing VoiceOver, you’ll now hear each snackbars when saving or eradicating a meal:
For those who’re utilizing TalkBack, you received’t discover any variations.
Nice job! Android and iOS display readers can now interpret Mealize. It was a problem, however you knocked it out of the park. Congratulations!
Contemplating Distinction Ratio and Colour Deficiency
Individuals with imaginative and prescient impairments usually have problem studying textual content that doesn’t distinction with its background. This may be worse if the individual has a shade imaginative and prescient deficiency that additional lowers the distinction.
Your accountability is to offer sufficient distinction between the textual content and its background, making the textual content extra readable even when the person doesn’t see the total vary of colours. It additionally works for people who see no shade.
The WCAG commonplace means that visible presentation of textual content and pictures of textual content have a distinction ratio of a minimum of 4.5:1. Massive-scale textual content and pictures can have a distinction ratio of a minimum of 3:1.
Whenever you open the meal element web page, you see the meal’s title and its picture within the header. There’s no distinction administration. So relying on the meal, it is likely to be tough to see the meal’s title. To make issues worse, the font isn’t that legible:

You’ll repair distinction points now.
Open lib/presentation/widgets/meal_card.dart and change // TODO: Enhance shade distinction. with the next code:
colorFilter: const ColorFilter.mode(
  Colours.black45,
  BlendMode.darken,
),
Within the code above, you added a black45 filter to the images, considerably enhancing distinction and making the textual content readable.
Scorching reload. Do you see your modifications? It’s now simpler to learn the meal’s title:
Responding to Scale Issue Modifications
Most Android and iOS smartphones assist you to enlarge the textual content and show. This characteristic is superb for individuals who’ve bother studying small fonts or figuring out objects on the display.
However that presents a problem for you because the developer since it is advisable make sure the UI stays legible and usable at very giant scale elements for textual content dimension and show scaling.
Now, it is likely to be tempting so as to add overflow: TextOverflow.ellipsis, or maxLines: 2, to your Textual contents all all through your app, however do not forget that it will solely conceal data from the person and forestall them from accessing the textual content.
Permitting horizontal scrolling is another choice. This enables the person to learn the textual content however doesn’t handle the problem of hidden data. In line with James Edwards, a stable rule of thumb is to by no means use textual content truncation. With regard to accessibility, vertical scrolling and not using a mounted header is an effective resolution.
You should put together your app’s format and widgets to develop in dimension when wanted. This ensures that texts stay seen to all and that customers can work together with them.
Testing Mealize’s Responsiveness
OK, time to check Mealize’s responsiveness to scale modifications. Go to your gadget’s settings and max out the font scale and show scale (if there’s one):
- In Android, open Settings, then go to Accessibility, discover and faucet on Textual content and show. Discover Font Dimension and faucet on it. Then set the slider to the best. Now return to the earlier menu and do the identical with Show Dimension.
- In iOS, go to Settings, then faucet Accessibility. Discover Bigger Textual content and faucet on it. Then set the slider on the backside of the display to essentially the most.
Reload the app and examine if it’s nonetheless usable:
Mealize makes use of a ConstrainedBox with a minimal peak to make MealCard‘s peak adjustable. It additionally makes use of a ListView when displaying the meal’s recipe to permit scrolling with out worrying about textual content dimension.
Notifying Customers on Context Switching
Subsequent, within the accessibility guidelines, guarantee nothing modifications the person’s context and not using a affirmation motion, particularly if the person is typing data. Examples you may run into embody opening a special app by way of a deep hyperlink or altering screens when typing data.
In Mealize, there’s one instance of context switching with out affirmation. Whenever you faucet Watch Video, you exit the app and open by way of deep hyperlink a separate app with the video (like YouTube or an internet browser). This occurs with out giving a warning to the person, which isn’t a perfect expertise. Have a look:

To repair this, open lib/presentation/widgets/watch_video_button.dart and discover the definition for _openVideoTutorial. Change the physique to the next:
showDialog<void>(
  context: context,
  builder: (dContext) => AlertDialog(
    title: const Textual content('Are you certain?'),
    content material: const Textual content('You'll exit Mealize and open an exterior hyperlink.'
        'Are you certain you need to proceed?'),
    actions: [
      TextButton(
        onPressed: () => Navigator.pop(dContext),
        child: const Text('Cancel'),
      ),
      TextButton(
        onPressed: () => launchUrl(
          Uri.parse(videoUrl),
        ),
        child: const Text('See Video'),
      )
    ],
  ),
);
Reload. Use the app to open the element web page of any recipe, then faucet Watch Video underneath the header. If the meal doesn’t have a Watch Video button, discover one other recipe by going again to the checklist and tapping Random Meal.
You must see this dialog:

Undoing Necessary Actions
Unsteady fingers and visible disabilities can have an effect on customers in a giant manner. Think about the frustration of tapping a delete button with out understanding it’s there. That’s why customers ought to have the ability to undo vital actions.
Within the app, eradicating a meal from the saved meals checklist shows a snackbar, however it doesn’t enable the person to undo the motion. You’re going to repair that now.
Open lib/presentation/widgets/meal_appbar.dart and find _onRemoveMeal. Change the SnackBar to incorporate motion by changing // TODO: Add undo harmful actions. with the next code:
motion: SnackBarAction(
  label: 'Undo',
  onPressed: () => context.learn<DetailCubit>().bookmarkMeal(),
),
It will add an Undo button to the snackbar, which can resave the meal for later.
Scorching reload. Verify that tapping Undo works as anticipated. Allow the display reader once more and spot that it pronounces the snackbar for eradicating a meal. Right here’s what it appears to be like like:
You’ll discover two issues:
- The snackbar not robotically dismisses.
- The display reader doesn’t learn the Undo button.
The primary concern is by design — customers with visible impairments won’t discover an motion. So, the person has to dismiss snackbars with actions.
The second downside is a way more complicated subject. Suffice it to say that Flutter ignores SnackBarAction when defining Semantics. So, you’ll want to offer an alternate resolution.
Change semanticsLabel on _onRemoveMeal to this:
last semanticsLabel="Eliminated $mealName from Saved Meals checklist."
 'Undo Button. Double faucet to undo this motion.';
Because the framework ignores SnackBarAction, by offering a customized semanticsLabel you’re overriding what the display reader will announce. Additionally, since SnackBar and SemanticsService use semanticsLabel, TalkBack and VoiceOver accurately learn it aloud.
Scorching restart. Whereas utilizing the display reader, observe that the Undo button is now talked about when the snackbar reveals.
You’ve added additional options to assist accessibility in your Flutter app and ensured it stays appropriate with display readers. Nice work!
The place to Go From Right here
Obtain the finished mission recordsdata by clicking the Obtain Supplies button on the prime or backside of the tutorial.
Flutter already has nice documentation on accessibility and studying sources so that you can try. It might even be nice for you to check out the Flutter Accessibility Widgets Catalog.
You can too see this oldie however goodie video recorded throughout the Flutter Work together some time again. In it, you’ll see actual person accessibility points that the Flutter staff needed to handle in its showcase app.
We hope you loved this tutorial. You probably have any questions or feedback, please be part of the discussion board dialogue under!