
Adobe Reader is a software program utility developed by Adobe Programs that’s used to view, print, and annotate the Transportable Doc Format (PDF) recordsdata. PDF is a well-liked file format which is used for paperwork, kinds, and different kinds of digital content material which can be meant to be shared and printed throughout a number of platforms. With it, the customers can open and examine the PDF paperwork, in addition to fill out the PDF kinds and add annotations comparable to feedback, highlights, and notes. It additionally consists of primary instruments to edit the PDF recordsdata comparable to the flexibility so as to add textual content and pictures, in addition to the flexibility to mix a number of PDF recordsdata into one doc.
Adobe Reader additionally consists of superior options comparable to the flexibility to seek for textual content inside a PDF doc, the flexibility so as to add digital signatures to PDF recordsdata, and the flexibility to entry and share the PDF recordsdata on-line utilizing Adobe’s Doc Cloud service. It’s utilized by a variety of people and organizations together with college students, companies, authorities businesses, and non-profit organizations. It’s used for a wide range of functions together with studying and printing paperwork, filling out and submitting kinds, and collaborating on paperwork with others.
Adobe Reader is a extensively used software program and it’s often pre-installed in most methods. In abstract, Adobe Reader might be put in in Linux Mint by downloading the “.deb” bundle from the Adobe web site and utilizing the “sudo dpkg -i adobereader-*.deb” terminal command to put in it. Alternatively, you possibly can set up it by including a PPA to your system utilizing the “sudo add-apt-repository ppa:mike-diehl/acroread” command after which the “sudo apt-get replace” and “sudo apt-get set up acroread”.
Steps to Set up the Adobe Reader in Linux Mint
Putting in the Adobe Reader in Linux Mint might be finished in just a few other ways, relying in your preferences and desires. First, we replace our packages utilizing the next command:
omar@omar-VirtualBox:~$ sudo apt replace
This command is used to replace the bundle record and refresh the bundle cache on a Linux system. It’s a good follow to run this command earlier than putting in a brand new software program or upgrading the present packages to make sure that the system is conscious of the most recent variations of the accessible packages. After we execute it, it first takes the permission from the person to replace the enlisted packages or not. By coming into “y”, you allow the compiler to replace all packages.
Now, we obtain the Adobe Reader “.deb” bundle from the Adobe web site. Be sure to obtain the bundle that corresponds to your Linux Mint model.
omar@linux-VirtualBox:~$ wget -O ~/adobe.deb ftp://ftp.adobe.com/pub/adobe/reader/unix/9.x/9.5.5/enu/AdbeRdr9.5.5-1_i386linux_enu.deb
The command that we executed is used to obtain the Adobe Reader bundle for Linux utilizing the wget command. A wget command lets you get the recordsdata from the web. The particular URL within the command is the obtain location for the Adobe Reader 9.5.5 bundle for Linux. The bundle identify is ” AdbeRdr9.5.5-1_i386linux_enu.deb“.
omar@linux-VirtualBox:~$ sudo dpkg –add-architecture i386
The “sudo dpkg –add-architecture i386” command is used so as to add the i386 structure to the dpkg bundle supervisor. The “.deb” bundle recordsdata, distinctive to Debian-based distributions like Ubuntu and Linux Mint, are managed on Linux methods by the dpkg bundle supervisor. The structure of a bundle refers to the kind of CPU on which it’s constructed for comparable to x86_64 (64-bit) or i386 (32-bit). The “–add-architecture” possibility tells the dpkg so as to add the desired structure (i386 on this case) to the record of architectures that dpkg can deal with. That is needed if you attempt to set up the 32-bit packages on a 64-bit system since, by default, dpkg is just capable of deal with the native structure of the system.
You’ll be able to set up the bundle by executing the “sudo dpkg” command within the terminal after it’s downloaded.
omar@linux-VirtualBox:~$ sudo dpkg –i ~/adobe.deb
This command is used to put in the Adobe Reader bundle that you simply downloaded utilizing the wget command. The “sudo” command is used to run the command with superuser privileges. The “dpkg” is the bundle supervisor for Debian-based methods like Linux Mint. The “-i” possibility tells dpkg to put in the bundle.
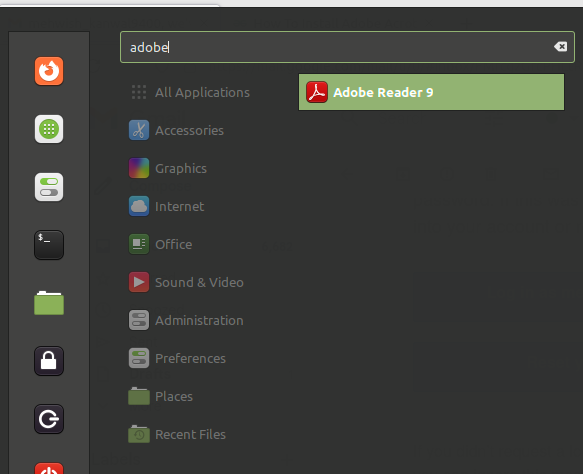
If you run this command, dpkg installs the Adobe Reader bundle and any required dependencies. As soon as the set up is full, you possibly can launch the Adobe Reader by trying to find it within the utility launcher or by working the “acroread” command within the terminal.
There may be one other command that can be utilized to put in the bundle which is as follows:
omar@linux-VirtualBox:~$ sudo apt set up ~/adobe.deb
The command that’s beforehand talked about is used to put in the Adobe Reader bundle that you simply downloaded. The “apt” is the bundle supervisor for Ubuntu-based methods. The “set up” possibility tells apt to put in the bundle.
If you run this command, apt installs the Adobe Reader bundle and any required dependencies. As soon as the set up is full, you possibly can launch the Adobe Reader by trying to find it within the utility launcher or by working the “acroread” command within the terminal. If any dependencies are lacking, run the next command to get them:
omar@linux-VirtualBox:~$ sudo apt-get set up –f
This command is used to repair the damaged packages and dependencies on a Linux system. The “-f” possibility or “–fix-broken” tells the apt-get to repair any damaged packages on the system. This feature is helpful when a bundle set up or removing is interrupted or failed, leaving the system in an inconsistent state. It is very important notice that if a bundle is damaged, it might not operate correctly. Working this command tries to repair the bundle, however it might not all the time achieve success. If the command isn’t profitable in fixing the bundle, you could must uninstall and reinstall the bundle or manually resolve the dependencies situation.
As soon as the set up is full, you possibly can launch the Adobe Reader by trying to find it within the utility launcher or by working the “acroread” command within the terminal.
Conclusion
We studied in regards to the Adobe Reader and the way it may be put in in Linux Mint. We tried to elucidate every step briefly to make it straightforward so that you can perceive the aim of each step. We hope that this text will help you in studying find out how to set up the Adobe Reader by using a number of instructions.