

One of many largest upgrades for the iPhone 14 Professional digital camera system is the primary lens being elevated to 48MP with what Apple calls an “superior quad-pixel sensor.” Nonetheless, the digital camera defaults to taking 12MP pictures. Learn on for find out how to use the 48MP iPhone 14 Professional digital camera.
Taking pictures with the complete 48MP decision principal digital camera on the iPhone 14 Professional isn’t one thing you’ll wish to do on a regular basis with a single picture starting from 75 to 100MB+ in dimension.
However whenever you wish to seize essentially the most quantity of element attainable – permitting for spectacular crops and edits – utilizing the complete energy of the primary iPhone 14 Professional digital camera is essential.
Providing 8064 x 6048 pixels, that’s 4x the decision of 12MP photographs. And Apple says “with a brand new machine studying mannequin designed particularly for the quad-pixel sensor, iPhone now shoots ProRAW at 48MP with an unprecedented degree of element, enabling new inventive workflows for professional customers.”
Find out how to use 48MP iPhone 14 Professional digital camera
Be aware: 48MP picture sizes vary from 75-100MB+ every
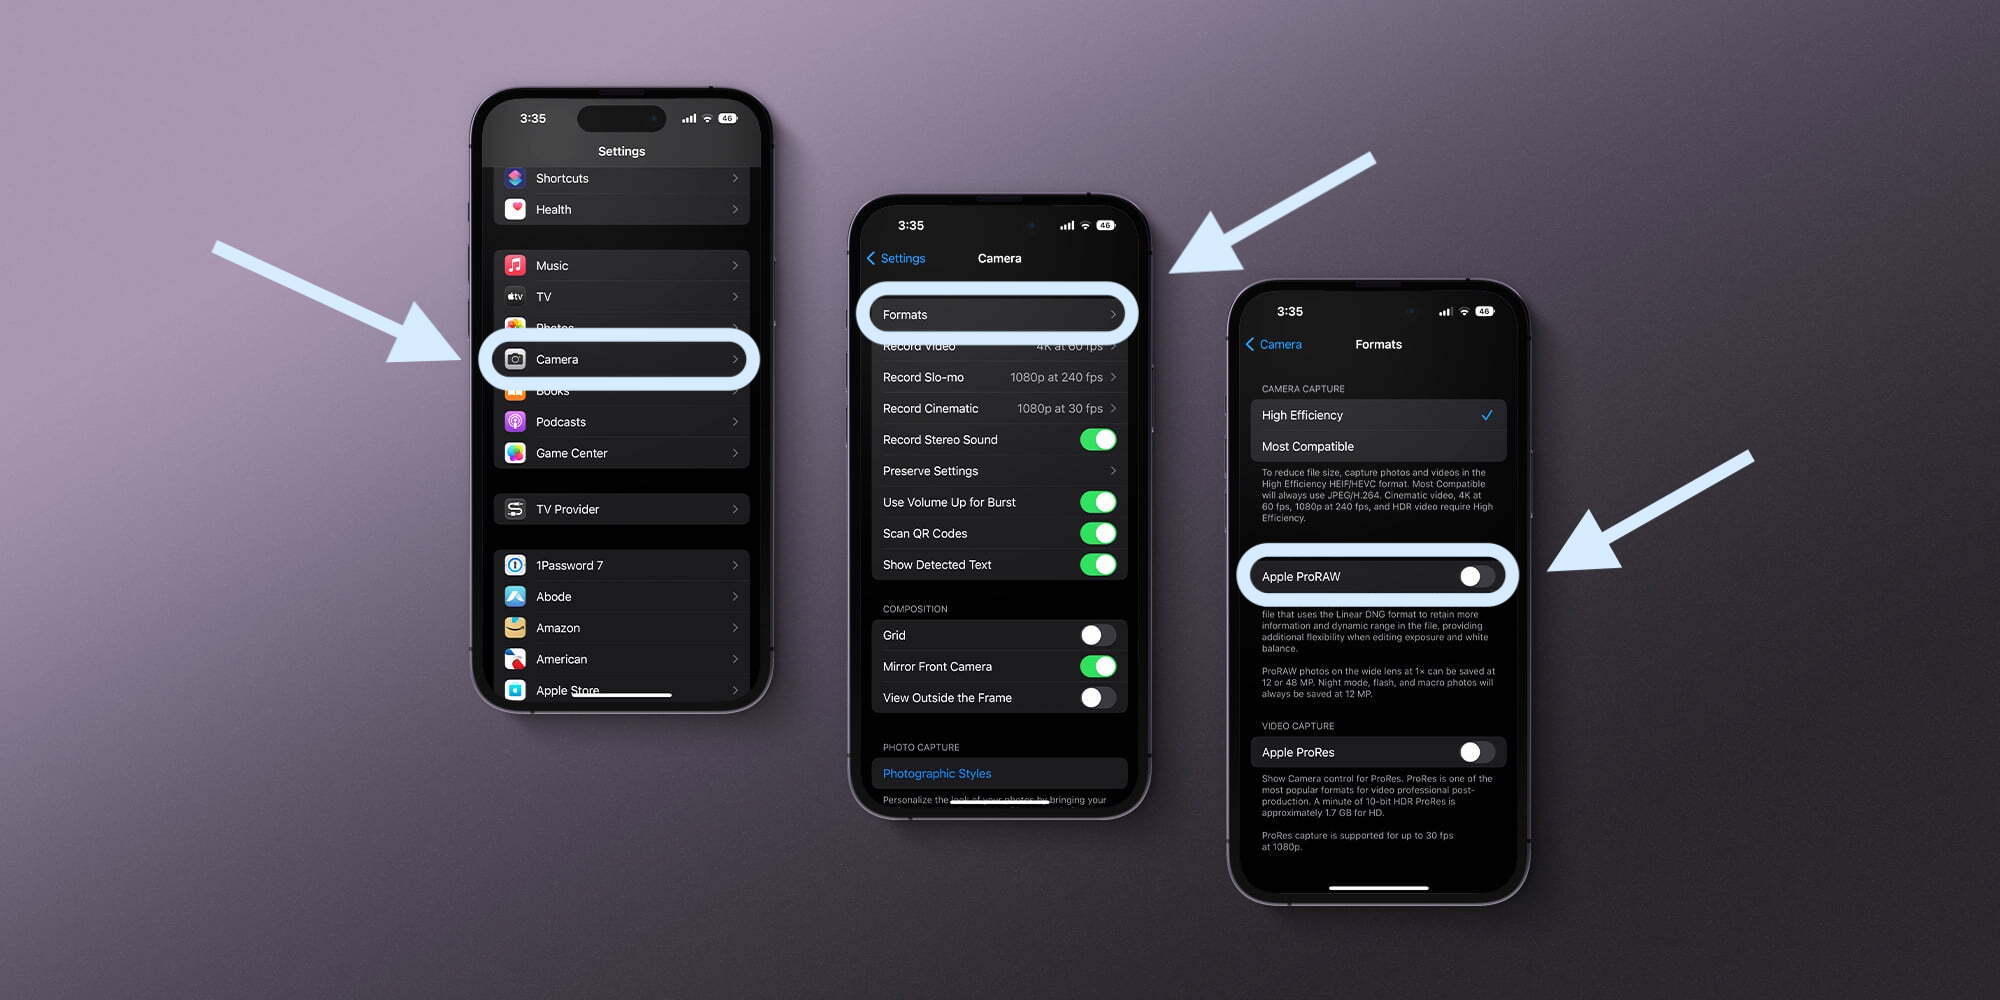
- If it’s not turned on already, allow Apple ProRAW
- Open the Settings app in your iPhone 14 Professional or Professional Max
- Swipe down and faucet Digicam
- Now select Codecs on the prime
- Faucet the toggle subsequent to Apple ProRAW – the default decision for Apple ProRAW needs to be 48MP
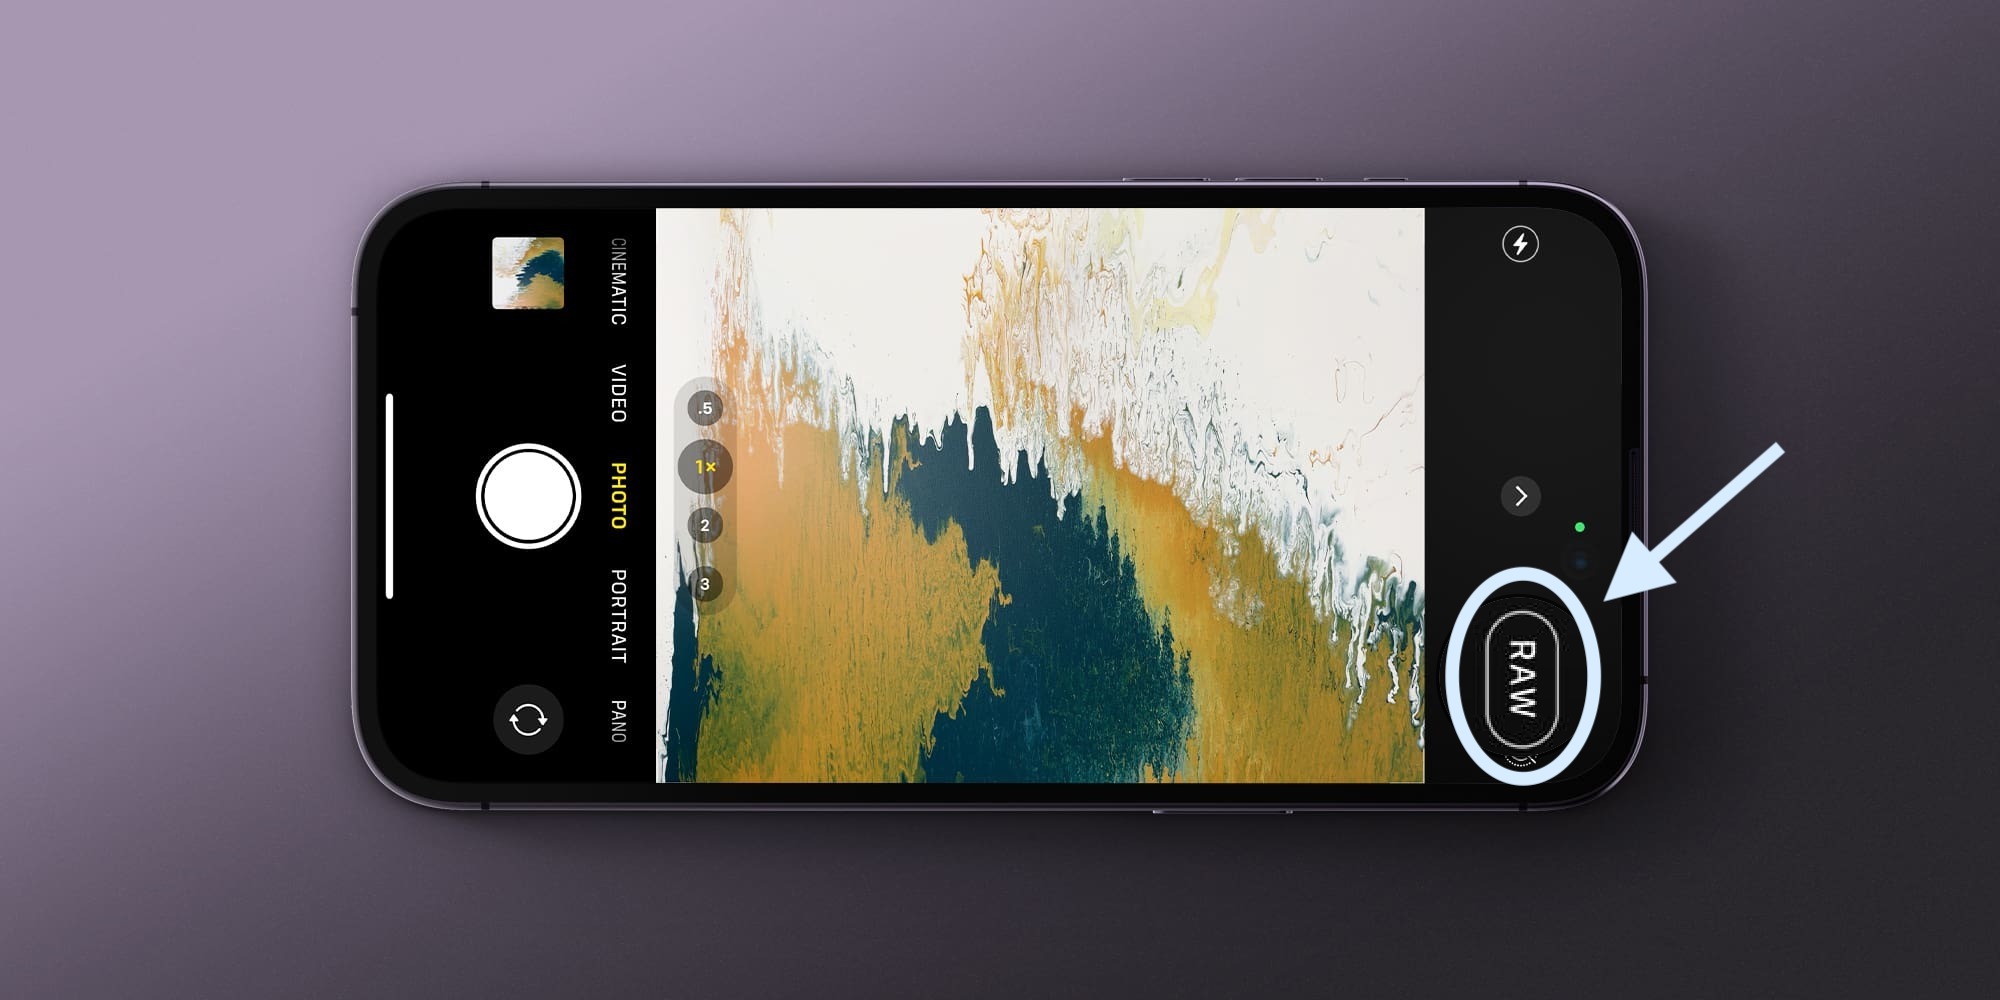
- Now open the Digicam app, make certain RAW exhibits within the prime proper or backside proper nook and isn’t crossed out – hearth away! Simply keep in mind to make use of the 1x focal size, altering that can swap you to 12MP photographs despite the fact that they’ll nonetheless be RAW
- You can even use third-party apps like Halide or Digicam+ to take full 48MP pictures
You can even select to Protect the ProRAW setting to on within the digital camera app as a substitute of it resetting to out there however off whenever you open the default digital camera – Settings > Digicam > Protect Settings > Apple ProRAW.
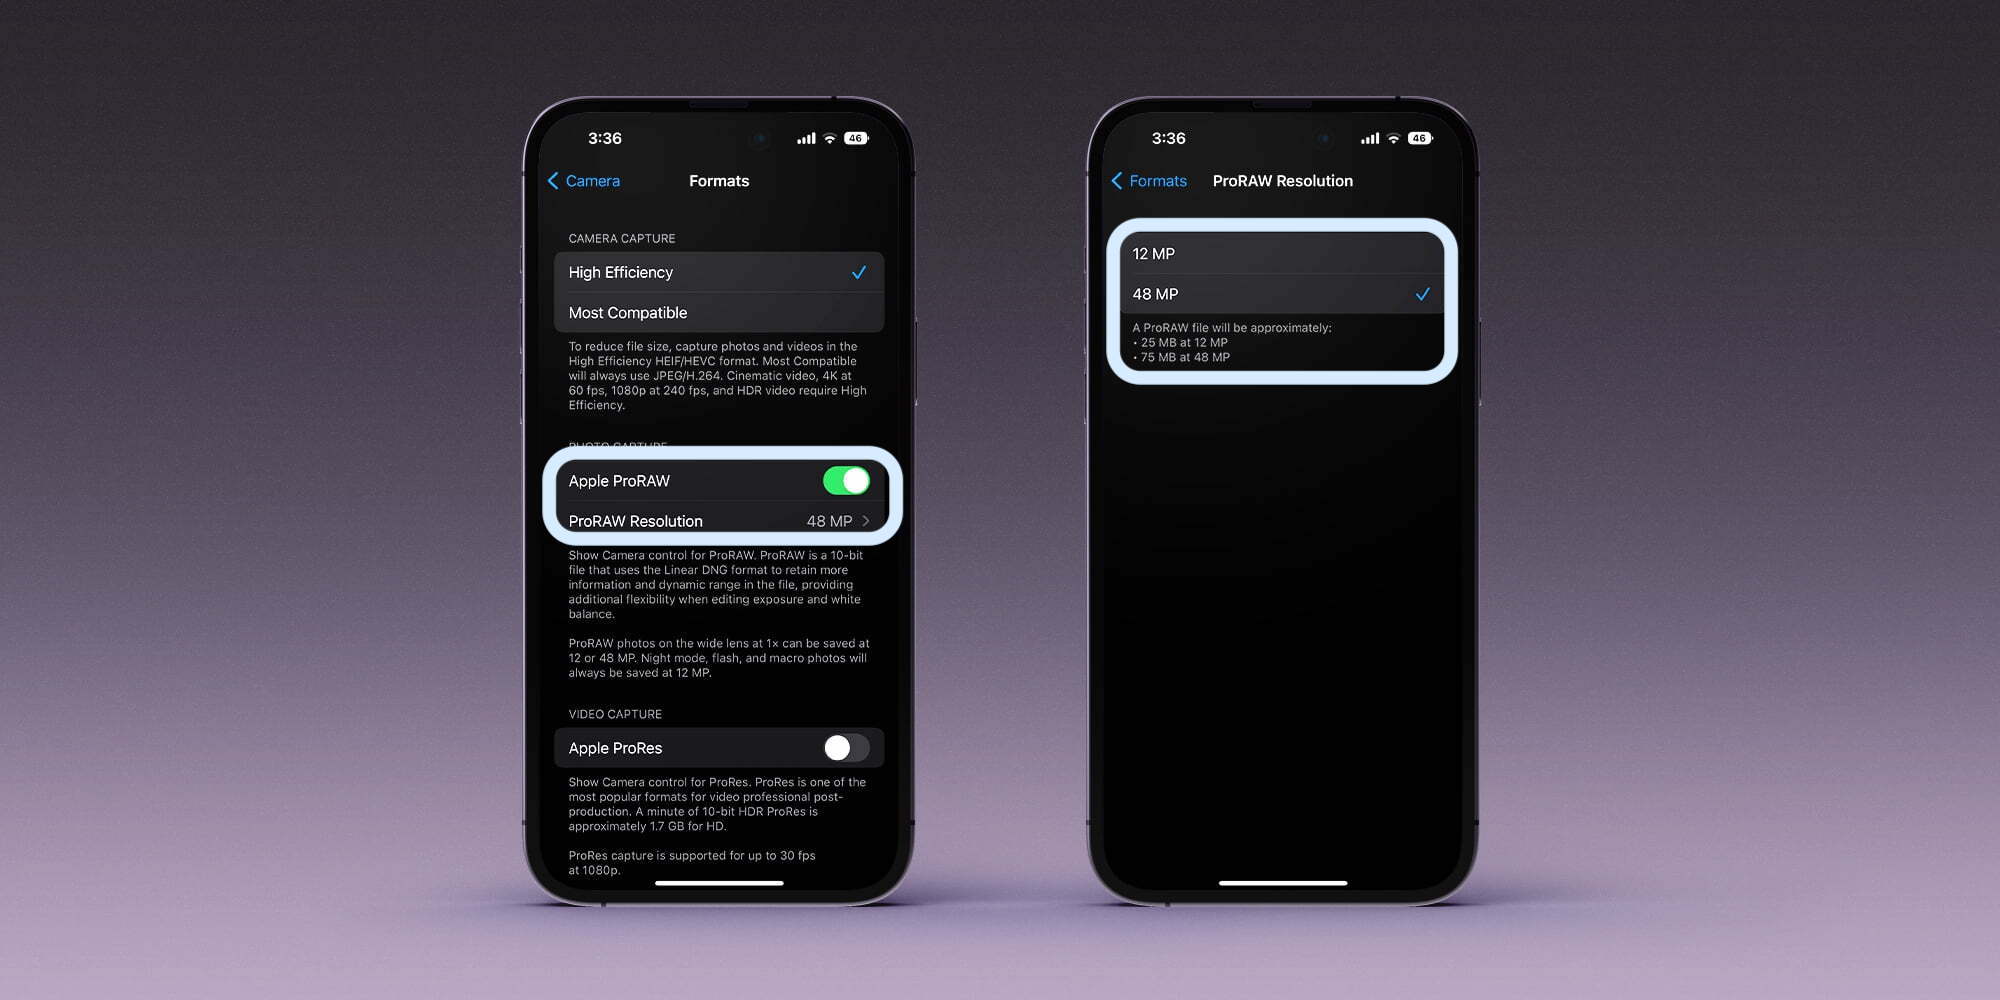
Right here’s how this seems to be on iPhone 14 Professional:
With Apple ProRAW turned on, it’s best to see 48MP because the default decision for iPhone 14 Professional and Professional Max (that is elective – faucet to modify again to 12MP for ProRAW).
Nonetheless, that’s solely when capturing with the 1x focus, for those who change to 0.5x, 2x, or 3x you’ll be auto-switched to 12MP pictures however it would nonetheless be within the RAW format.
Now whenever you take an image with the default Digicam app, make certain RAW isn’t crossed out:
In case you faucet the “i” information button after taking a photograph, you may verify you’re capturing with the complete 48MP 8064 x 6048 decision. This picture for instance is 83.9MB.

What do you concentrate on the choice to shoot 48MP ProRAW pictures with the iPhone 14 Professional and Professional Max? Share your ideas within the feedback!
Extra tutorials from 9to5Mac:
FTC: We use revenue incomes auto affiliate hyperlinks. Extra.