
Rocky Linux 9.1 was formally launched on November 22, 2022, and helps x86-64, aarch64, ppc64le, and s390x architectures. Notable adjustments embrace:
- New module stream variations embrace PHP 8.1, Maven 3.8, Node.JS 18, and Ruby 3.1 to say a couple of.
- New compiler toolset variations together with Rust 1.62, LLVM 14.0.6, GCC 12, and Go 1.18.
- Keylime. It is a distant boot attestation and runtime integrity administration resolution that leverages the TPM (Trusted Platform Module) module.
- Vagrant pictures at the moment are obtainable for x86-64 and aarch64.
- Container pictures at the moment are obtainable for all x86-64, aarch64, ppc64le, and s390x.
For extra info and extra main adjustments in Rocky Linux 9.1, take a look at the discharge notes within the official documentation.
It is a three-part information that constitutes the next sections.
With out a lot ado, let’s get began!
1. Set up Oracle VM VirtualBox on Home windows
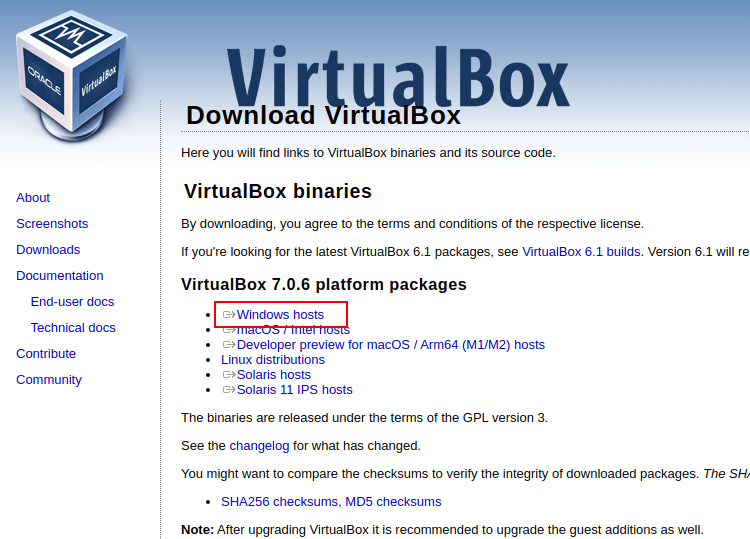
Step one is to put in Oracle VM VirtualBox on which you’ll set up your occasion of Rocky Linux 9. Subsequently, head over to the Oracle VM VirtualBox obtain web page and choose ‘Home windows Hosts’ to obtain the executable file.
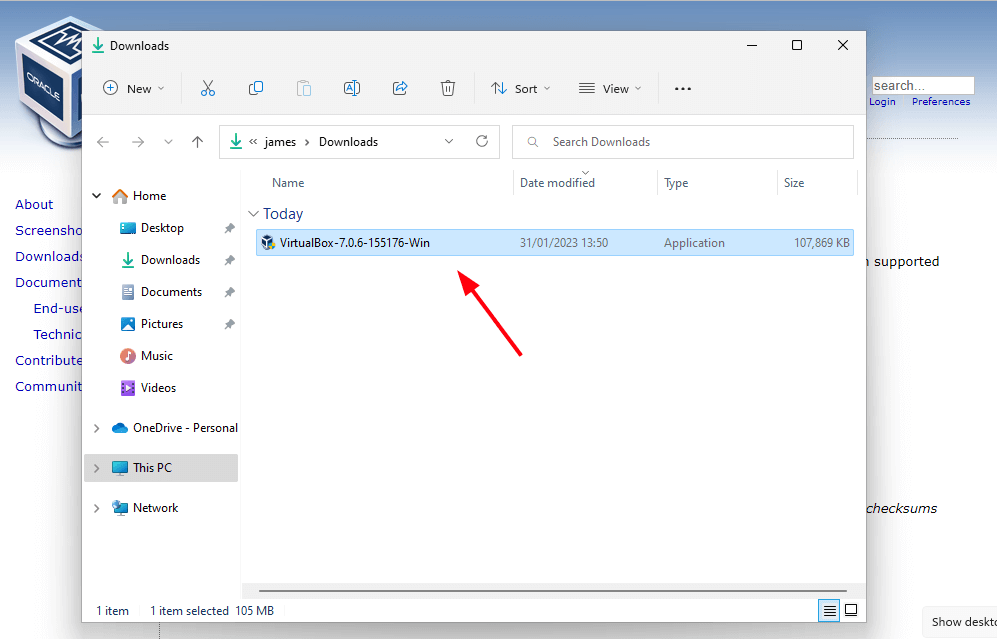
The obtain will begin and the set up file can be saved within the ‘Downloads‘ folder. To start the set up, double-click the VirtualBox set up file.
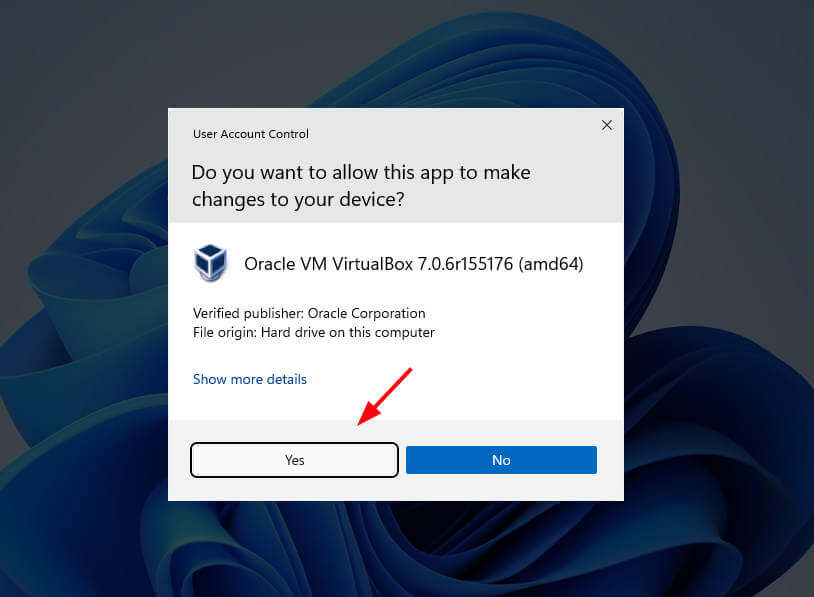
On the UAC (Consumer Entry Management) pop-up, click on ‘Sure‘ to proceed with the set up.
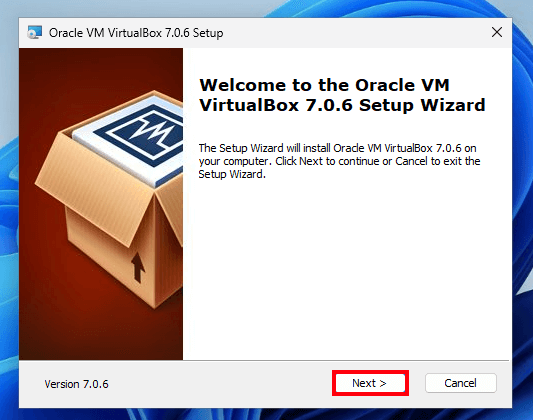
This launches the Oracle VirtualBox set up wizard as proven. The set up is kind of a breeze and all you want is to click on ‘Subsequent‘ or ‘Sure‘ all the way in which to the ultimate step the place you’ll hit ‘Set up‘.
Step one is the ‘Welcome‘ step. Simply click on ‘Subsequent‘ to proceed.
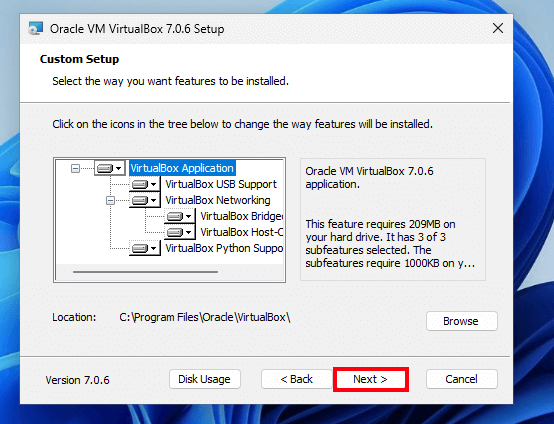
Subsequent is the ‘Customized Setup‘ step. By default, the Oracle VirtualBox recordsdata are saved within the C:Program FilesOracleVirtualBox path. Until obligatory, it is suggested to keep up the default path as it’s.
So simply click on ‘Subsequent‘.
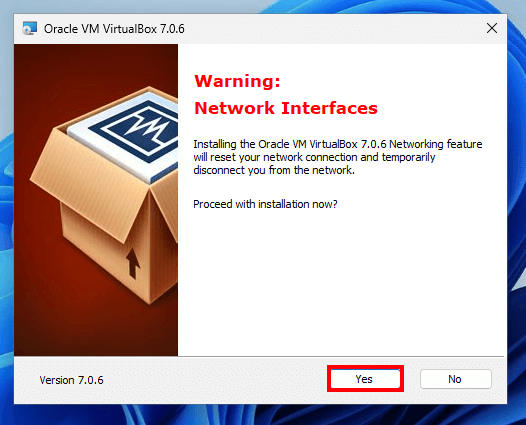
You’ll get a warning in regards to the community connections being reset along with a brand new digital community interface being created. To proceed, click on ‘Sure‘.
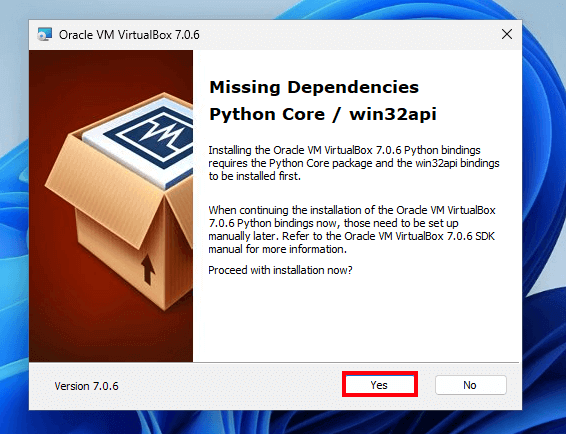
You may encounter a warning about lacking dependencies (Python Core and Win32api). In our case, these weren’t put in. However fret not, the dependencies can manually be put in afterward.
So click on ‘Sure‘.
Then click on ‘Set up‘ to start the customized set up of Oracle VirtualBox.
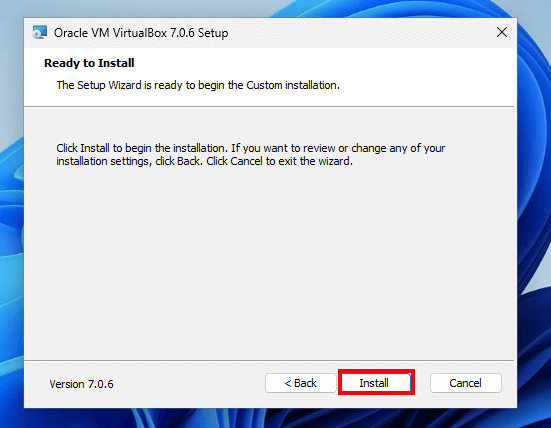
This takes a minute or two at most. Lastly, click on ‘End‘ to finish the set up and exit the Wizard.
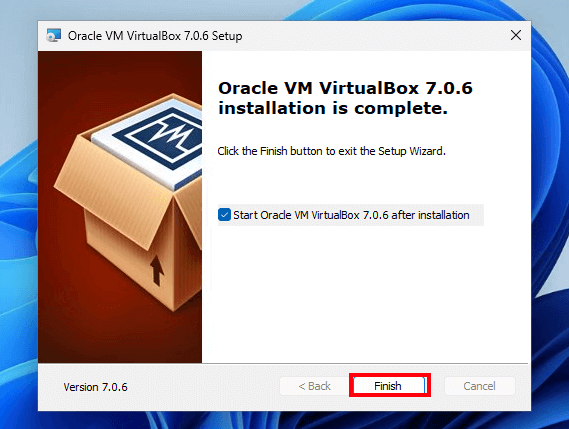
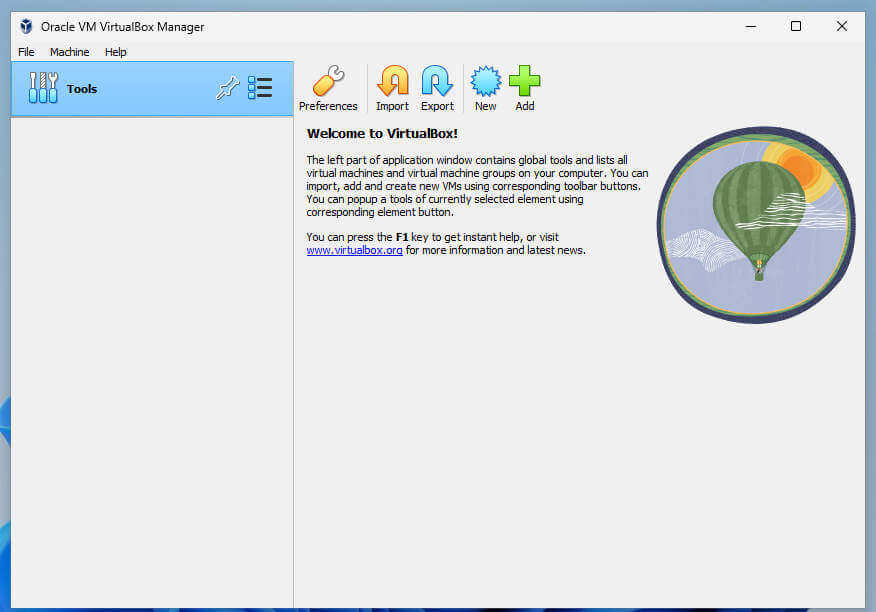
The Oracle VirtualBox GUI supervisor can be displayed as proven. Within the subsequent part, we are going to create a digital machine for Rocky Linux 9.
2. Making a Digital Machine for Rocky Linux 9
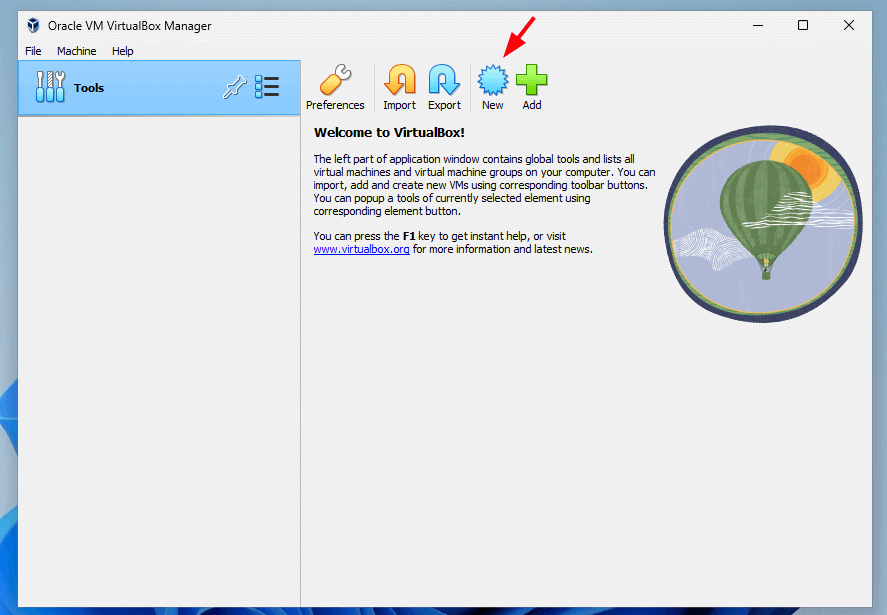
To create a digital machine, click on the ‘New‘ button proven under.
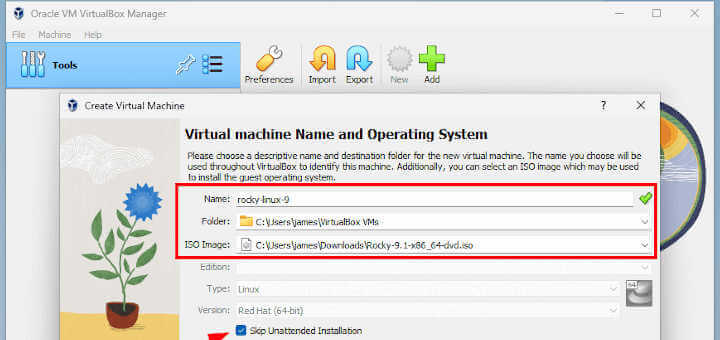
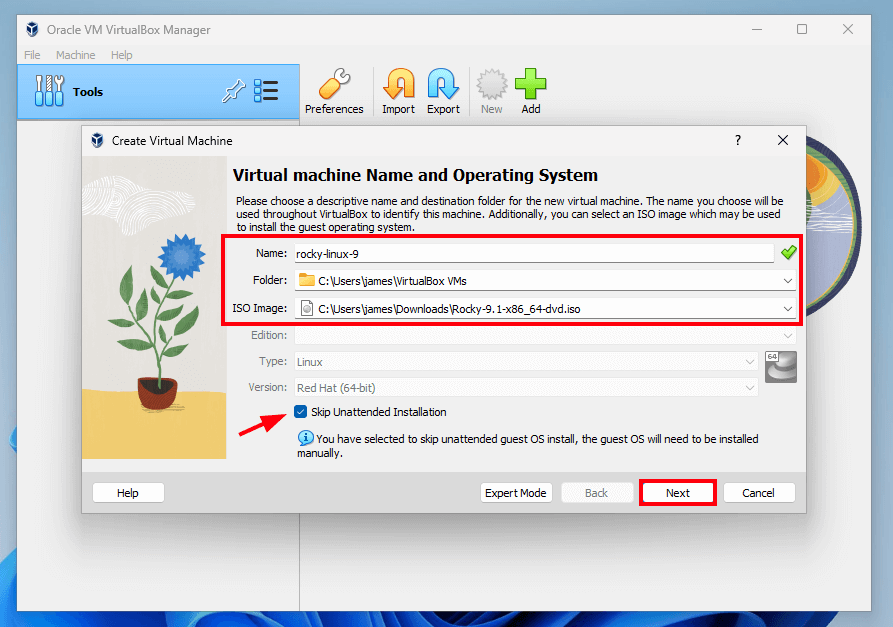
This launches the digital machine creation wizard. On this step, specify the digital machine particulars which embrace the Title, default folder of the digital machine, and the trail to the Rocky Linux ISO picture.
Then click on ‘Subsequent‘.
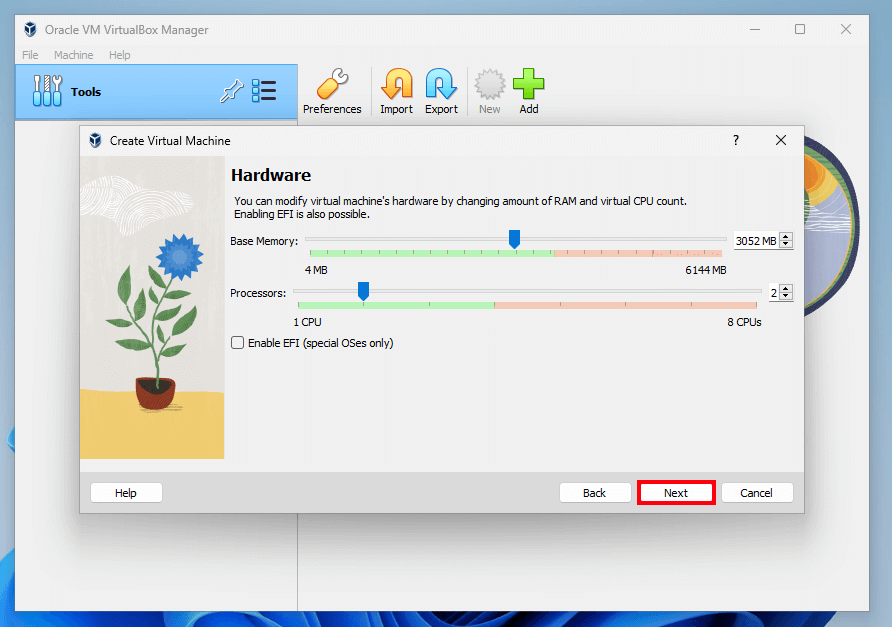
On this step, specify the quantity of reminiscence (RAM) and CPU cores to allocate to the digital machine.
Then hit ‘Subsequent‘.
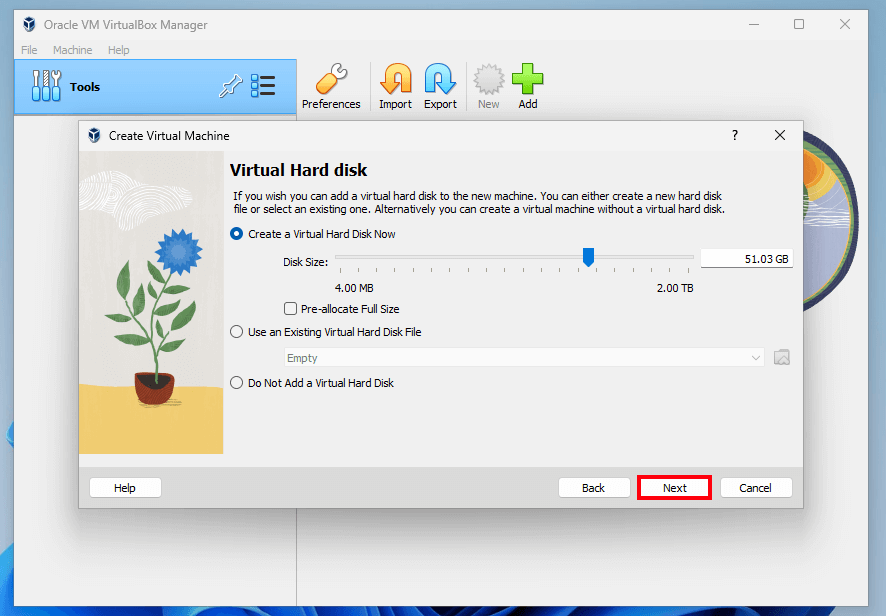
Within the subsequent step, specify the scale of the digital arduous disk by dragging the slider forwards and backwards, and as soon as glad together with your choice, click on ‘Subsequent’.
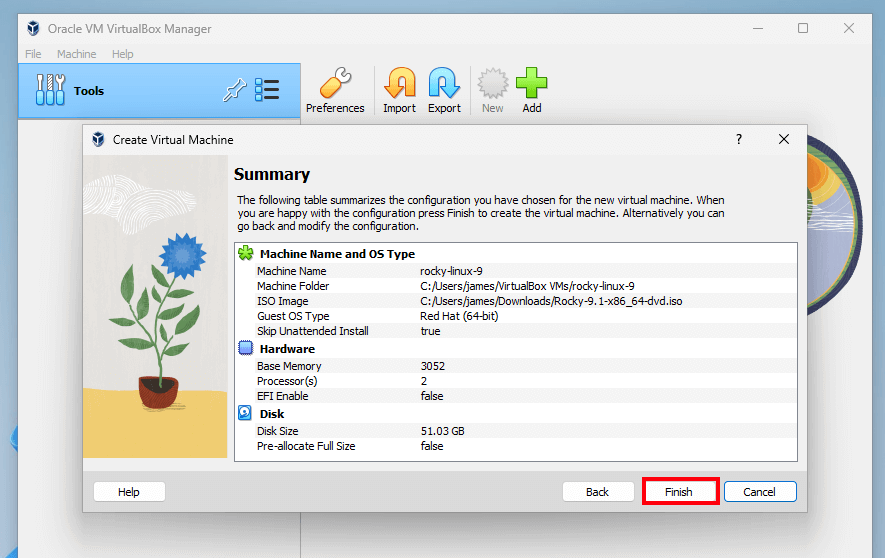
Lastly, evaluate all of the alternatives made, and if all seems good, click on ‘End’ to exit the set up Wizard. In any other case, click on ‘Again’ and make the required adjustments.
As soon as created, the digital machine can be displayed on the correct pane as proven under.

3. Putting in Rocky Linux 9 on VirtualBox
To start out the set up, click on the ‘Begin’ button on the menu bar or double-click the rocky-Linux digital machine icon on the left pane as proven earlier.
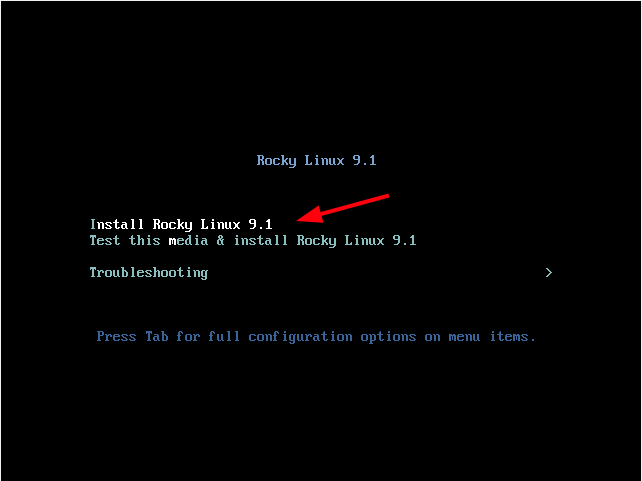
As soon as the digital machine begins, you’ll get a black display with a listing of menu choices. Choose the primary possibility ‘Set up Rocky Linux 9.1’ and hit ENTER.
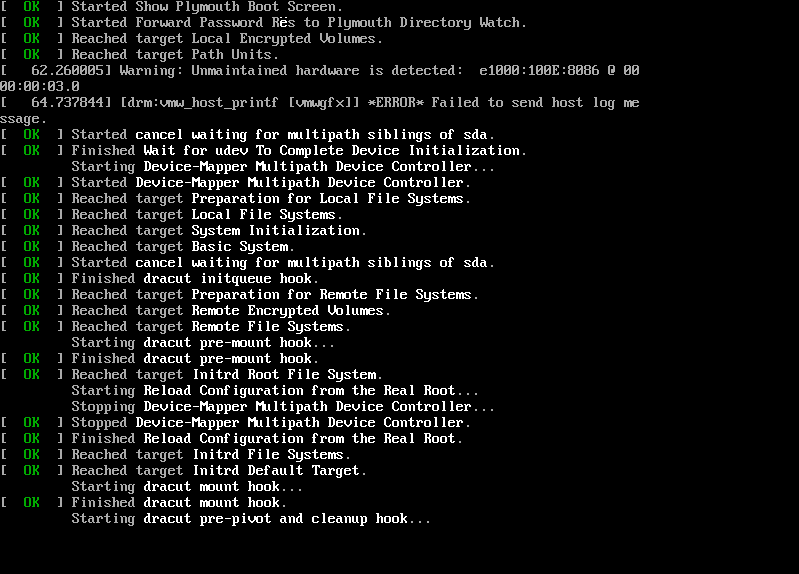
You will note a flurry of boot messages because the system powers on.
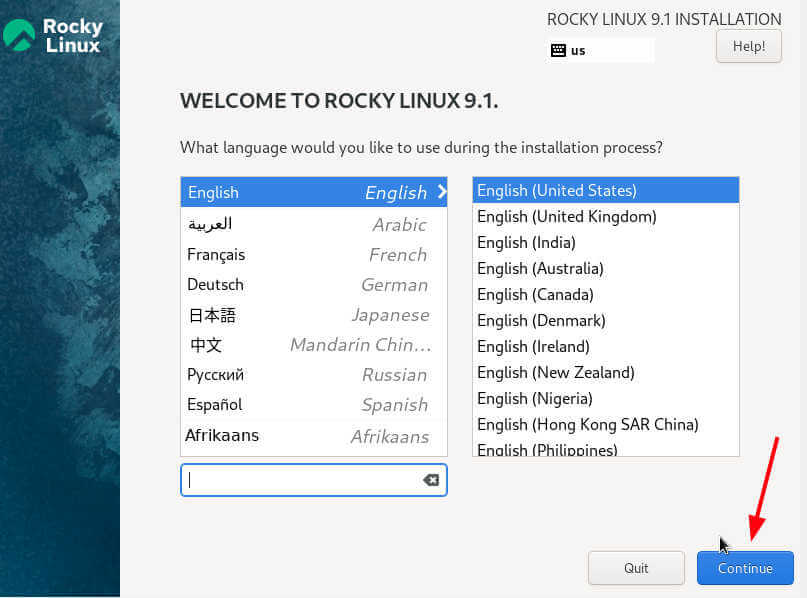
The installer can be initialized and the Rocky Linux 9 installer will lastly become visible, and the welcome web page will immediate you to pick out the set up language. Choose your most popular language and click on ‘Proceed’.
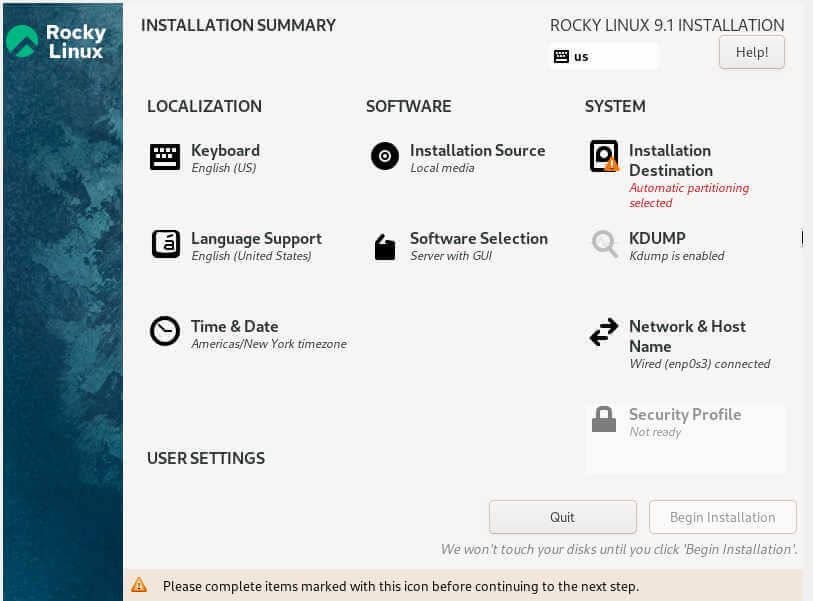
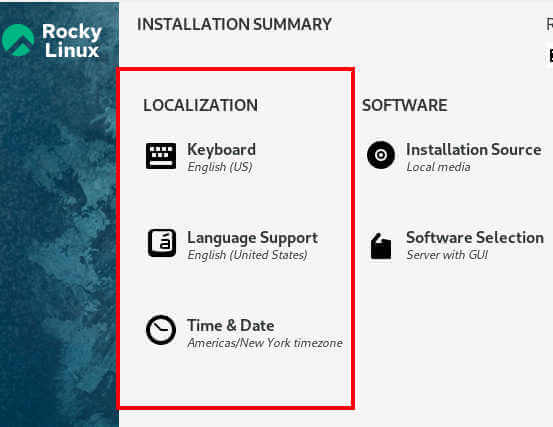
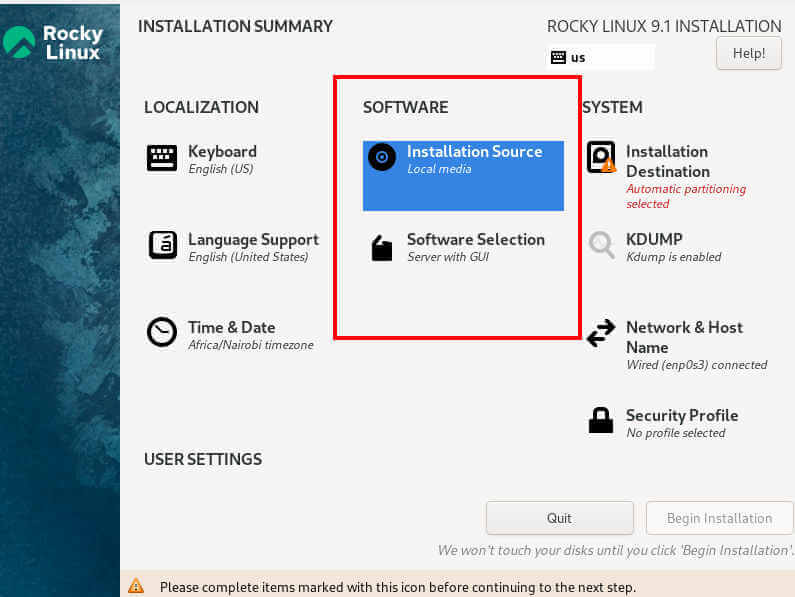
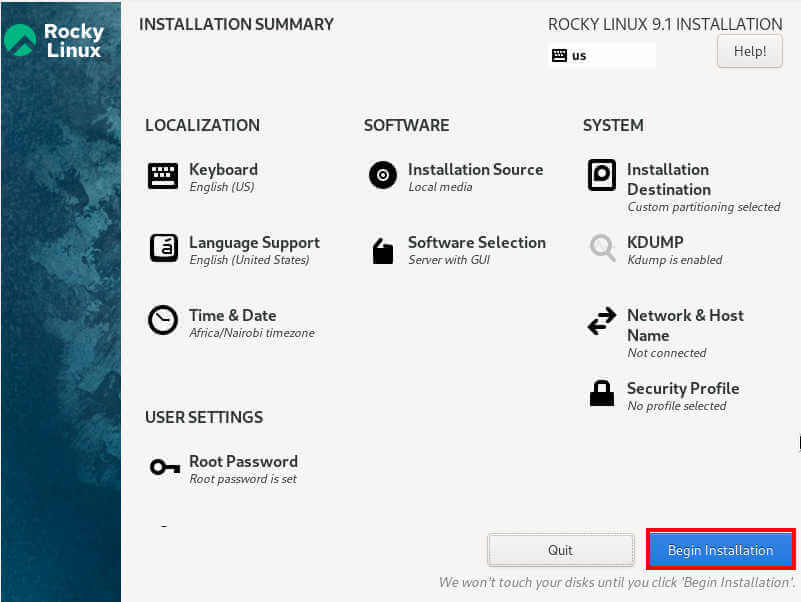
This shows an ‘Set up Abstract’ window exhibiting numerous elements that should be configured earlier than the set up will get underway. These elements are categorized into the next sections:
- Localization
- Software program
- System
- Consumer Settings
Allow us to go over every of those salient elements.
We are going to begin off with the ‘Localizaton‘ part which includes three key sub-sections: Keyboard, Language Assist, and Time & Date.
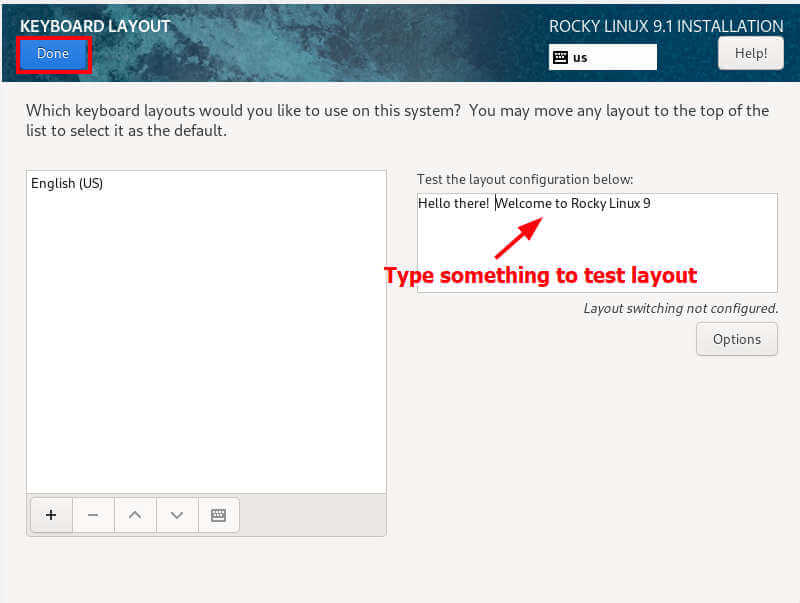
Configure Keyboard
Click on ‘Keyboard‘. By default, it’s set to English(US). You’ll be able to confirm this by typing some textual content within the supplied textual content subject. If all seems good click on ‘Completed‘. In any other case, if you wish to add a brand new format, click on the plus signal [ + ] on the backside left, add your most popular keyboard format, and click on ‘Completed‘.
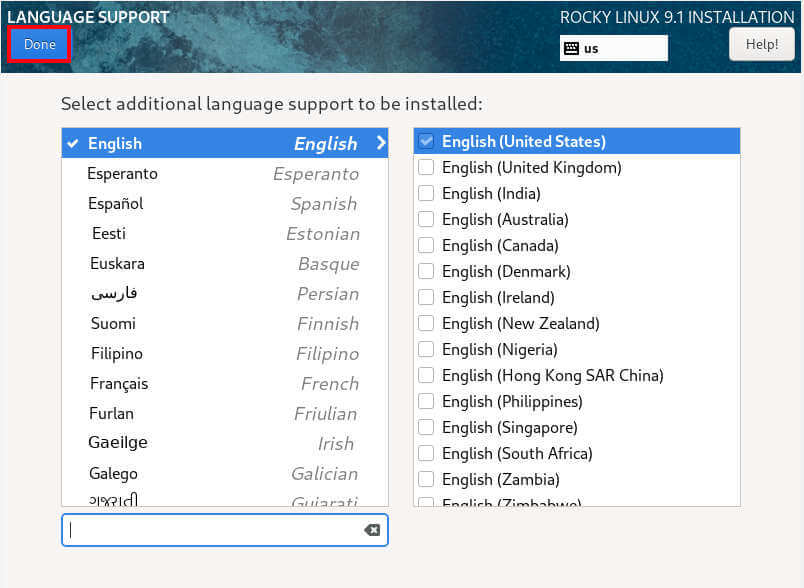
Configure Langauge
Subsequent, click on ‘Language Assist‘ and choose your most popular language.
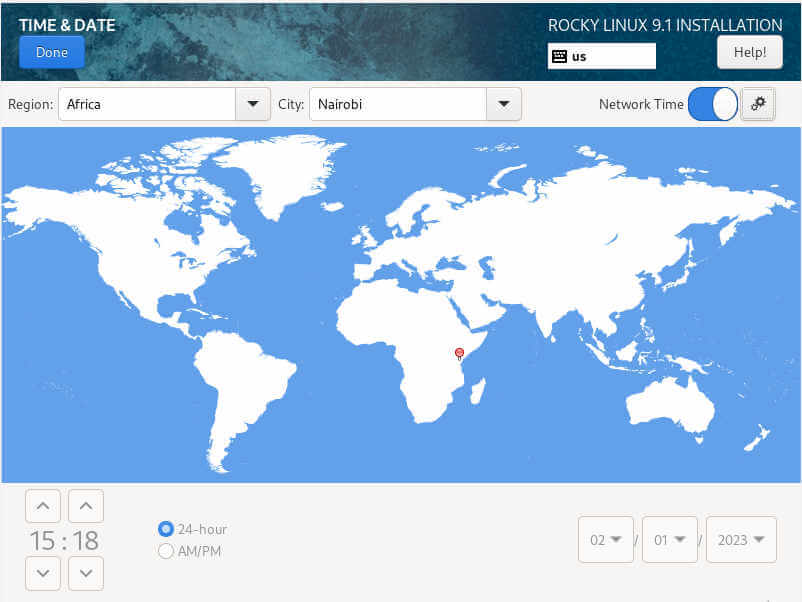
Configure Time and Date
Thereafter, click on ‘Time and Date‘ and set the right time and date settings as per your timezone. You’ll be able to simply do that by choosing your geographical area on the map supplied.
Then click on ‘Completed‘.
Subsequent, up, now we have the ‘SOFTWARE‘ part that incorporates the ‘Set up Supply‘ and ‘Software program Choice‘ sub-sections.
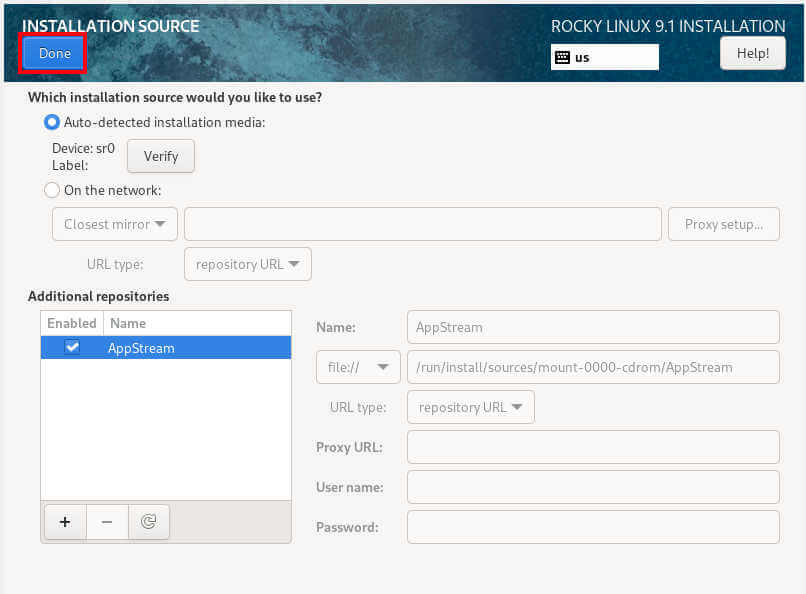
Configure Set up Supply
Click on the ‘Set up Supply‘ possibility. By default, the set up media is robotically detected and the AppStream repository is ready because the default repository. Subsequently, go together with the defaults and easily click on ‘Completed‘.
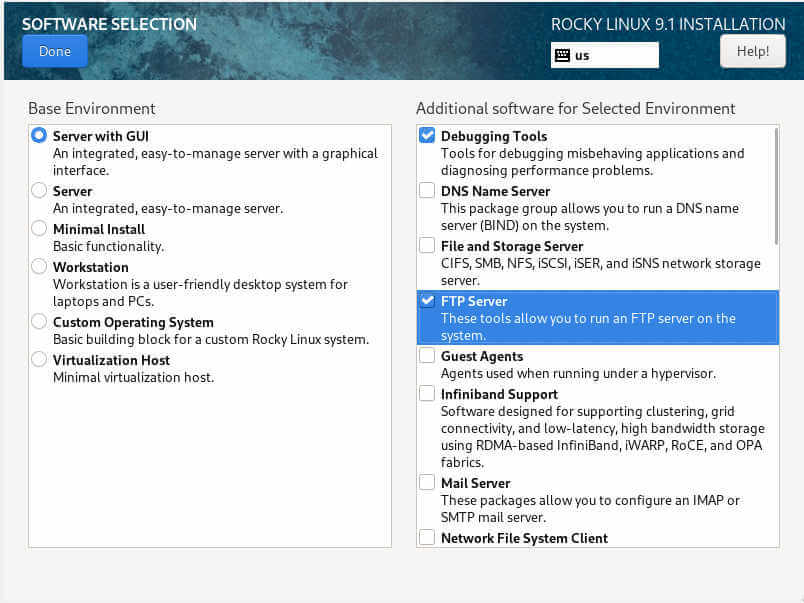
Software program Choice
The ‘Software program Choice‘ sub-section gives you with an array of base environments to select from and extra software program for a particular setting. On this case, now we have chosen to go together with a ‘Server with GUI‘ base setting and some extra packages. After getting accomplished making your alternatives, as soon as once more, click on ‘Completed‘.
The ‘SYSTEM‘ part is one other but essential part. Right here, you’ll partition your arduous drive and likewise configure networking.
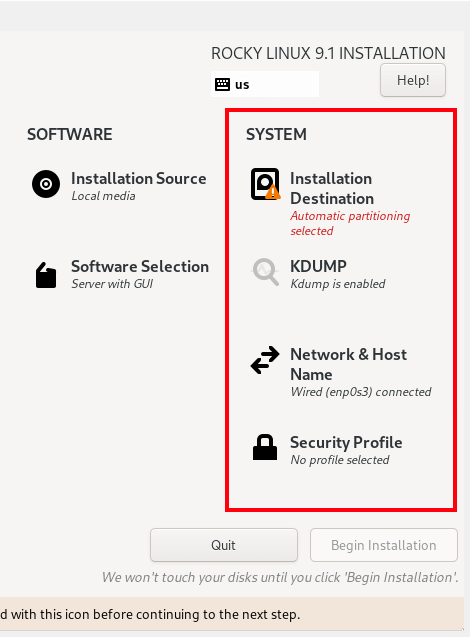
Set up Vacation spot
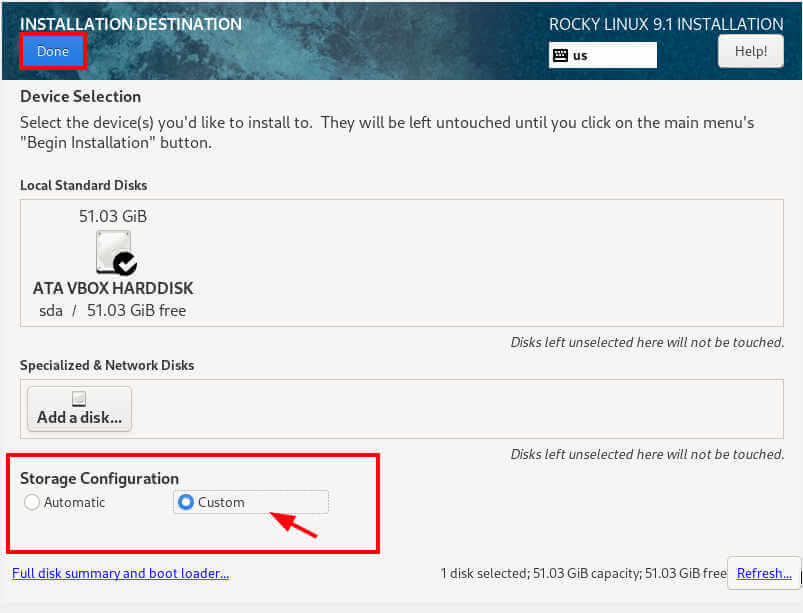
Subsequent up, click on ‘Set up Vacation spot‘. By default, computerized partitioning is the partitioning format. You’ll be able to select to go together with this because it makes work simpler.
The installer intelligently partitions the arduous drive and assigns the filesystem and partition dimension. That is beneficial partitioning format for novices or learners at Linux who are usually not acquainted with handbook partitioning.
On this information, we are going to take a unique method and display how one can manually configure the disk partitions. To get round this, below the Storage Configuration part, change from ‘Computerized’ to ‘Customized’ and click on ‘Completed’.
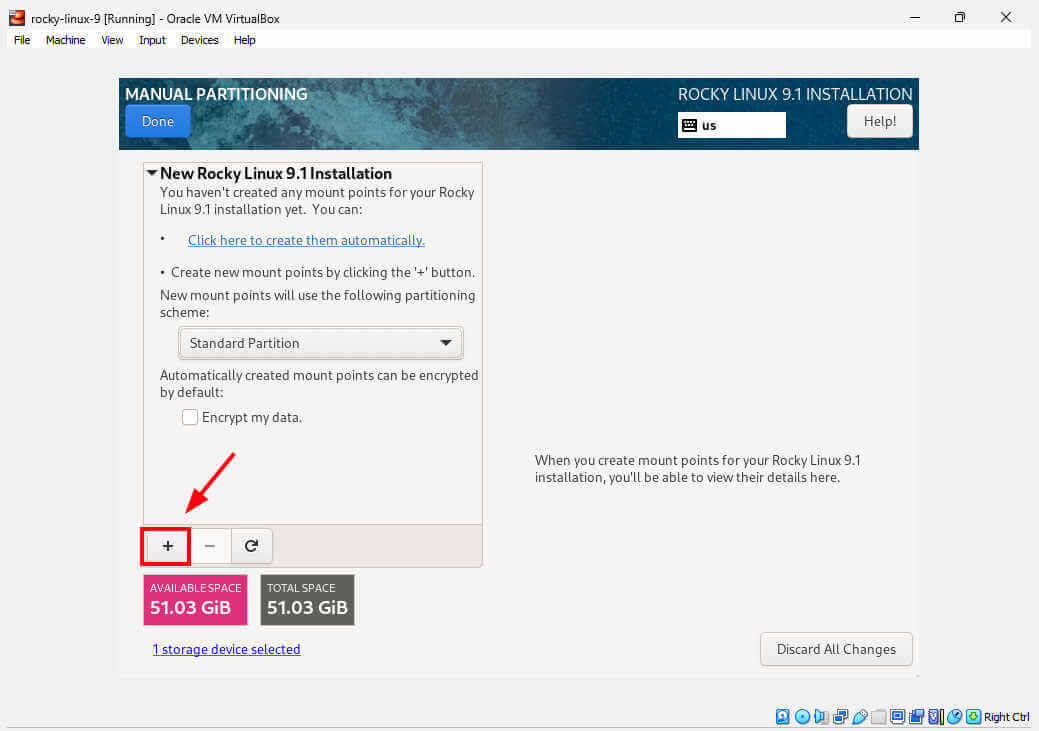
This takes you to the ‘Guide Partitioning’ part as proven. We’re going to partition the arduous drive as follows.
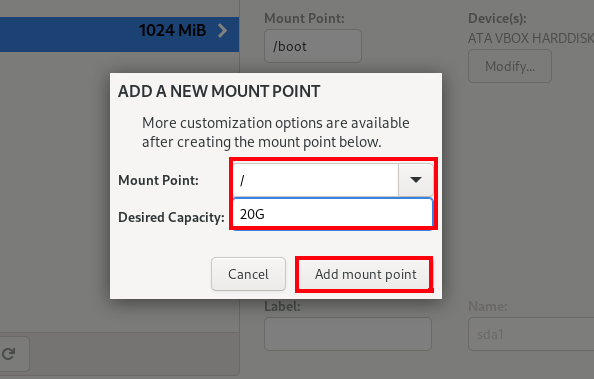
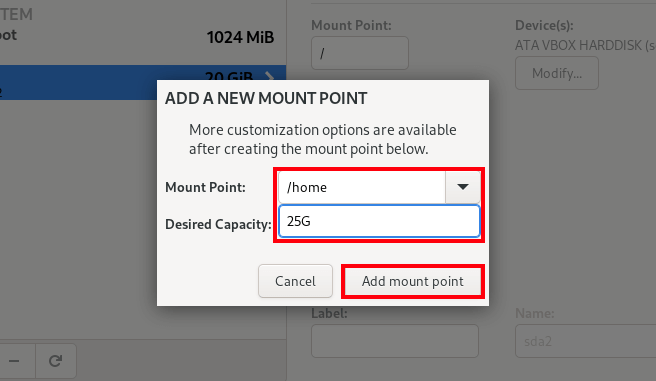
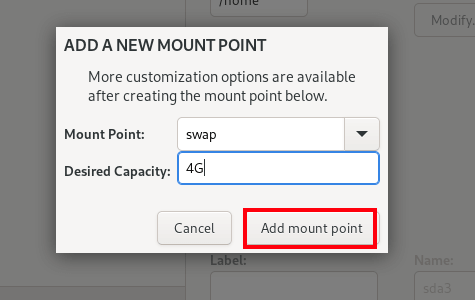
/ (root partition) - 25GB
/boot - 1GB
/residence - 20GB
Swap  - 4GB
To get began with creating the partitions, click on the plus signal [ + ] as proven.
On the pop-up that seems, specify the mount level identify and the reminiscence dimension. Then click on ‘Add mount level’.
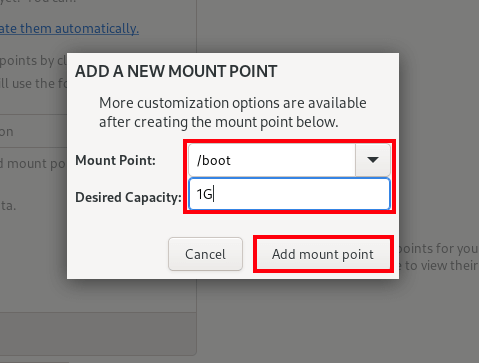
You’ll be able to see the boot partition has been created and listed on the left panel.
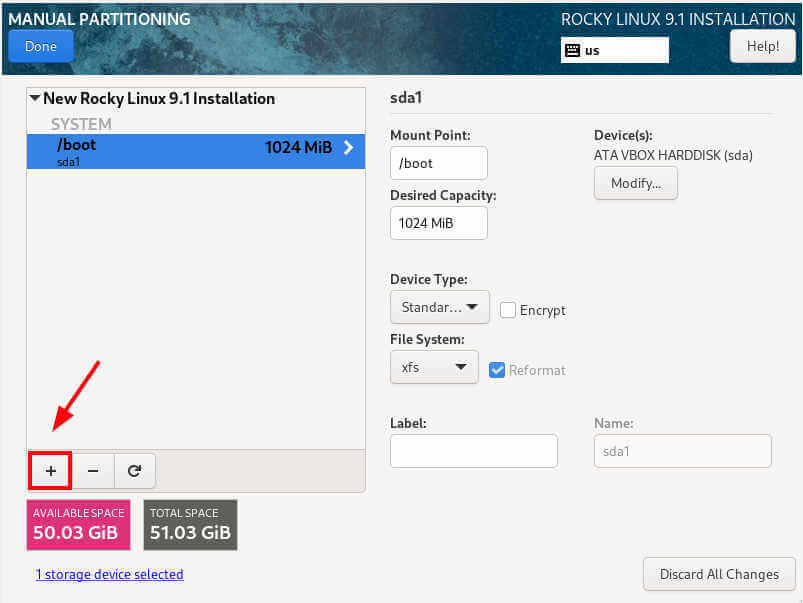
Repeat the identical drill for the foundation ( / ) partition.
For /residence partition.
And create the swap partition.
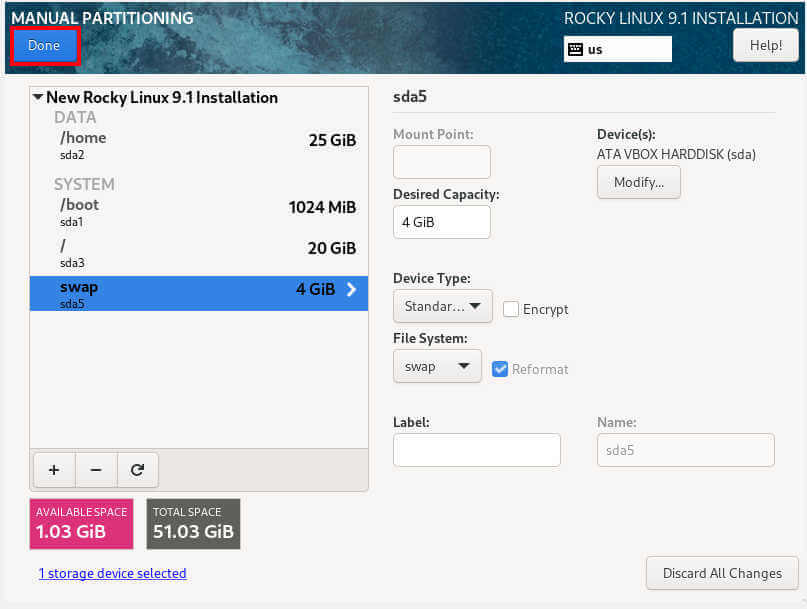
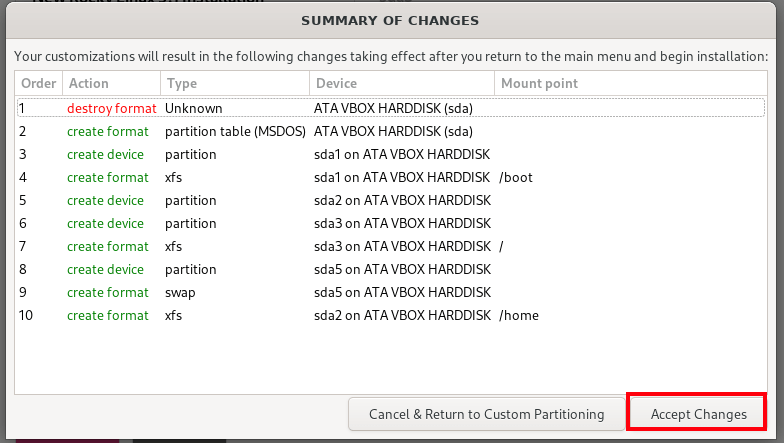
That is how our partition desk seems. All of the essential partitions have been created. You need to have an identical desk indicating the created partitions.
To save lots of the adjustments, click on ‘Completed’.
A desk with all of the adjustments that can be effected can be displayed as proven. Click on ‘Settle for Adjustments’ to avoid wasting the partitions on the arduous drive.
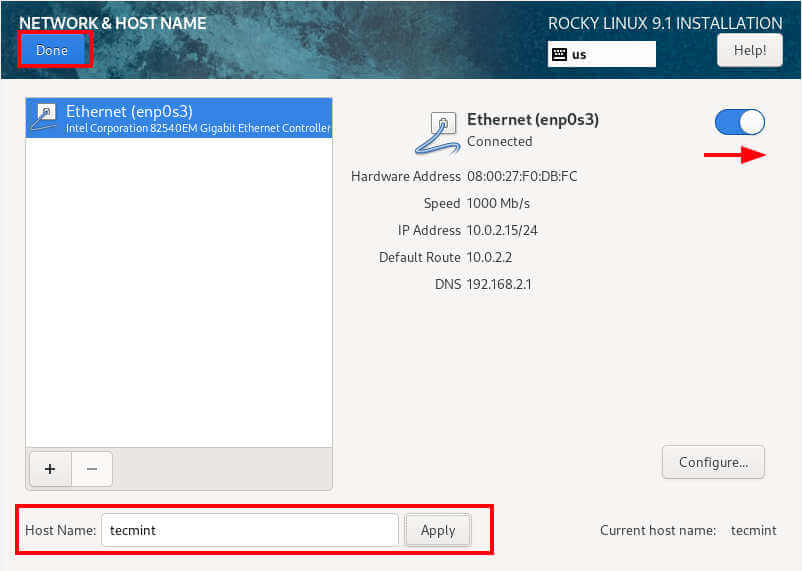
Community and Hostname
Subsequent up, that you must configure the community and hostname. Activate the toggle to allow community connection and with the intention to robotically purchase an IP deal with from the router or DHCP server.
As well as, you possibly can specify your most popular hostname and click on ‘Apply’.
Then click on ‘Apply’.
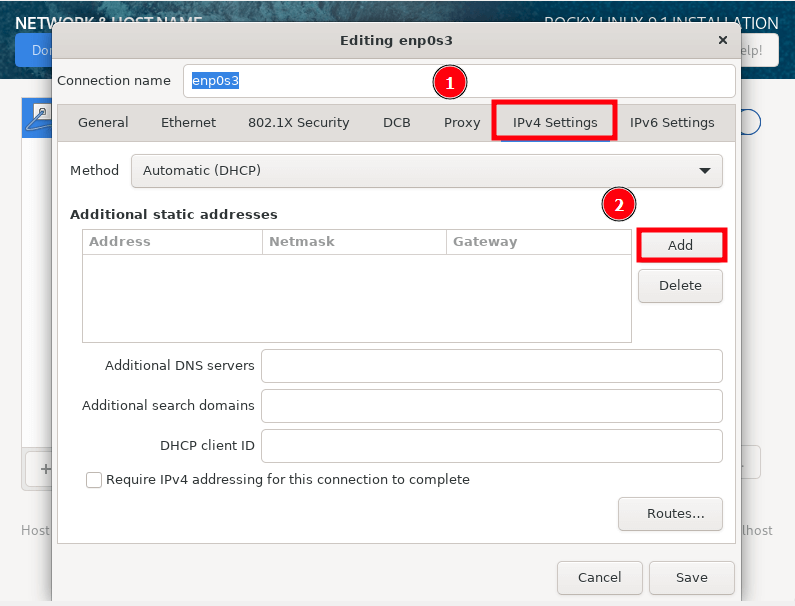
For those who want to set a static IP, click on ‘Configure’ and navigate to ‘IPv4’ settings, after which click on ‘Add’.
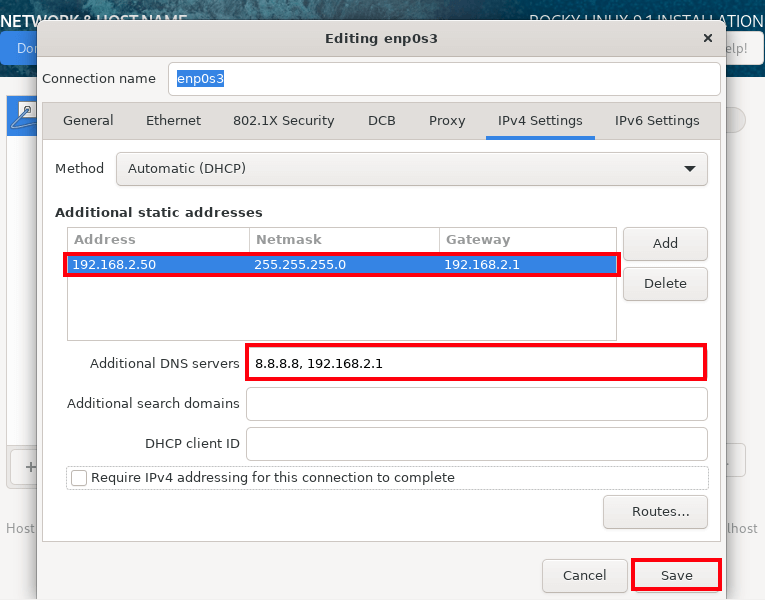
Fill out the IP deal with, netmask, and gateway addresses. Remember to additionally specify the DNS servers and click on ‘Save’.
Consumer Settings
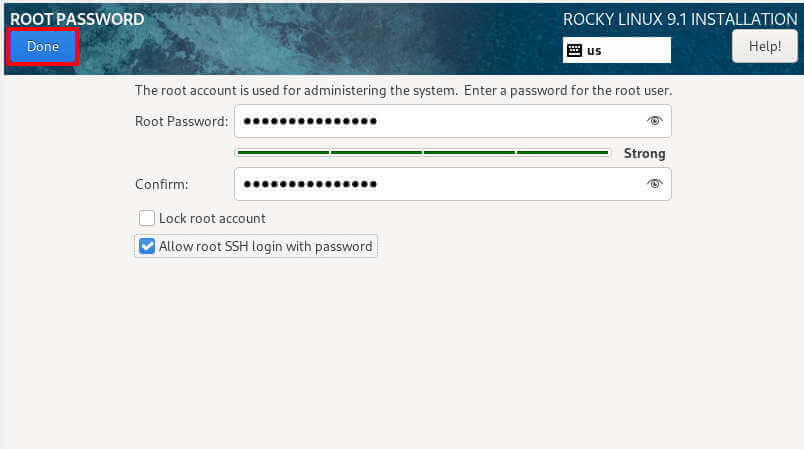
Lastly, now we have the ‘USER SETTINGS’ part that requires you to specify the foundation account password and create an everyday login person account.
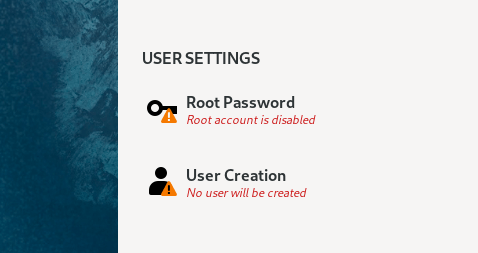
Specify the foundation password and make sure it. You too can determine to allow SSH root login with a password. That is completely as much as you.
Then click on ‘Completed’.
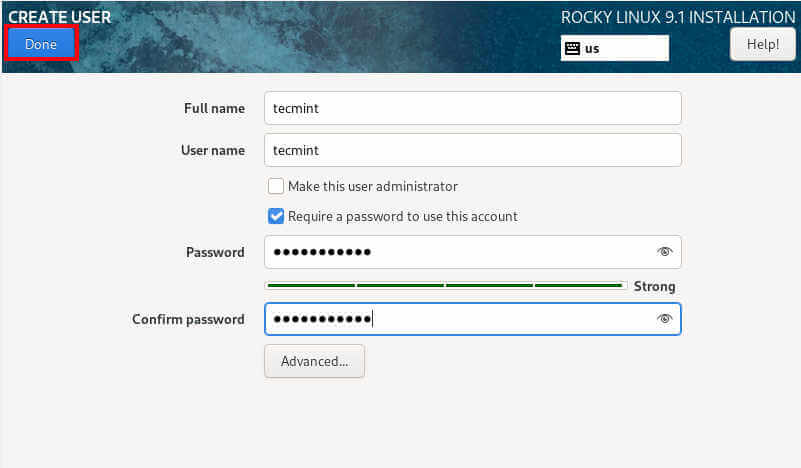
On this ‘Consumer Creation‘ part specify the common person particulars equivalent to full identify and username and specify the password.
Then click on ‘Completed’.
All of the essential elements have been efficiently configured. The ‘KDUMP’ and ‘Safety Profile’ may be left of their default state as they received’t have an effect on the set up course of.
Start Rocky Linux Set up
To start the set up course of, click on ‘Start Set up’.
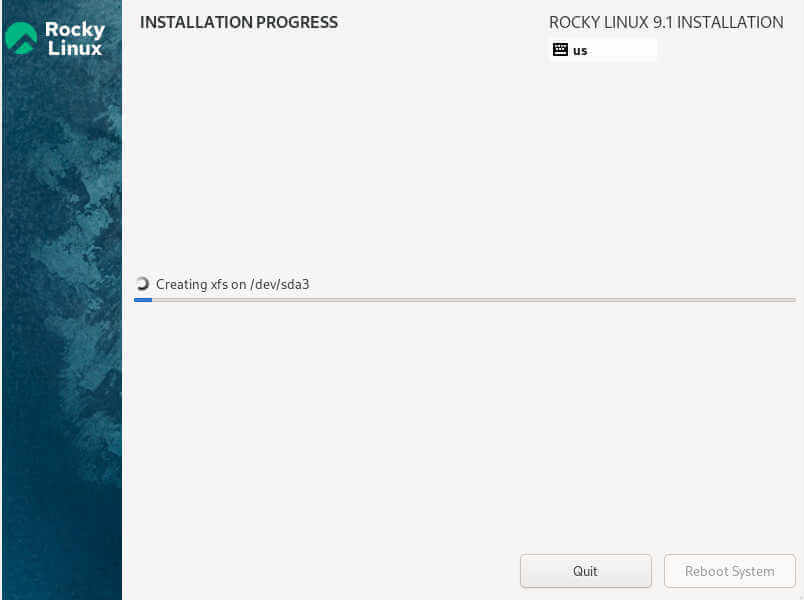
The installer will begin copying the recordsdata from the ISO picture to the arduous disk. The method can take fairly some time, relying in your system specs. This is a perfect time to take a break and let the installer do its job.
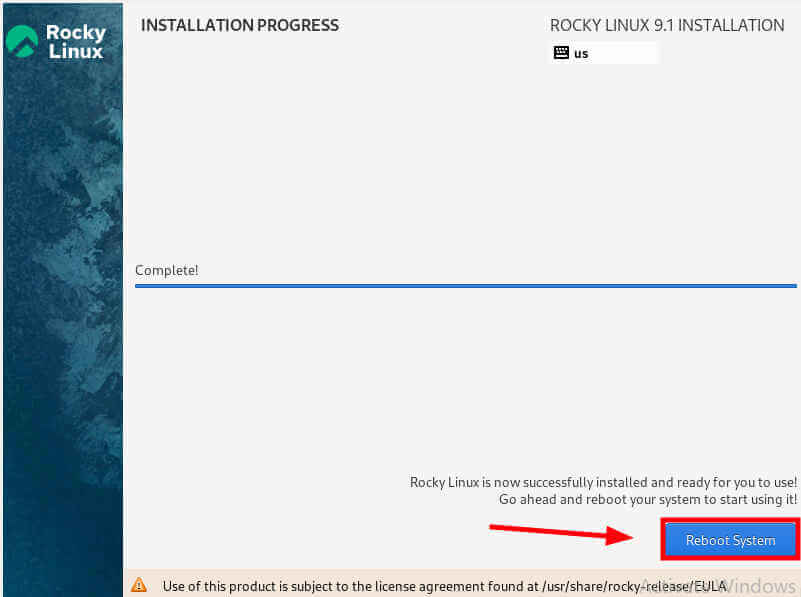
As soon as the set up is full, click on ‘Reboot’ system with the intention to boot into your recent set up of Rocky Linux 9.1.
Booting into Rocky Linux 9.1
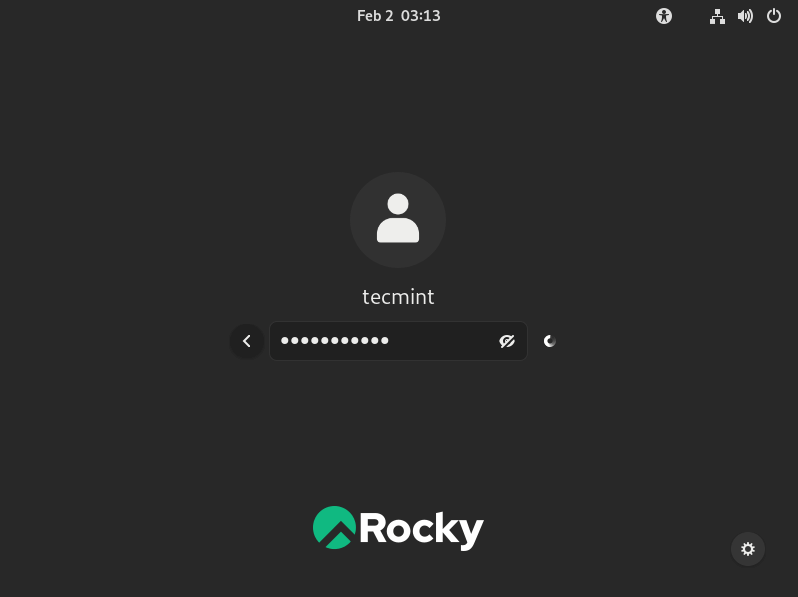
As soon as the system boots, you’ll get a login display with the username identify of the newly created person displayed.
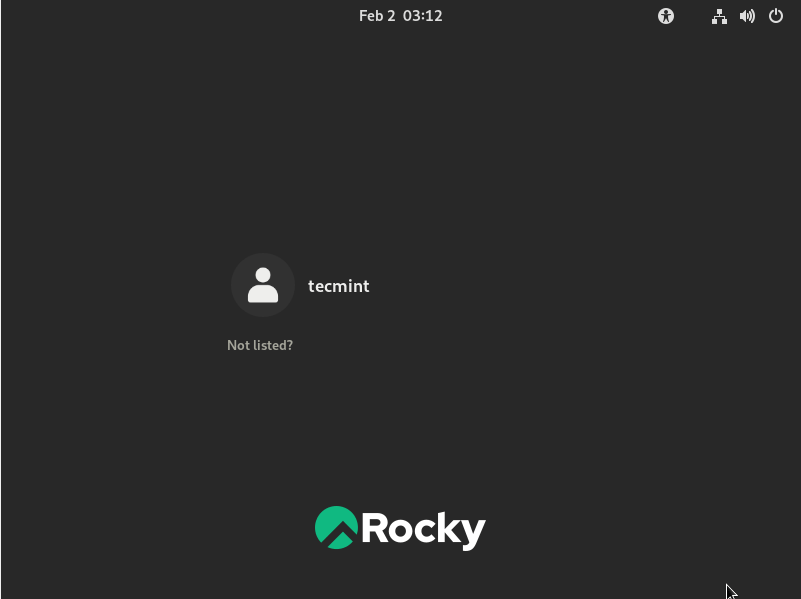
To log in, click on on the person account icon, present the person’s password, and press ENTER.
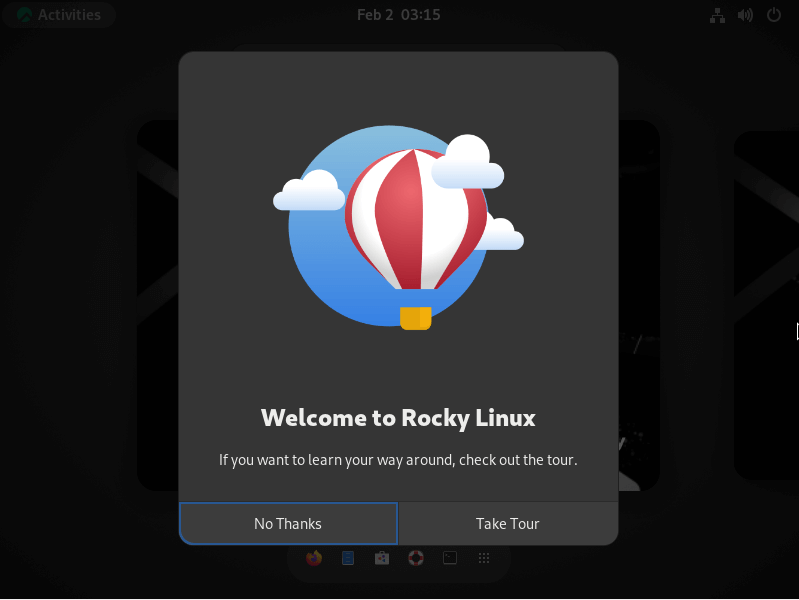
After getting logged in, you will note a ‘Welcome to Rocky Linux’ pop-up which presents to take you thru a tour of the system with the intention to assist you to get began. You’ll be able to decide to take the tour or cancel by choosing ‘No Thanks’ – the choice is completely as much as you.
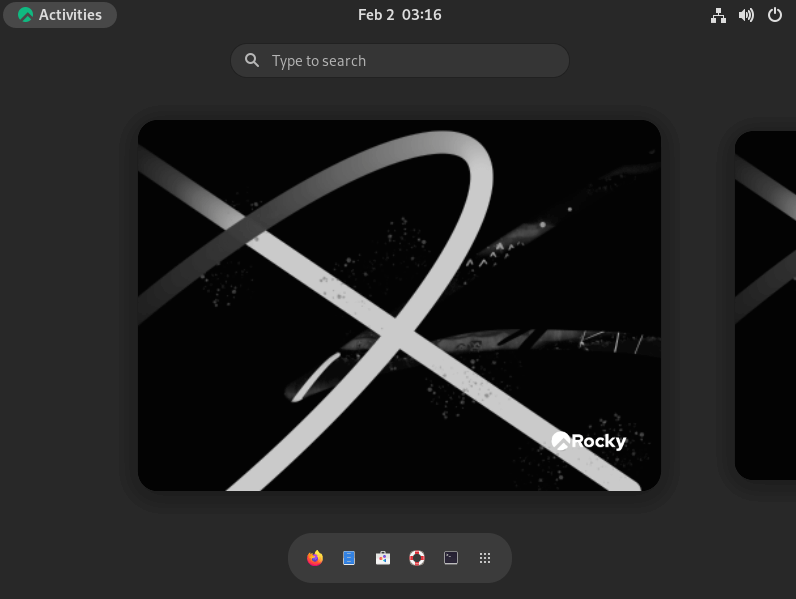
Lastly, you will note the GNOME 40 desktop setting. From right here, you can begin utilizing your recent Rocky Linux 9.1 set up.!
Conclusion
On this information, we began off by putting in Oracle VM VirtualBox on Home windows 11. We additional went a step additional and created a digital machine and eventually documented tips on how to set up Rocky Liinux 9.1 on Oracle VirtualBox.
That’s it for now. We belief you discovered this information helpful. Your suggestions is welcome.