

For pure Jetpack Compose app, technically we do not want the themes.xml and colours.xml anymore, that are meant for Android View system.
Nonetheless, I’ve seen a number of code on the market nonetheless have these themes.xml and colours.xml outlined. Personally, I might take away them to keep away from duplication or confusion.
1. Take away themes.xml and colours.xml
Eradicating themes.xml and colours.xml may cause compilation error as a result of it’s nonetheless being referenced from AndroidManifest.xml. You might want to modify the AndroidManifest.xml
- Take away
android:theme="@model/Theme.EmptyComposeApp"in each<software>and<exercise>
<software
    ...
    android:theme="@model/Theme.EmptyComposeApp">
    <exercise
        ...
        android:theme="@model/Theme.EmptyComposeApp">
        ...
    </exercise>
</software>
- Substitute with
android:theme="@android:model/Theme.Materials.Gentle.NoActionBar"in<software>which is the dad or mum model in yourthemes.xml.
<software
    ...
    android:theme="@android:model/Theme.Materials.Gentle.NoActionBar">
    ...
</software>
The creates an app with out the highest motion bar. The highest motion bar could be created utilizing
Scaffoldcomposable perform. See this Add Prime App Bar Instance on this Easy LazyColumn App.
I did attempt to not including this android:theme="@android:model/Theme.Materials.Gentle.NoActionBar" however the ComponentActivity() creates the highest motion bar by default which I do not know to eliminate it utilizing Jetpack Compose.
2. Set Standing Bar Coloration with Compose
Effectively, the app works, however the default purple colour within the standing bar is gone.
In the event you take a look at the unique themes.xml, it set the standing bar colour there.
<assets>
    <model identify="Theme.EmptyComposeApp" dad or mum="android:Theme.Materials.Gentle.NoActionBar">
        <merchandise identify="android:statusBarColor">@colour/purple_700</merchandise>
    </model>
</assets>
Since this has been eliminated, we have to implement this in Jetpack Compose. To do this, we have to use the System UI Controller from Accompanist.
- Add
com.google.accompanist:accompanist-systemuicontrollerlibrary:
dependencies {
    ...
    implementation "com.google.accompanist:accompanist-systemuicontroller:0.24.1-alpha"
    ...
}
- In
uiThemeTheme.kt, add this to setpurple_700colour which can be theprimaryVariantcolour
val systemUiController = rememberSystemUiController()
systemUiController.setStatusBarColor(
    colour = colours.primaryVariant
)
- The entire code appears to be like like this:
enjoyable EmptyComposeAppTheme(
    darkTheme: Boolean = isSystemInDarkTheme(),
    content material: @Composable () -> Unit
) {
    val colours = if (darkTheme) {
        DarkColorPalette
    } else {
        LightColorPalette
    }

    val systemUiController = rememberSystemUiController()
    systemUiController.setStatusBarColor(
        colour = colours.primaryVariant
    )

    MaterialTheme(
        colours = colours,
        typography = Typography,
        shapes = Shapes,
        content material = content material
    )
}
The template venture from Android Studio would not set the navigation bar colour. Thus, we’re not setting them right here within the instance above. Nonetheless, we often need to set the identical colour for each the navigation and standing bars. In that case, you should utilize systemUiController.setSystemBarsColor():
val systemUiController = rememberSystemUiController()
systemUiController.setSystemBarsColor(
    colour = colours.primaryVariant
)
Since I need to use this instance as my very own template venture. I’ll change it to make use of
systemUiController.setSystemBarsColor()on this app instance.
3. Add Promoting ID Permission
The newest requirement on your app concentrating on SDK 33 is, you have to declare this promoting ID (com.google.android.gms.permission.AD_ID) consumer permission in your manifest file.
<?xml model="1.0" encoding="utf-8"?>
<manifest xmlns:android="http://schemas.android.com/apk/res/android">
    <uses-permission android:identify="com.google.android.gms.permission.AD_ID"/>
    ...
</manifest>
Points
Preview is Not Rendering
There’s a bug the preview is just not working when the System UI controller is used. See challenge tracker right here.
java.lang.IllegalArgumentException: The Compose View should be hosted in an Exercise with a Window!
The workaround is you must disable the System UI controller within the preview by passing within the useSystemUIController parameter.
In Theme.kt:
@Composable
enjoyable EmptyComposeAppTheme(
  ...
  useSystemUIController: Boolean = true,
  ...
) {
    ...
    if (useSystemUIController) {
        val systemUiController = rememberSystemUiController()
        systemUiController.setStatusBarColor(
            colour = colours.primaryVariant)
    }
    ...
}
In MainActivity.kt:
@Preview(showBackground = true)
@Composable
enjoyable DefaultPreview() {
    EmptyComposeAppTheme(useSystemUIController = false) {
        ...
    }
}
Clear Job is No Longer Wanted
[Updated – Jan 11, 2023]: I came upon that we not must register the clear activity in your construct.gradle file as Gradle has already been carried out by default.
The next activity could be faraway from construct.gradle file.
duties {
    register("clear", Delete::class) {
        delete(rootProject.buildDir)
    }
}
Abstract
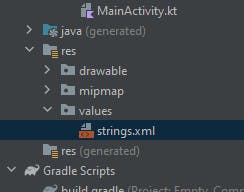
Now I solely have strings.xml in my useful resource folder. Cool, is not it?
I’ll most likely additionally use this as place to begin of any Jetpack Compose venture. This diff right here exhibits the adjustments wanted to alter the bundle and venture names.
[Updated – 18 July, 2022]: In the event you rename the bundle and and so forth. from the template app, you are possibly getting the compilation error (often is said to string assets). In that case, you may invalidate caches. I solely activate the Clear VCS Log caches and indexes and it really works for me.
Supply Code
GitHub Repository: Demo_CleanEmptyCompose