
With this Swift programming tutorial we’ll create a easy cell app and can learn to use Firebase Social Authentication to implement person to Login with Google account performance. The app we’re going to create can have solely two views. One view with a login button and one other view is protected web page which is able to open as soon as the person authentication is profitable.
Within the following two tutorials I’ll share how one can use Firebase Social Authentication to implement Check in with Fb account and Check in with Twitter accounts. So ultimately we can have all thee:
- Login with Google account,
- Login with Fb account,
- Login with Twitter account.
Let’s begin with Login with Google Account!
Create a New Xcode Mission
Create a brand new Single View Software Swift venture in Xcode and provides it a singular Bundle Identifier. We might want to use this Bundle Identifier when working with Firebase. In my case I’ve created a
com.swiftdeveloperblog.socialauthentication
as bundle identifier however yours will have to be completely different.

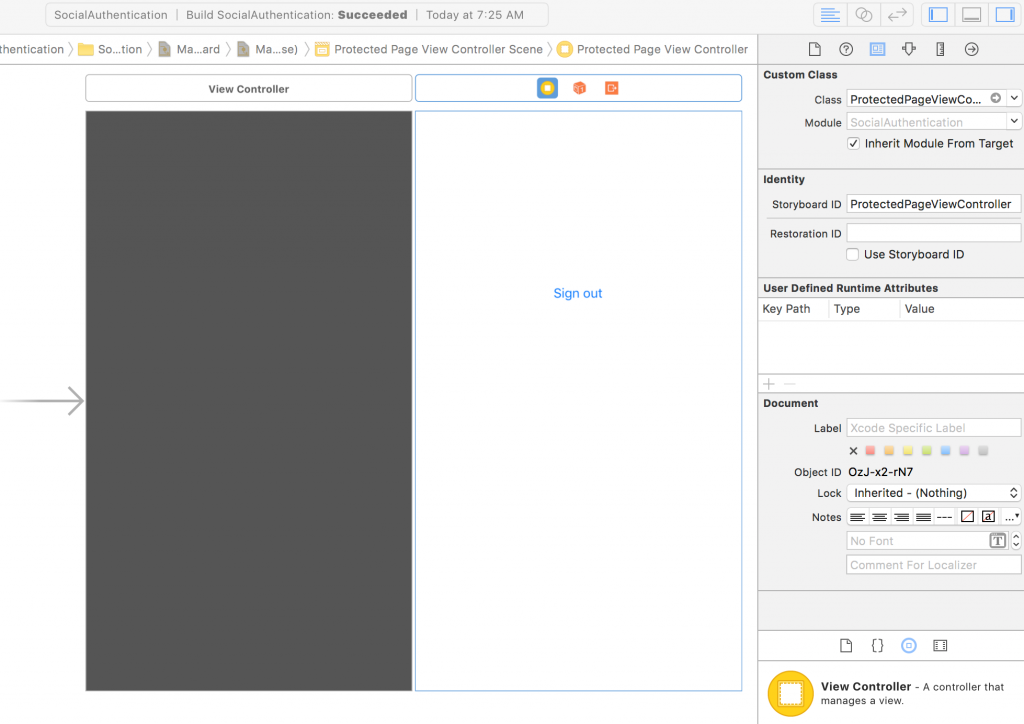
Add another ViewController to your Fundamental.storyboard. This new view controller will probably be our protected web page which will probably be offered to person provided that authentication with Google account is profitable. In my case the register web page known as ViewController.swift and has a ViewController as Storyboard ID. And the protected web page is ProtectedPageViewController.swift with ProtectedPageViewController as Storyboard ID.
Create Firebase App
Use Firebase Social Authentication and implement Consumer Check in with Google account we’ll first have to create a brand new Firebase App. Let’s do this.
To create a brand new Firebase app:
- Check in into Firebase Console,
- Click on on Add venture button to create a brand new Firebase venture. It is best to see a dialog window inviting you to create a brand new venture:
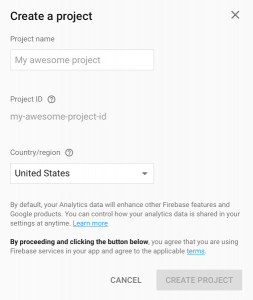
- Present venture identify and Nation. In my case I’ve offered “Social Authentication” as venture identify.
You’ll then be redirected to the venture overview web page. Beneath the Mission Overview you will notice an inventory of assorted providers which Firebase offers builders with and which you should utilize in your app.

Subsequent, it’s a must to go to the Mission Setting web page which one can find subsequent to the Project Overview (see the Settings gear icon) and add Firebase to your iOS app.
Add Firebase to your iOS app
On the picture above you will notice the Settings gear icon,
- Click on on the Settings gear icon,
- On the Settings web page click on on Add Firebase to your iOS App hyperlink.

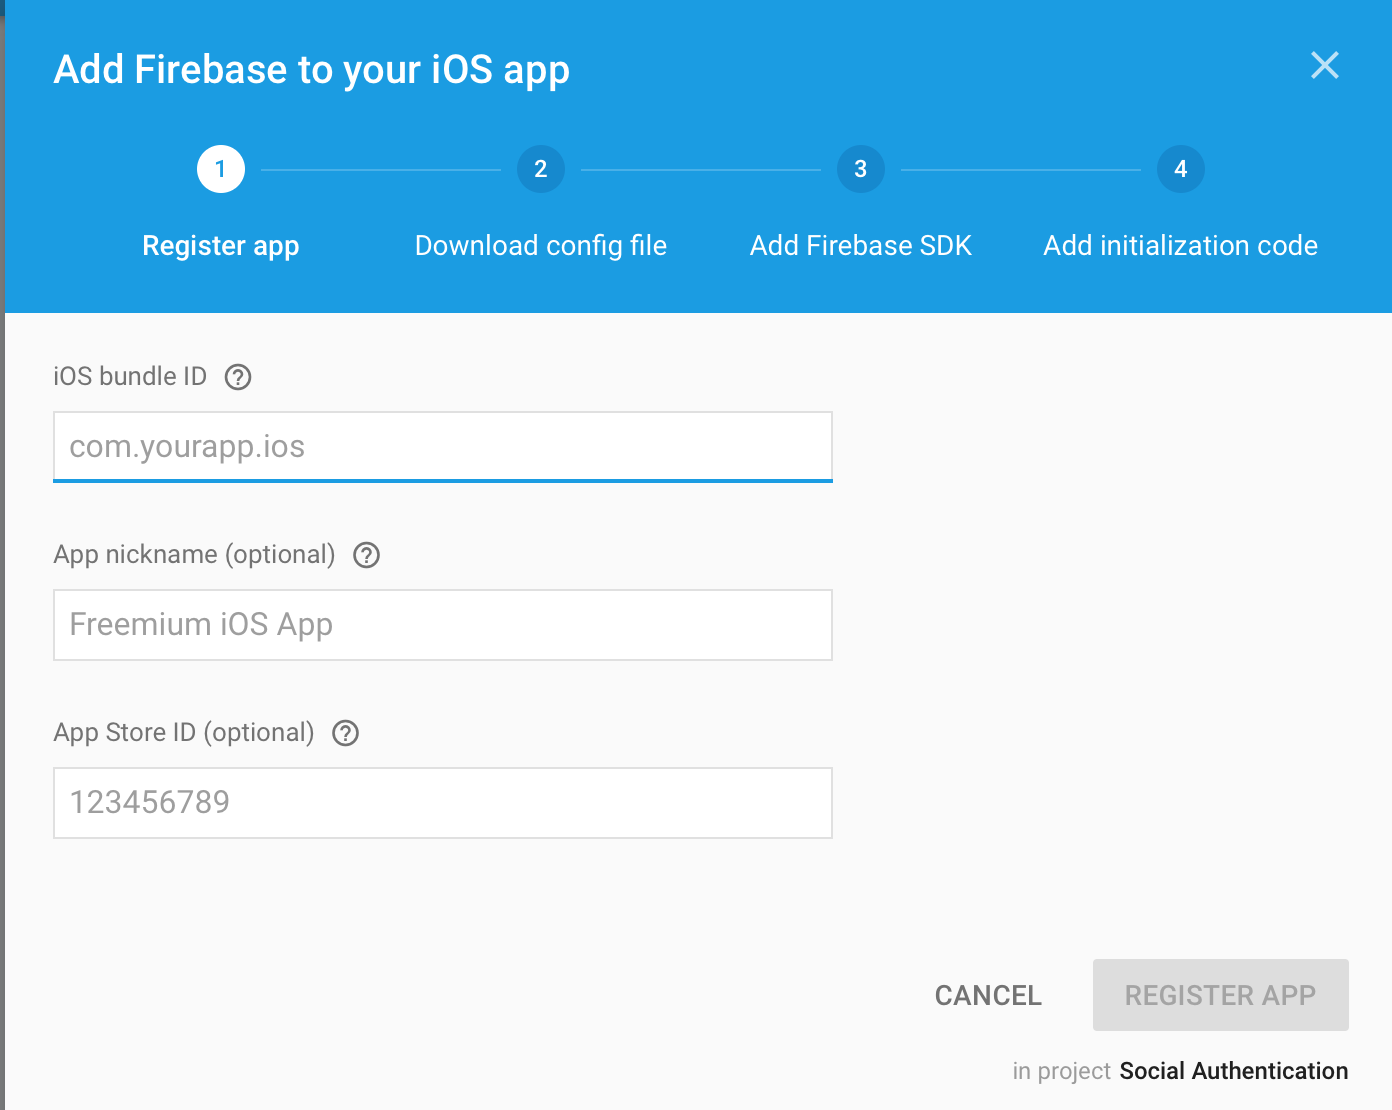
Within the window that pops up enter the bundle identifier which you get out of your Xcode venture.
- Open Xcode venture,
- Choose Mission identify after which beneath Targets choose identify of your venture,
- On Basic tab you will notice Bundle Identifier. See the image beneath
- Copy the bundle identifier and paste it into the iOS Bundle ID area which you’ll be able to see on the picture beneath:
The following step is to obtain the GoogleService-Information.plist and the dragging it to the venture.
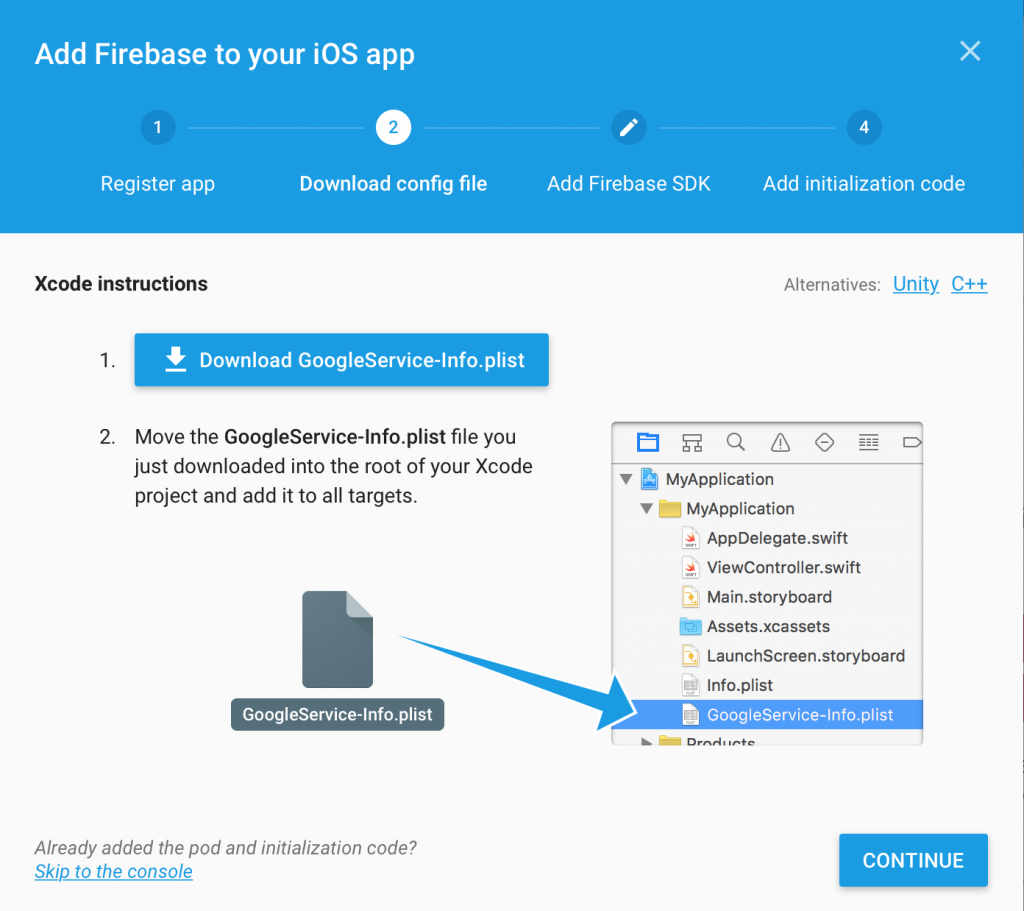
Upon getting added the GoogleService-Information.plist to your venture, click on on Proceed button.
The following step is to Add Firebase SDK to your venture and we’re advisable to do it utilizing the Pods. Open a terminal window, navigate to the placement of the Xcode venture in your app and comply with the steps proven on the picture beneath:
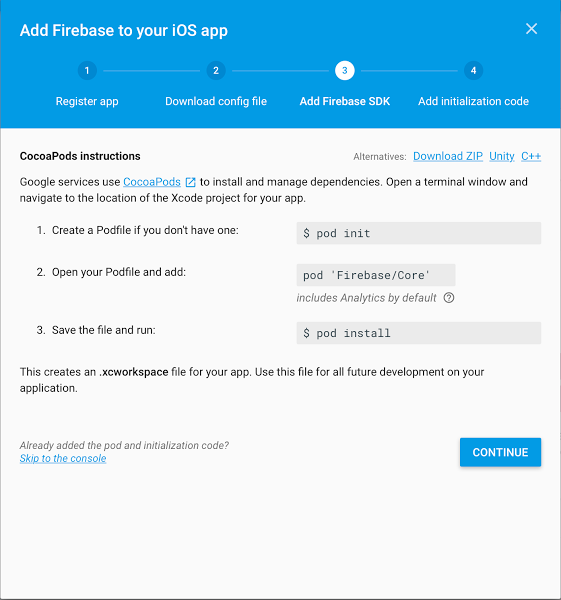
As soon as you might be carried out including Firebase SDK to your venture click on on Proceed button.
On this tutorial we’ll use Swift reasonably than Goal-C. On the following and the ultimate step referred to as “Including initialization code” you’ll need so as to add the FirebaseApp.configure() to the AppDelegate.swift file of your Xcode venture.
In case your Xcode venture is opened, shut it now. This is essential! After including Firebase SDK to your Xcode venture we have to begin it utilizing the .xcworkspace file reasonably than .xcodeproj. Shut your Xcode venture and re-open it by clicking on .xcworkspace file. Discover AppDelegate.swift file and edit it by including the FirebaseApp.configure() to the didFinishLaunchingWithOptions function as it’s proven within the picture beneath:
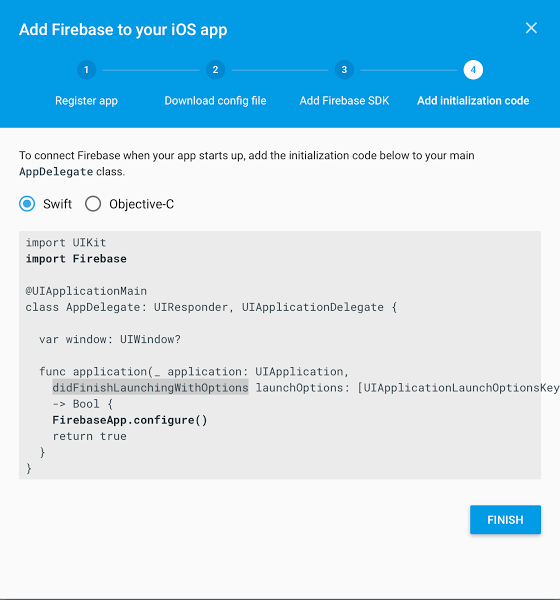
Click on on End button to finish this stream.
Add SIGN-IN METHOD
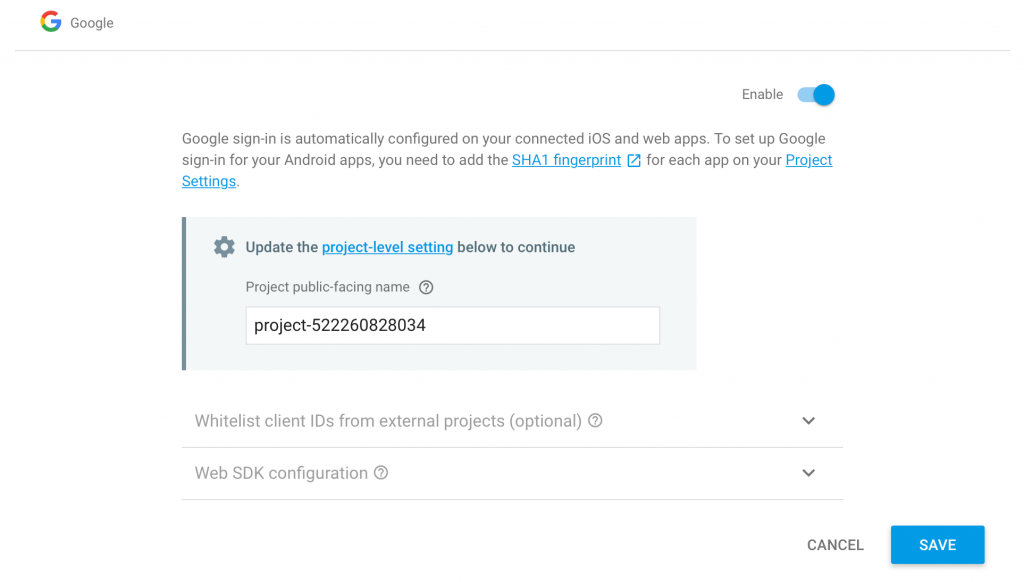
It’s time to allow Google Signal-in methodology for our app. Have a look at the picture beneath. Within the record of providers beneath the Develop header, you will notice Authentication menu choice.
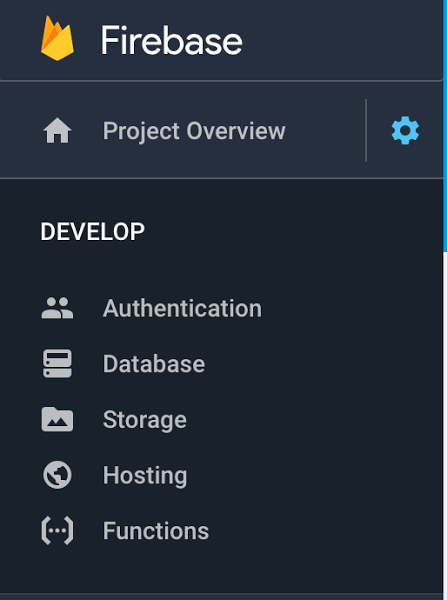
Click on on the Authentication hyperlink after which click on on SIGN-IN METHOD tab you’ll see that through the use of Firebase you might have completely different Signal-in suppliers.
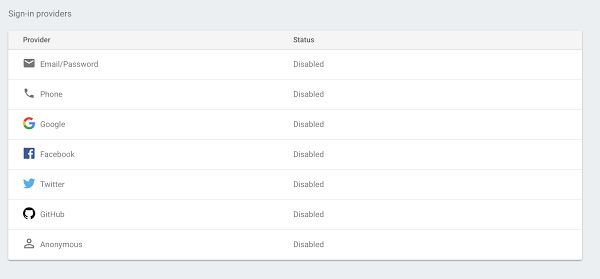
By default Google register methodology will probably be disabled. Click on on the row after which Allow to choice as it’s proven on the picture beneath:
If you change to USERS tab you will notice an inventory of all customers who’ve authenticated together with your app:

We’re carried out establishing our app venture in Firebase Console. Now let’s proceed with the Swift code and implement the Signal-in with Google Account function.
Including Firebase Google Dependencies
To let customers Signal-in with their Google account to our app we might want to add Google Signal-in library dependency to our Xcode venture. And since we’ve began utilizing Pods as dependency administration we’ll use Pods as soon as once more so as to add the GoogleSignIn library.
- Open the terminal and go to your venture root listing.
- Then, in terminal window enter the next command open Podfile. Within the podfile it’s a must to add 2 new strains identical to within the picture beneath.
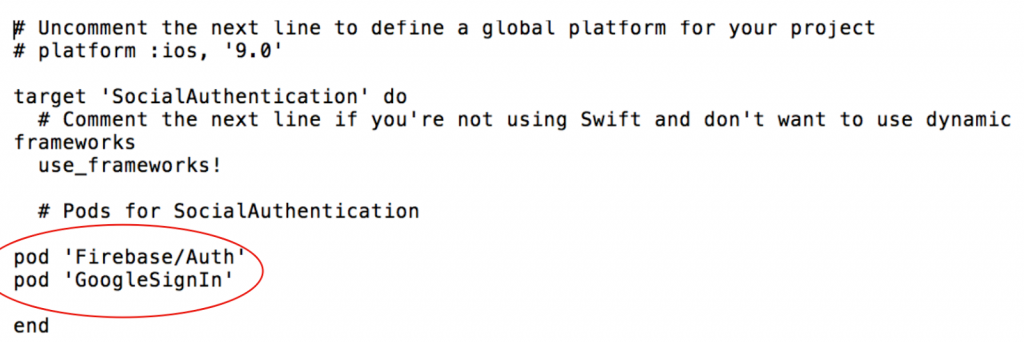
- Save the pod file
- Now, after you saved the pod file file, kind in terminal window the pod set up command.
Do not forget that after you began utilizing Pods to handle the libraries dependency in your venture you’ll need to be opening your venture utilizing the .xcworkspace reasonably than .xcodeproj.
Set URLTypes and URL Schemes
Now it’s a must to go to your Xcode venture Targets, then, go to Information part and on the backside click on on URLTypes and within the URL Schemes textual content area enter the worth of REVERSED_CLIENT_ID which you will get from GoogleService-Information.plist. which you might have downloaded from Firebase and added to your Xcode venture a bit earlier.

ViewController with Check in Button
Beneath is a supply code of Check in web page that holds the Check in button. It’s a must to import GoogleSignIn and Firebase in your ViewController file.
First, it’s a must to create an occasion of the GIDSignInButton, then give it a body and add it to the view. When you run the venture you’ll see that the button will seem on the display screen, however when you faucet on it the app will crash. To repair this it’s a must to conform the ViewController to GIDSignInUIDelegate and set its delegate.
import UIKit
import GoogleSignIn
import Firebase

class ViewController: UIViewController, GIDSignInUIDelegate {

    override func viewDidLoad() {
        tremendous.viewDidLoad()

        configureGoogleSignInButton()
    }

    //creating the Google register button
    fileprivate func configureGoogleSignInButton() {
        let googleSignInButton = GIDSignInButton()
        googleSignInButton.body = CGRect(x: 120, y: 200, width: view.body.width - 240, top: 50)
        view.addSubview(googleSignInButton)
        GIDSignIn.sharedInstance().uiDelegate = self

    }
  }
AppDelegate Swift File
Within the AppDelegate file within the func software(_ software: UIApplication, didFinishLaunchingWithOptions launchOptions: [UIApplicationLaunchOptionsKey: Any]?) -> Bool it’s a must to configure Firebase by including FirebaseApp.configure() and the clientID. Additionally, it’s essential conform it to the GIDSignInDelegate
import UIKit
import Firebase
import GoogleSignIn

@UIApplicationMain
class AppDelegate: UIResponder, UIApplicationDelegate, GIDSignInDelegate {

    var window: UIWindow?

    func software(_ software: UIApplication, didFinishLaunchingWithOptions launchOptions: [UIApplicationLaunchOptionsKey: Any]?) -> Bool {

        FirebaseApp.configure()

        GIDSignIn.sharedInstance().clientID = FirebaseApp.app()?.choices.clientID
        GIDSignIn.sharedInstance().delegate = self

        return true
    }

    func software(_ app: UIApplication, open url: URL, choices: [UIApplicationOpenURLOptionsKey : Any] = [:]) -> Bool {
        let googleAuthentication = GIDSignIn.sharedInstance().deal with(url, sourceApplication:choices[UIApplicationOpenURLOptionsKey.sourceApplication] as? String, annotation: [:])


        return googleAuthentication
    }


    // Google Signal In
    func signal(_ signIn: GIDSignIn!, didSignInFor person: GIDGoogleUser!, withError error: Error!) {
        if (error) != nil {
            print("An error occured throughout Google Authentication")
            return
        }

        guard let authentication = person.authentication else { return }
        let credential = GoogleAuthProvider.credential(withIDToken: authentication.idToken,
                                                       accessToken: authentication.accessToken)
        Auth.auth().signIn(with: credential) { (person, error) in
            if (error) != nil {
                print("Google Authentification Fail")
            } else {
                print("Google Authentification Success")

                let mainStoryBoard: UIStoryboard = UIStoryboard(identify:"Fundamental", bundle:nil)
                let protectedPage = mainStoryBoard.instantiateViewController(withIdentifier: "ProtectedPageViewController") as! ProtectedPageViewController
                let appDelegate = UIApplication.shared.delegate
                appDelegate?.window??.rootViewController = protectedPage
            }
        }
    }


}
Please word the code within the Auth().signIn(with:credential) methodology.
If authentication is profitable person will probably be taken to a ProtectedPageViewController. This ProtectedPageViewController is only a common ViewController web page which you’ll need to create. I’ll web page the supply code of this web page beneath.
Protected Web page ViewController Swift File
Beneath is the supply code of ProtectedPageViewController which ought to open provided that person authentication on register web page is profitable.
import UIKit
import Firebase
import GoogleSignIn

class ProtectedPageViewController: UIViewController {

    override func viewDidLoad() {
        tremendous.viewDidLoad()

        // Do any further setup after loading the view.
    }

    override func didReceiveMemoryWarning() {
        tremendous.didReceiveMemoryWarning()
        // Eliminate any sources that may be recreated.
    }

    @IBAction func signOut(_ sender: Any) {

        do {
            strive Auth.auth().signOut()

            let signInPage = self.storyboard?.instantiateViewController(withIdentifier: "ViewController") as! ViewController
            let appDelegate = UIApplication.shared.delegate
            appDelegate?.window??.rootViewController = signInPage

        } catch let signOutError as NSError {
            print ("Error signing out: %@", signOutError)
        }
    }

}
And that is it. When you run this code it ought to begin with a view that comprises Google Check in button. Faucet on Check in button and login together with your Google credentials. As soon as logged in it is best to see a protected web page with Signal out button. Faucet on Signal out button and you need to be taken again to Check in web page.
Hope this tutorial is useful for you! The next two tutorials will probably be:
- Use Firebase Social Authentication to Check in with Fb account
- and Check in with Twitter account.
Keep tuned!
Additionally, because you learn this tutorial you have to be fascinated with Firebase and Swift. Try the beneath record of books and video classes on Firebase and iOS! I hope one can find some which are helpful to you and your venture.
Sergey