
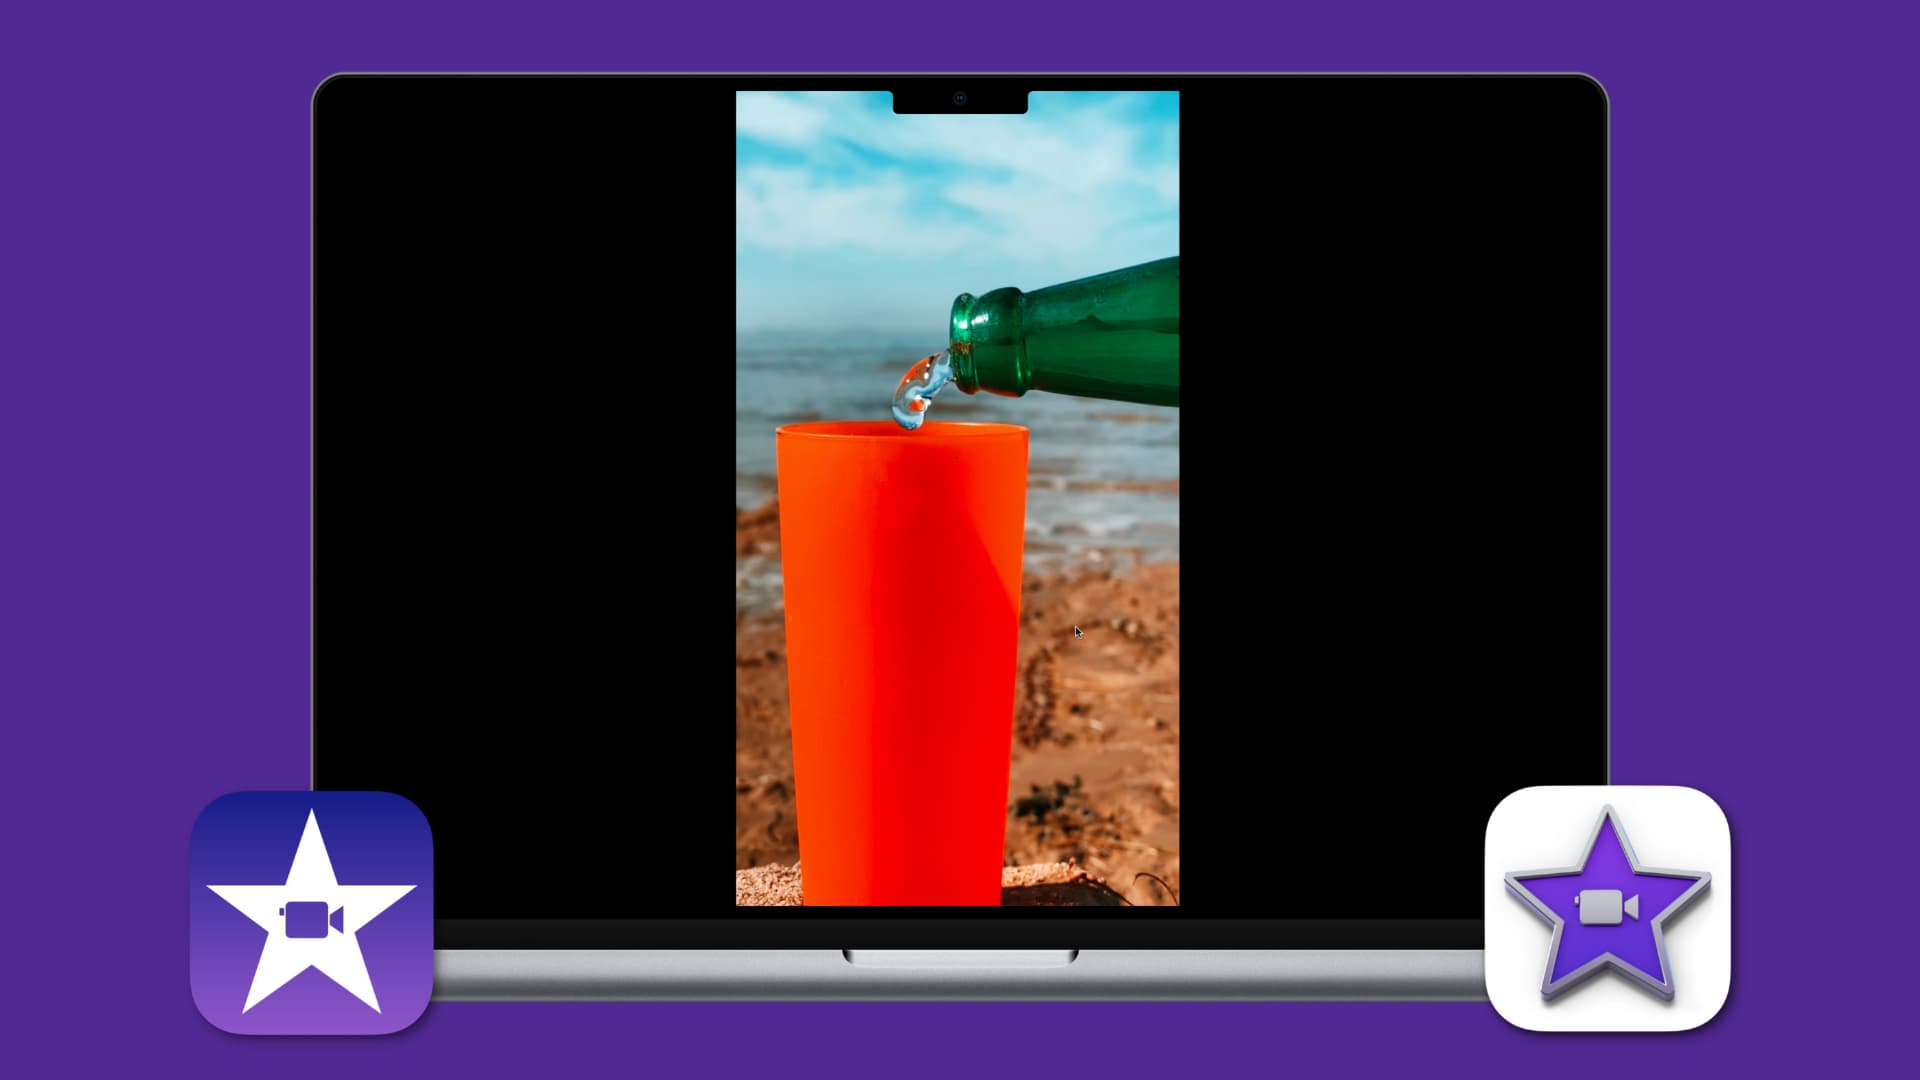
Discover ways to edit vertical movies with out black bars in iMovie in your Mac, iPhone, or iPad, and ensure they give the impression of being nice in portrait orientation. That is significantly useful if you wish to publish your movies to Instagram, TikTok, YouTube Shorts, and so forth.
iMovie is designed to supply 16:9 facet ratio movies that go effectively with playback on TV, laptop screens, and cell phones in panorama orientation.
Nonetheless, with the rise of vertical content material pushed by TikTok, Snapchat, YouTube Shorts, Instagram, and such, you might need to edit vertical movies you are taking in your iPhone and export the ultimate single file in the identical vertical facet ratio.
We’ll assist you do this utilizing iMovie on macOS and iOS.
Create video with out black bars in iMovie for Mac
There are two simple methods to do that, and we’ve got listed each of them right here.
Utilizing App Preview mode
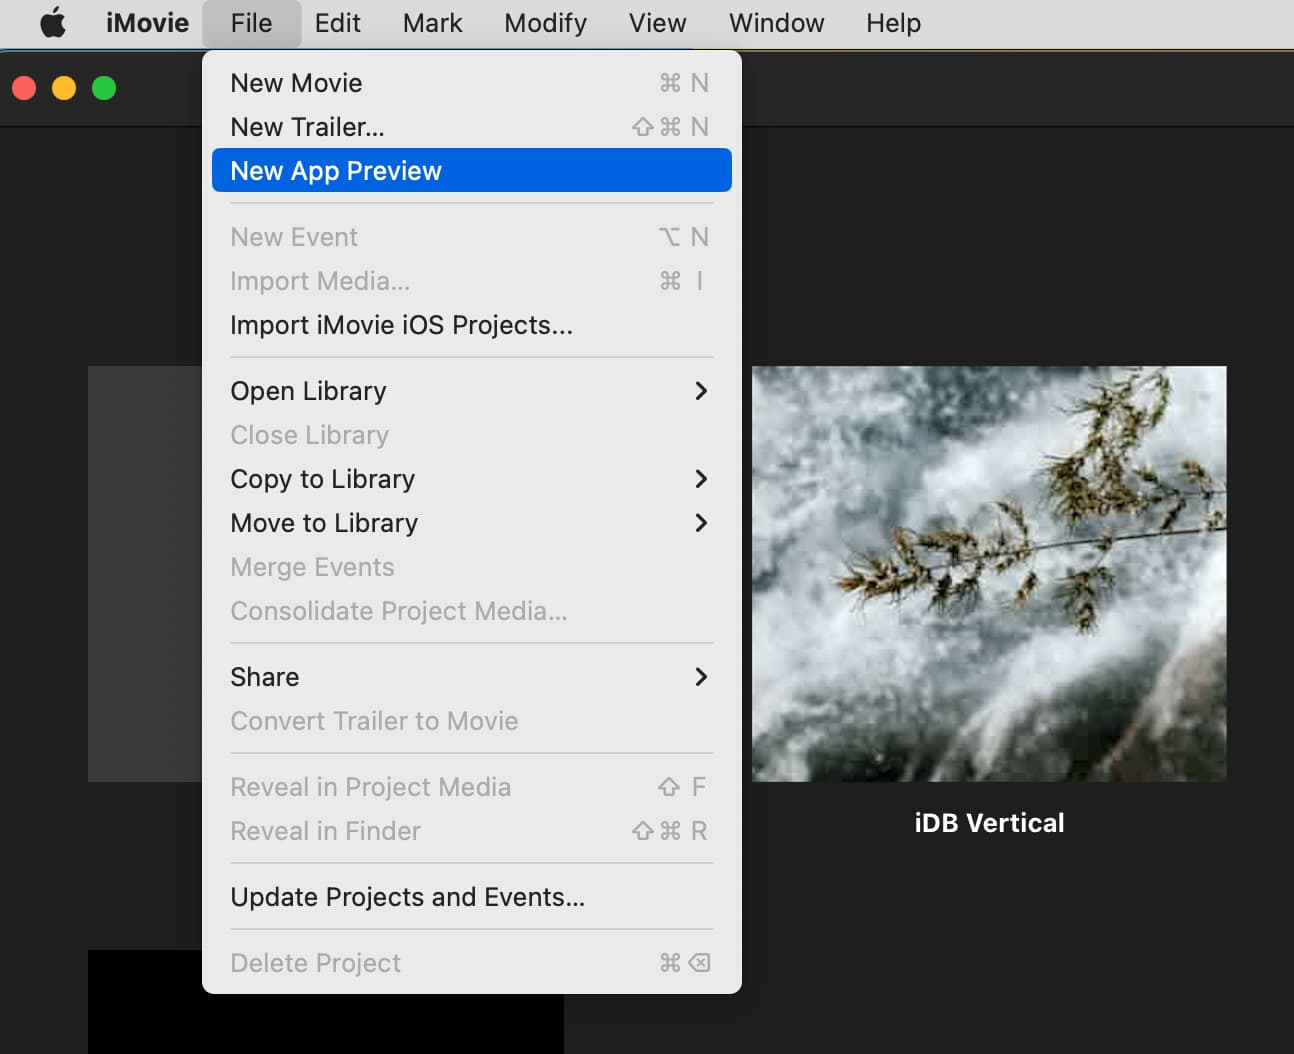
iMovie has a little-known choice known as App Preview, which permits app builders to create video previews to be featured alongside their apps within the App Retailer. This function is by far the quickest and best solution to work with vertical movies with out black bars in your Mac.
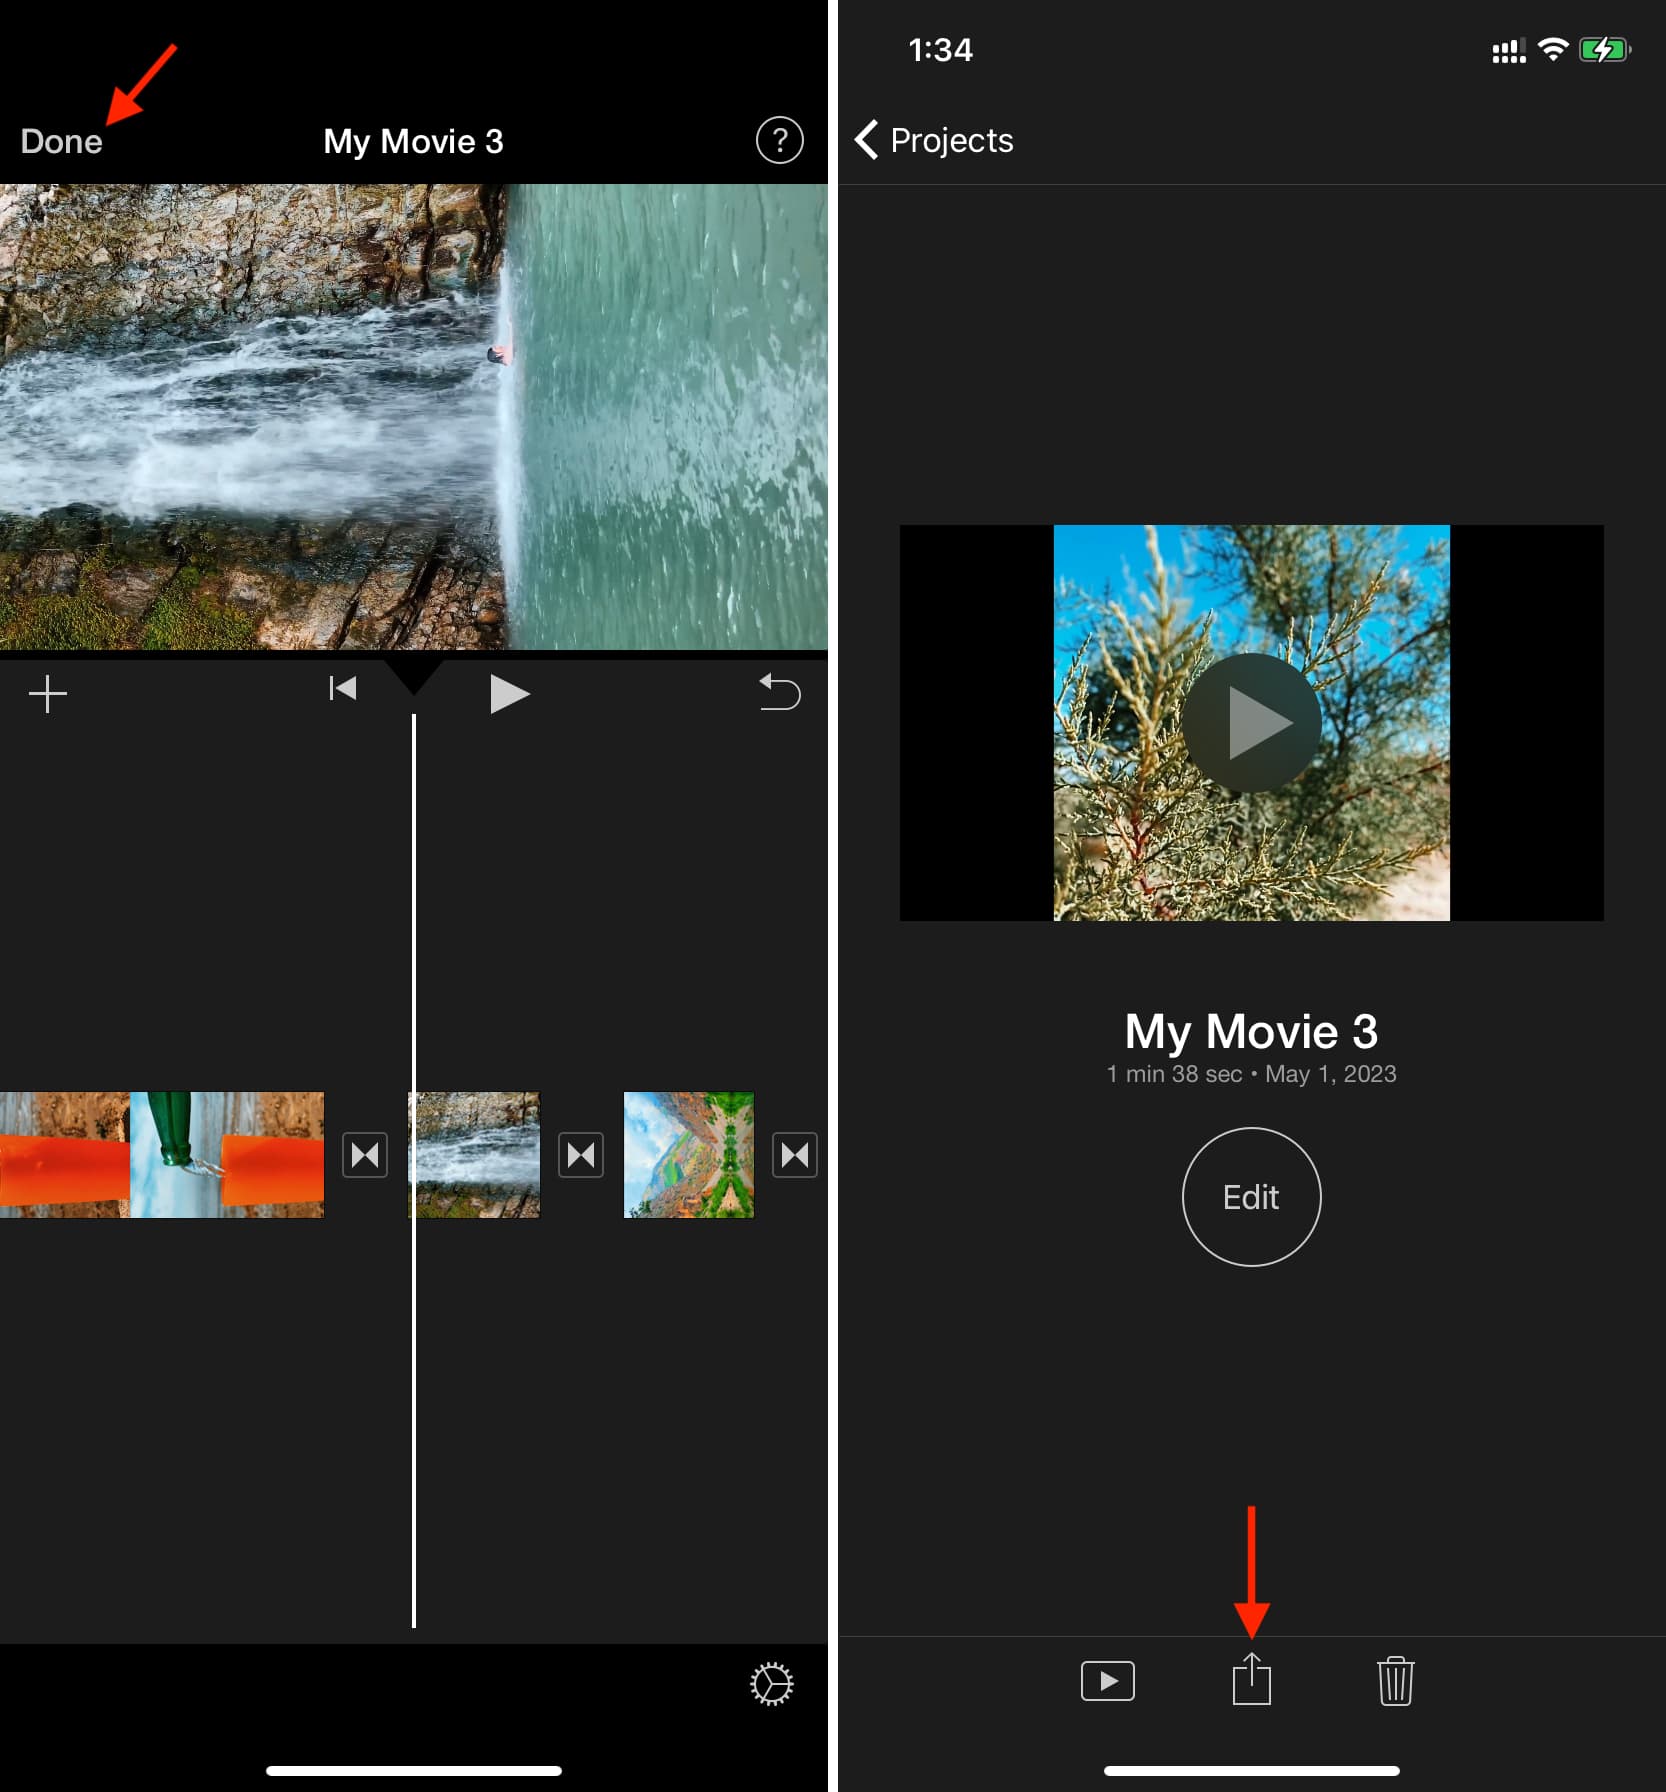
1) Open iMovie and click on File > New App Preview from the highest menu bar.
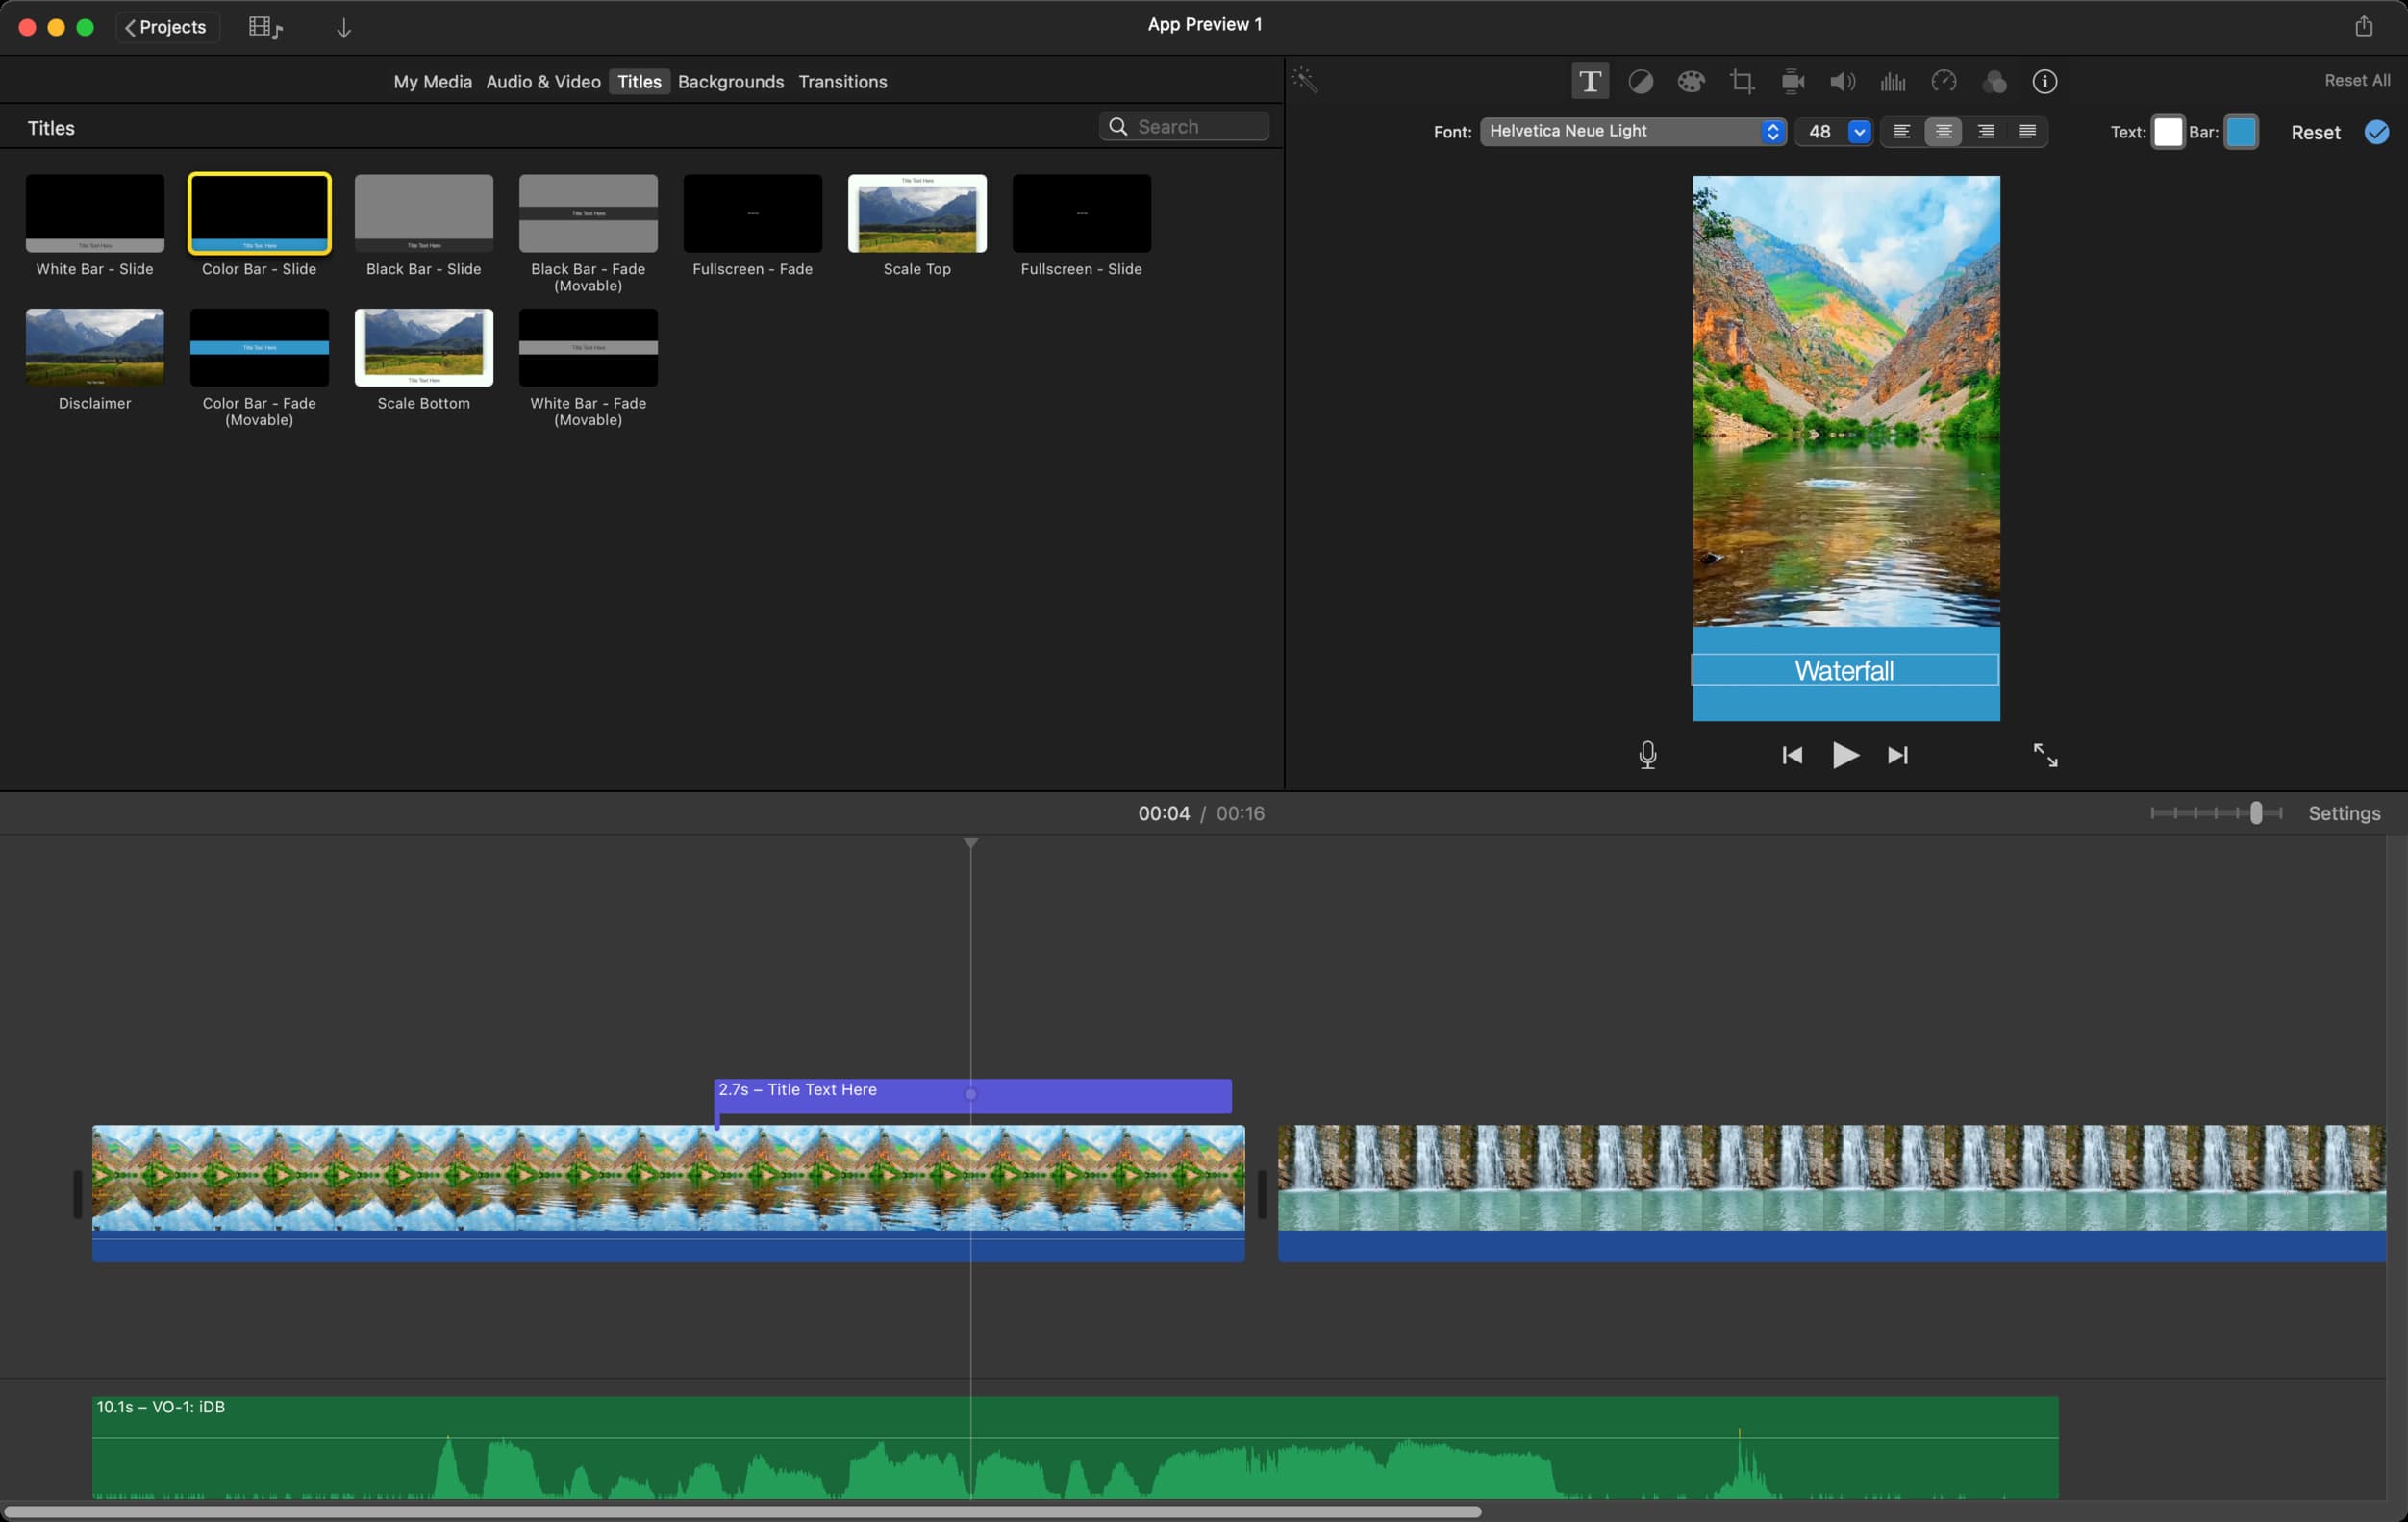
2) Add your vertical movies to the modifying timeline.
3) Edit it as you want. You can too click on Titles from the highest and choose an choice so as to add textual content.
4) Lastly, click on the share button from the highest proper and select App Preview to export the video as an MP4 file in 1080 x 1920 HD decision or use the usual Export File choice.
One other technique that entails rotating, exporting, and rotating the video once more
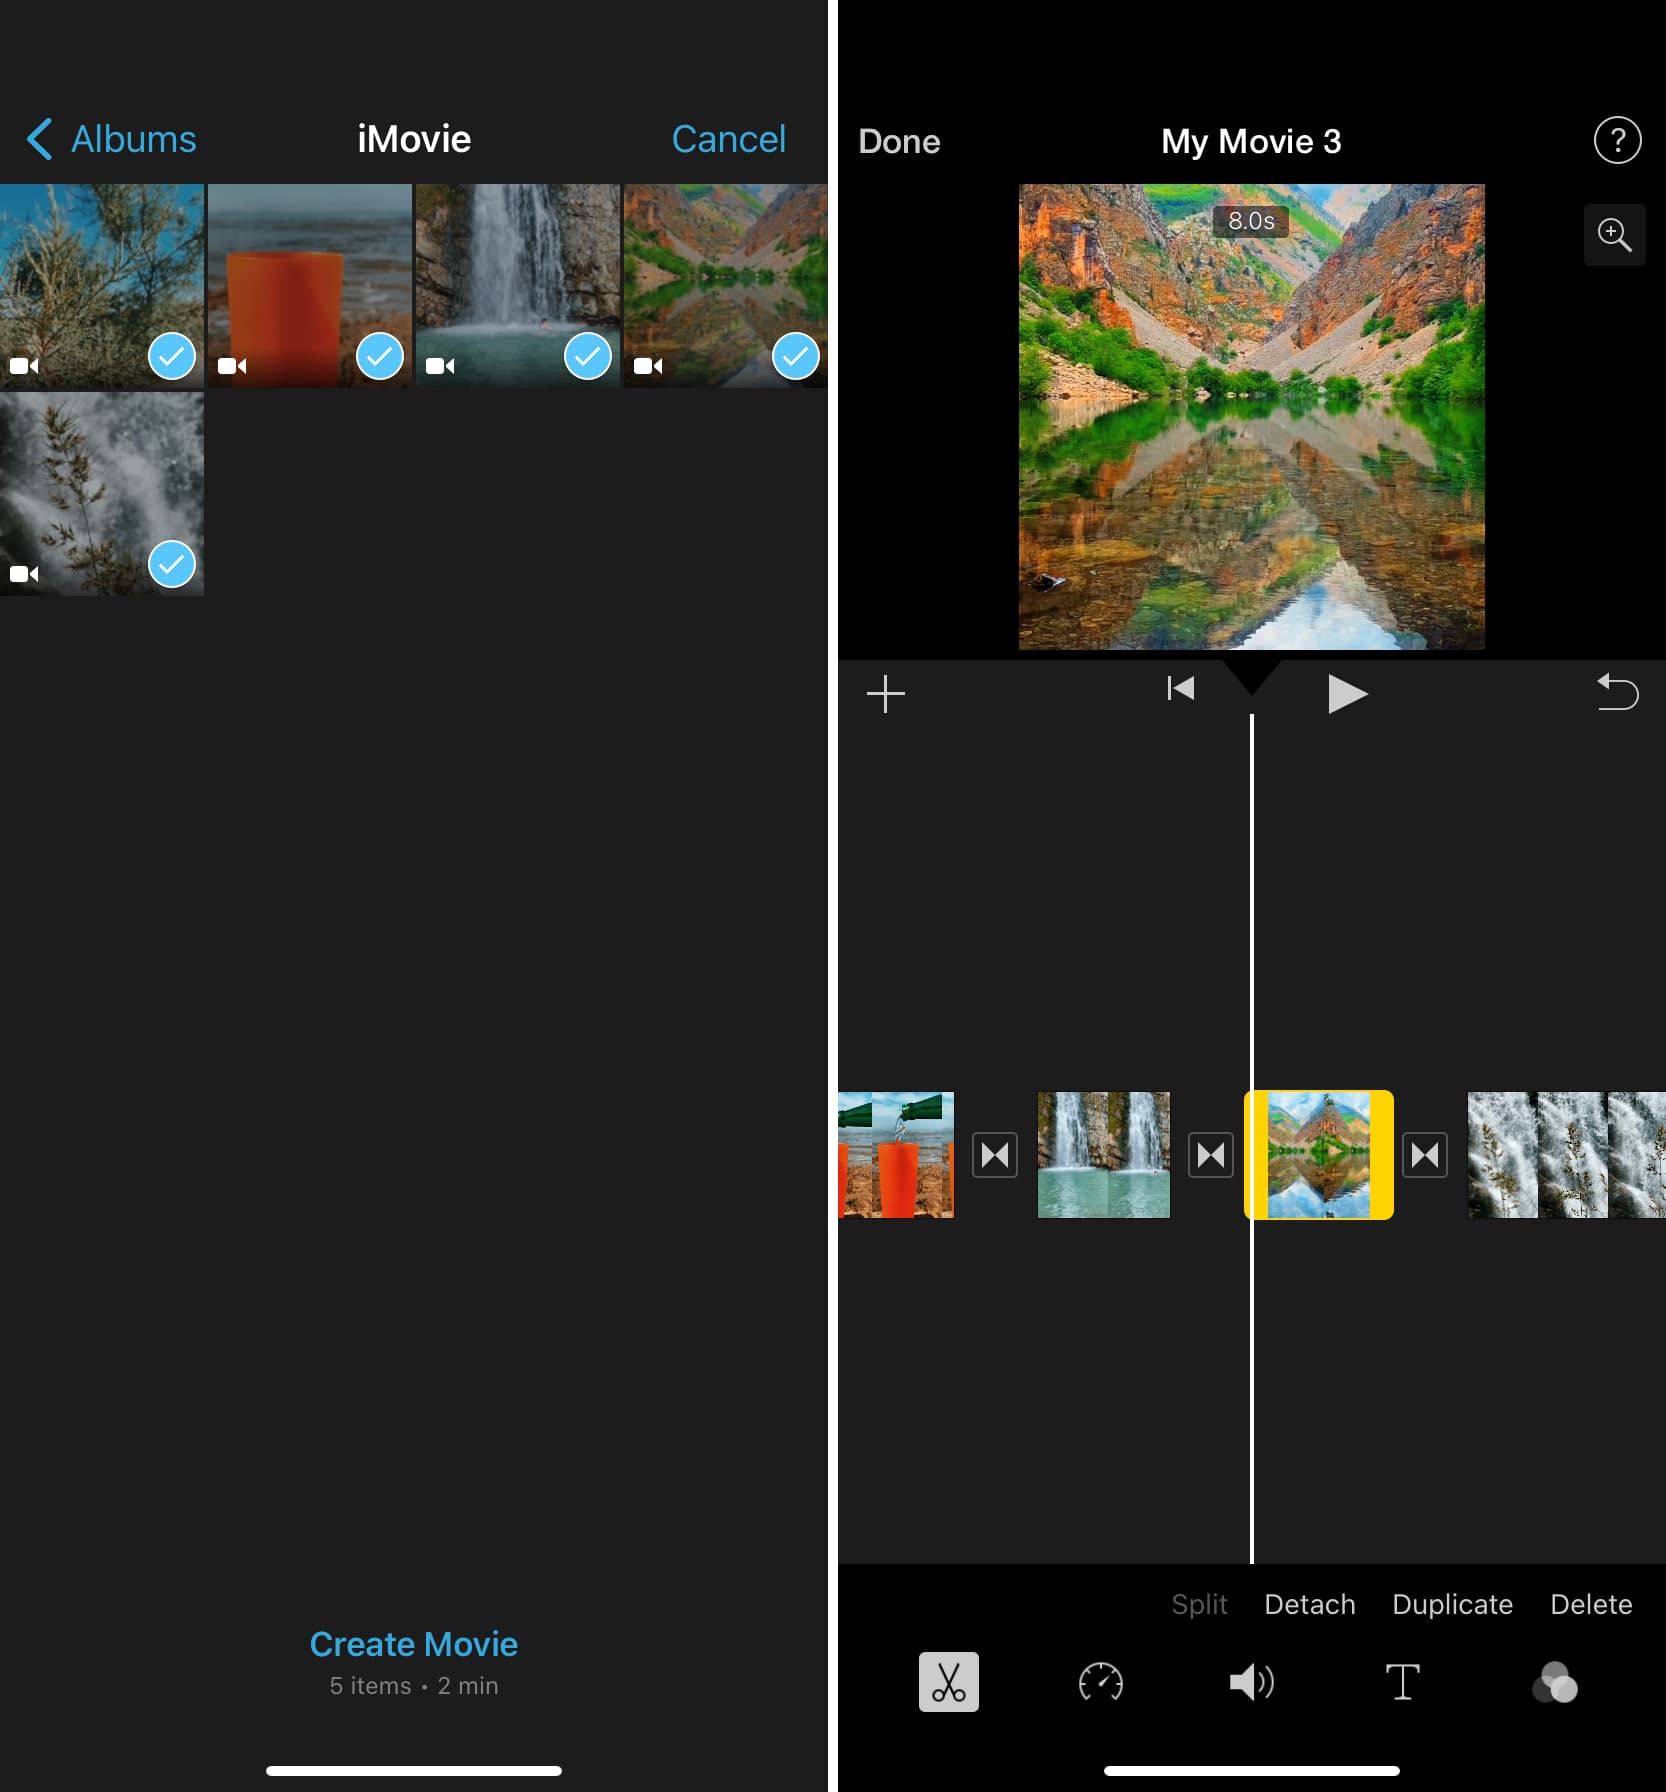
1) Create a undertaking in iMovie in your Mac and add vertical movies to the modifying timeline.
2) Choose one vertical video within the decrease modifying timeline, and it’ll have a yellow border signifying it’s chosen. Now, maintain the Command key and click on all vertical movies within the timeline to pick out them.
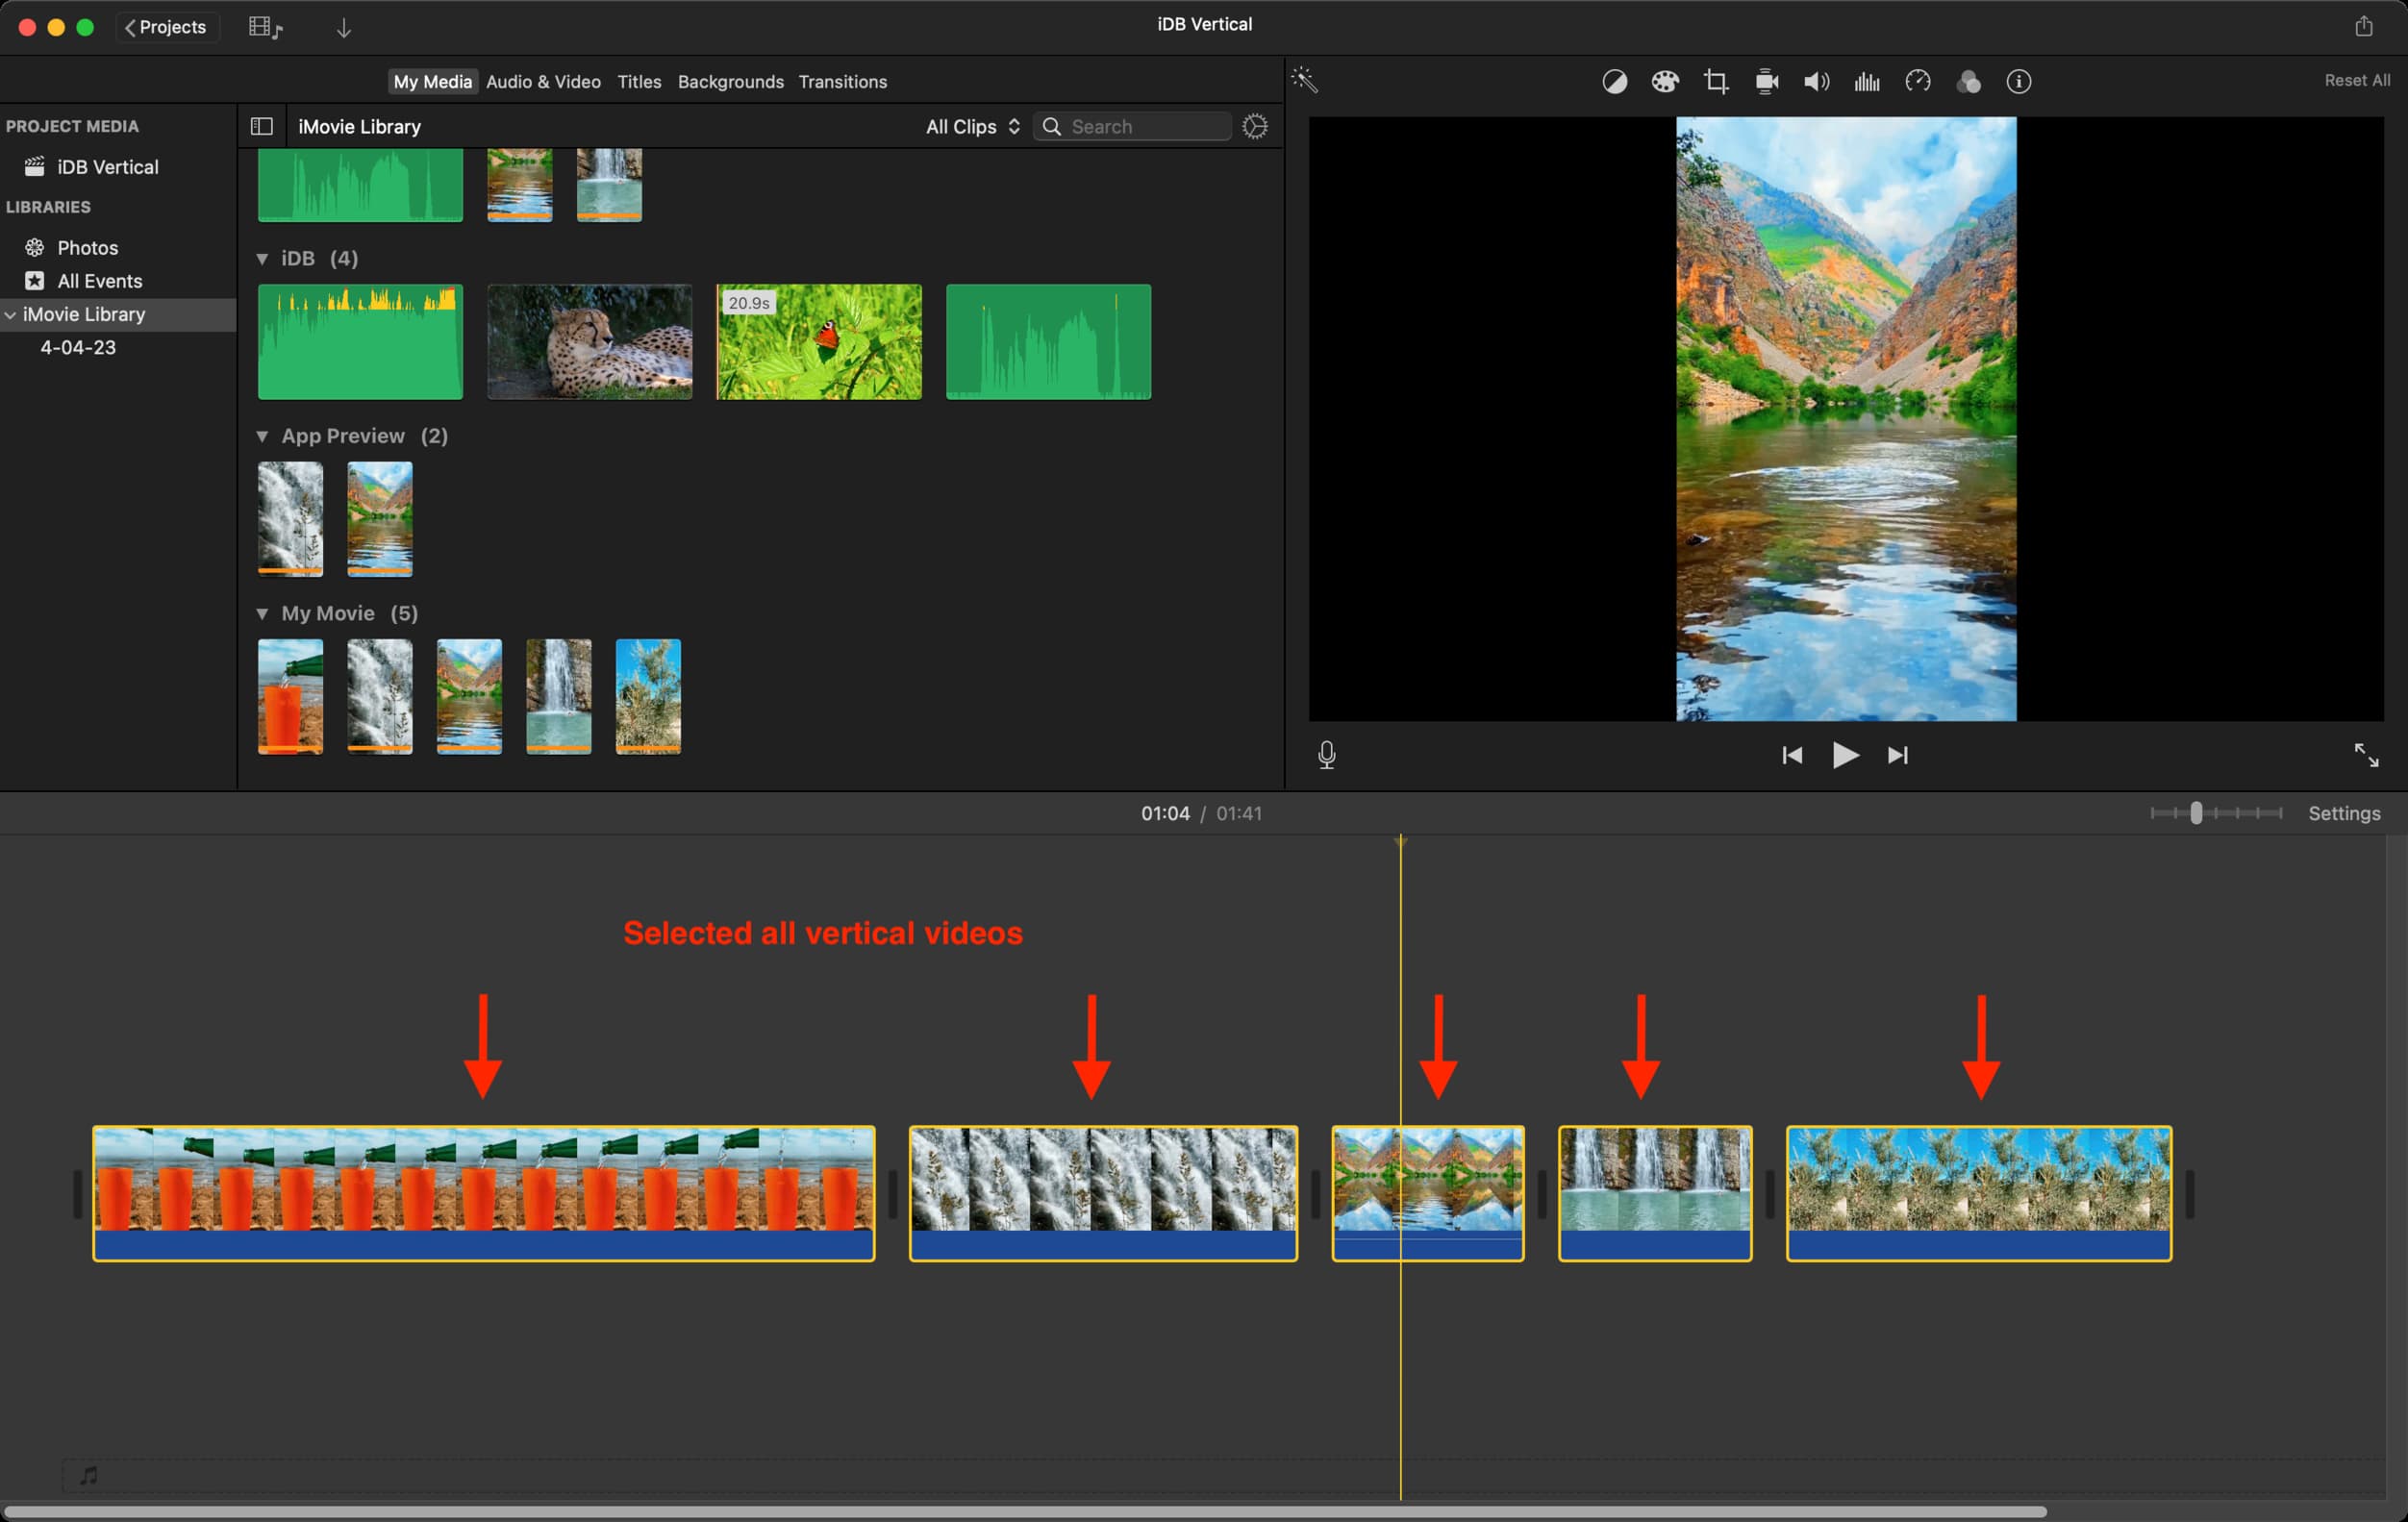
3) Click on the crop icon from the highest of the preview part.
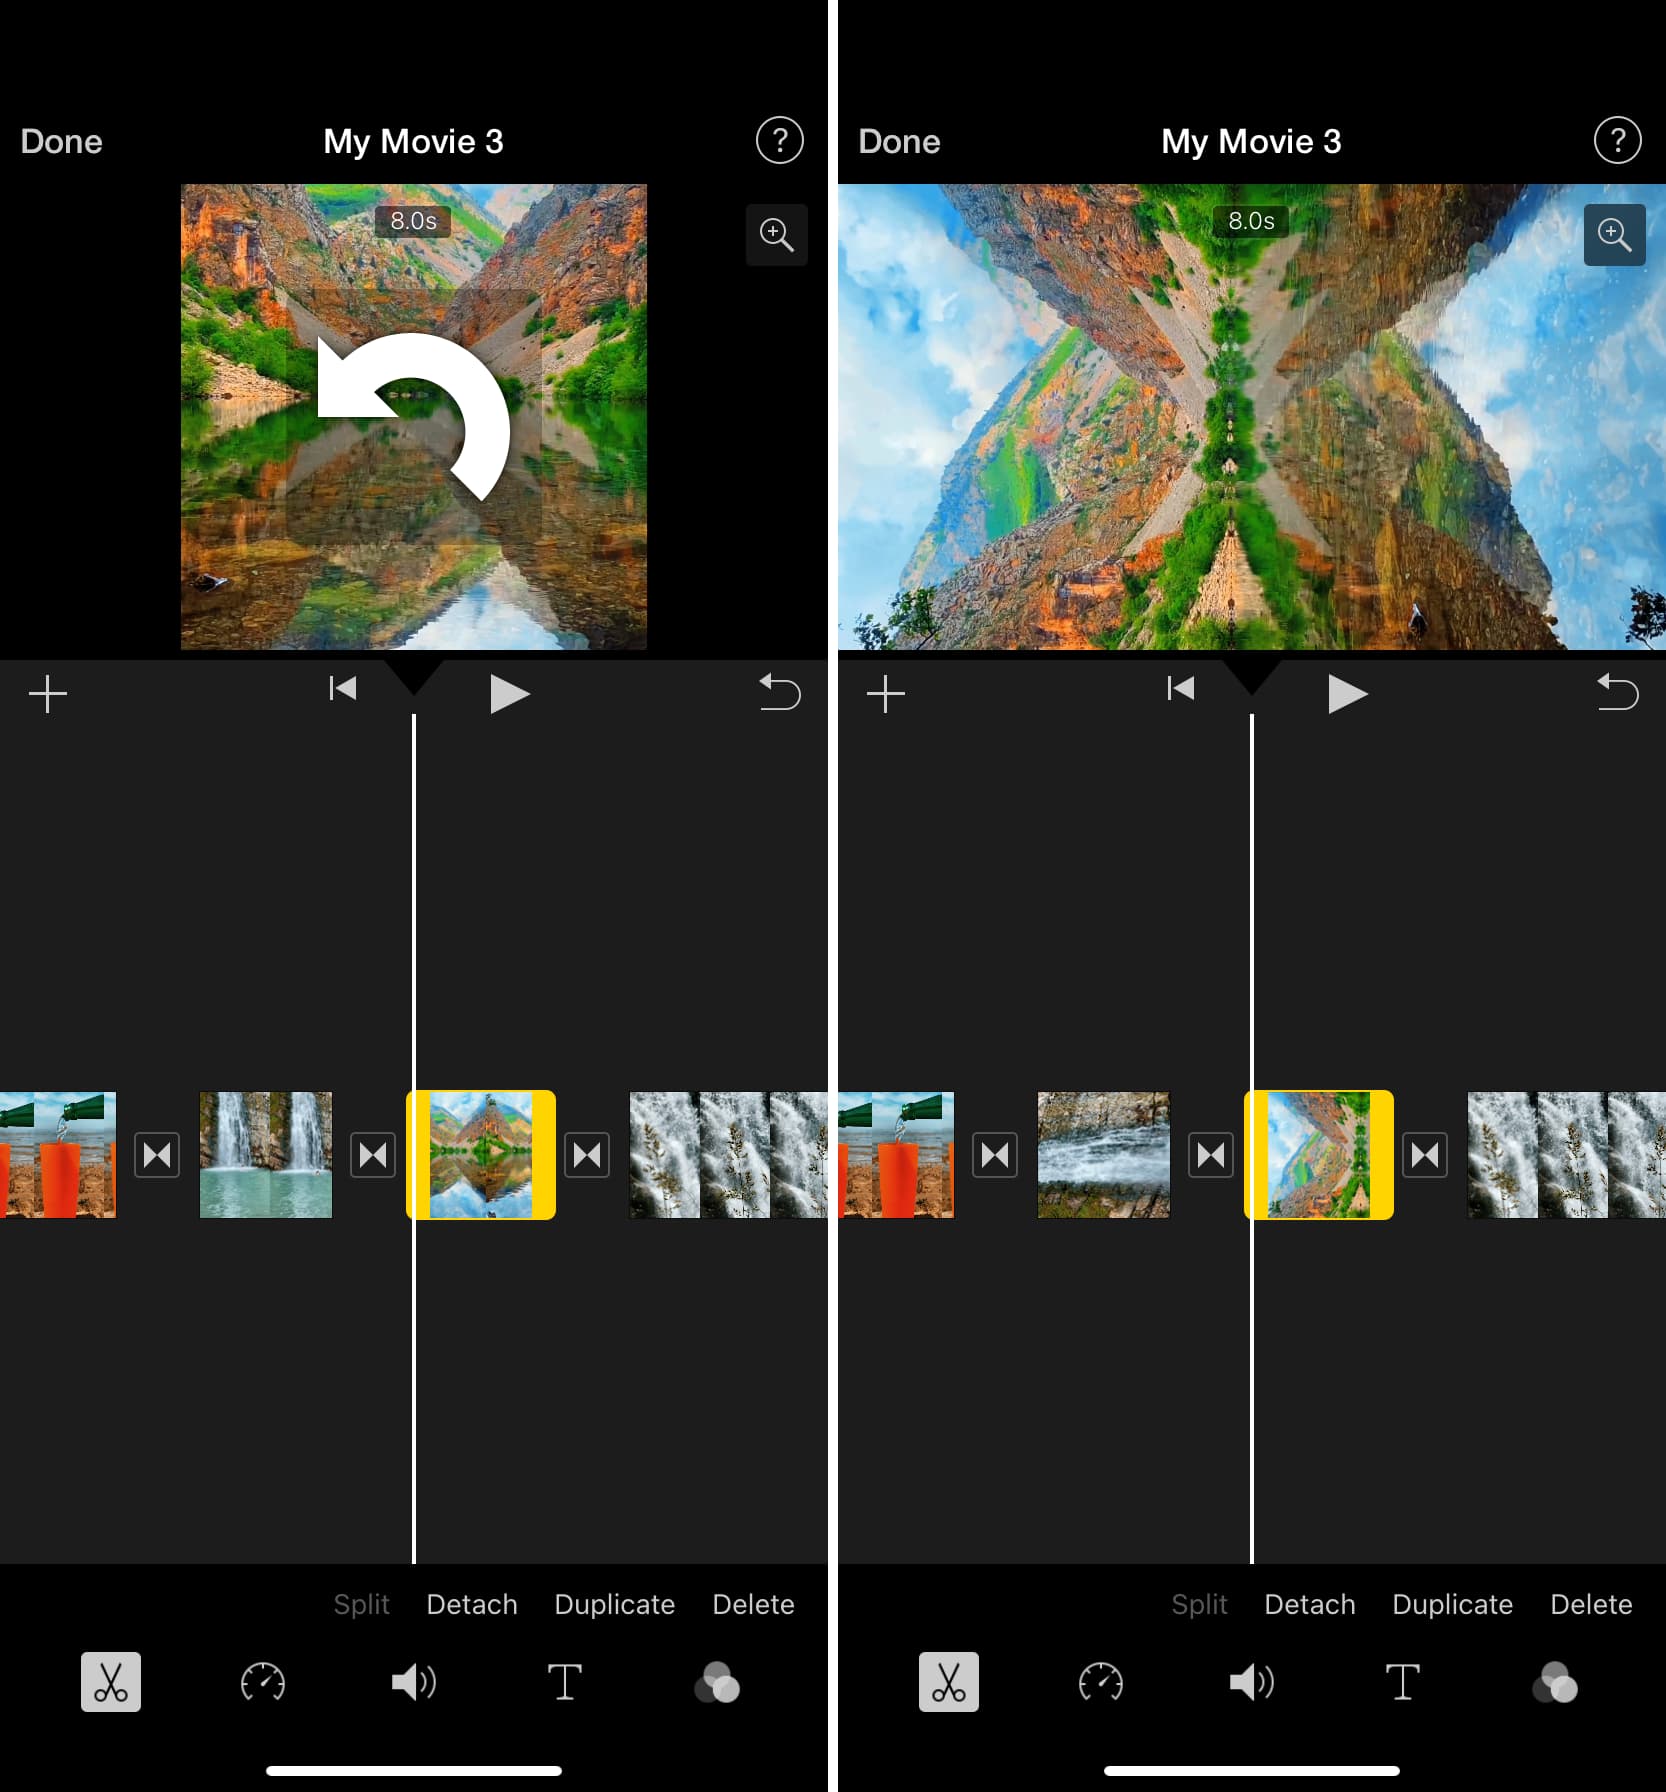
4) Comply with it by hitting the rotate button, and it’ll flip all of the vertical movies. After that, click on the little blue tick icon.
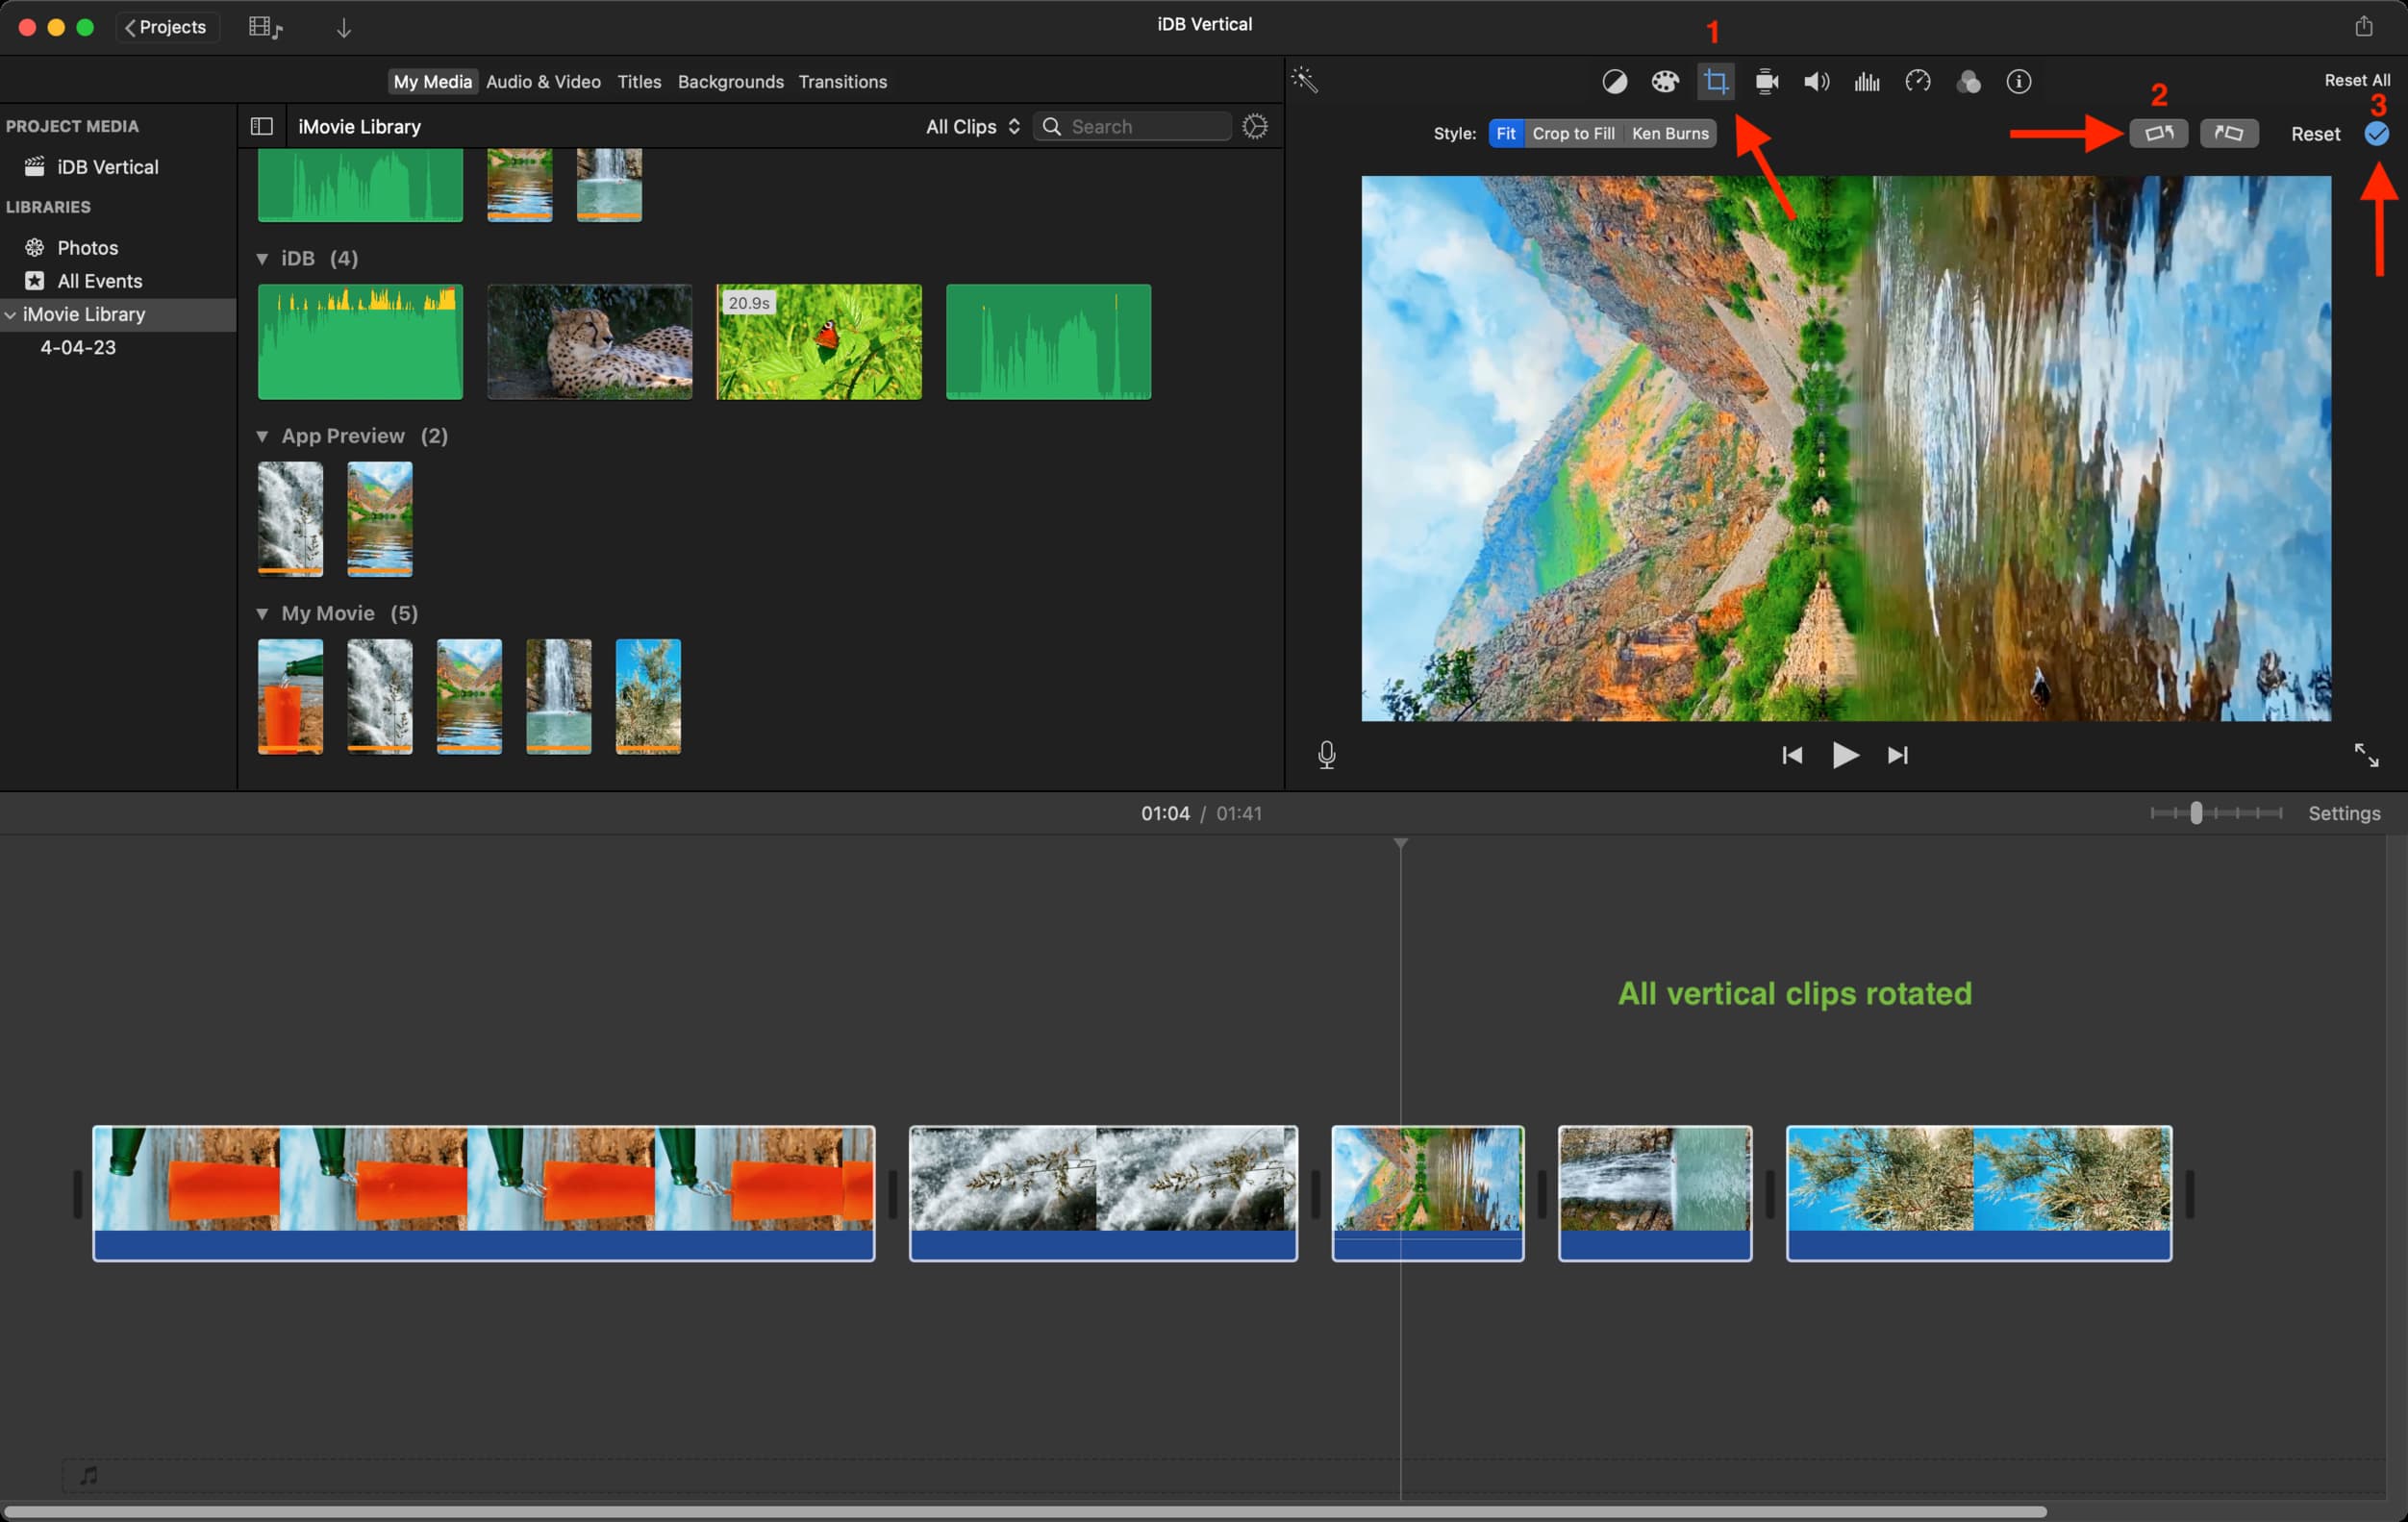
5) Elective: You may trim the person rotated clips and make different edits like including music/sound results, voiceover, and so forth.
Simply bear in mind not to click on Titles and add textual content, as they will’t be rotated and can seem in panorama orientation, thus not aligning along with your vertical movies. So as to add textual content to vertical movies, it’s best to use iOS apps like InShot. Or, add textual content immediately utilizing the social media app’s built-in instruments when posting the video to that platform.
6) With all executed, click on the share icon, export the file, and reserve it.
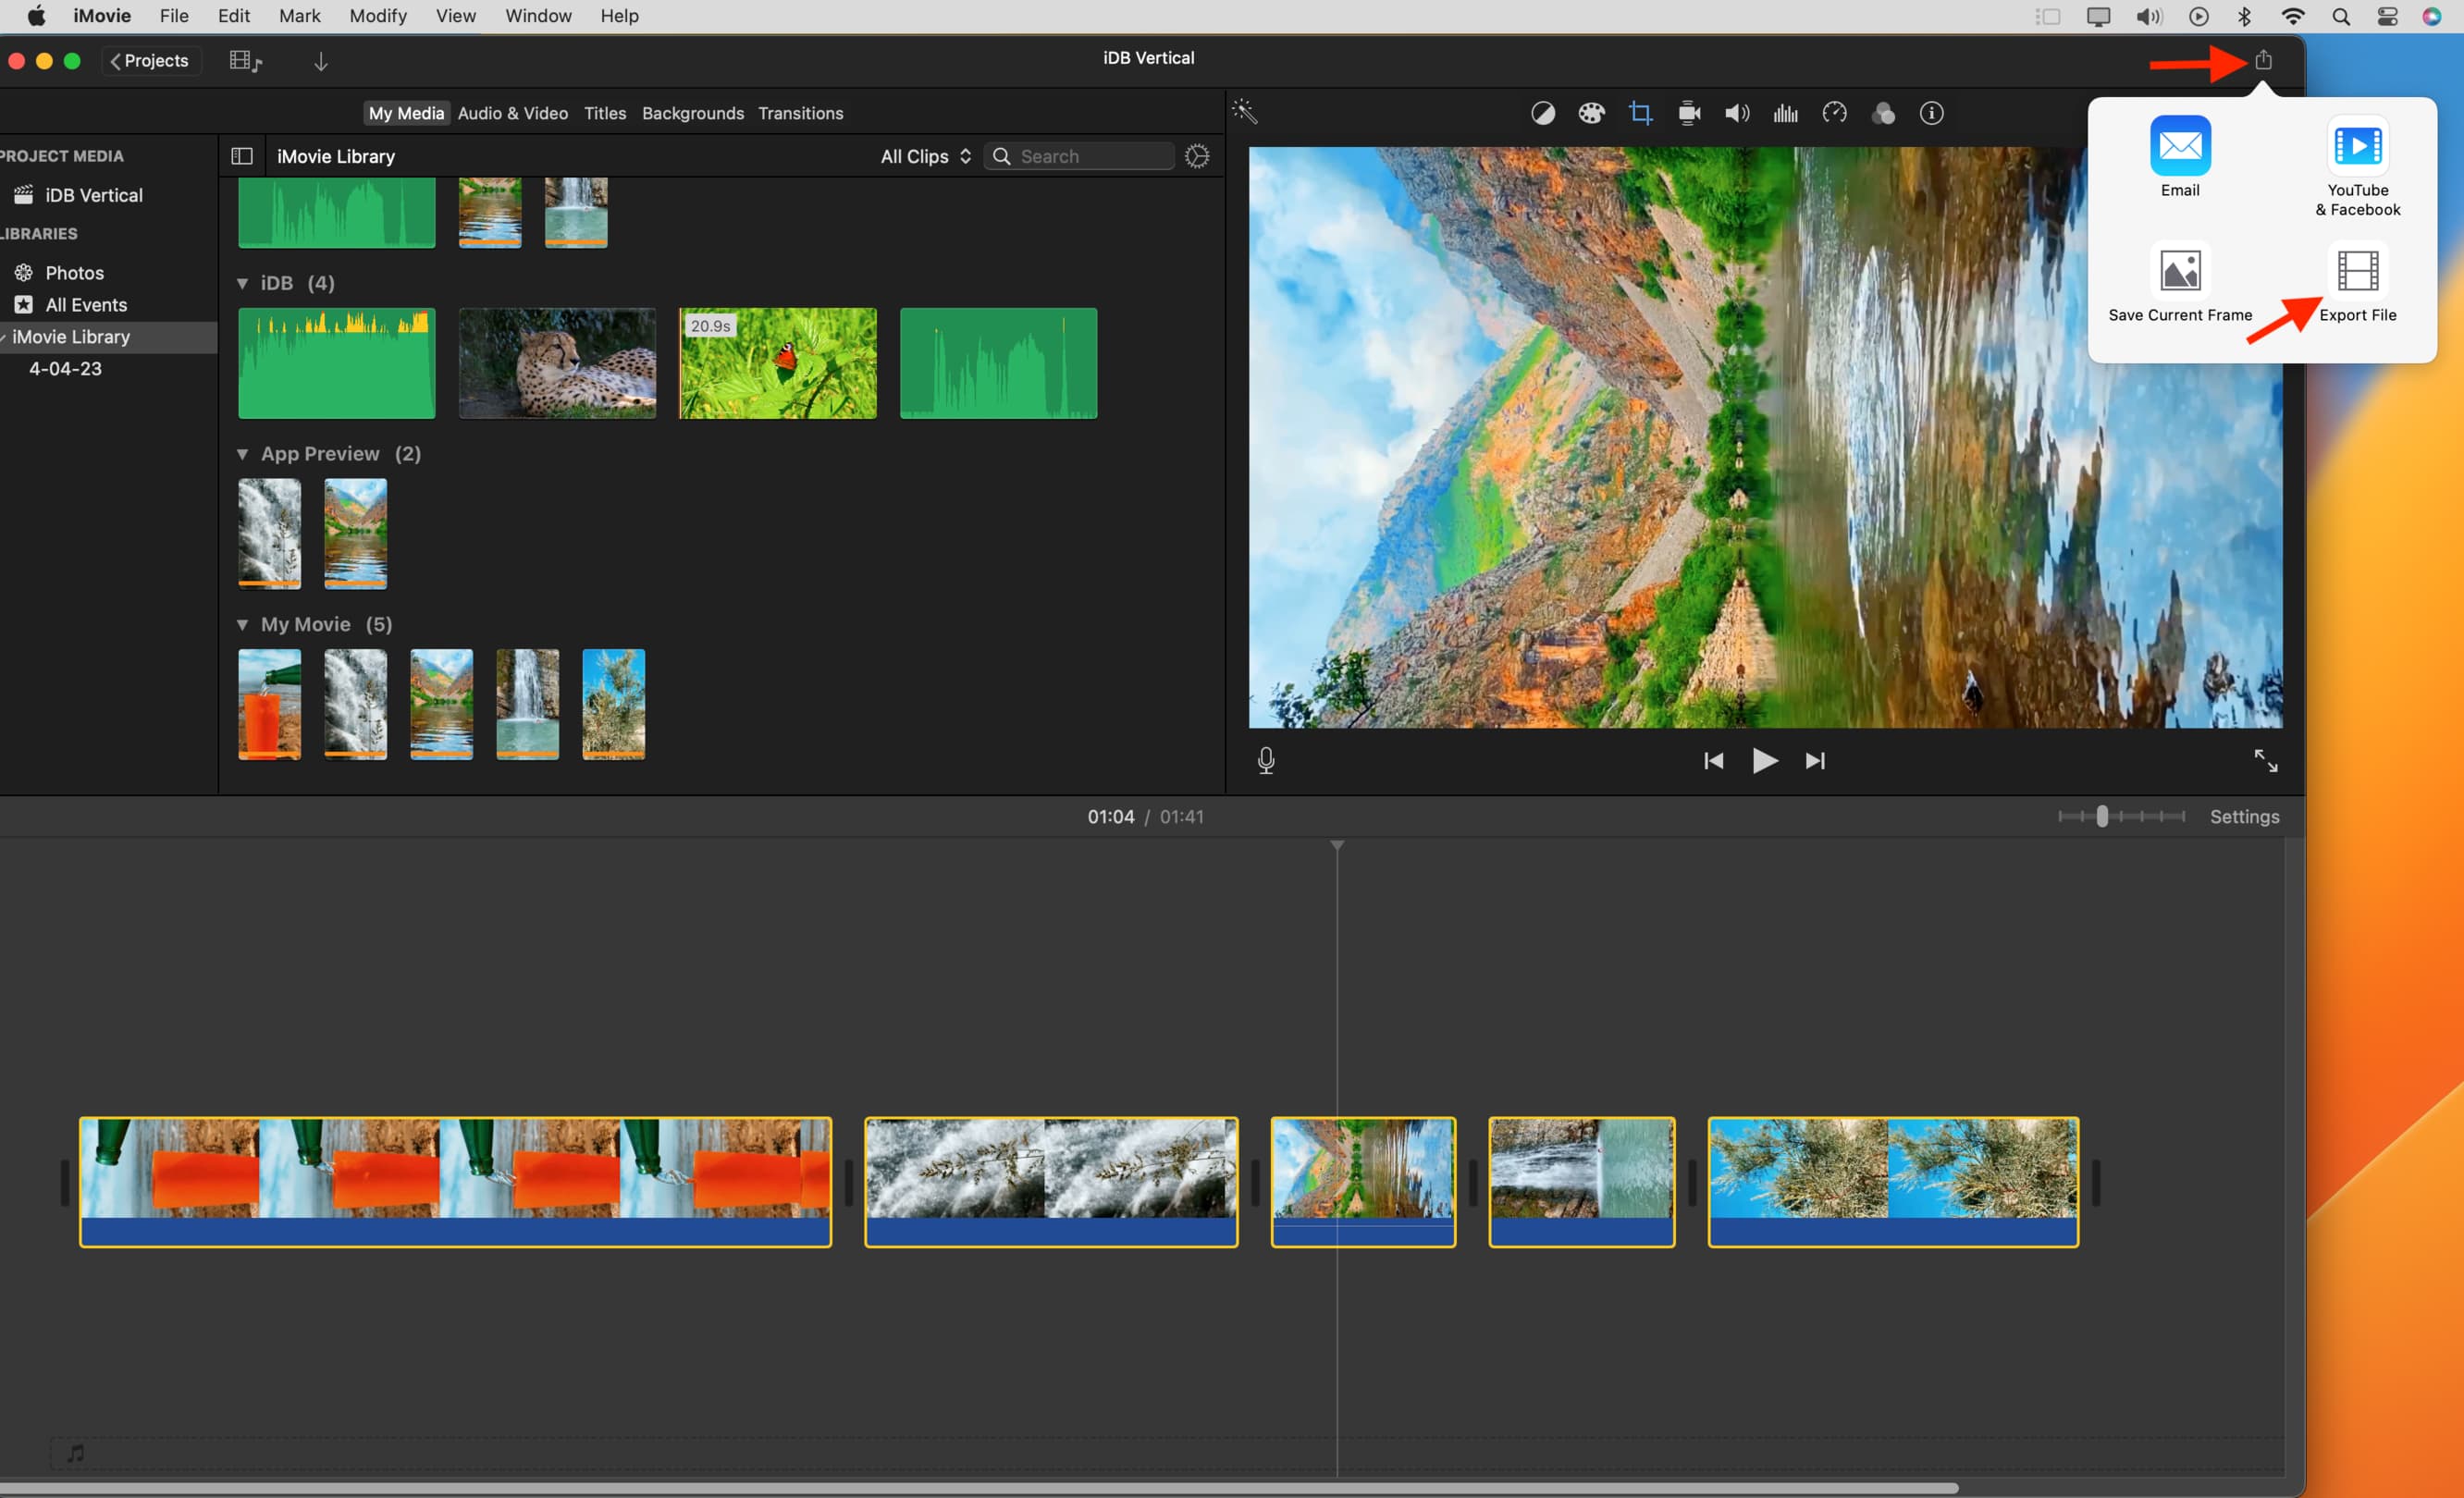
7) As soon as the file is saved to a Finder folder, choose it and hit the area bar in your keyboard. Doing so will open the video in a popup participant. From right here, click on the rotate button to make the video vertical.
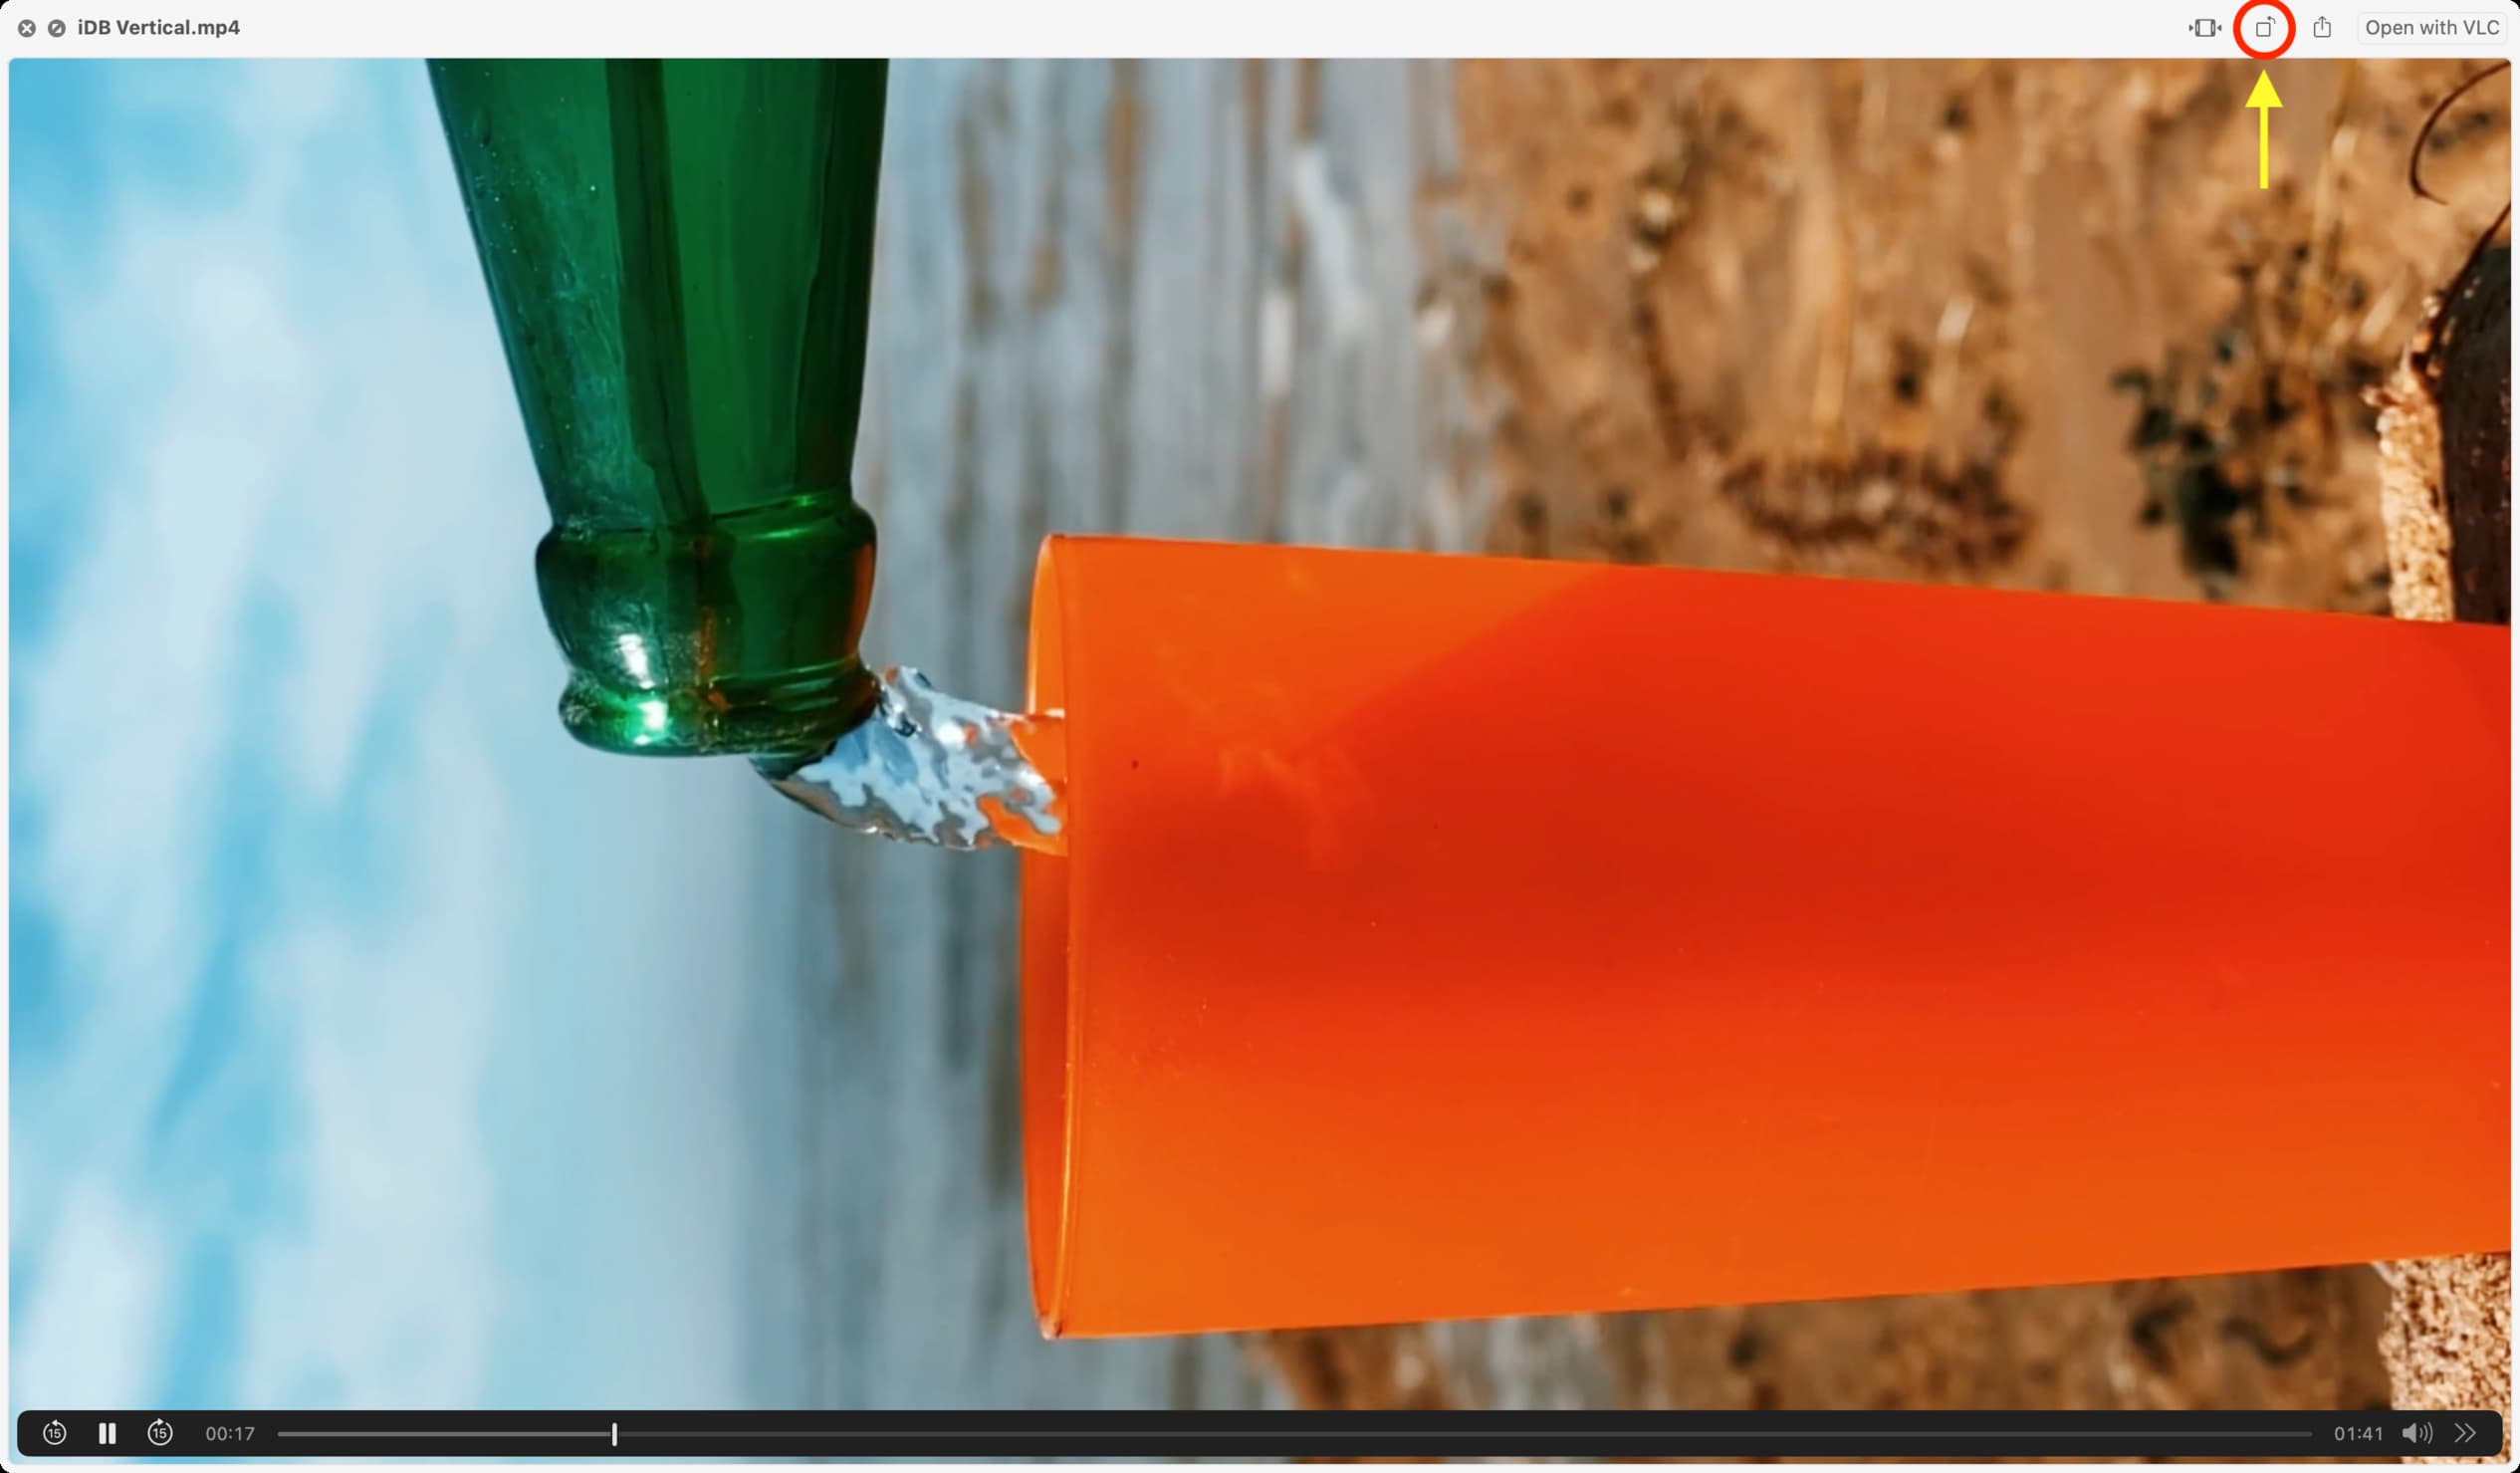
Lastly, hit the area bar once more, and it’ll save the modifications.
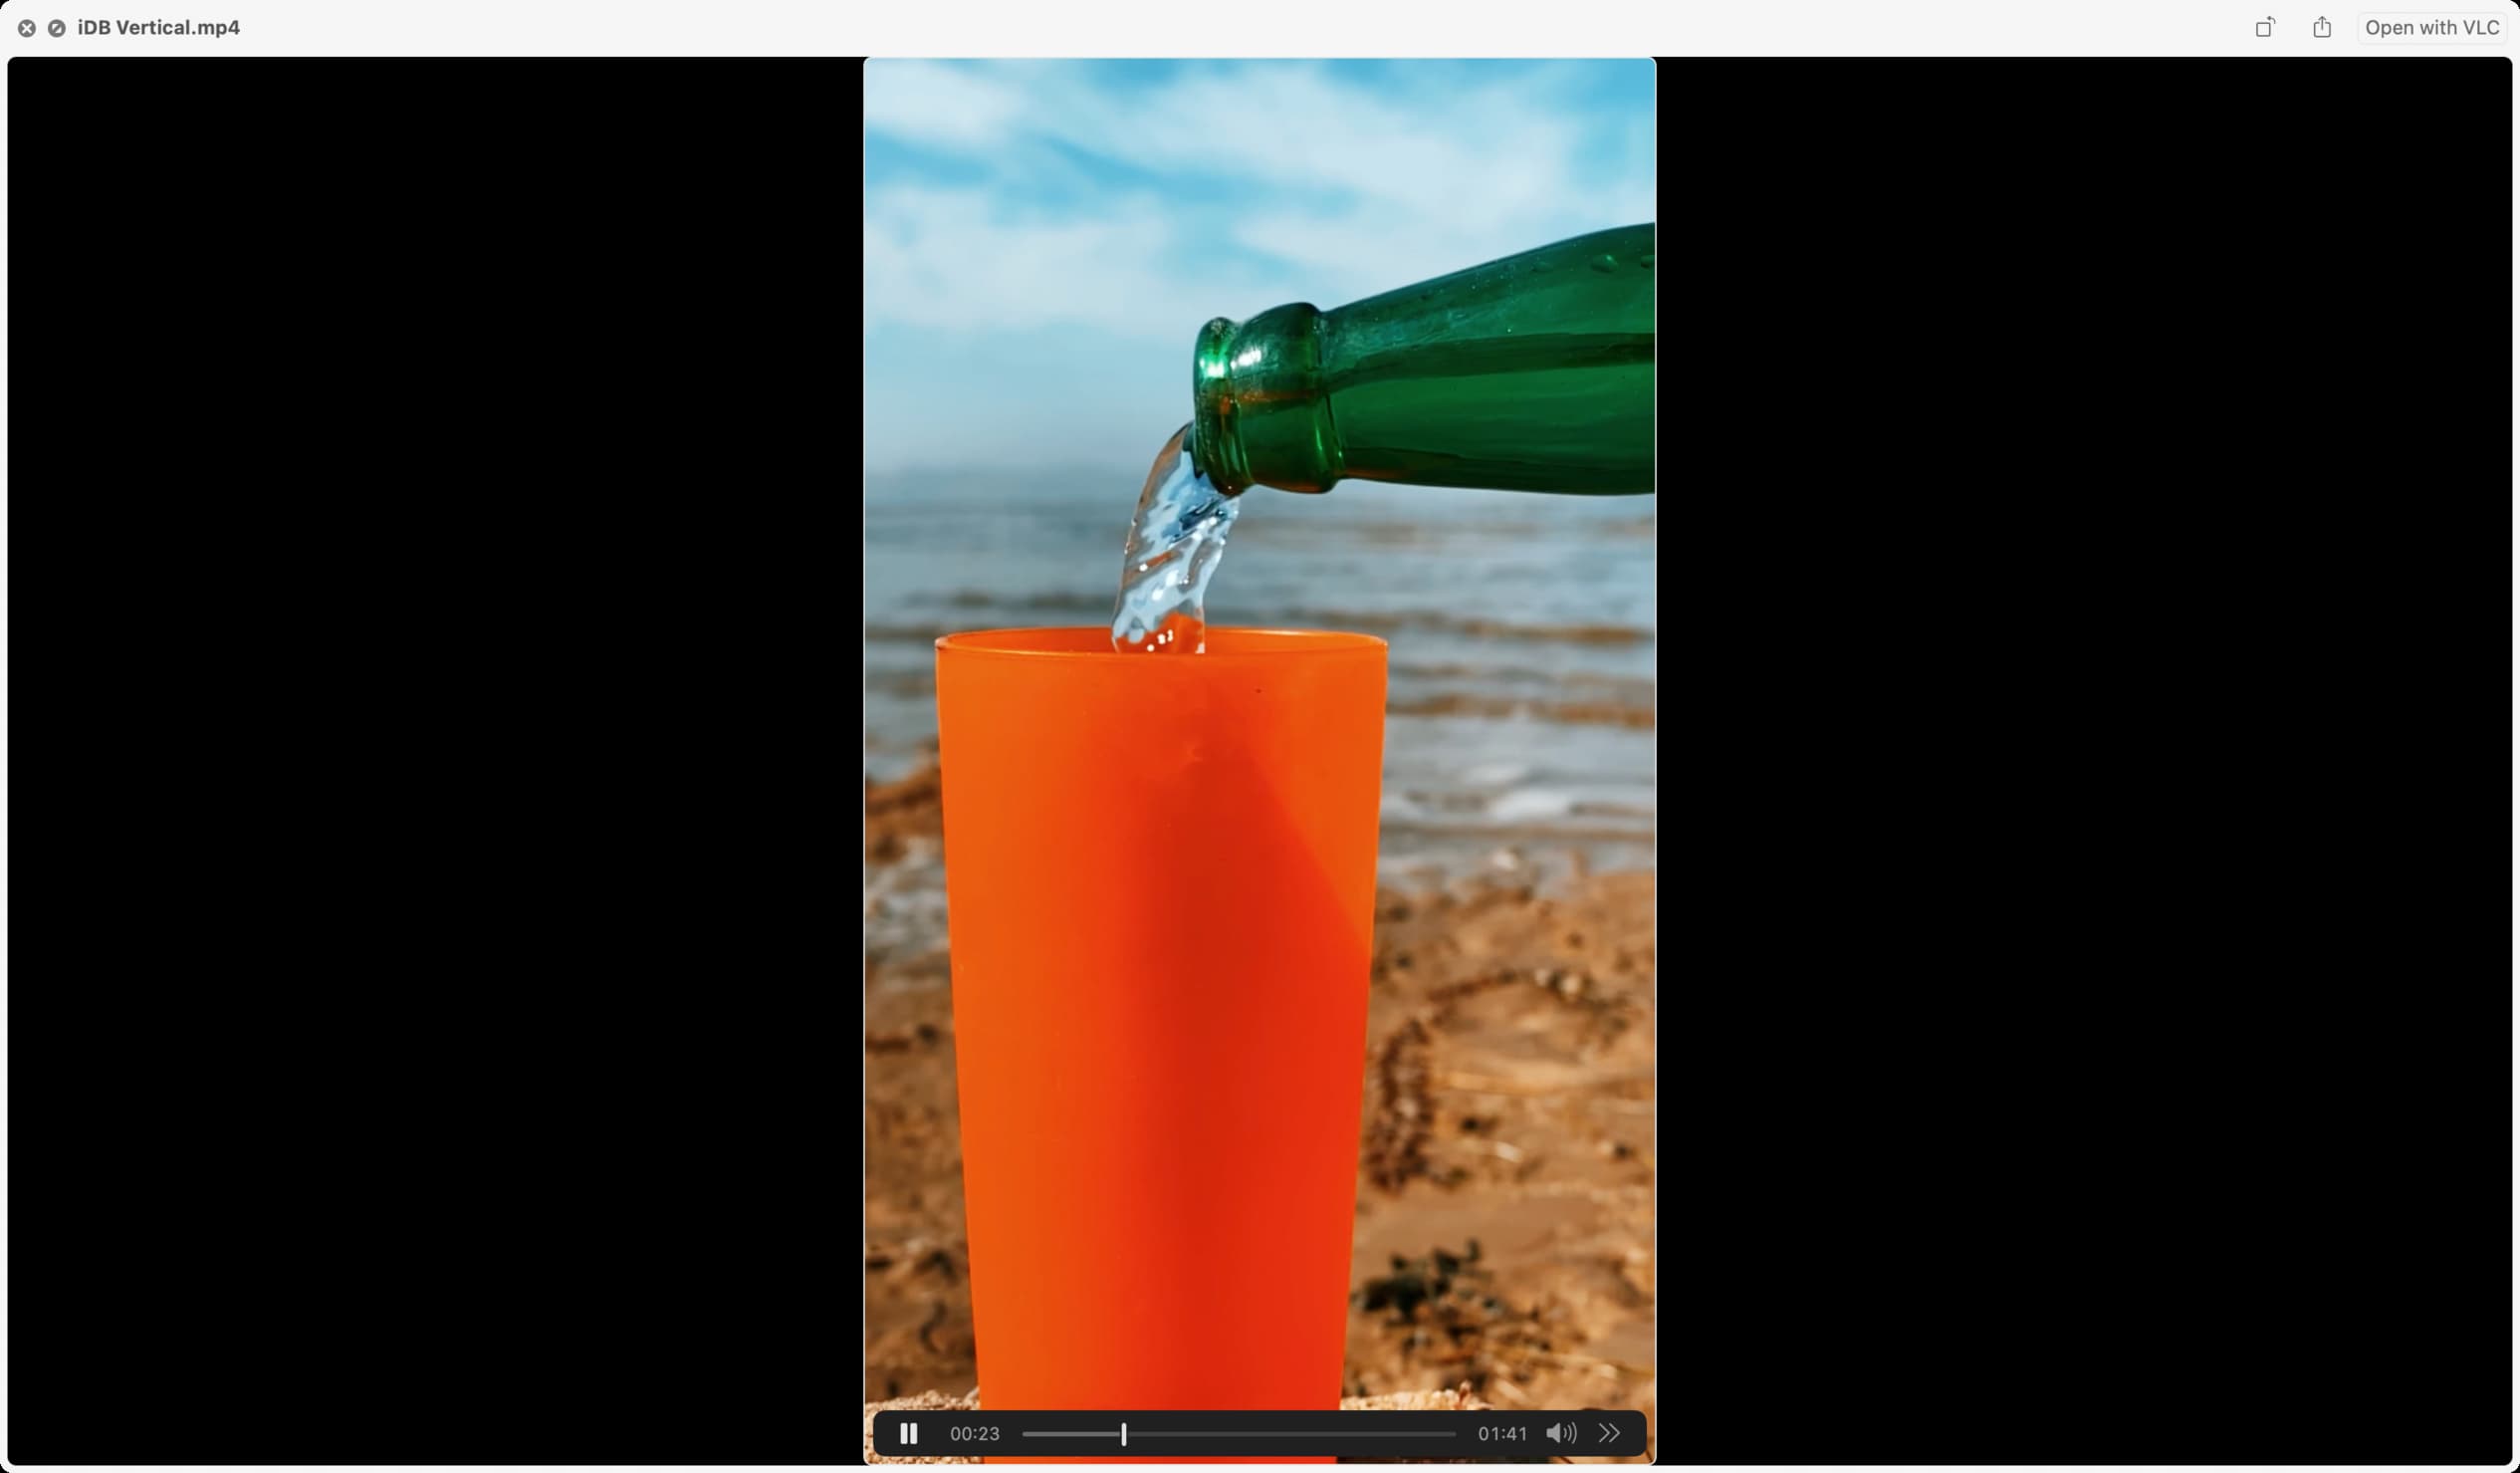
You’ve your vertical video now. While you play it or AirDrop it to your iPhone, it’ll have its vertical look with out black bars on the perimeters. You may preserve it within the Images app or publish it on social media.
Create video with out black bars in iMovie for iPhone or iPad
Sadly, there isn’t a simple solution to create a vertical video with out black bars in iMovie for iPhone and iPad. As a substitute, you’ll have to soar via a few hoops to get the job executed.
The primary precept of working with vertical movies in iMovie on iOS is just like the second technique talked about above. All it’s a must to do is rotate the video on the iMovie modifying timeline > make your required edits > export it > after which rotate it again to vertical orientation:
1) Open iMovie in your iPhone or iPad, faucet Begin New Venture, and select Film.
2) Now, choose your vertical movies and Create Film.
As soon as the vertical movies are added to iMovie, you’ll discover the empty black bars on the left and proper sides of the video on the highest preview display. We have now to eradicate this.
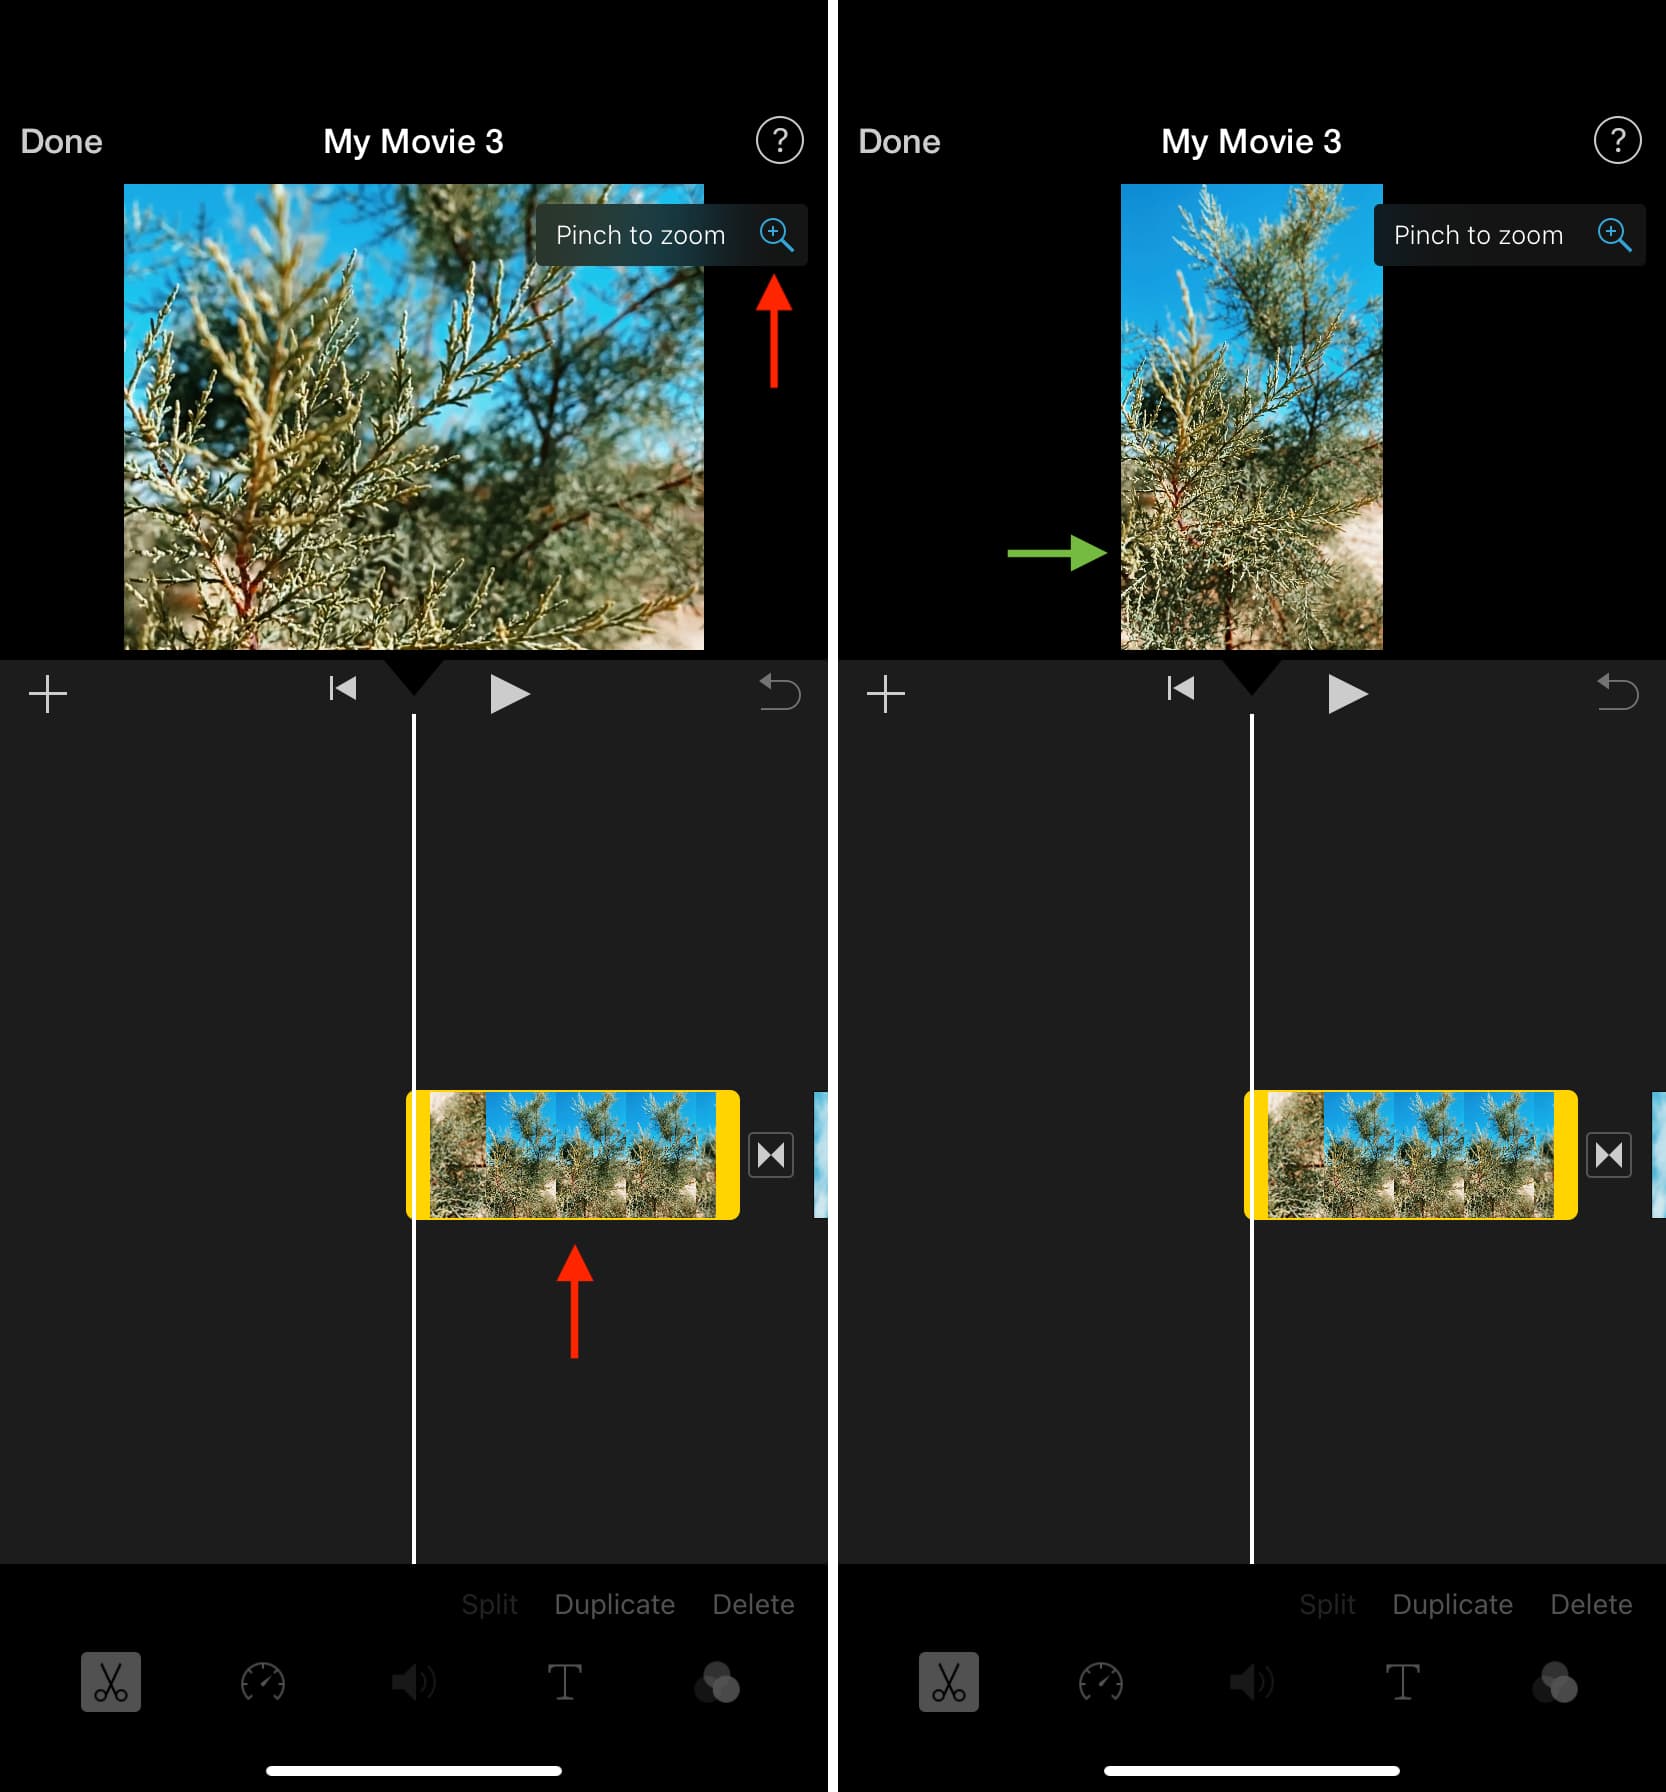
3) Faucet a video within the timeline to pick out it. Now, place two fingers on the highest preview and rotate your fingers counterclockwise (anticlockwise). You will note a white curved arrow icon signifying rotation. Attempt once more for those who don’t see this arrow.
Notice: If the vertical video seems zoomed with the highest and decrease elements cropped, faucet the video within the timeline. After that, faucet the plus icon from the highest after which pinch in utilizing two fingers to have all the skinny vertical video on the preview.
4) Choose different vertical clips in your iMovie timeline and comply with the above steps to rotate them.
5) Elective: Trim, add sound, change playback velocity, and make different modifying modifications if required.
6) Lastly, faucet Performed > share icon > Save Video to export this video within the acquainted Images app.
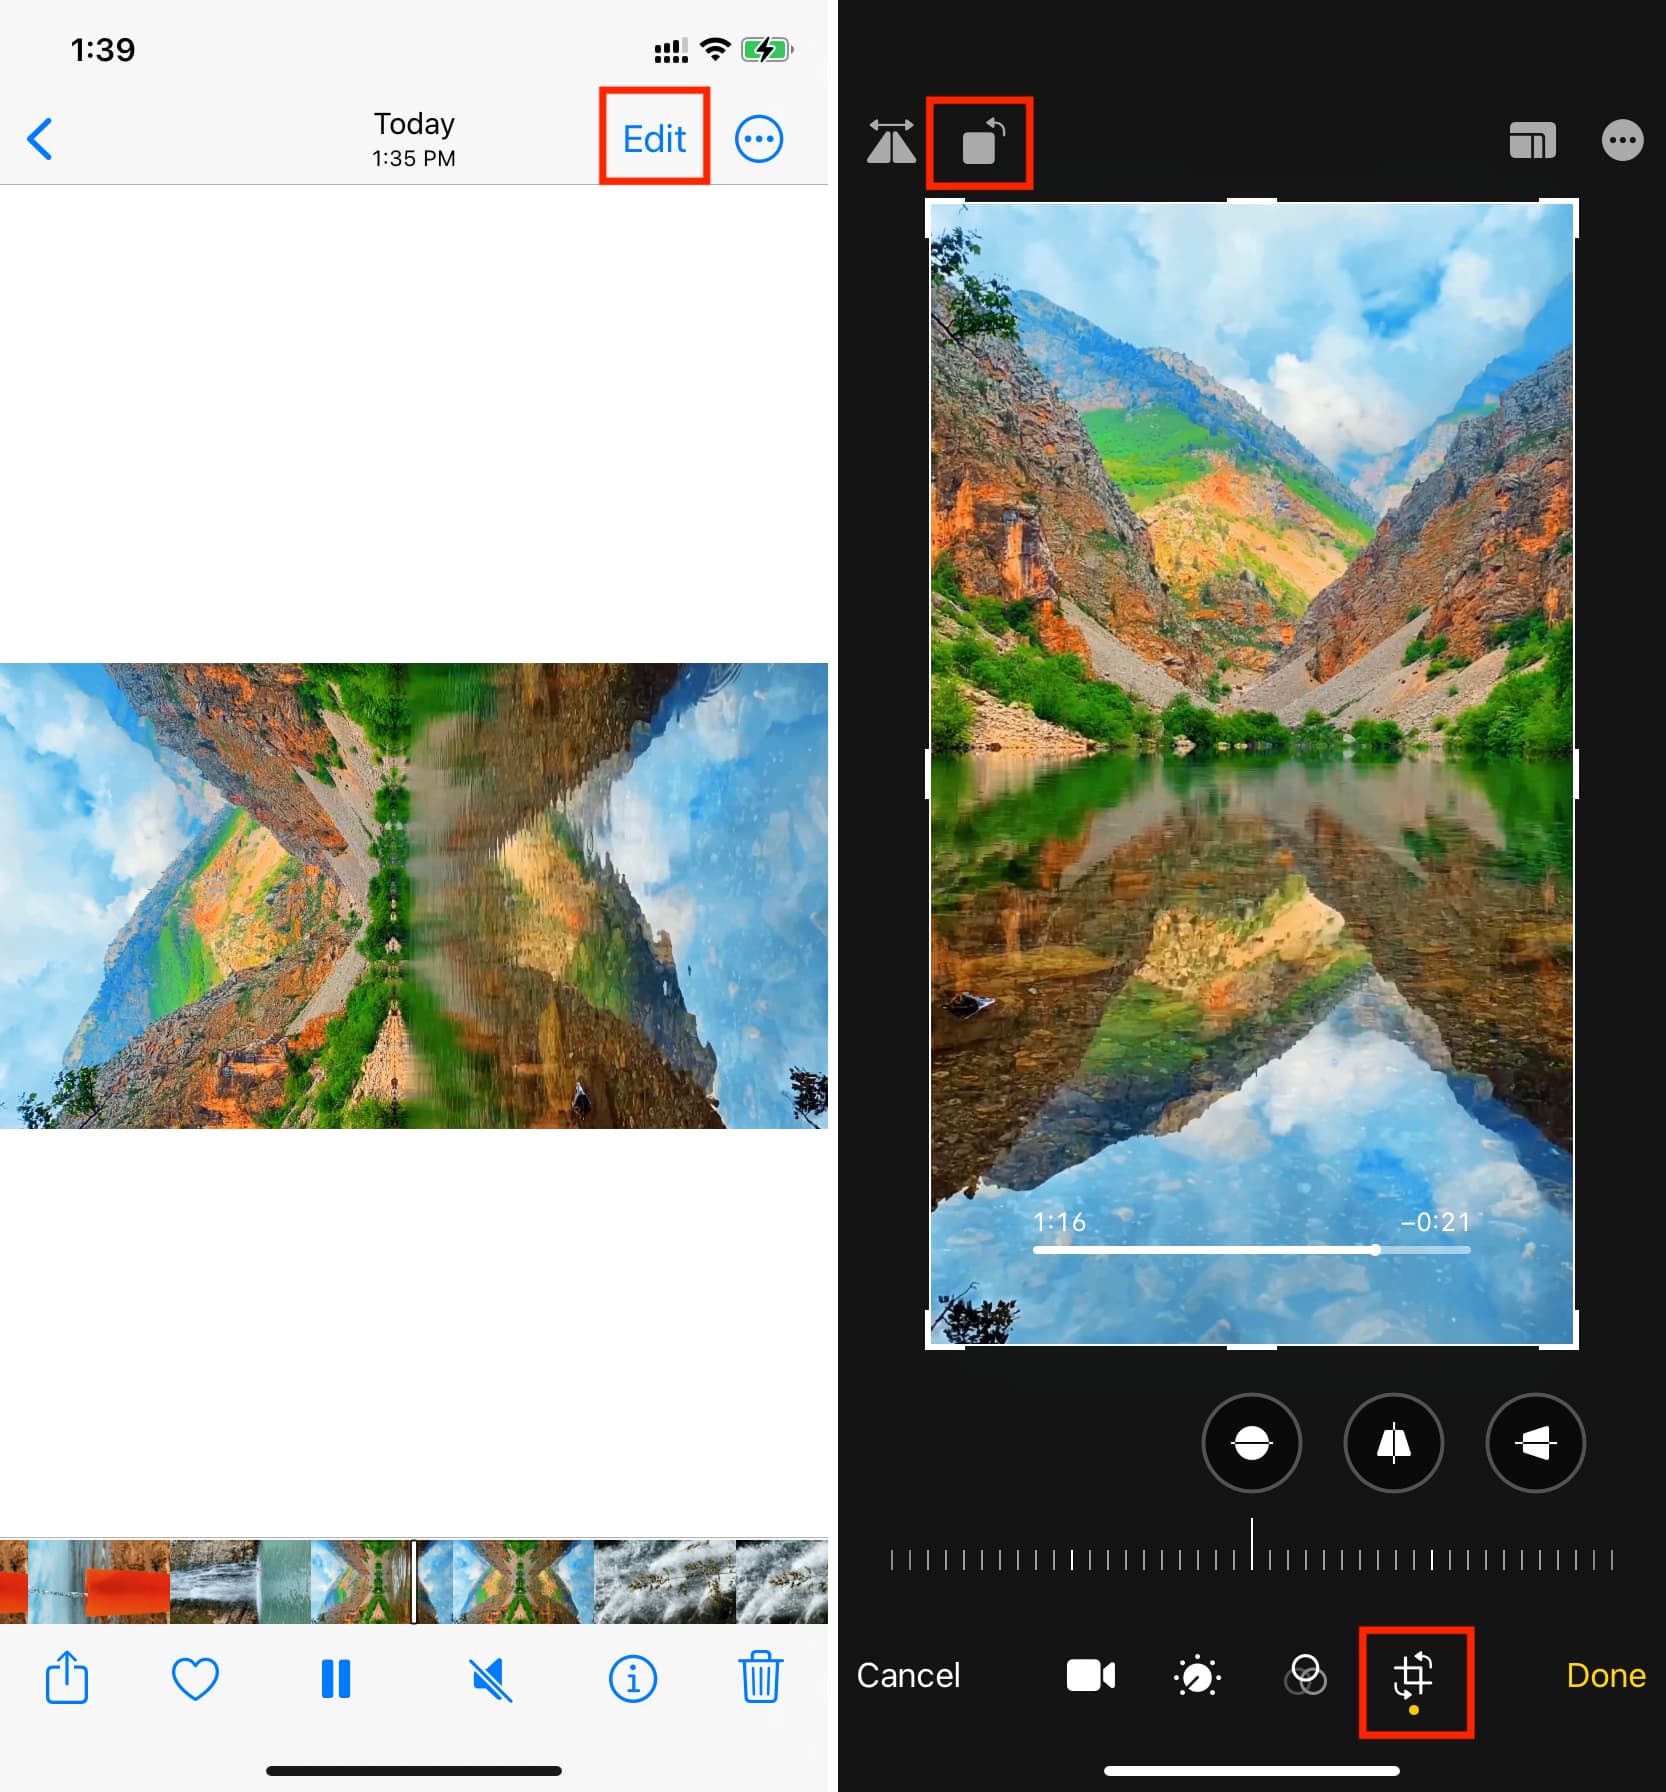
7) Go contained in the Images app and open this video. Subsequent, faucet Edit.
8) Faucet the crop software icon and use the rotate button to make this video vertical once more.
9) Lastly, faucet Performed to reserve it.
You’ve your vertically edited video able to be posted in your favourite social media platform!

Take away vertical black bars from an present video
A unique method you possibly can take is to edit your video as you’d usually do in iMovie and export it. The panorama video can have empty black bars, which you’ll eliminate utilizing the Images app in your Mac, iPhone, or iPad.
On Mac
1) Open the video contained in the Images app. The best approach is to launch the Images app and drop the video from Finder to the Images app window.
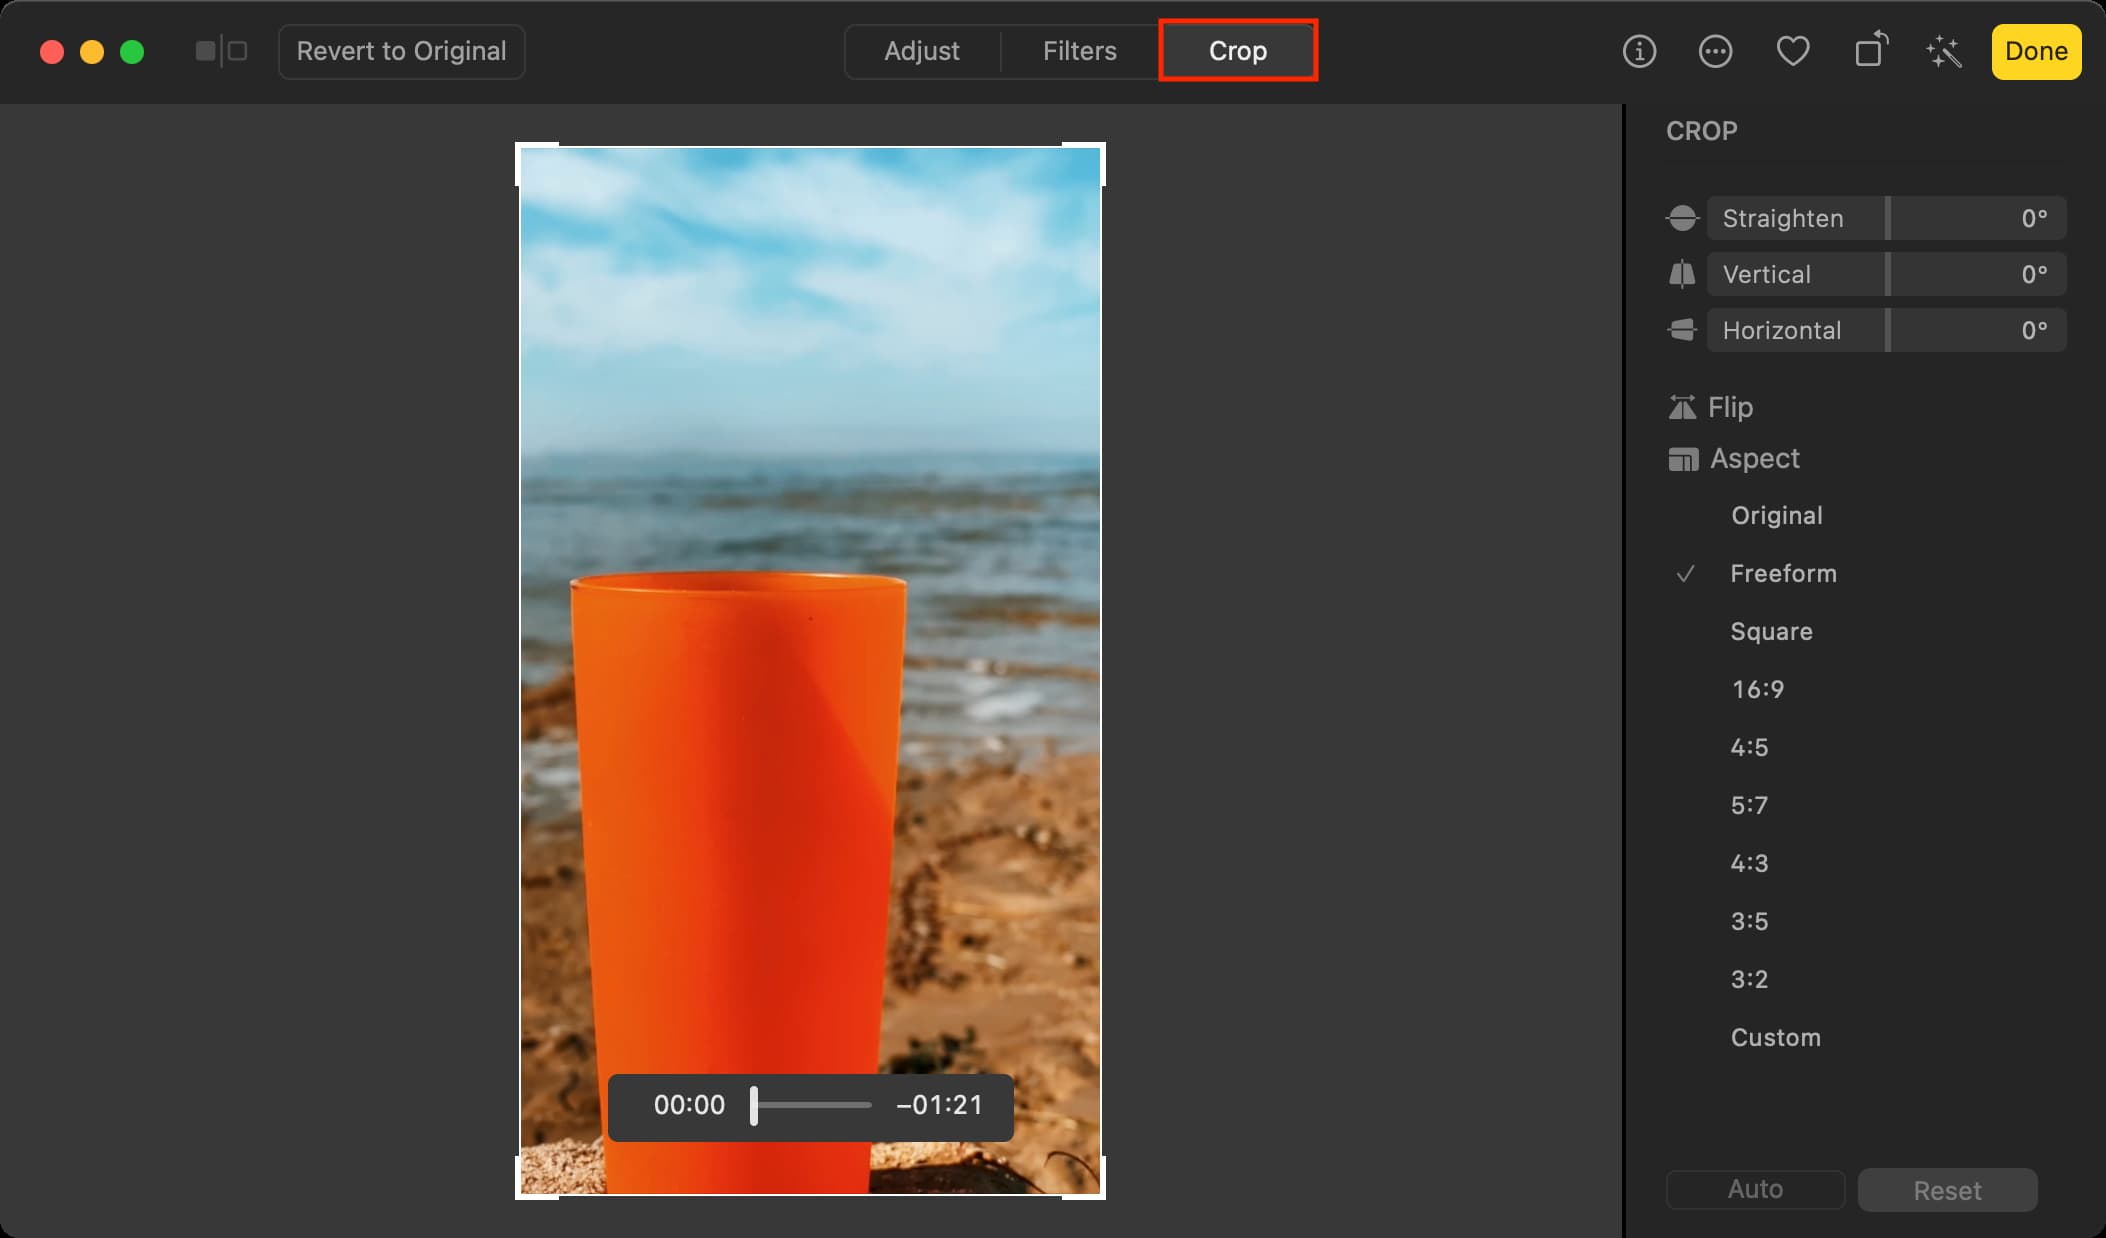
2) Double-click the video within the Images app and click on Edit.
3) Go to the Crop part.
4) Place the pointer on the left and proper edges of the crop software and drag it to eliminate the black space.
5) Lastly, click on Performed to avoid wasting the video with out the undesirable black bars.
You may transfer this edited video again to a Finder folder by merely dragging it out of the Images app and dropping it over the Desktop or a folder.
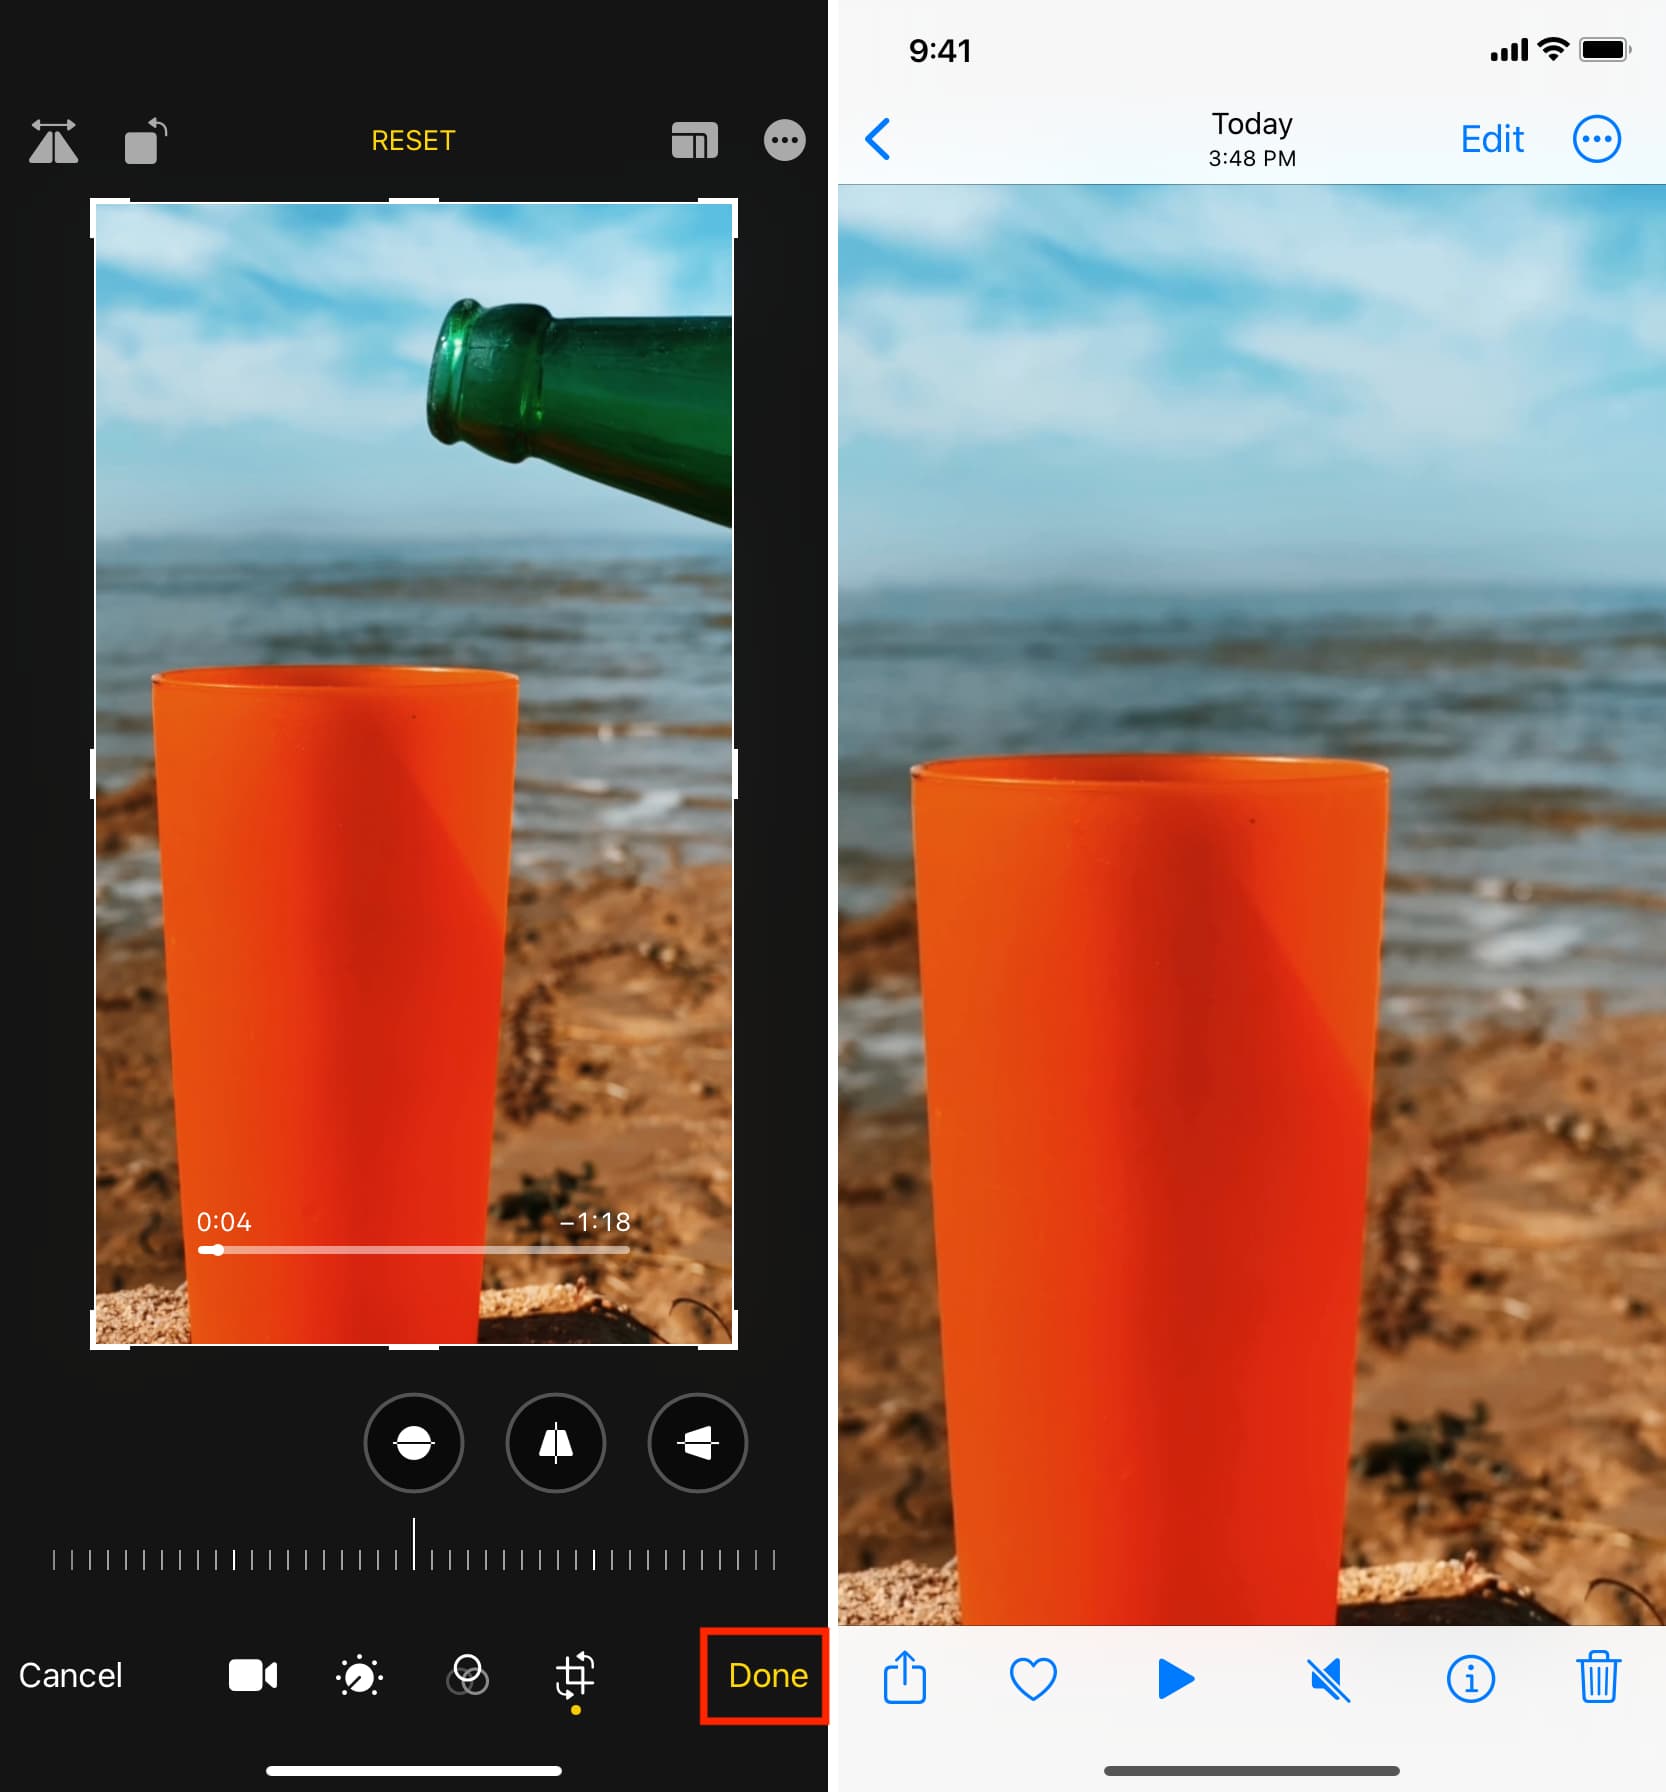
On iPhone or iPad
1) Go contained in the Images app and faucet the video to open it.
2) Faucet Edit.
3) Now, faucet the crop icon and modify the cropping zone to take away the black bars from the left and proper sides of the video.
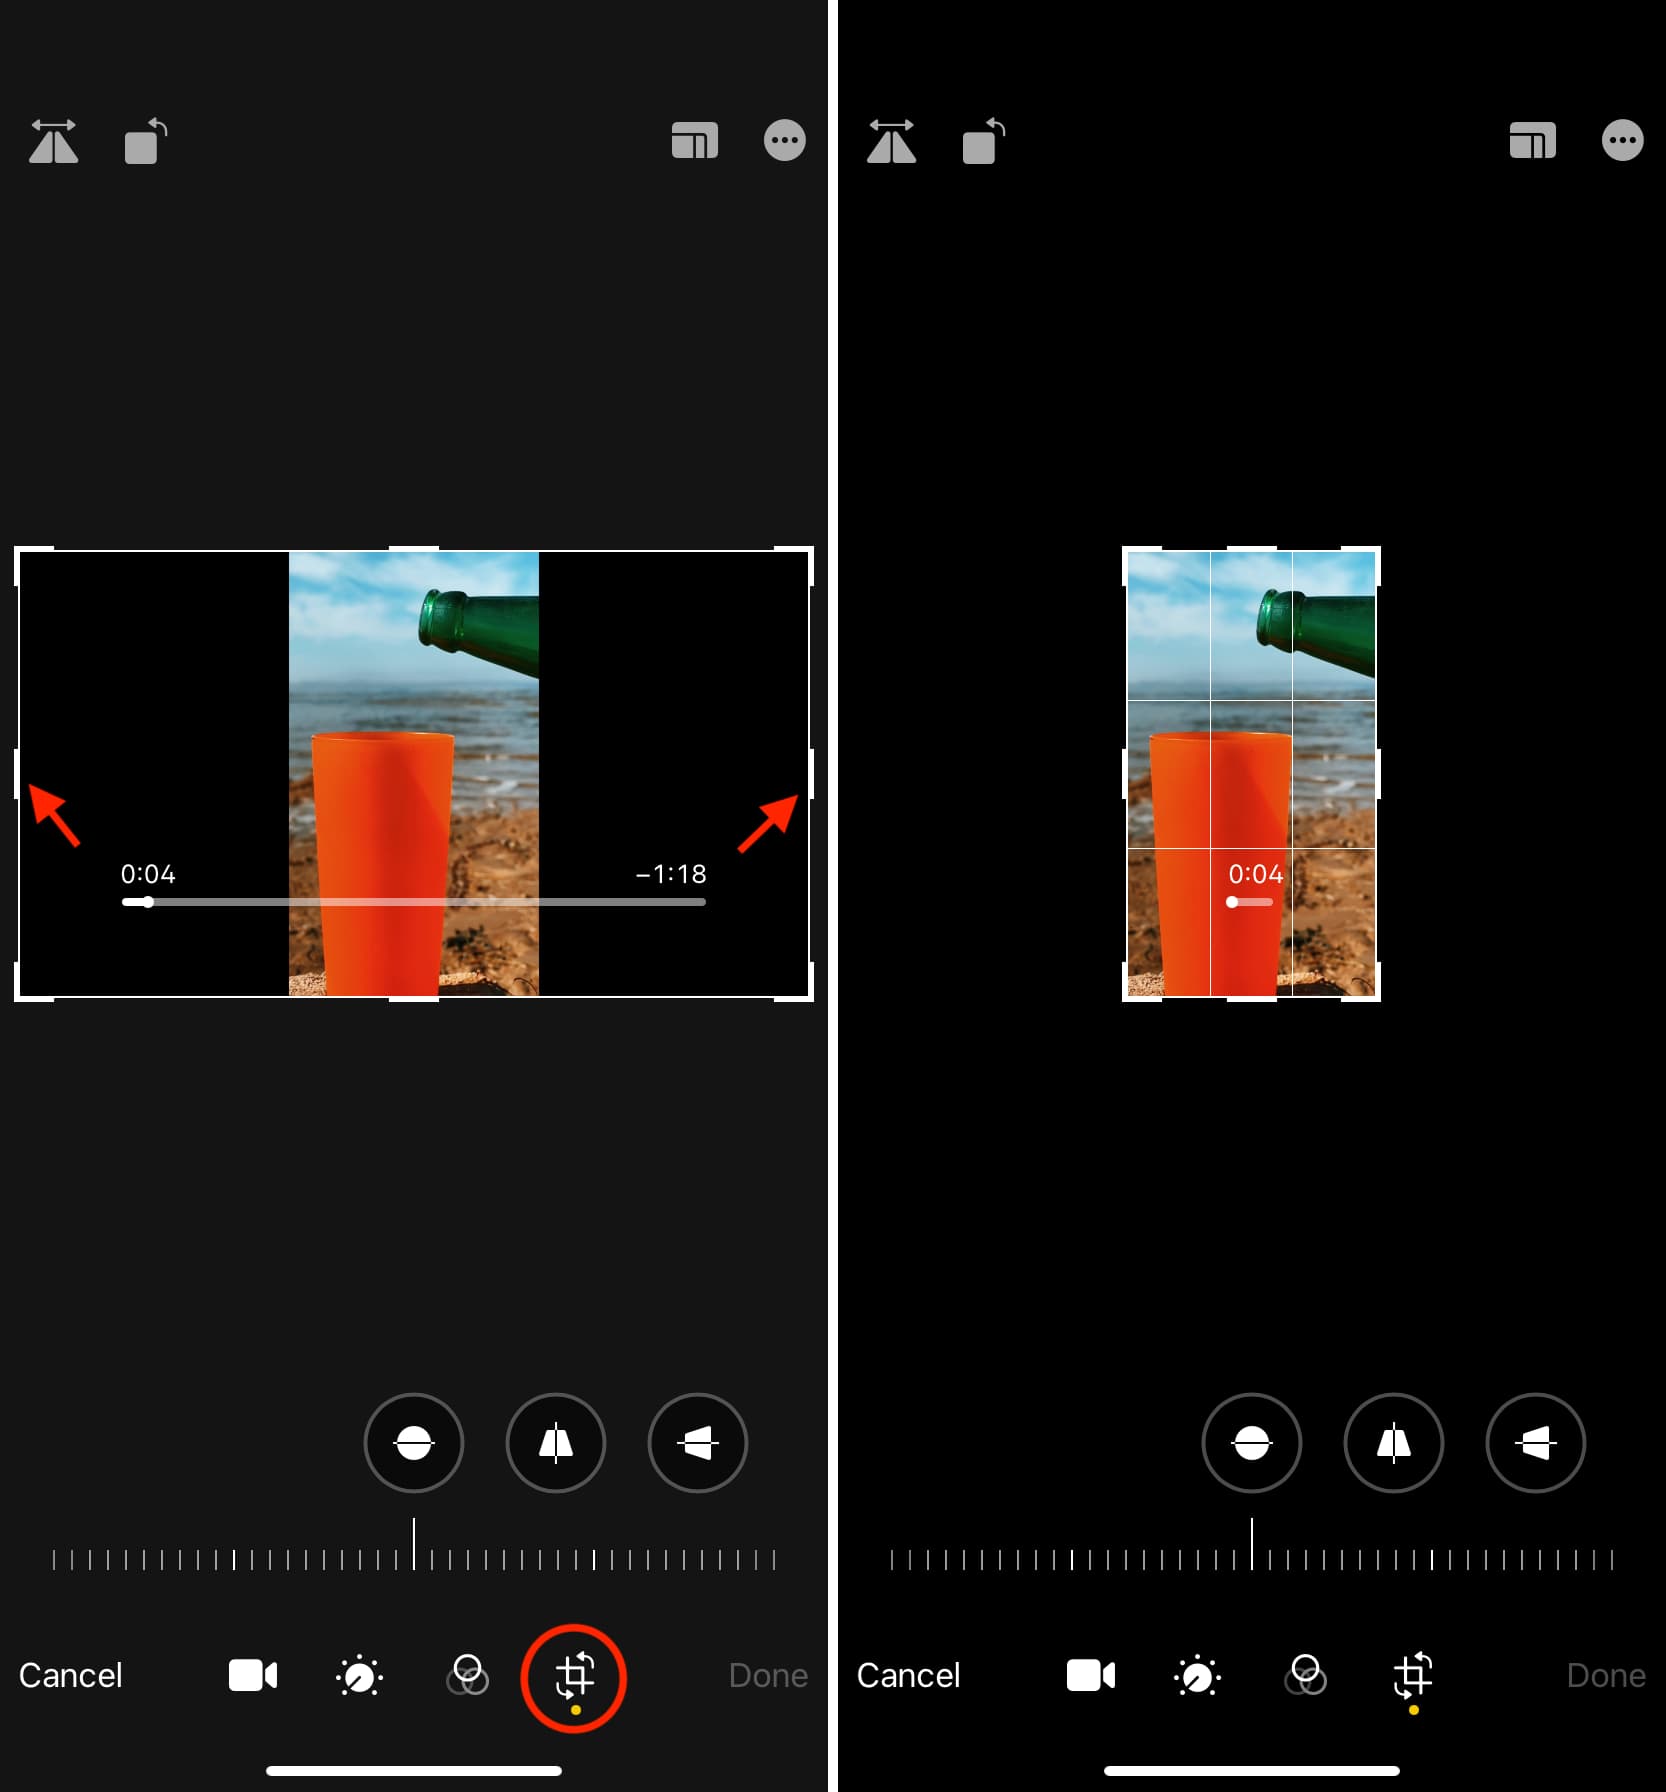
4) Lastly, faucet Performed to avoid wasting the video in vertical orientation with out the pointless black bars.
iMovie various for iOS
Lastly, you need to use the InShot Video Editor app to merge vertical video clips, add textual content, and make many different edits in your iPhone or iPad. The app is free, simple to make use of, and total glorious.
Do extra in iMovie: