
Ubuntu Restricted Extras is a software program bundle for the Ubuntu working system that permits customers to put in software program that isn’t at present included for moral or copyright causes, akin to usually used media codecs and fonts.
The Ubuntu Restricted Extras is a metapackage that has the next dependencies:
- flashplugin-installer
- gstreamer0.10-ffmpeg
- gstreamer0.10-fluendo-mp3
- gstreamer0.10-pitfdll
- gstreamer0.10-plugins-bad
- gstreamer0.10-plugins-ugly
- gstreamer0.10-plugins-bad-multiverse
- gstreamer0.10-plugins-ugly-multiverse
- icedtea6-plugin
- libavcodec-extra-52
- libmp4v2-0
- ttf-mscorefonts-installer
- unrar
Essential: Earlier than you proceed to put in Ubuntu-restricted extras in your system, pay attention to the next:
- All software program supplied by the Ubuntu restricted extras meta-package isn’t free, which suggests that the licensing necessities of such software program don’t meet the Ubuntu most important part license coverage.
- Additionally, make sure that you confirm your rights to make use of any of the non-free software program and cling to the licensing phrases of the copyright holder.
- Moreover, non-free software program is often not supported and might’t be mounted or up to date, due to this fact, use it at your personal danger.
Allow Multiverse Repository in Ubuntu
To put in the restricted extras on Ubuntu, it’s essential allow the Multiverse Repository (which offers non-open-source software program to customers) in your Ubuntu system.
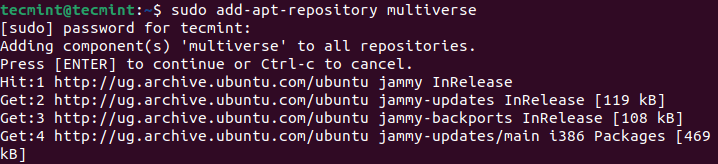
Run the next command to allow the multiverse repository: if you’re prompted for a password, enter a sound one to proceed:
$ sudo add-apt-repository multiverse
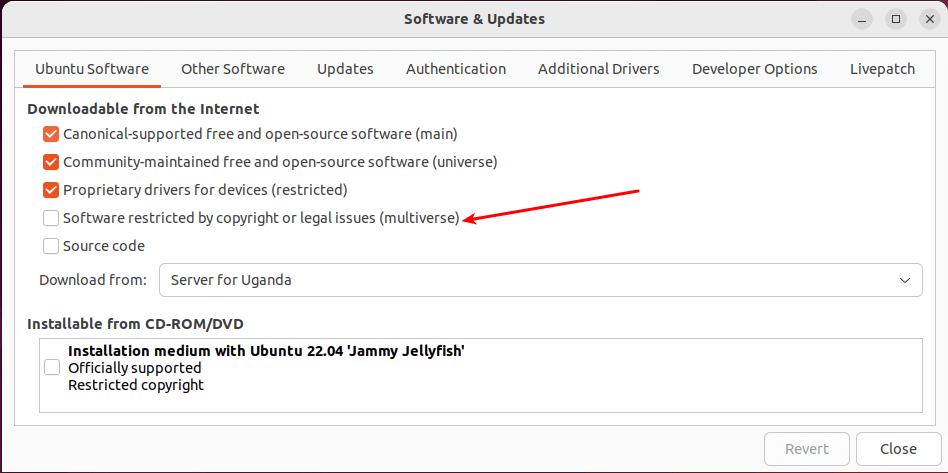
Should you favor GUI, you possibly can allow Multiverse Repository by clicking on Actions, then seek for Software program & Updates and open it.
The primary or default tab, “Ubuntu Software program” shows an inventory of repositories, or “channels“. Search for the choice Multiverse (software program restricted by copyright or authorized points) within the record and examine it as highlighted within the subsequent screenshot.
The system will immediate you to enter your person password to proceed. Enter a sound password and click on “Authenticate” to proceed.
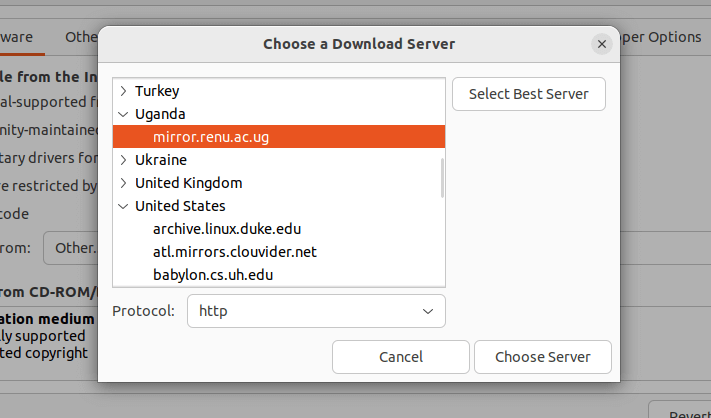
Subsequent, the system may additionally immediate you to decide on a obtain server. Choose a server in your location or close by. Alternatively, you possibly can click on “Choose Finest Server” in order that the system performs a couple of exams to pick the very best server. Then, to proceed, click on “Select Server” and enter your password.
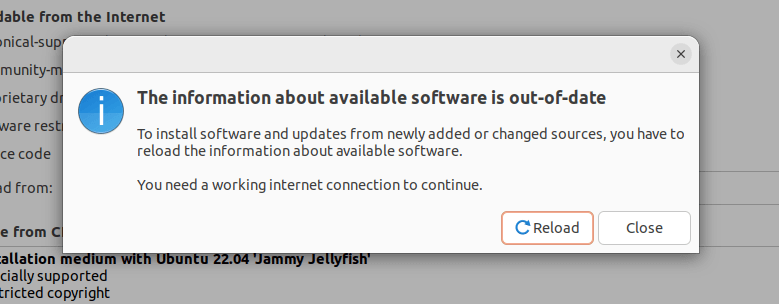
When you attempt to shut the Software program & Updates software, the system will immediate you to refresh the package deal cache (just like working the “sudo apt replace” or “sudo apt-get replace” command).
This step will add details about packages within the just-enabled repository to the native package deal index. Click on Reload to proceed.
Set up Ubuntu Restricted Extras Bundle
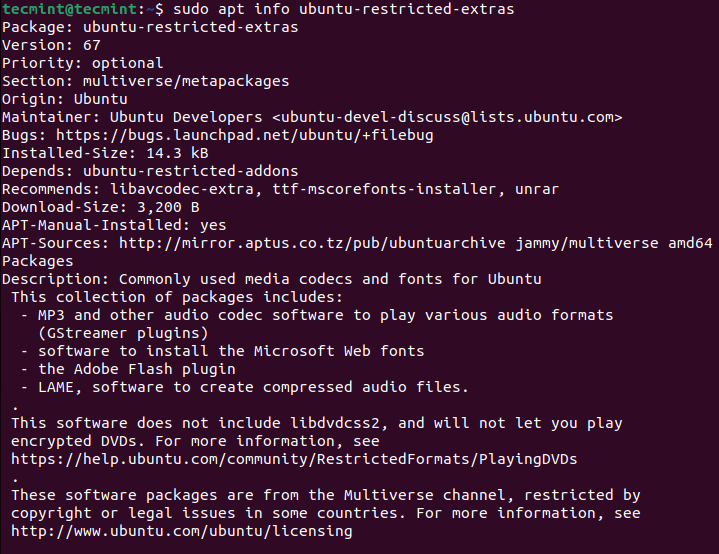
Earlier than you proceed to put in the ubuntu-restricted-extras package deal, you possibly can view details about it, akin to model, precedence, description, and extra, by working the next apt command:
$ sudo apt data ubuntu-restricted-extras
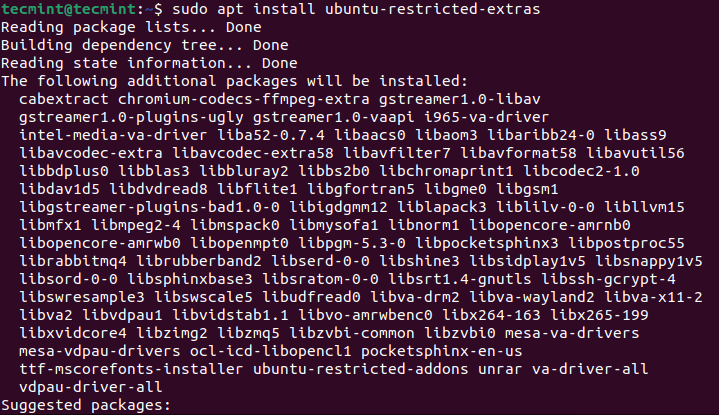
Then set up ubuntu-restricted-extras package deal as proven:
$ sudo apt set up ubuntu-restricted-extras
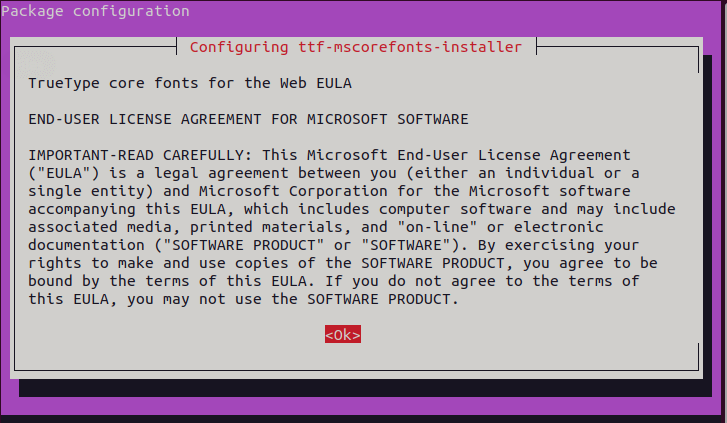
In the course of the set up course of, you can be prompted to comply with sure package deal licenses earlier than they are often put in in your system. The primary is the Microsoft end-user license settlement (EULA). Click on OK to agree and proceed.
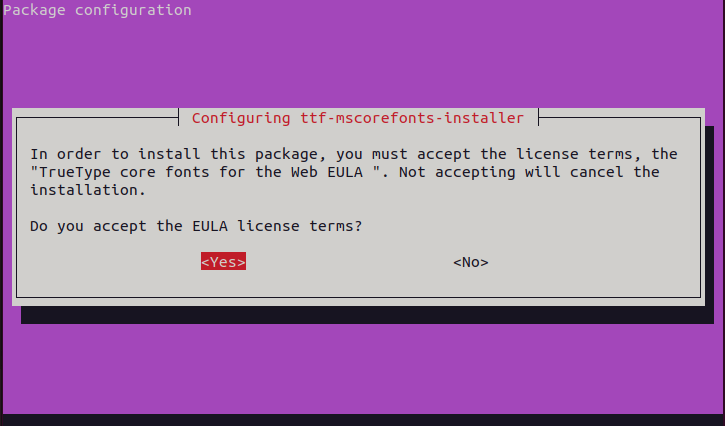
Subsequent, you even have to just accept the TrueType core fonts package deal’s Internet EULA earlier than the package deal might be put in. Choose “Sure” to agree and proceed.
Confirm Ubuntu Restricted Extras Set up
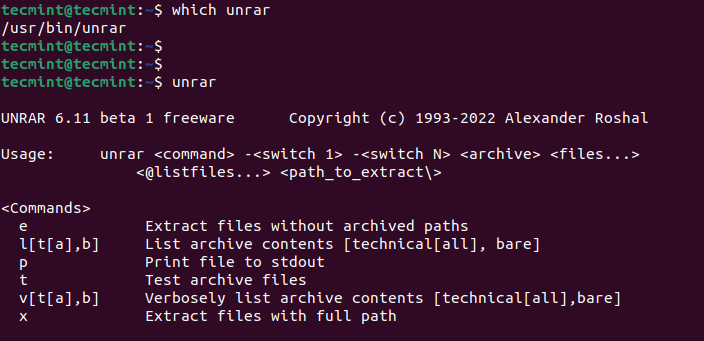
To make sure that the Ubuntu Restricted Extras have been efficiently put in in your system, search for the unrar command and run it with none choices or arguments, for instance:
$ which unrar
$ unrar
Take away Ubuntu Restricted Extras
To take away the Ubuntu Restricted Extras meta-package, run the next command:
$ sudo apt autoremove --purge ubuntu-restricted-extras
That’s all. On this information, we’ve proven methods to set up Ubuntu Restricted Extras. Use the feedback part to ask any questions or share your ideas about this information.