
This put up will illustrate the usage of the “matplotlib.pyplot.hist2d()” perform to create a “2D Histogram” in Python.
Find out how to Plot a “Matplotlib 2-Dimension Histogram” in Python?
The “hist2d()” perform of the “pyplot” module within the “matplotlib” library is used to plot a 2D histogram in Python.
Syntax
matplotlib.pyplot.hist2d(x, y, bins=10, vary=None, density=False, weights=None, cmin=None, cmax=None, *, information=None, **kwargs)
Now, let’s plot a “2D histogram” utilizing the under instance code:
import matplotlib.pyplot as plt
import numpy
x = numpy.random.randn(1000)
y = numpy.random.randn(1000)
plt.hist2d(x, y, bins=30, cmap=‘Blues’)
plt.colorbar()
plt.present()
Within the above code:
- Step one is to import the “matplotlib” and “numpy” libraries.
- The “numpy.random.randn()” perform is utilized twice to generate random numbers throughout the specified vary, i.e., “0-1000”.
- The “plt.hist2d()” perform is used to create a 2D histogram plot of “x” and “y” with 30 bins and a coloration map of “Blues”.
- Lastly, the “plt.colorbar()” perform provides the colour bar, and the “plt.present()” perform shows the graph.
Output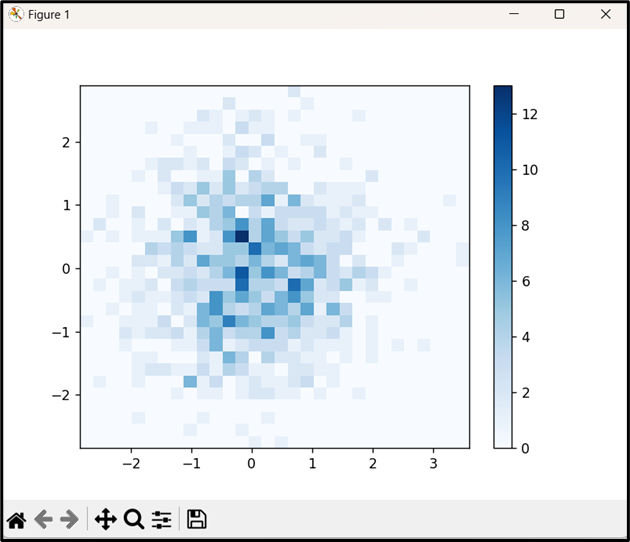
As seen, the “hist2d()” perform creates a two-dimensional histogram with rectangular bins.
Find out how to Customise a 2D Histogram in Matplotlib?
We are able to customise the plot by including a title, labels to the axes, and altering the colour map. An instance code might be discovered right here:
import matplotlib.pyplot as plt
import numpy
x = numpy.random.randn(1000)
y = numpy.random.randn(1000)
plt.hist2d(x, y, bins=30, cmap=‘jet’)
plt.colorbar()
plt.title(‘2D Histogram’)
plt.xlabel(‘X’)
plt.ylabel(‘Y’)
plt.present()
Within the above traces of code:
- The “hist2d()” perform is used to create a 2D histogram of the 2 random quantity arrays “x” and “y” throughout the outlined vary, i.e., “0-1000”.
- The “plt,title()”, “plt.xlabel()” and “plt.ylabel()” features are used so as to add title and label the “x” and “y” axes, respectively.
Output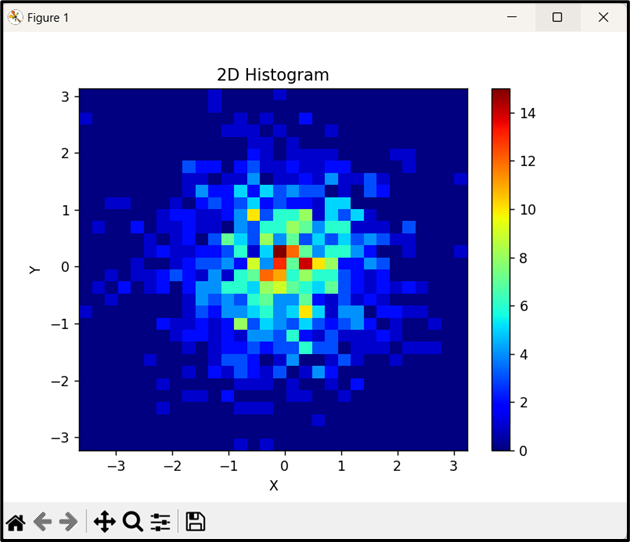
The above output implies that the “2D Histogram” is custom-made appropriately by setting the title and labeling the “x” and “y” axes.
Conclusion
In Python, the “plt.hist2d()” perform of the “pyplot” module within the “matplotlib” library is used to plot a 2D histogram in Python. To customise the histogram, the “plt.title()”, “plt.xlabel()” and “plt.ylabel()” features can be utilized by setting the title and labeling of the “x” and “y” axis, respectively. This put up introduced an in-depth information on the right way to create a 2D histogram utilizing the mentioned perform within the matplotlib library in Python.