
A textual content editor that’s steadily used within the command-line conditions is named Vim (Vi Improved). It’s famend for its efficient keyboard shortcut implementation and simultaneous utilization of a number of paperwork. A Vim plugin is a set of Vim scripts that add a performance to the textual content editor. These scripts can provide many options like syntax highlighting, new instructions, and file kind compatibility. Vim plugins are usually distributed as a package deal and will be simply put in and managed utilizing a plugin supervisor. With quite a few plugins out there for added performance, Vim is a textual content editor that’s extraordinarily adjustable and adaptable. On this information, we are going to present you a way to put in the Vim plugins in Linux.
Verify the Vim Model
First, we check out the model command to get the model of a “Vim” editor put in. If the command reveals the output just like the one within the following, it signifies that your system has no “Vim” editor put in. Additionally, it provides you some command recommendations for its set up.
omar@virtualbox:~$ vim –version
Command ‘vim’ not discovered, however will be put in with:
sudo apt set up vim # model 2:8.2.3995-1ubuntu2.3, or
sudo apt set up vim-tiny # model 2:8.2.3995-1ubuntu2.3
Identical to that, for those who attempt to open some file with “vim”, it gained’t permit you and reveals you the next output together with some command recommendations like “vim not discovered”:
omar@virtualbox:~$ vim move.txt
Command ‘vim’ not discovered, however will be put in with:
sudo apt set up vim # model 2:8.2.3995-1ubuntu2.3, or
sudo apt set up vim-tiny # model 2:8.2.3995-1ubuntu2.3
Set up the Vim Editor
To get Vim in your Linux system, it’s a must to attempt utilizing the following-attached command utilizing the apt package deal supervisor. The system downloads two packages, “vim” and “vim-runtime”, that are each new to the system. The command prompts the consumer to verify the set up by typing “y” and hitting enter. Vim editor is put in in lower than 10 seconds.
omar@virtualbox:~$ sudo apt-get set up vim
Set Vim
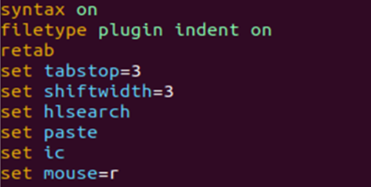
To set the Vim editor in keeping with your wants, you should utilize its configuration file which is vimrc. To open the vimrc file, we use the “nano” editor with sudo rights. After including some instructions to it, we put it aside and open it as soon as once more to mirror the adjustments.
omar@virtualbox:~$ sudo nano ~/.vimrc
Set up Curl and Git
It’s obligatory to put in curl and Git in your Linux system earlier than putting in the Vim plugins. Subsequently, we use the apt-get instruction with the “set up” key phrase adopted by the package deal identify. The command is executed and each the packages are put in easily.
omar@virtualbox:~$ sudo apt-get set up curl git
Set up the Vim Plugin Supervisor
Right here, we create two directories, “autoload” and “bundle”, inside a listing known as “.vim” within the consumer’s house listing. The “mkdir” command is used to create the directories. The “-p” possibility tells the command to create any father or mother directories within the path if they don’t exist already. After this, you should transfer throughout the bundle folder of Vim utilizing the next “cd” instruction:
omar@virtualbox:~$ mkdir -p ~/.vim/autoload ~/.vim/bundle
omar@virtualbox:~$ cd ~/.vim/bundle
omar@virtualbox:~/.vim/bundle$
There are a number of methods to put in Vim plugins, however one of the vital widespread strategies is to make use of a plugin supervisor i.e. device that makes it simple to put in, replace, and handle Vim plugins. The “curl” command is putting in a Vim plugin supervisor known as “vim-plug”. Choice -f tells curl to fail silently if the HTTP server returns an error code, -L tells the curl to observe any redirections, -o tells curl to avoid wasting the output to a file named “~/.vim/autoload/plug.vim”. and –create-dirs tells curl to create the directories specified within the -o possibility in the event that they don’t exist. The file being downloaded will likely be saved within the “~/.vim/autoload” listing. As soon as the command is executed efficiently, the vim-plug is put in and able to use in Vim.
omar@virtualbox:~/.vim/bundle$ curl -fLo ~/.vim/autoload/plug.vim –create-dirs https://uncooked.githubusercontent.com/junegunn/vim-plug/grasp/plug.vim
Set up the Vim Plugins
The handbook manner of putting in the Vim plugins is to make use of the straightforward Git command to clone the official package deal of the repository. Let’s say, we wish to set up the nerdtree Vim plugin and use the Git clone command adopted by the listing the place the repository ought to be cloned. The progress reveals that the repository is cloned into the required listing. The end result shows the repository’s obtain standing and obtain velocity. As soon as the command is executed efficiently, the nerdtree plugin is put in and is able to use in Vim.
omar@virtualbox:~/.vim/bundle$ git clone https://github.com/preservim/nerdtree.git/ ~/.vim/pack/vendor/begin/nerdtree
The opposite method to set up the Vim plugins is to make use of the Vim plugin supervisor, “vim-plug”, through the Vim configuration file, “vimrc”. It is a configuration code for Vim’s plugin supervisor that’s used to put in and handle the plugins for Vim. Open the vimrc file and write the next code in it. The code begins by calling the “plug#start()” operate. Begin the configuration of the plugins which might be managed by the vim-plug. After that, the code makes use of the “Plug” command adopted by the identify of the plugin which is “preservim/NERDTree”. This command tells the vim-plug to put in the plugin from the required “preservim/NERDTree” repository. Lastly, the code calls the “plug#finish()” operate to finish the configuration of the plugins which might be managed by the vim-plug and it ought to proceed with the set up of the required plugins. After this code is executed, the NERDTree plugin is put in and is able to use in Vim.

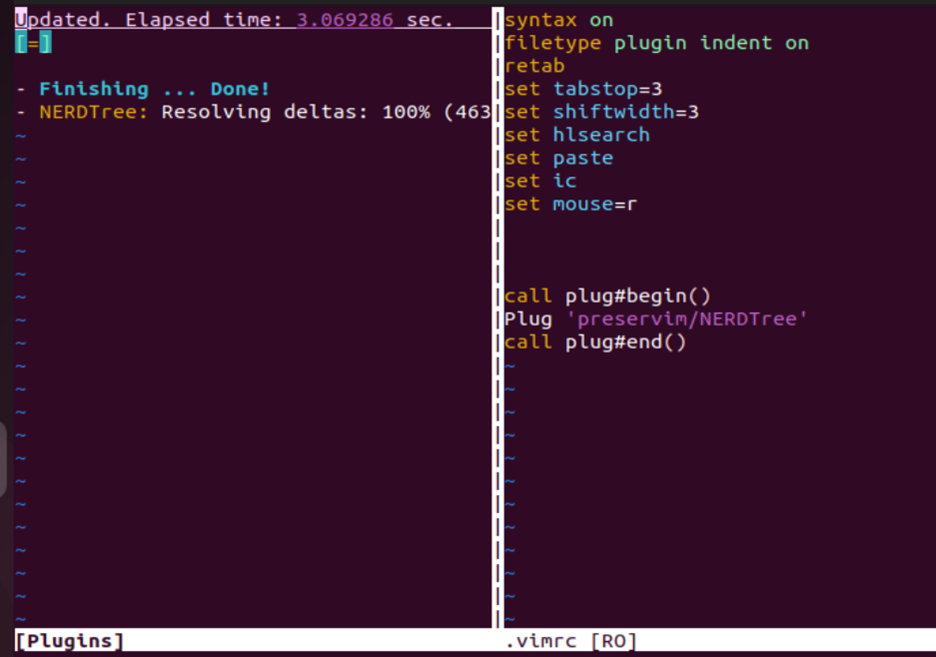
There’s a command that’s used to put in the plugins which might be specified within the vim-plug configuration. The “:PlugInstall” command tells the vim-plug to put in any plugins which might be specified within the configuration however haven’t but been put in. Use this command within the “insert” mode of the Vimrc file. It downloads the plugin from their repository. After this, it installs the Nerdtree plugin and makes it prepared to make use of in Vim.
![]()
The set up course of is displayed on the proper panel of the vimrc file after executing the “:PlugInstall” instruction as proven within the hooked up picture the place the NERDTree plugin is put in:
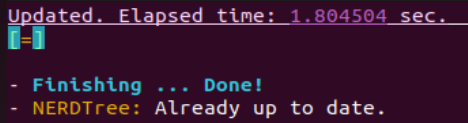
If you wish to replace the already put in plugin of Vim, use the “PlugUpdate” instruction within the insert mode of Vim adopted by the identify of a plugin as proven within the following:
![]()
The output reveals that the NERDTree plugin is already up-to-date.
Conclusion
We defined using Vim editor and its plugins throughout the introduction. Additionally, this information is the bundle of instructions to put in the Vim plugins utilizing two completely different strategies: utilizing the Git clone instruction and the vim-plug plugin supervisor. Utilizing each methods, we demonstrated how a Vim plugin like NERDTree will be put in within the Linux system.