

For those who prefer to edit motion pictures, I would like to try how they’ll transfer textual content in iMovie. There’s loads of nice options that come contemporary from the field with Apple’s free movie-editing app, although there are some notable variations between the Mac, iPad and iPhone variations. Relying on the way you wish to transfer the textual content, it might be very easy, or you might have to get a bit extra inventive.
For these utilizing a Mac, whereas there are loads of highly effective choices and options obtainable, there isn’t a method to transfer textual content instantly inside the display itself. You’ll be able to select when the textual content exhibits up, however you may’t manually decide the place on the display it would present up. There are loads of choices inside the app itself, however getting it precisely the place you want it would take some finesse. Let me clarify.
Can I Transfer Textual content Round in iMovie?
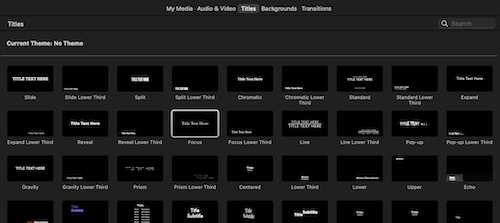
In terms of including textual content to a challenge in iMovie, there’s the Titles possibility. There’s loads of completely different types and choices right here, so I might advocate testing all of them, as this the one official means so as to add textual content to your display. Observe that you simply will be unable to maneuver the place the Title is positioned inside the film itself. Nonetheless, there’s an alternative choice. Earlier than diving into the unofficial possibility, let me briefly clarify the official means.
In case you are seeking to merely transfer the Title you created to a special place in your film, corresponding to transferring it from the start to the top of the movie, you merely have to click on the Title/Textual content within the Timeline and drag it left or proper on the display to regulate the precise time the Title or textual content exhibits up. Nonetheless, when you’re seeking to transfer the textual content across the display itself (I.E: the place it exhibits up on the display within the exported challenge), you’re going to wish to get extra inventive.
Moreover, in one other associated article, I instructed readers how simple it’s to add subtitles to tasks in iMovie. Although it may be an concerned course of, the gist of it permits customers so as to add their very own textual content to the display. Should you’re undecided easy methods to already add textual content to a display in iMovie, I might recommend beginning with this information.
How Do I Alter the Textual content in iMovie?
Utilizing the Titles supplied in iMovie ought to offer you sufficient choices to place your textual content. However, when you’re not proud of any of those, there’s a means you may create your individual textual content and add it manually into iMovie. On the one hand, this may be an effective way so as to add textual content and have it within the precise place that you really want it. Then again, you’re going to wish to make use of a photograph enhancing app.
Fortunately, all you’re going to wish to make use of is Apple’s Preview app, and the picture-in-picture function that’s obtainable in iMovie. I additionally speak about the advantages of Image-in-Image in one other article.
In order for you textual content precisely the place you need, whenever you need it, merely observe these steps.
First: Create the Textual content-Picture
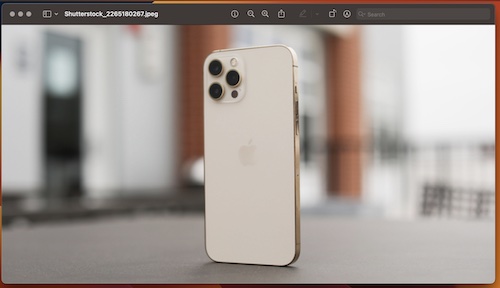
- First, open any image in Preview. Merely go to any picture that’s not animated, and open it through Preview. Until you’ve got modified the default picture editor, double-clicking a picture file will carry up Preview. You too can discover Preview in your Functions folder.
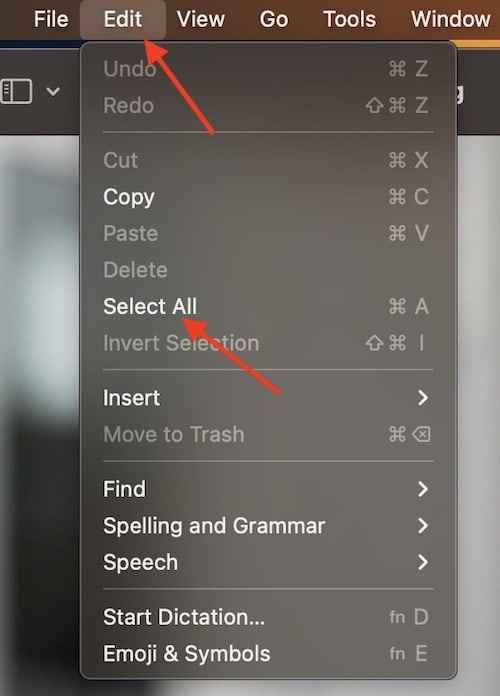
- When you’re in Preview, go to Edit > Choose All. It will choose your complete picture.
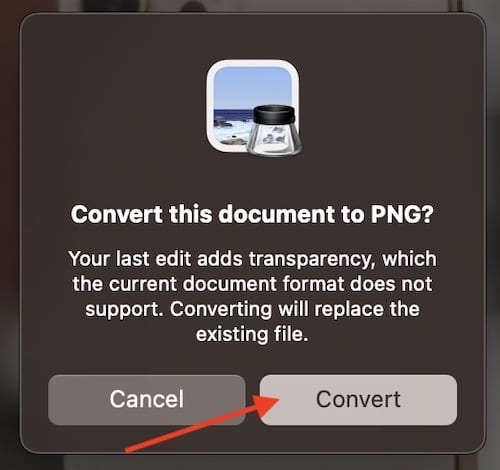
- Hit your Delete key to delete the picture. Preview could ask to transform the file to a PNG. Choose Convert.
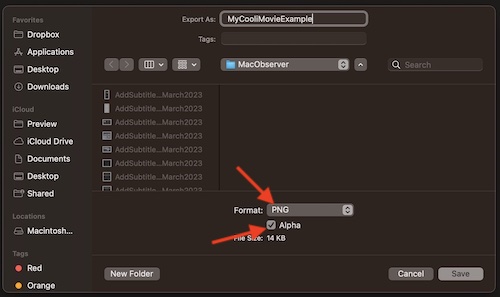
- Now, export this new picture as a PNG, and be sure that Alpha is chosen. Export it wherever is best so that you can find it. If you wish to be sure that your unique picture was not deleted, hit the Edit > Undo possibility within the Menu Bar. (or Command-Z) to carry the unique picture again. It’s best to now have two completely different pictures. Now you can shut out of the unique picture.
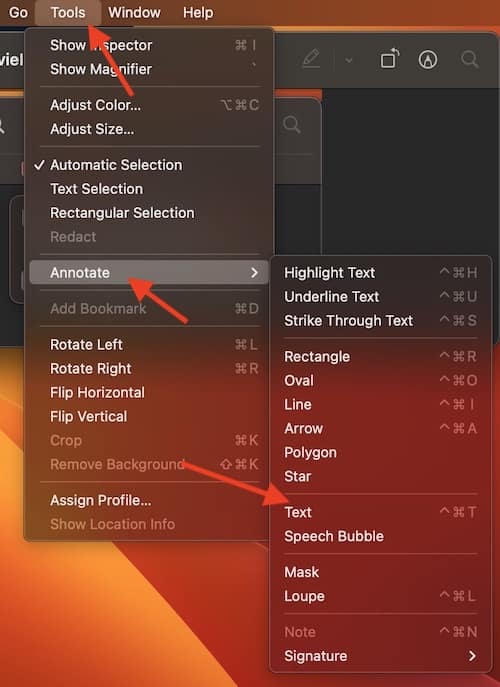
- Now, utilizing your new, clean PNG picture, open it once more in Preview, and go to Instruments > Annotate > Textual content. A Textual content field ought to seem within the Preview window.
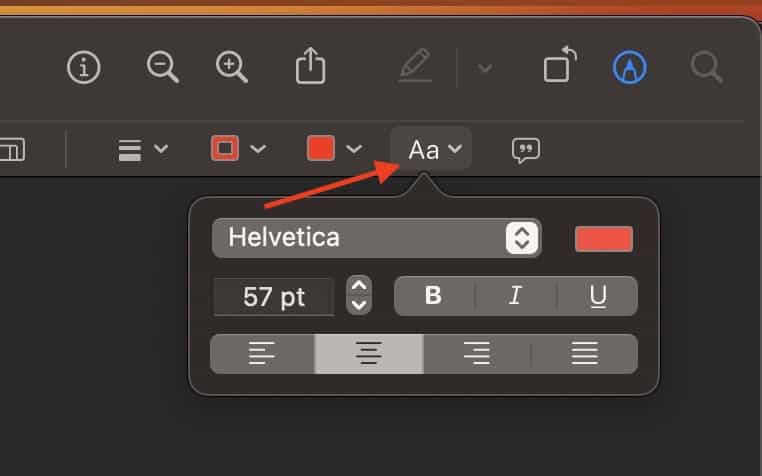
- Now you can add no matter textual content you wish to the picture. When you’re completed, you may change sure settings, together with font color and style, by way of the Textual content button on the prime of Preview. You too can modify the scale of the Textual content field instantly in preview. Once more, bear in mind to put it aside as a PNG with the Alpha possibility chosen.
Second: Add the Textual content-Picture to iMovie
Time wanted: 2 minutes.
Add your individual textual content to iMovie
- Now that you’ve your textual content picture, you may add this to your iMovie challenge.
With each iMovie open and the Finder window containing your picture being open, drag the picture into iMovie, and place it someplace above the clip in your Timeline the place you need the Textual content to seem.

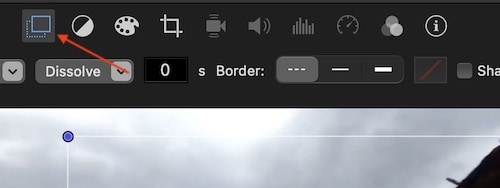
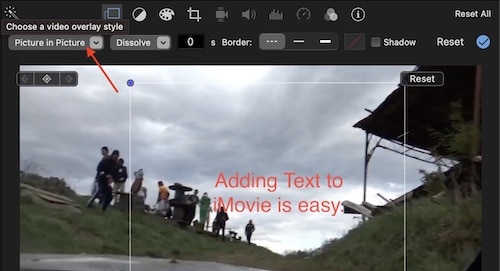
- Subsequent, above the Preview window, click on the Video Overlay Settings, which seems like two rectangles stacked on prime of one other. Choose this.
It’s possible you’ll have to have chosen the textual content overlay in your Timeline first earlier than this setting will seem.
- Select Image-in-Image. From right here, you may as well select the period of the textual content, and you may as well transfer the textual content round and modify its measurement inside the Preview window.
Observe you could transfer the textual content wherever you prefer to inside your Timeline as effectively. Additionally observe that you’ve some transition choices to the fitting of Image-in-Image. Set the Timer to zero if you do not need transitions.
And that’s all there’s to it! Remember that you may as well use a photo-editor to attain the identical impact. I went with Preview, as everybody has preview on their Mac, and it’s the quickest method to go about doing this. Should you’re going to make use of a special photograph editor, be certain the background is clear.
Bear in mind you could additionally modify the size of time that the textual content seems within the challenge by dragging the handles of the clip inside your Timeline. Dragging the clip itself will modify the place it begins to play. Additionally, keep in mind that since you’re going with a PNG picture in your textual content, you will be unable to animate it exterior of the easy transitions obtainable.
How Do You Transfer Textual content in iMovie on iPhone?
Should you’re seeking to transfer textual content round in iMovie for iPadOS and iOS, that is happily simpler to do. All you’ll want to do is choose a spot in your Timeline the place you need the textual content, then hit the Textual content icon (the T icon. You’ll have your normal choices, however you may transfer the textual content itself within the film by merely clicking it and dragging it. Inside iPadOS and iOS, all you’ll want to do is click on and drag the textual content wherever on display to maneuver it inside the film itself. If you’ll want to transfer it on the Timeline, that’s a bit completely different.
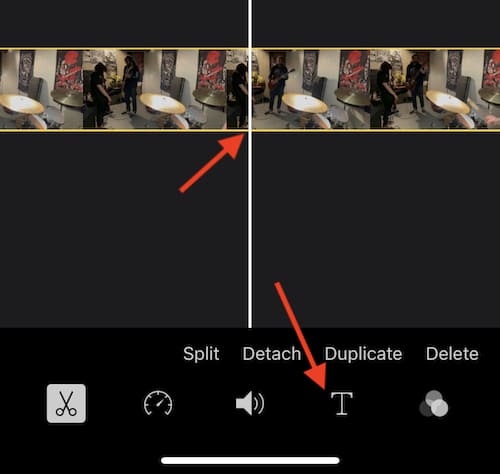
Should you’re utilizing an iPad, you need to be capable of modify the precise place of the textual content by clicking and dragging the yellow bars. Nonetheless, when you’re utilizing an iPhone, you’re going to wish to separate the clips to make sure that the textual content isn’t prevalent all through the entire film. While you add textual content to your Timeline inside iOS, it provides it to the entire clip. Be sure you are splitting your clips earlier than including your textual content. You’ll be able to cut up a clip by choosing the world you wish to cut up, and the press the Scissors icon and choose Break up. Relying on what model of iMovie you’ve got on iPadOS, you might have to observe this step as effectively.
Crafting Your Personal Imaginative and prescient
Whereas it’s kind of annoying that that is the one method to really transfer textual content round in iMovie, upon getting it found out, it’s comparatively straight-forward. Once more, when you’re a novice with iMovie, I might advocate merely utilizing the Titles which can be obtainable inside the program itself. There’s loads of completely different choices obtainable, with most of them being the everyday areas you’ll wish to have textual content.
In terms of making a challenge in iMovie, some customers merely need probably the most customization choices as doable. Should you’re not proud of the textual content choices which can be obtainable in iMovie, there’s a relatively easy and artistic method to make your individual. There’s loads of methods to get inventive utilizing this movie-editing software program. Whereas it might appear small, the functions and choices are mighty. All the time bear in mind to experiment on this program to see what potentialities you may uncover.