
Maintaining your system up to date is important for any working system. Linux Mint is not any totally different.
Linux Mint has a sturdy replace system. It gives well timed safety patches for the kernel and different software program packages. That is not it. You additionally get updates on the functions you put in utilizing the Software program Supervisor software.
Principally, other than safety patches, your system receives new options, bug fixes, improved {hardware} assist, efficiency enhancement, and much more.
Whereas the Updater software is simple, it might nonetheless appear overwhelming in case you are new to Linux Mint.
This is the reason we at It is FOSS got here up with this newbie’s information thought. It will provide you with some concepts about utilizing this software and the very best practices you must comply with.
So on this information, I’ll clarify how one can carry out the system updates in Linux Mint and can stroll you thru the next:
- Create backups utilizing Timeshift (optionally available but really useful)
- Prioritizing and putting in updates (know the several types of updates)
- Restore from the Timeshift backup (if the replace tousled the system)
- Including the quickest mirrors (optionally available however good to know)
📋
Whereas you need to use the apt command, the main focus of this tutorial is on the GUI software.
Linux Mint Replace Supervisor
When there are updates out there on your system, you may discover a ‘safe’ image with pink dot on it within the backside proper nook of the display screen (notification space).
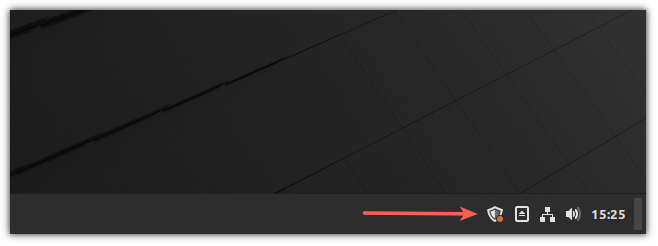
For those who click on on it, you may see the out there system updates. By default, all updates are chosen to be put in. You may deselect some (if you understand what you’re doing).
Earlier than you study extra in regards to the varieties of updates and their set up, I wish to discuss backups.
Create Timeshift backup (optionally available but really useful)
Linux Mint is a secure distro as it’s primarily based on the long-term assist model of Ubuntu. Updates you put in will not often create issues.
Hardly ever however attainable. Say you pressured energy off the system whereas it was putting in package deal updates. It’s attainable that it might mess up the peerlessly working system.
Precaution is best than remedy. So I like to recommend making common backups. If nothing else, make a backup earlier than making use of updates.
Linux Mint comes preinstalled with Timeshift backup software. It’s a third-party software however is extremely really useful by Mint builders.
To create a backup, begin the Timeshift from the system menu:
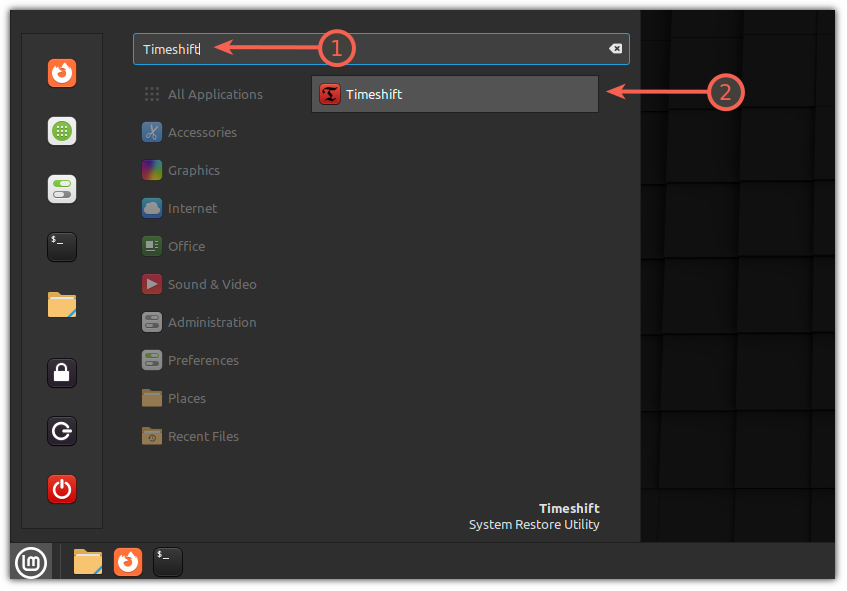
If you have not used it earlier than, it’s going to ask you many questions earlier than permitting you to create a backup.
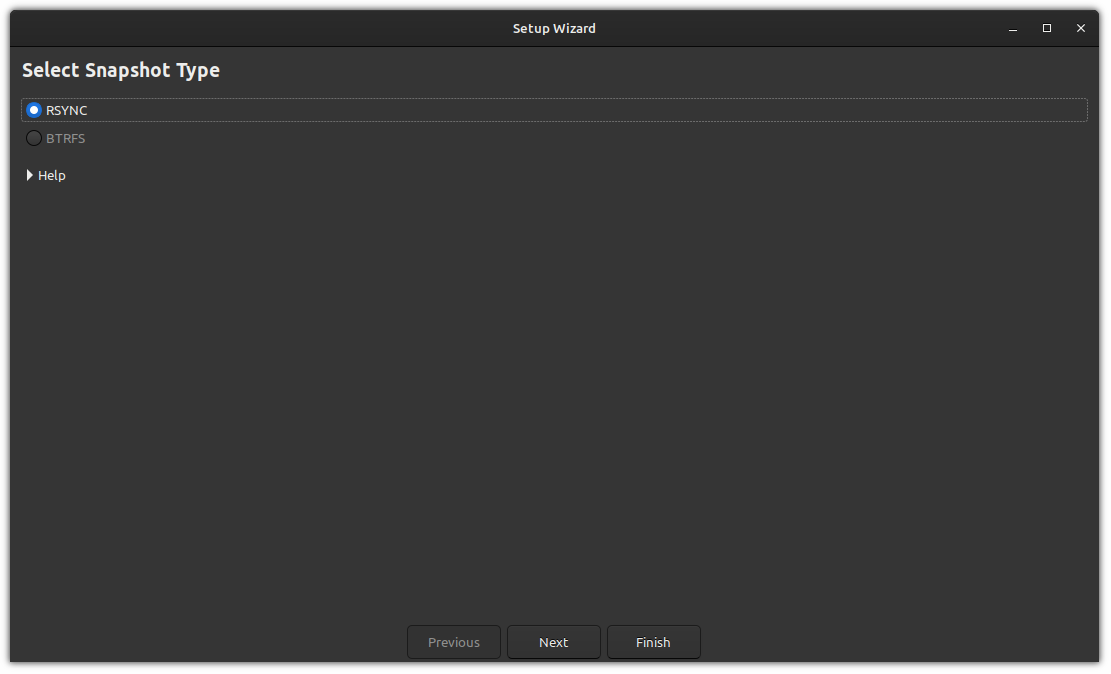
First, it’s going to ask you which sort of backup you wish to create. There are two choices: RSYNC and BTRFS.
RSYNC is predicated upon onerous hyperlinks and might work on any filesystem, whereas BTRFS is barely used for the BTRFS filesystem.
If you do not know what to decide on, choose RSYNC as it could work simply superb:
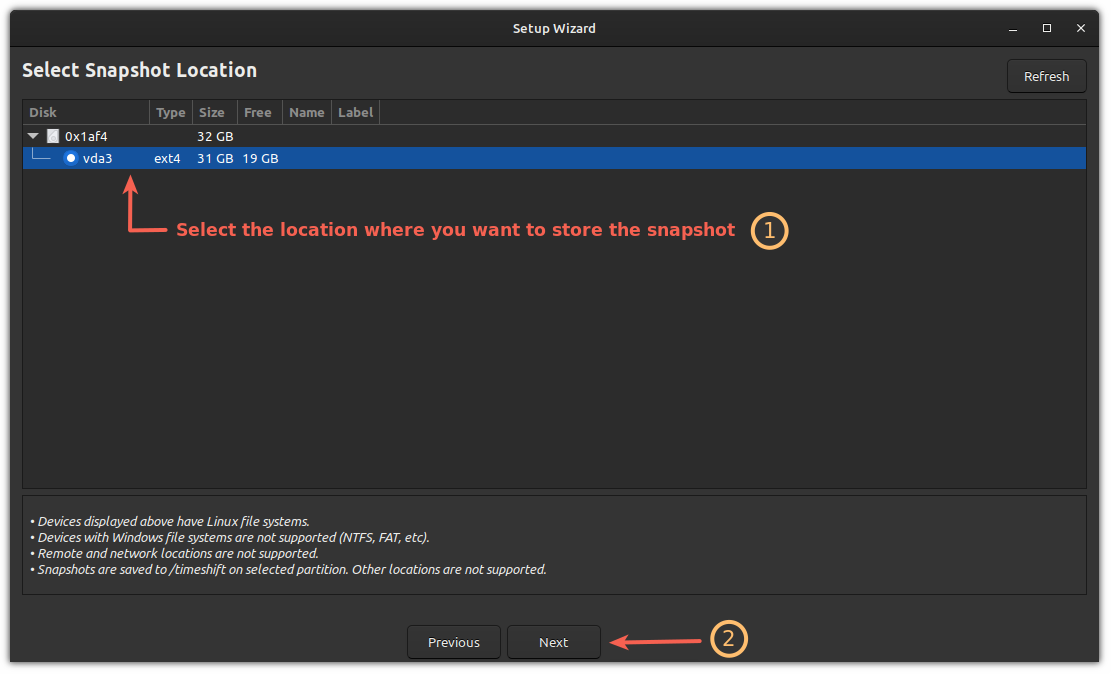
Subsequent, it’s going to ask you the place you wish to retailer the snapshots.
You probably have a number of drives, it could present a number of choices however for many customers, there will likely be a single choice. In my case, it was vda3:
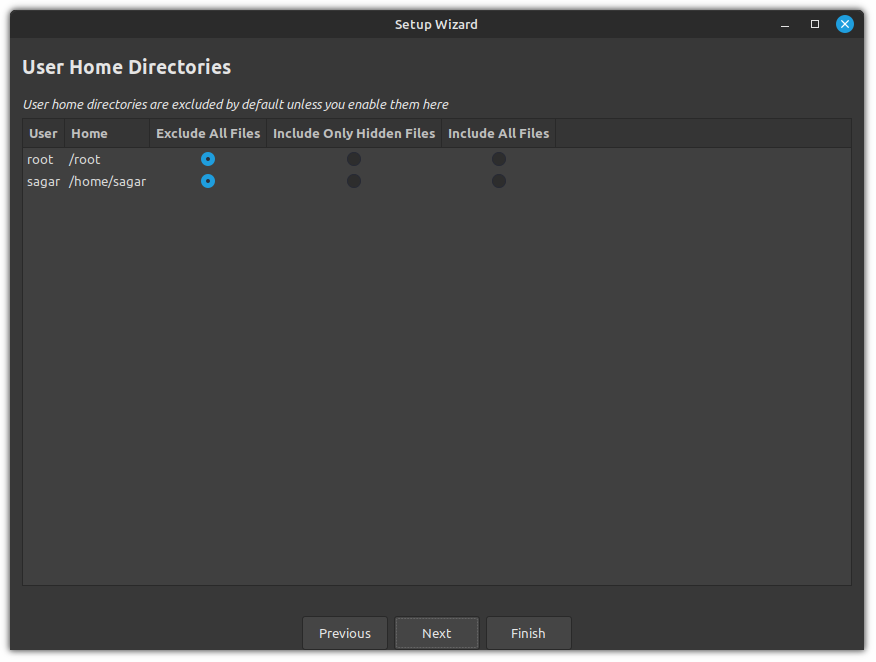
Now, it’s going to ask you to decide on the directories that want backing up.
By default, it’s going to exclude all of the information inside the house listing and I like to recommend you do the identical.
🚧
Timeshift is primarily used for backing up system settings. Utilizing it to backup private information in residence listing will take up an enormous quantity of disk house and is impractical. Use DejaDup for private file backups on an exterior disk.
As soon as carried out, it’s going to present you a web page informing the setup is full.
Now, you’ll be able to create a backup by clicking on the Create button:
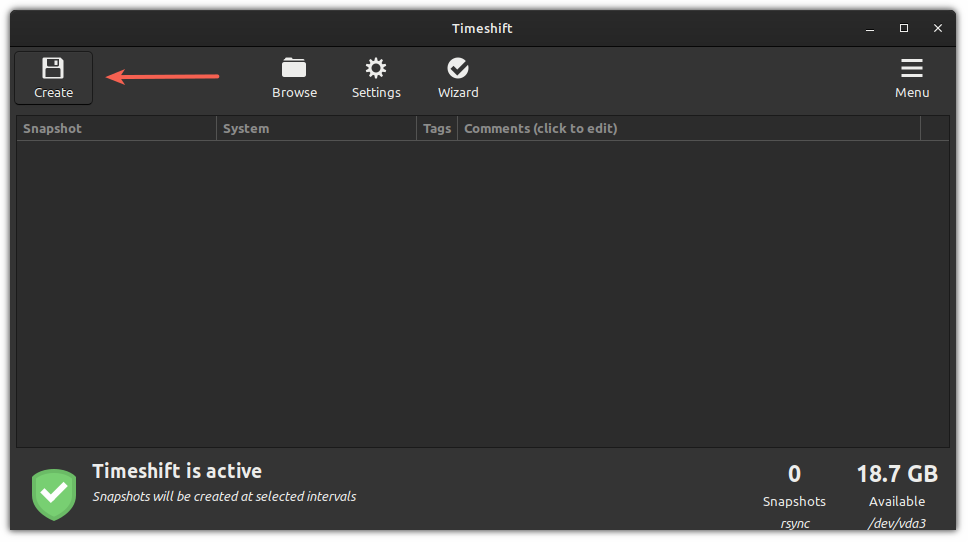
It could take some time, primarily based in your selections through the setup.
As soon as carried out, the snapshot will replicate within the Timeshift:
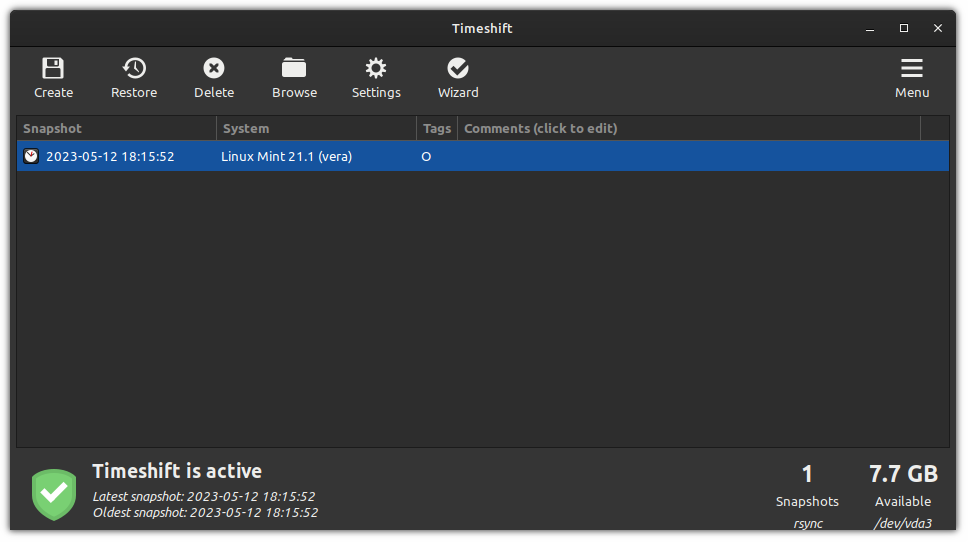
Nice! So now you’ve gotten created the backup. Let’s return to the system updater.
Putting in updates
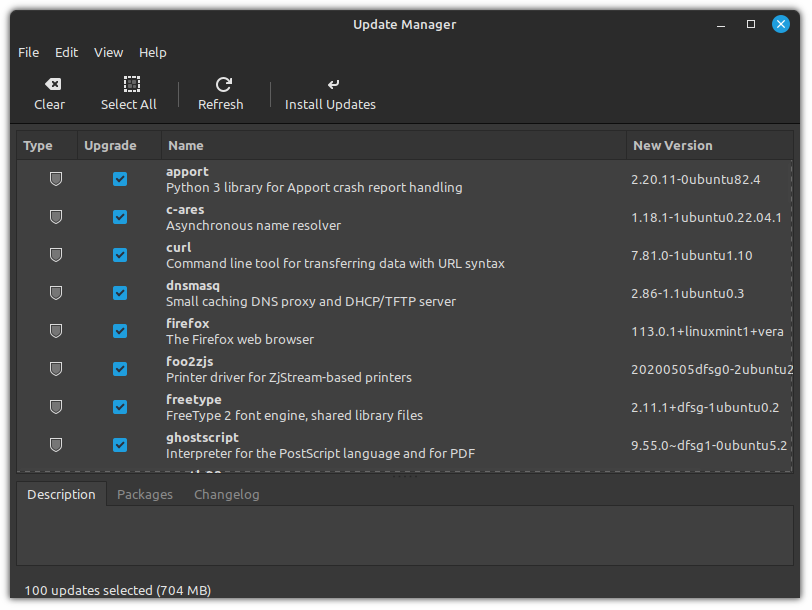
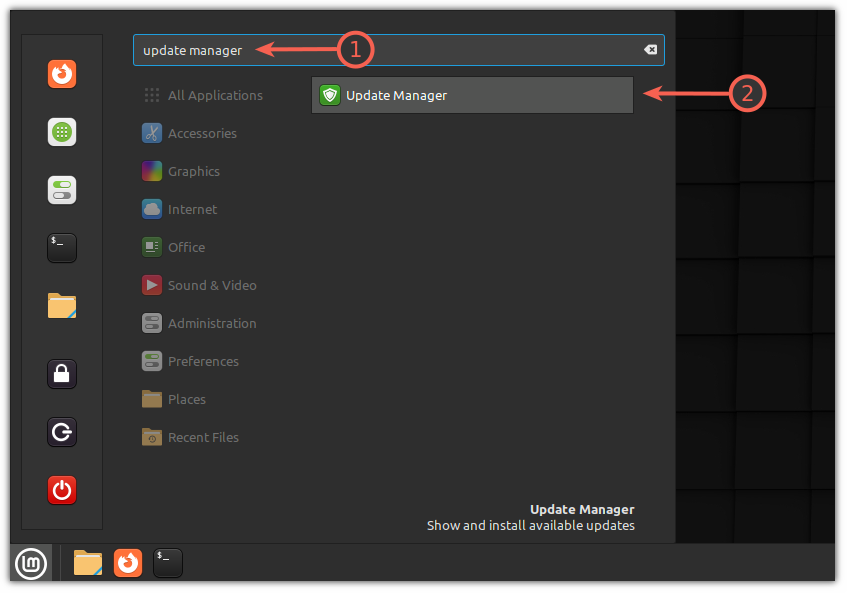
First, open the replace supervisor from the system menu:
Right here, you can find an inventory of packages that must be up to date and all of them will likely be chosen by default (I’d suggest you go along with the identical).
However if you need, you’ll be able to uncheck software program updates or kernel updates if you wish to follow that particular model solely.
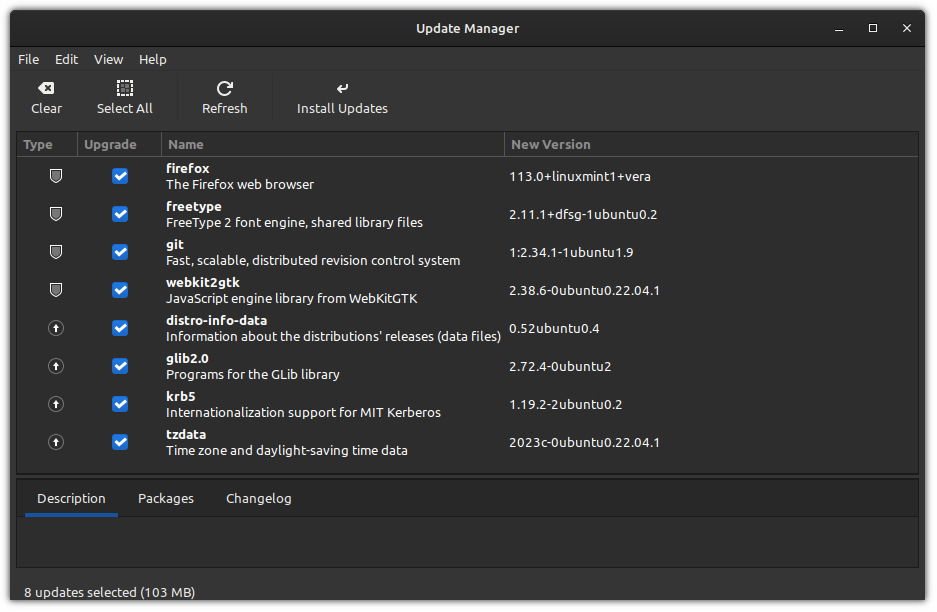
To make issues easy, in Linux Mint, the updates are divided into three classes:
- Safety patches (Highest precedence and indicated by
🛡): You’re supposed to put in the safety patches instantly as it’s supposed to save lots of you out of your system’s present vulnerability. - Kernel updates (Medium precedence and indicated by
🗲): New kernel brings {hardware} assist for brand new {hardware}, bug fixes on your present kernel, and might also have efficiency enchancment. - Software program updates (Lowest precedence and indicated by
⬆): These updates are supposed to roll out new options and bug fixes in your software program.
Once more, I’ll advise you to go along with the defaults!
As soon as you’re carried out choosing, click on on the Set up Updates button, enter the password and it’ll begin the set up of latest packages:
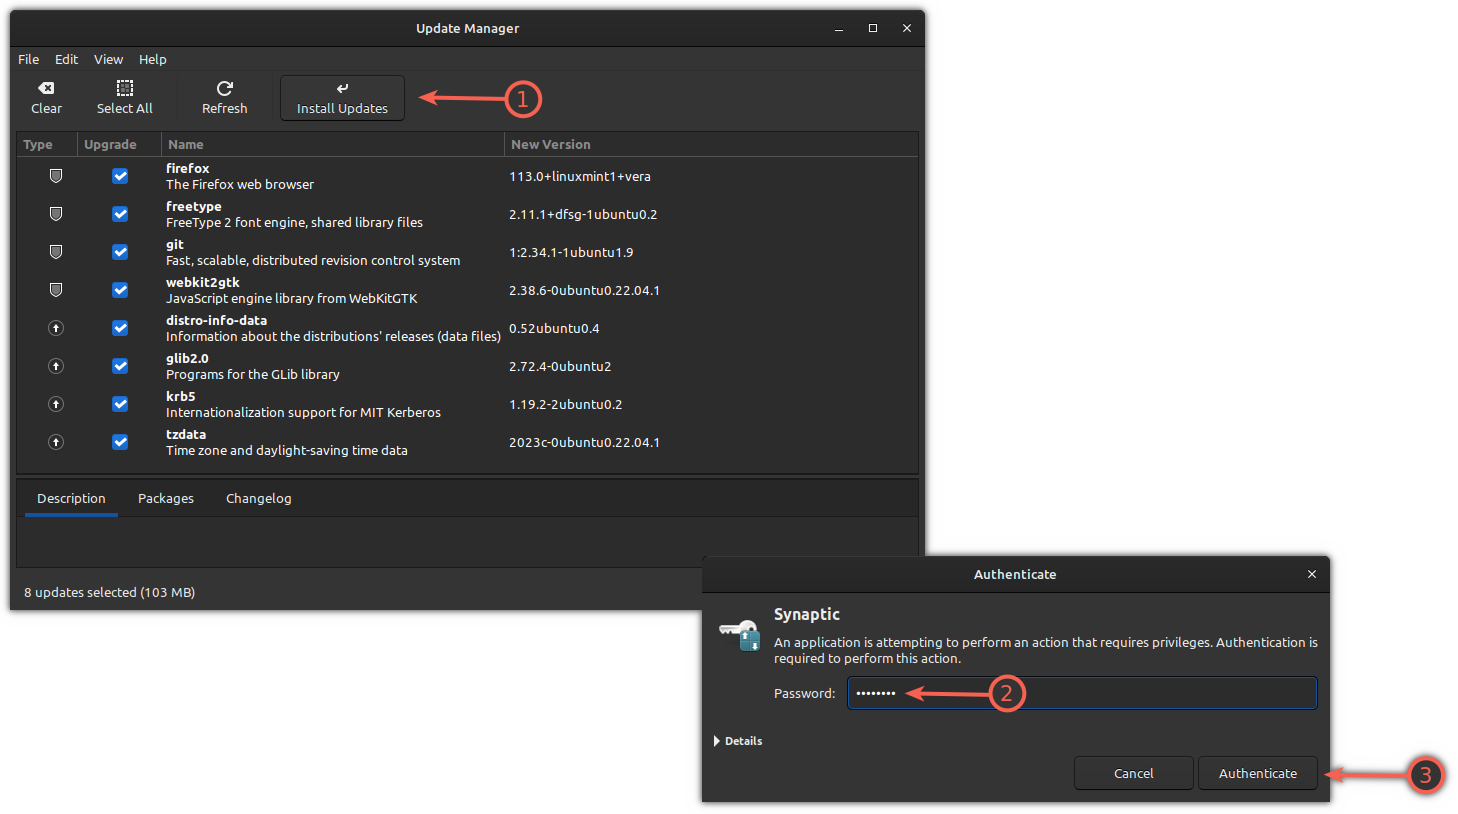
That is it! The system is up to date!
Rollback if the system crashed after the replace (Backup required)
For those who can entry the GUI, you’ll be able to simply roll again to the earlier state utilizing the Timeshift backup you had created earlier.
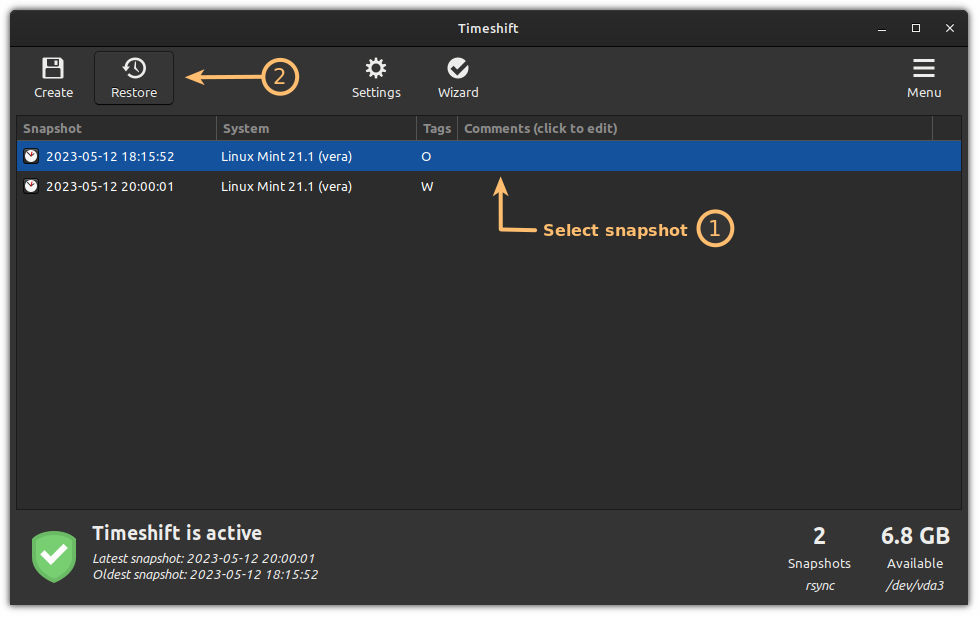
First, open the Timeshift from the system menu and it’ll present the created snapshots backup you took up to now:

To revive to the earlier state, choose the snapshot and click on on the Restore button:
Subsequent, it’s going to ask you to pick out the focused gadgets. I’d suggest going with the chosen choices:
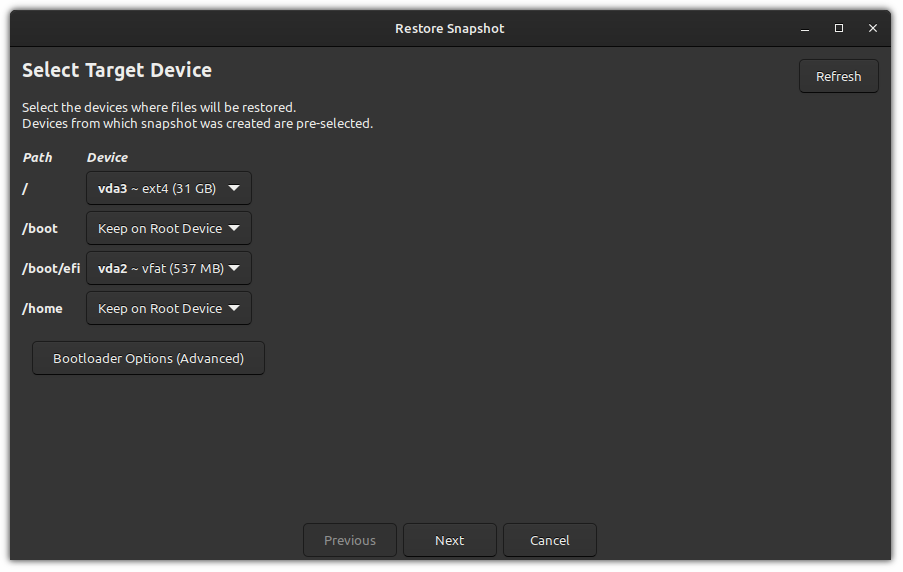
Click on on the subsequent button and it’ll begin the restoration course of!
💡
In case your system doesn’t boot, you need to use a stay Linux Mint USB, boot from it and set up Timeshift within the stay surroundings. Run Timeshift and it ought to detect the Timeshift backups current on the onerous disk. You may restore it from right here.
Add the quickest mirrors to hurry up the obtain (optionally available)
Choosing the quickest mirror is nothing however selecting the closest server to you, which can finally scale back the latency and get you a sooner expertise.
📋
That is the way it ought to work in concept. However generally, sticking to the principle server is extra dependable as a result of the closest server might not at all times carry out the very best repeatedly. This is the reason that is an optionally available step.
So as to add the quickest mirror, first, open the software program sources from the system menu and enter the password when requested:

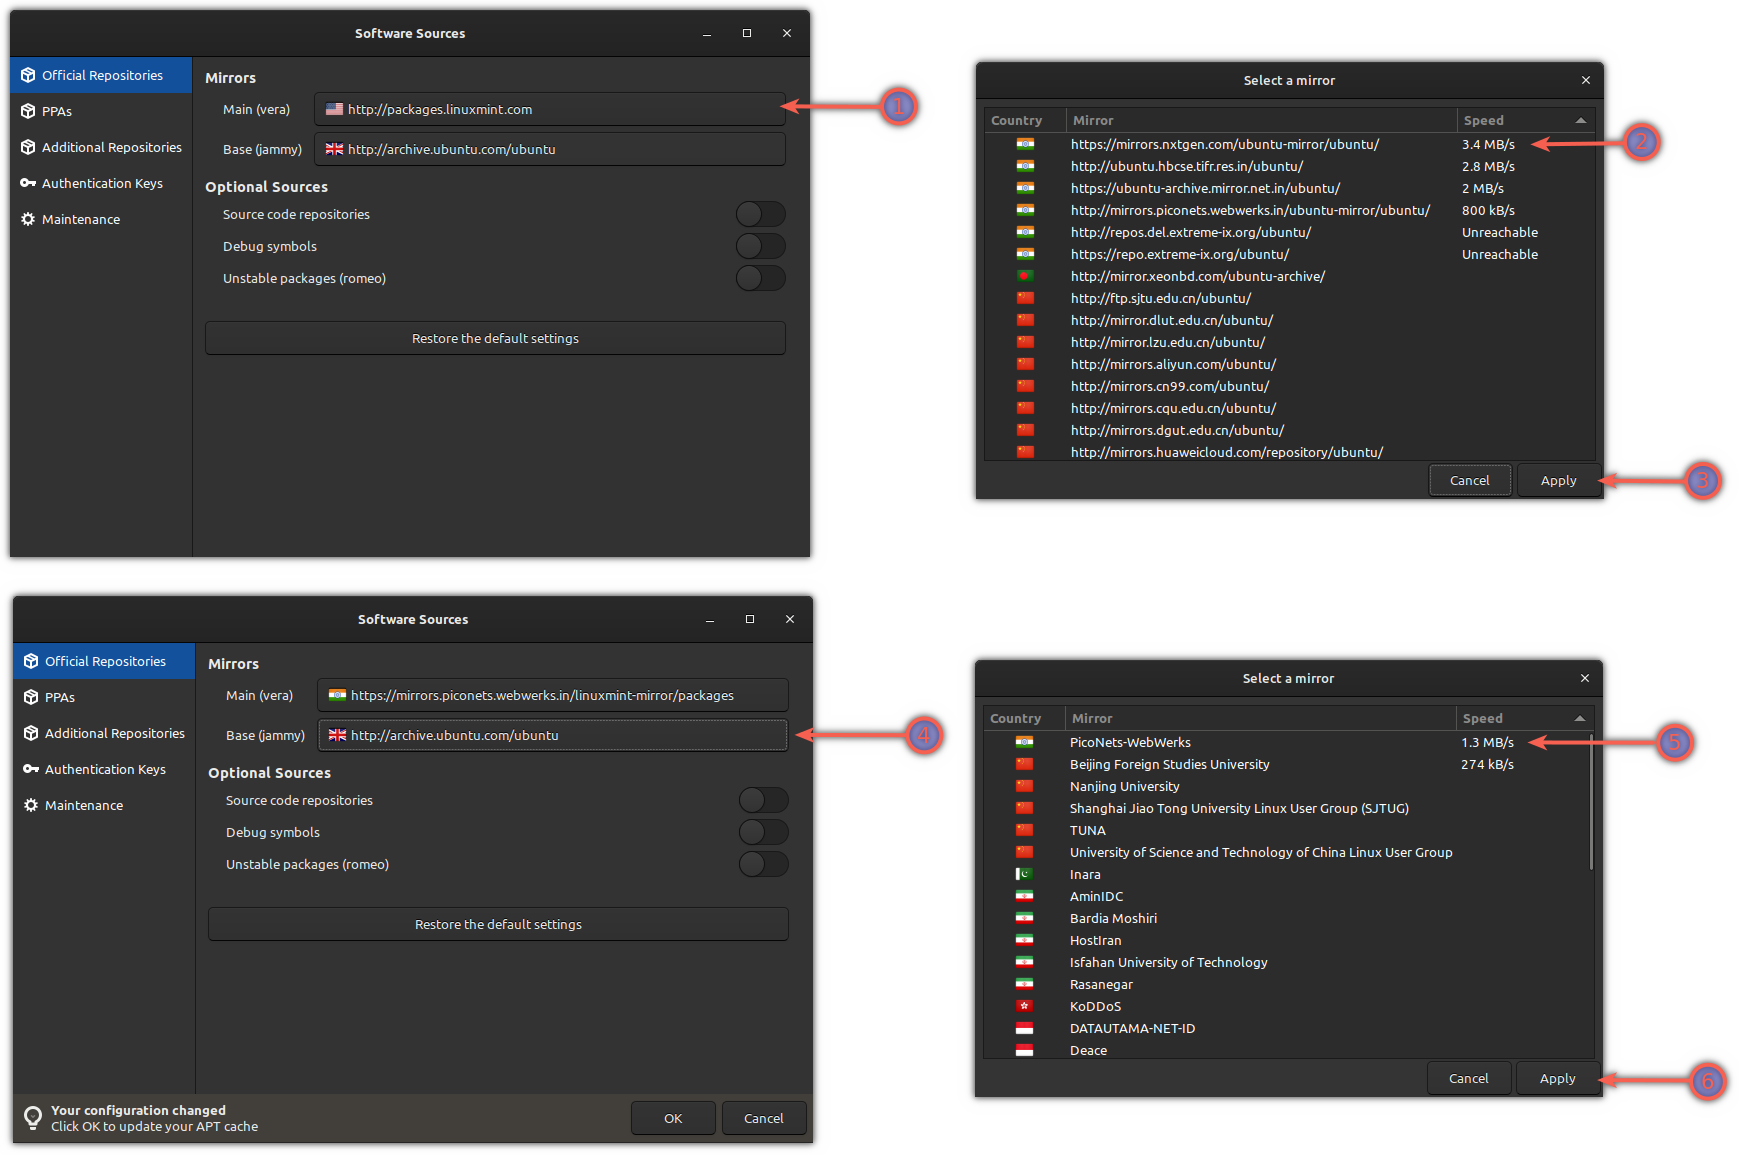
When you do this, you’d need to do the next:
- Choose the primary mirror (labeled as Predominant)
- Anticipate some seconds and select the quickest mirror
- Click on on apply
- Now, select the second mirror (labeled as Base)
- Select the quickest mirror and click on on the apply button
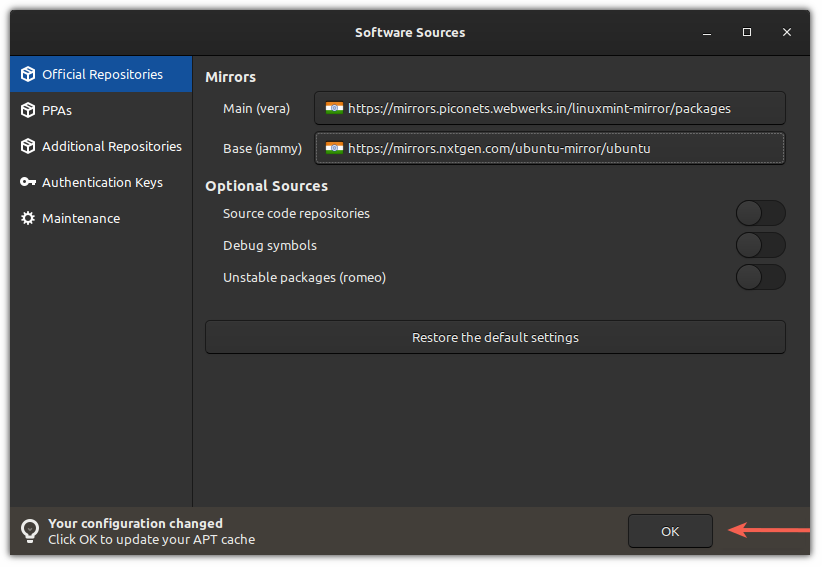
As soon as carried out, it’s going to present the message saying, “Your configuration modified, click on OK to replace your APT cache.”
Click on on the OK button and it’ll begin updating the cache and can activate the quickest mirrors you selected lately:
That is it!
The Replace Supervisor works on the deb packages by the apt command line utility.
However Linux packages are additionally fragmented. There are Snap, Flatpaks and AppImages. Utilizing a number of package deal managers means updating every sort of package deal manually.
That is the place you need to use a terminal utility referred to as Topgrade which can replace every thing without delay. Sounds fascinating? Here is the detailed information:
Improve Varied Sorts of Packages in Linux at As soon as With Topgrade
Right here’s how one can improve numerous packages in Linux without delay, utilizing a nifty software i.e topgrade.
Now, you must have a good suggestion in regards to the system replace course of in Linux Mint.
🗨 Please let me know should you discovered one thing new on this tutorial. Additionally, if I missed one thing you suppose I ought to have talked about, please point out it within the feedback.