
Workspaces are digital desktops that let you juggle and manage a set of utility home windows.
As a substitute of cluttering all of the home windows in a single display screen, you may have a number of home windows in numerous workspaces. This manner, your desktop workspace stays organized, and you’ll rapidly entry the specified window/app.
Fashionable desktop environments present a number of methods to prepare your digital desktops.
The newest releases of Ubuntu use GNOME 40 and above. With them, you get a horizontal alignment of workspaces and spectacular touchpad gesture assist for the Wayland show server.
Utilizing the Default Ubuntu Workspaces
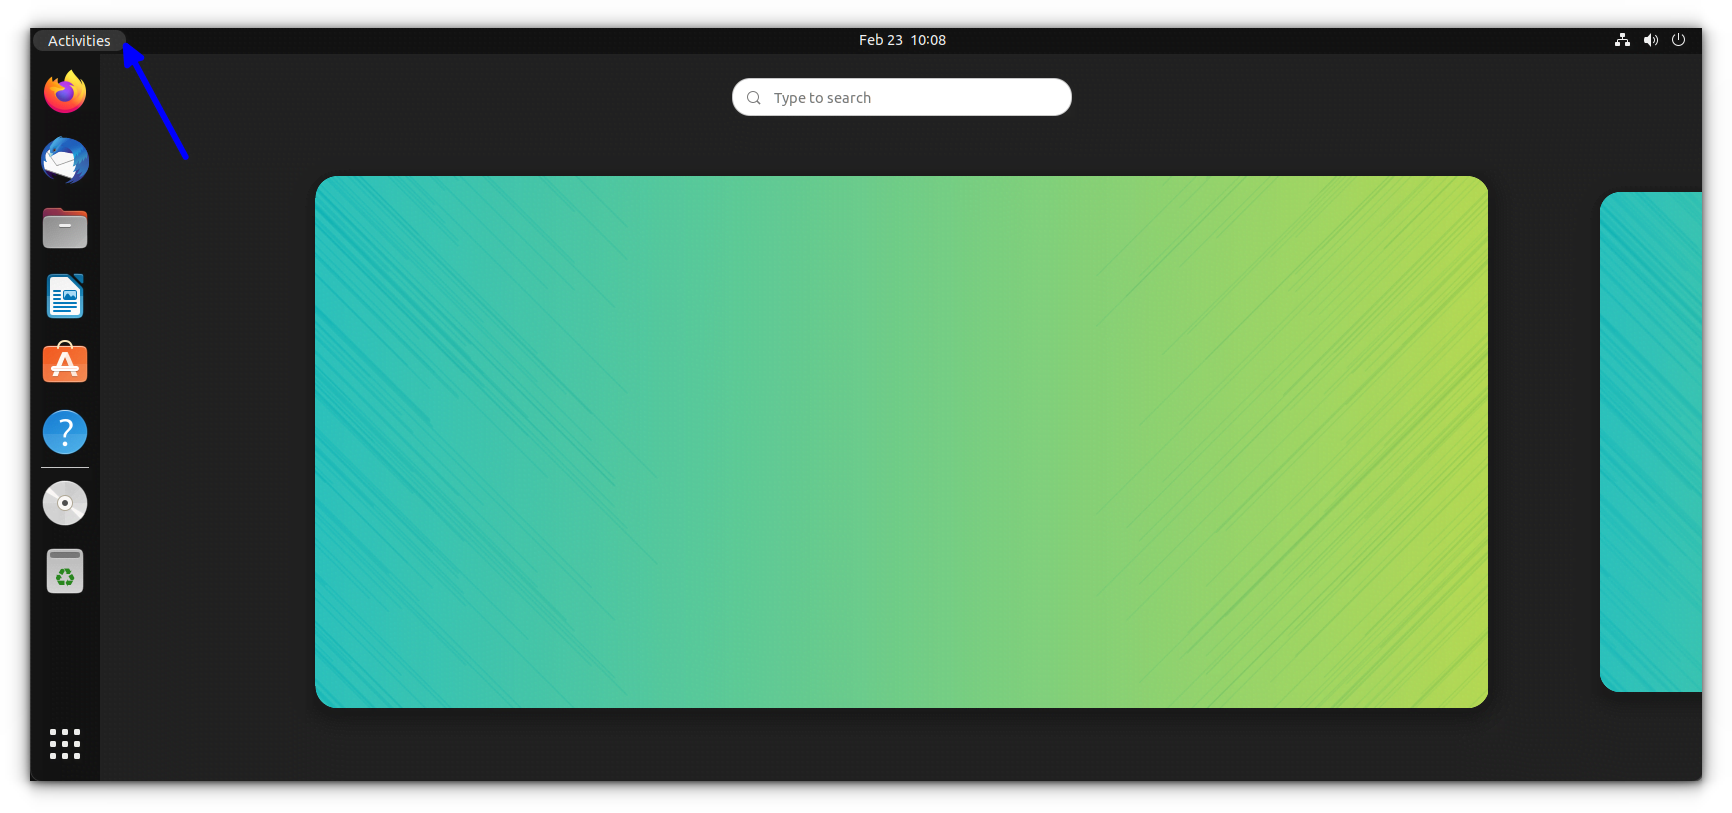
Whether or not you employ Ubuntu or another distribution with GNOME, you may entry the workspace overview by urgent the Tremendous key. You get an outline of the 2 workspaces (and something in it).
You too can entry the workspaces utilizing the highest Actions button.
By default, the workspaces are dynamically allotted and begin at 2.
In different phrases, a brand new workspace can be appended while you transfer a window to the final workspace.
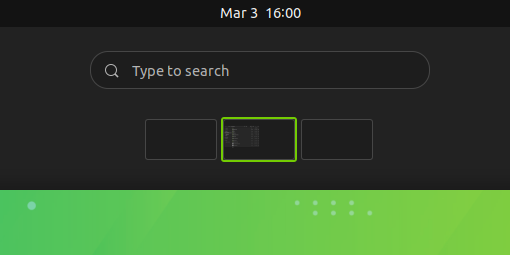
And for those who take away all of the home windows from any of the additional workspaces, these workspaces can be routinely closed.
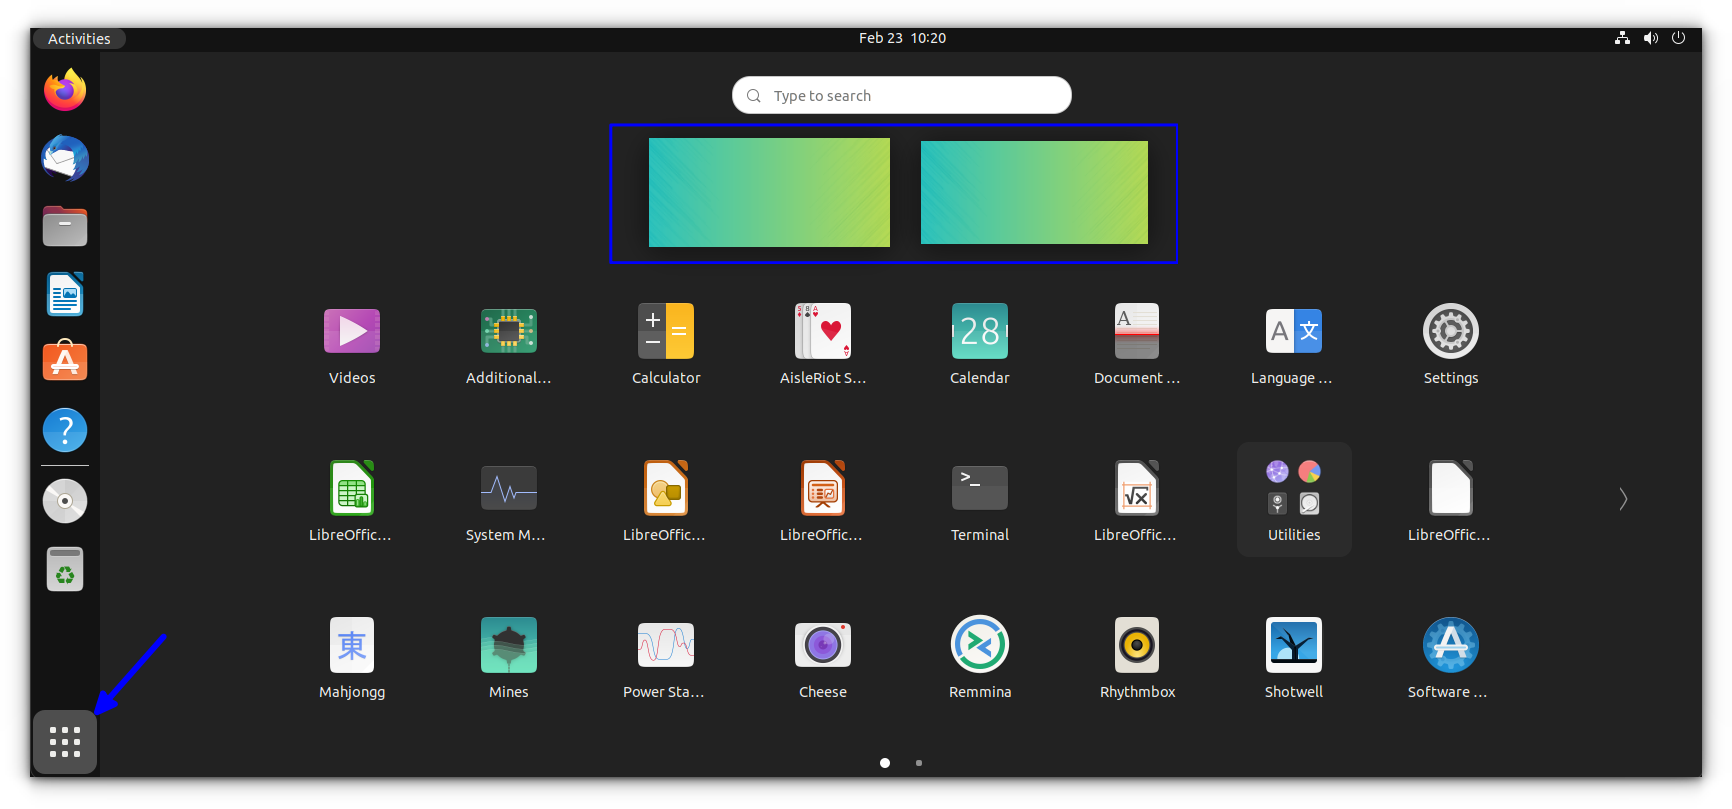
As well as, for those who press the tremendous key twice or click on the underside left Functions button, you’re going to get an overview of workspaces together with the applying grid as proven beneath:
💡
You’ll be able to drag and drop any icon from the dock or grid to a selected workspace to open it there.
Now that you know the way to entry a workspace, you may need to be taught the shortcuts to navigate by way of it effectively earlier than you customise it to your necessities.
Workspace Navigation Shortcuts
| Description | Use |
|---|---|
| Transfer to workspace on the left | Tremendous + PageUp |
| Transfer to workspace on the appropriate | Tremendous + PageDown |
| Transfer window one workspace to the left | Shift + Tremendous + PageUp |
| Transfer window one workspace to the appropriate | Shift + Tremendous + PageDown |
| Change to workspace 1 | Tremendous + Dwelling |
| Change to the final workspace | Tremendous + Finish |
| Transfer a window to workspace 1 | Shift + Tremendous + Dwelling |
| Transfer a window to final workspace | Shift + Tremendous + Finish |
You’ll be able to obtain a cheatsheet for these shortcuts utilizing the PDF file linked beneath:
💡
You should use the three-finger left/proper swipe on laptop computer touchpads to modify between the workspaces.
Configuring the Workspaces
Whereas the default settings are greater than sufficient for many customers, generally, you might need to configure them to fit your wants.
There are a number of methods you may tweak the default workspace habits. I’m utilizing Ubuntu GNOME right here, and the identical steps ought to work on virtually all GNOME-based Linux distributions.
Enabling the Sizzling Nook Characteristic
By default, the scorching nook characteristic is disabled in Ubuntu. To allow it, open settings and go to the Multitasking tab. And, toggle the Sizzling Nook choice, as proven within the screenshot beneath.
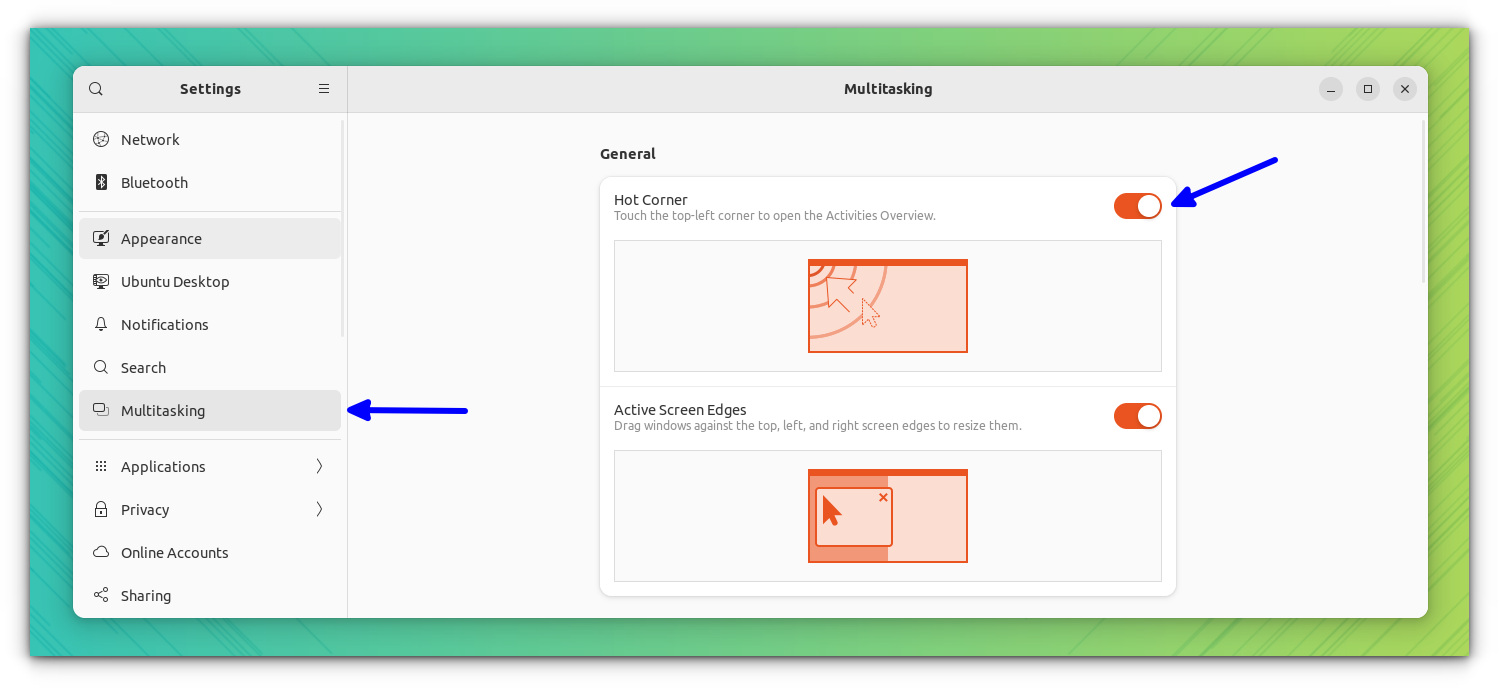
Now you can hover on the highest left nook to get the overview of workspaces. That is very helpful if you’re utilizing the mouse regularly.
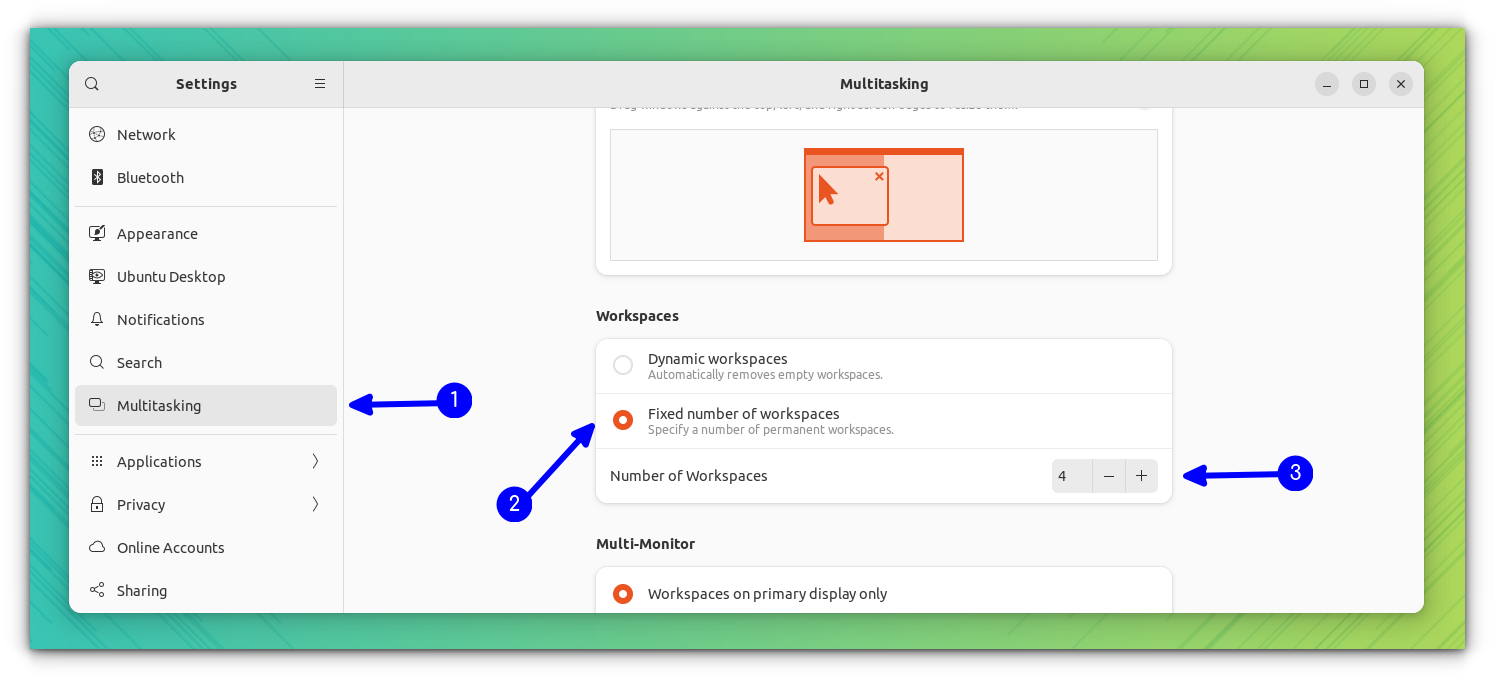
Fastened Variety of Workspaces
As talked about, Ubuntu makes use of dynamic workspaces by default.
Nevertheless, you may change it to a hard and fast variety of workspaces for those who want.
Be aware that this may take away the automated appending of workspaces. So, everytime you suppose you want one other workspace, it’s a must to come again to this setting and alter the variety of workspaces.
To proceed with this, head to the Multitasking tab, allow fastened workspaces, and alter the quantity to your liking.
Workspace Settings for Multi-Monitor Setup
This is without doubt one of the most important options for these with a number of screens who need to improve productiveness.
The default setting for that is workspace on Main show solely.
This implies your digital desktops are confined to your main monitor. The opposite screens can keep on with any devoted use-case you need (or assume it as a single workspace).
Say, for instance, use your digital desktops on the first monitor for numerous modifying duties whereas utilizing the exterior monitor for presentation functions.
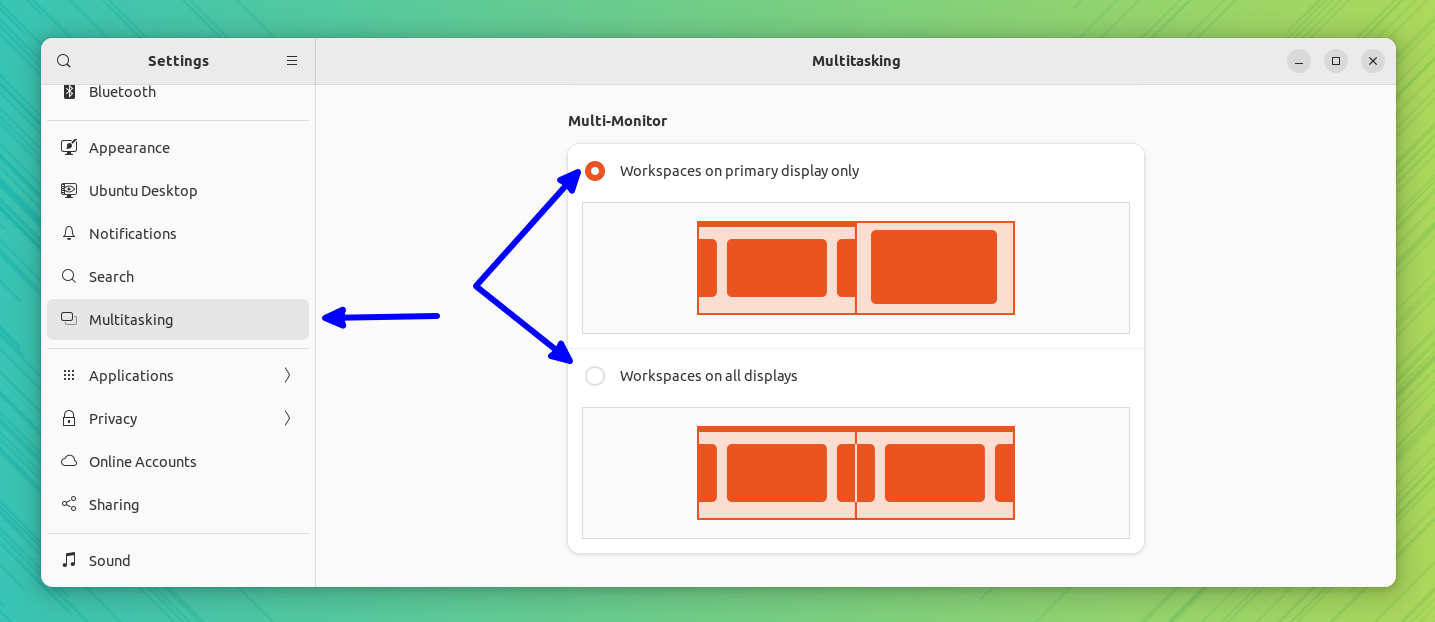
Now, when you have a number of screens, you may tweak it to Workspaces on all shows, making your workspace out there to all of the screens, identical to a single large monitor.
It may be useful for enhanced productiveness as per your necessities. Beneath this setting, you may seamlessly transfer your home windows to any monitor.
Tweak Utility Switching between Workspaces
By default, the applying switching is about to “utility home windows from all workspaces” and “utility home windows from all screens“.
This implies you may swap between app home windows opened on totally different workspaces or screens from any workspace. You should use both a keyboard shortcut or Ubuntu Dock to do it.
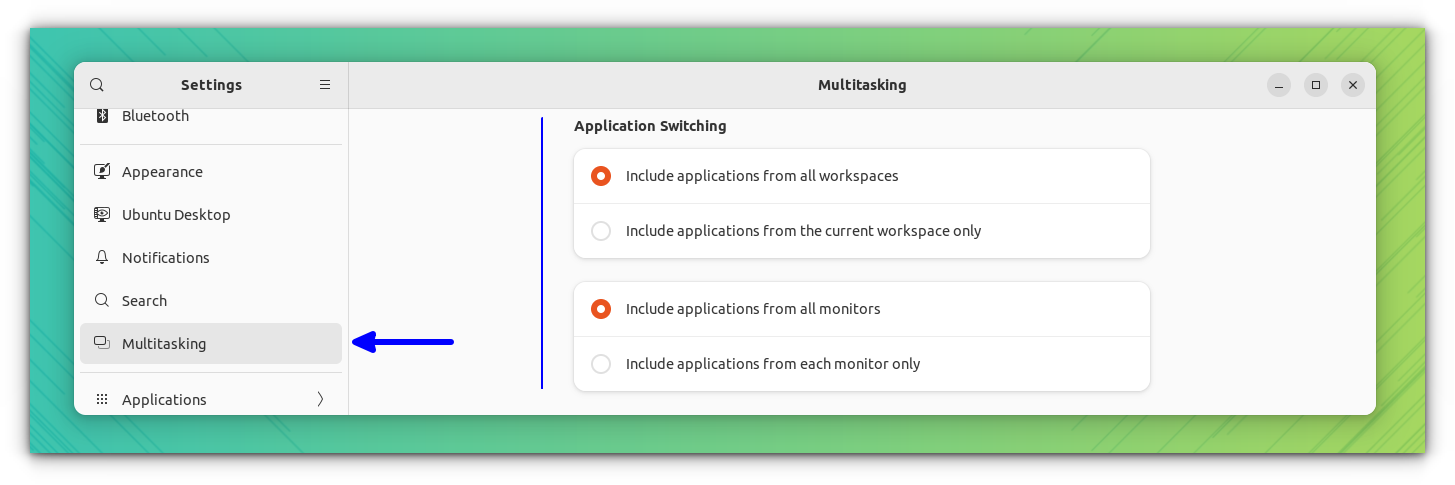
Should you set it to “Embody utility from present workspace solely,” then you may solely swap between functions in your present workspace.
To go to a window on a distinct workspace, you have to first go to that workspace.
Should you wish to juggle between issues rapidly, the default settings ought to suffice. And, if you need extra management, you might have to tweak the settings as talked about above.
Extra to Tweak
I’ve mentioned the essential tweaks to the workspace out there out of the field.
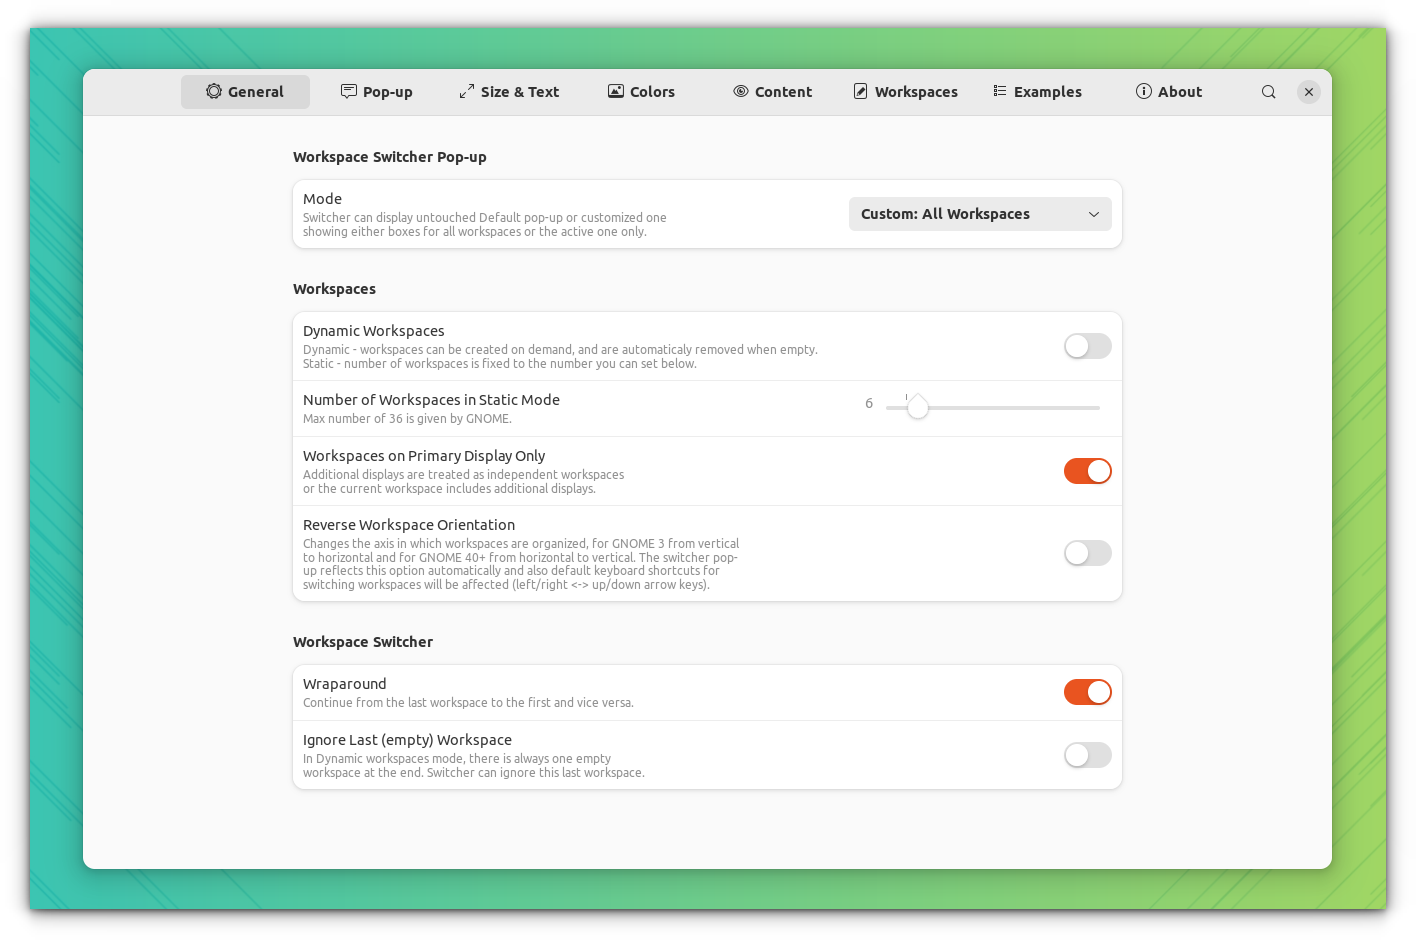
However there are a number of different issues that you need to use for extra enhancements. One such help is the Workspace Switcher Supervisor GNOME extension.
With this extension, you are able to do a number of tweaks to the default workspace switcher, accessible by way of the shortcut Tremendous + PageUp/Down, like giving names to workspaces, displaying the lively window title on every workspace, and so forth.
When you set up this GNOME extension, you may tweak it in keeping with your liking from the extension settings.
💡
You’ll be able to entry the settings from the gear icon adjoining to the extension on the Extensions app.
💬 Do you employ workspaces usually? Share your ideas in your expertise within the feedback.