
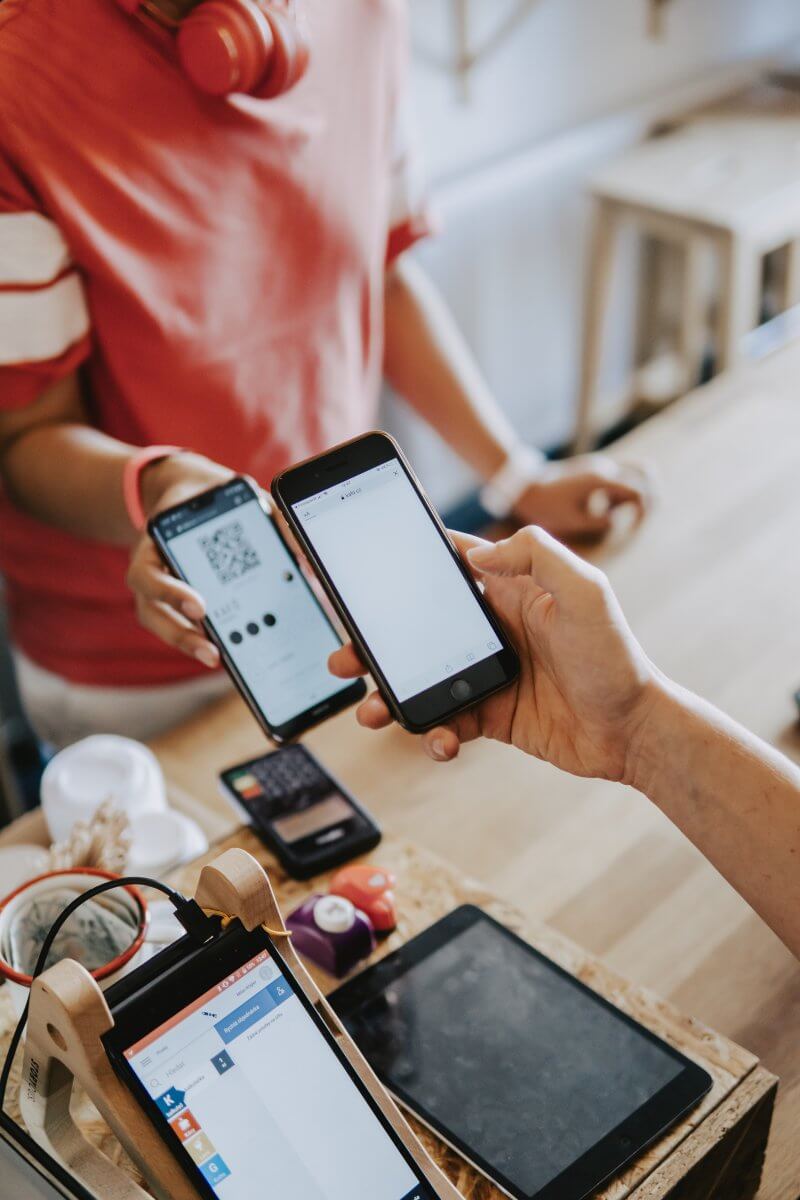
So, what’s QR code? I consider most of you recognize what a QR code is. In case you haven’t heard of it, simply check out the above picture – that’s a QR code.
QR (brief for Fast Response) code is a sort of two-dimensional bar code developed by Denso. Initially designed for monitoring elements in manufacturing, QR code has gained recognition in shopper area lately as a approach to encode the URL of a touchdown web page or advertising and marketing data. In contrast to the essential barcode that you just’re conversant in, a QR code accommodates data in each the horizontal and vertical path. Thus, this contributes to its functionality of storing a bigger quantity of information in each numeric and letter kind. I don’t need to go into the technical particulars of the QR code right here. In case you’re taken with studying extra, you’ll be able to try the official web site of QR code.
As an iOS developer, it’s possible you’ll marvel how one can empower your app to learn a QR code. Earlier, I’ve written a tutorial on constructing a QR Code reader utilizing UIKit and AVFoundation. With the discharge of SwiftUI, let’s see how the identical QR Code Scanner app will be applied utilizing this new UI framework.
Take a Fast Take a look at the QR Code Scanner App
The demo app that we’re going to construct is pretty easy and easy. Earlier than we proceed to construct the demo app, nonetheless, it’s essential to know that each one sorts of barcode scanning in iOS, together with QR code scanning, is completely based mostly on video seize. Maintain this level in thoughts, because it’ll assist you perceive this tutorial.
So, how does the demo app work?
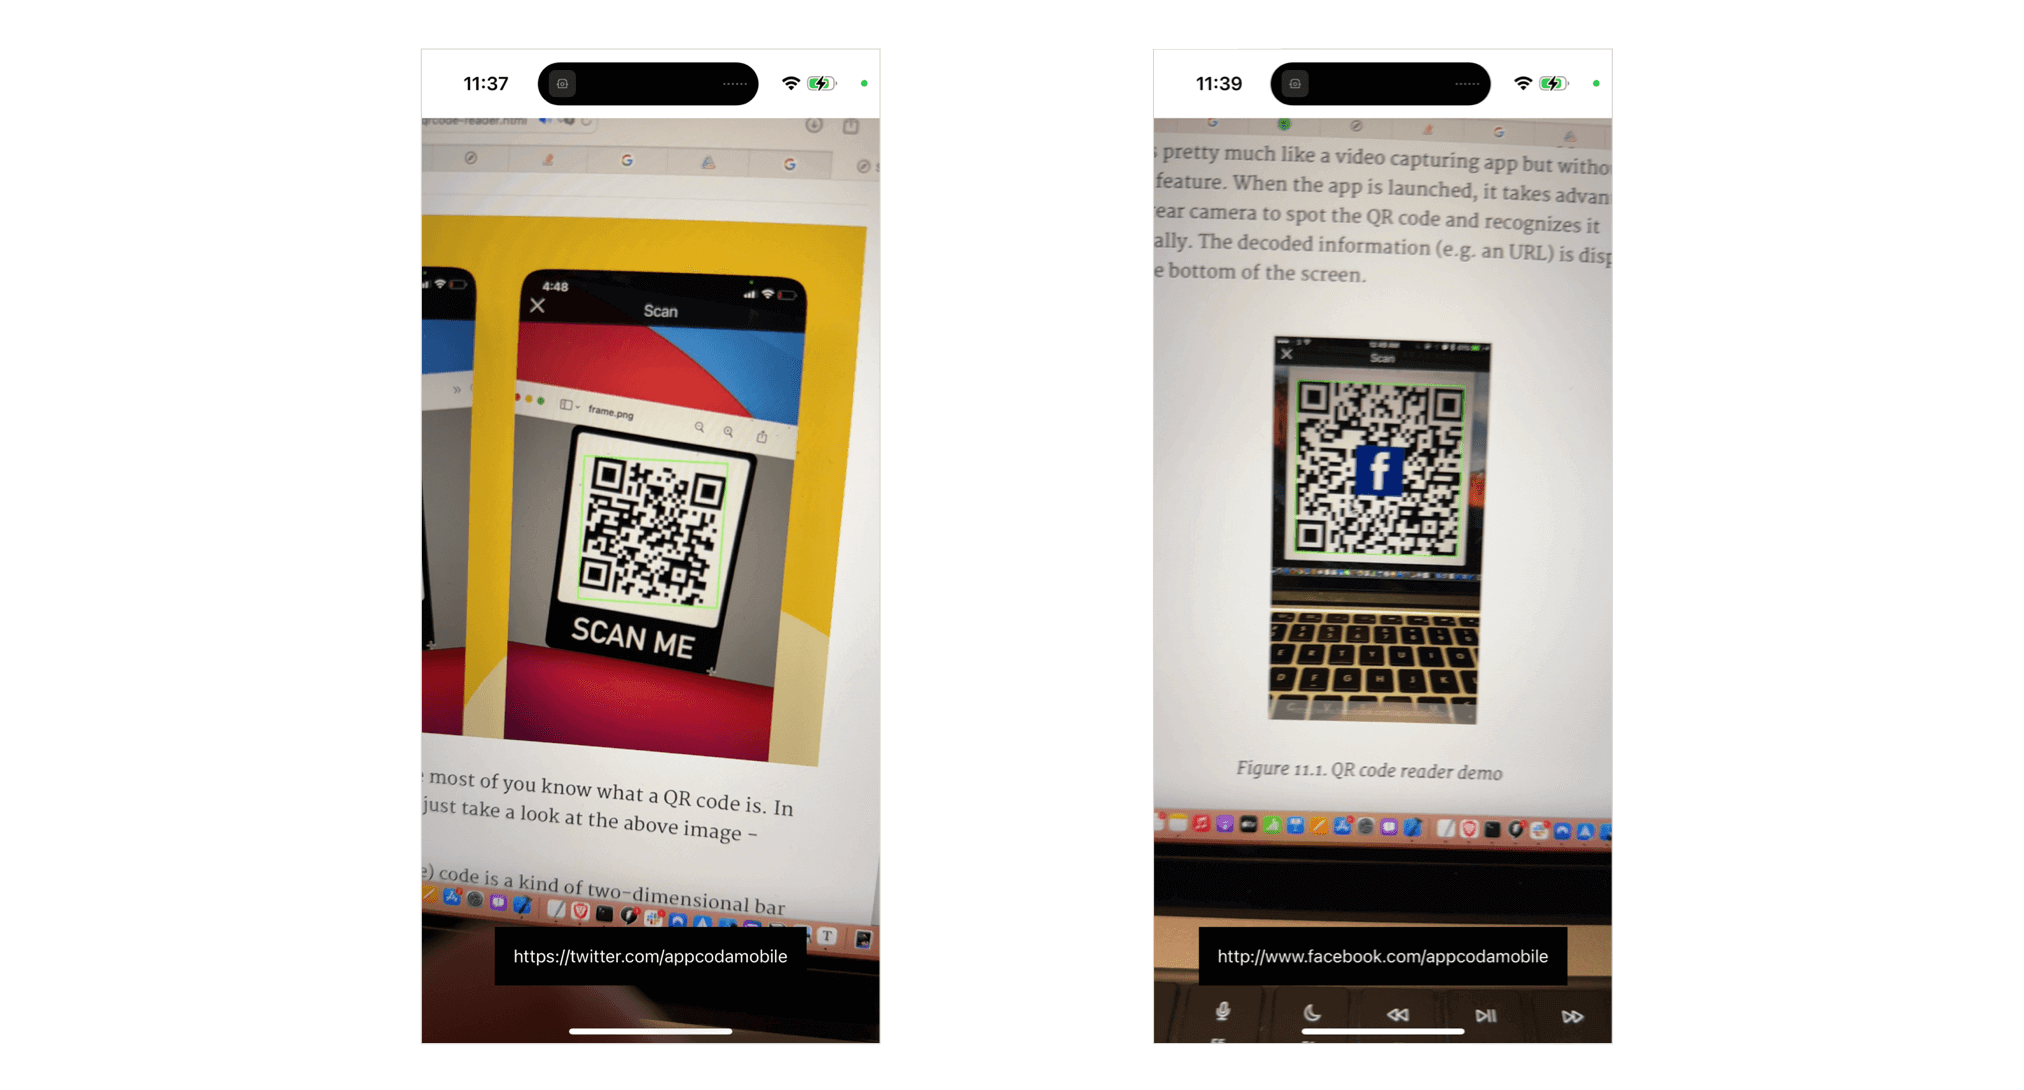
Check out the screenshot beneath. That is how the app UI appears. The app works just about like a video capturing app however with out the recording characteristic. When the app is launched, it makes use of the iPhone’s rear digital camera to identify a QR code and decodes it mechanically. The decoded data (e.g. an URL) is displayed proper on the backside of the display.
Now that you just perceive how the demo app works, let’s get began and develop the QR code reader app in SwiftUI.
Constructing the QRScannerController Class
The SwiftUI framework doesn’t include a built-in API for launching the digital camera. To make use of the system’s digital camera, we have to use UIKit to construct a view controller for capturing movies. After which we make use of UIViewControllerRepresentable so as to add the view controller to the SwiftUI venture.
Assuming you’ve created a brand new SwiftUI venture in Xcode, let’s first create a brand new Swift file named QRScanner.swift. Within the file, import each SwiftUI and AVFoundation frameworks:
|
import SwiftUI import AVFoundation |
Subsequent, implement a brand new class known as QRScannerController like this:
|
1 2 3 4 5 6 7 8 9 10 11 12 13 14 15 16 17 18 19 20 21 22 23 24 25 26 27 28 29 30 31 32 33 34 35 36 37 38 39 40 41 42 43 44 45 46 47 48 49 50 51 52 53 |
class QRScannerController: UIViewController { var captureSession = AVCaptureSession() var videoPreviewLayer: AVCaptureVideoPreviewLayer? var qrCodeFrameView: UIView?
var delegate: AVCaptureMetadataOutputObjectsDelegate?
override func viewDidLoad() { tremendous.viewDidLoad()
// Get the back-facing digital camera for capturing movies guard let captureDevice = AVCaptureDevice.default(.builtInWideAngleCamera, for: .video, place: .again) else { print(“Did not get the digital camera system”) return }
let videoInput: AVCaptureDeviceInput
do { // Get an occasion of the AVCaptureDeviceInput class utilizing the earlier system object. videoInput = attempt AVCaptureDeviceInput(system: captureDevice)
} catch { // If any error happens, merely print it out and do not proceed any extra. print(error) return }
// Set the enter system on the seize session. captureSession.addInput(videoInput)
// Initialize a AVCaptureMetadataOutput object and set it because the output system to the seize session. let captureMetadataOutput = AVCaptureMetadataOutput() captureSession.addOutput(captureMetadataOutput)
// Set delegate and use the default dispatch queue to execute the decision again captureMetadataOutput.setMetadataObjectsDelegate(delegate, queue: DispatchQueue.essential) captureMetadataOutput.metadataObjectTypes = [ .qr ]
// Initialize the video preview layer and add it as a sublayer to the viewPreview view’s layer. videoPreviewLayer = AVCaptureVideoPreviewLayer(session: captureSession) videoPreviewLayer?.videoGravity = AVLayerVideoGravity.resizeAspectFill videoPreviewLayer?.body = view.layer.bounds view.layer.addSublayer(videoPreviewLayer!)
// Begin video seize. DispatchQueue.international(qos: .background).async { self.captureSession.startRunning() }
}
} |
In case you’ve learn the earlier tutorial, you need to perceive how the code works. Anyway, let me rapidly stroll you thru the code once more. As talked about within the earlier part, QR code scanning is predicated on video seize. To carry out a real-time seize, all we have to do is:
- Search for the again digital camera system.
- Set the enter of the
AVCaptureSessionobject to the suitableAVCaptureDevicefor video capturing.
So, within the viewDidLoad technique, we initialize the again digital camera utilizing AVCaptureDevice. Subsequent, we create an occasion of AVCaptureDeviceInput utilizing the digital camera system. The enter system is then added to the captureSession object. An occasion of AVCaptureMetadataOutput is created and added to the identical session object as an output to the seize session.
We additionally set the delegate object (AVCaptureMetadataOutputObjectsDelegate) for processing the QR code. When QR codes are captured from the receiver’s connection, they’re vended to the delegate object. We haven’t applied this delegate object but and can do it later.
The metadataObjectTypes property is used to specify what sort of metadata we’re taken with. The worth of .qr clearly signifies that we simply need to do QR code scanning.
The previous few strains of the code above is to create the video preview layer and add it as a sublayer to the viewPreview view’s layer. This shows the video captured by the system’s digital camera on display.
Integrating QRScannerController with SwiftUI
Now that we’ve ready the view controller for capturing video and scanning QR code, how can we combine it with our SwiftUI venture. SwiftUI gives a protocol known as UIViewControllerRepresentable to create and handle a UIViewController object.
In the identical file, let’s create a struct named QRScanner that adopts the protocol:
|
struct QRScanner: UIViewControllerRepresentable {
func makeUIViewController(context: Context) –> QRScannerController { let controller = QRScannerController()
return controller }
func updateUIViewController(_ uiViewController: QRScannerController, context: Context) { } } |
We implement the 2 required strategies of the UIViewControllerRepresentable protocol. Within the makeUIViewController technique, we return an occasion of QRScannerController. Since we don’t must replace the state of the view controller, the updateUIViewController technique is empty.
That is how you utilize a UIViewController object in SwiftUI venture.
Utilizing QRScanner
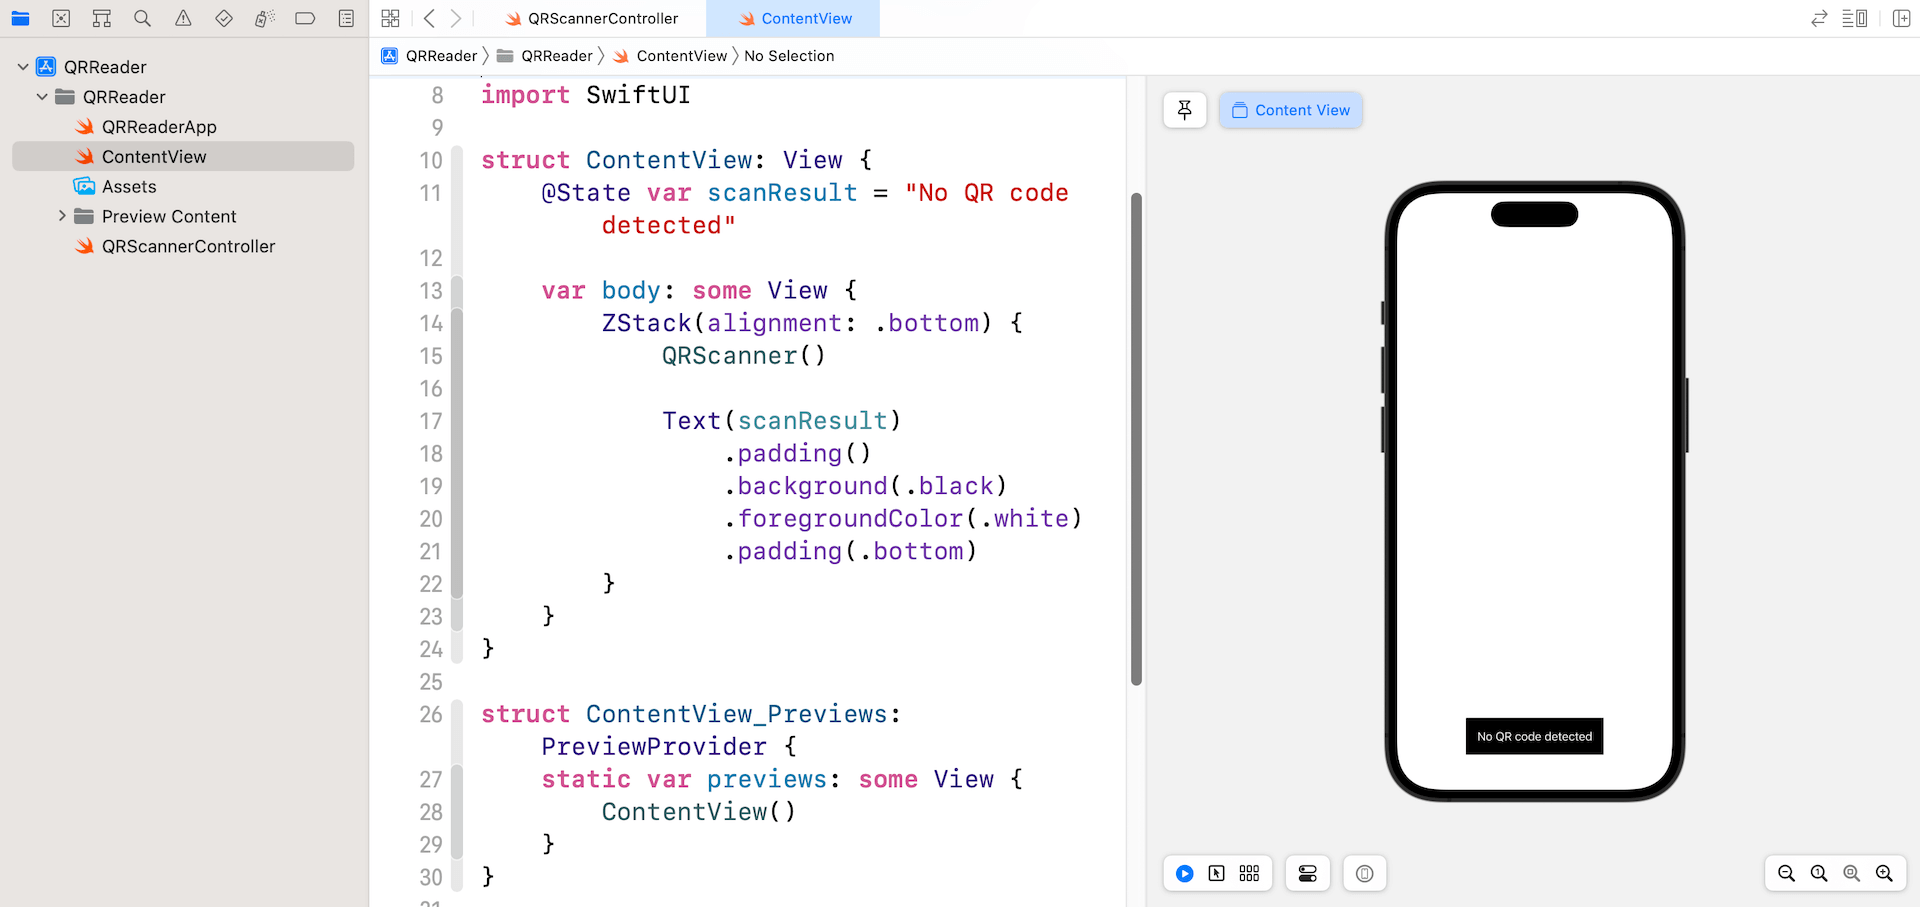
Now let’s change over to ContentView.swift and use the QRScanner struct we simply created. All it is advisable initialize within the physique a part of ContentView:
|
struct ContentView: View { @State var scanResult = “No QR code detected”
var physique: some View { ZStack(alignment: .backside) { QRScanner()
Textual content(scanResult) .padding() .background(.black) .foregroundColor(.white) .padding(.backside) } } } |
I additionally added a textual content label for displaying the results of QR scan. Within the simulator, it solely shows the textual content label. Later, should you run the app in an actual system (iPhone/iPad), the app ought to begin the built-in digital camera.
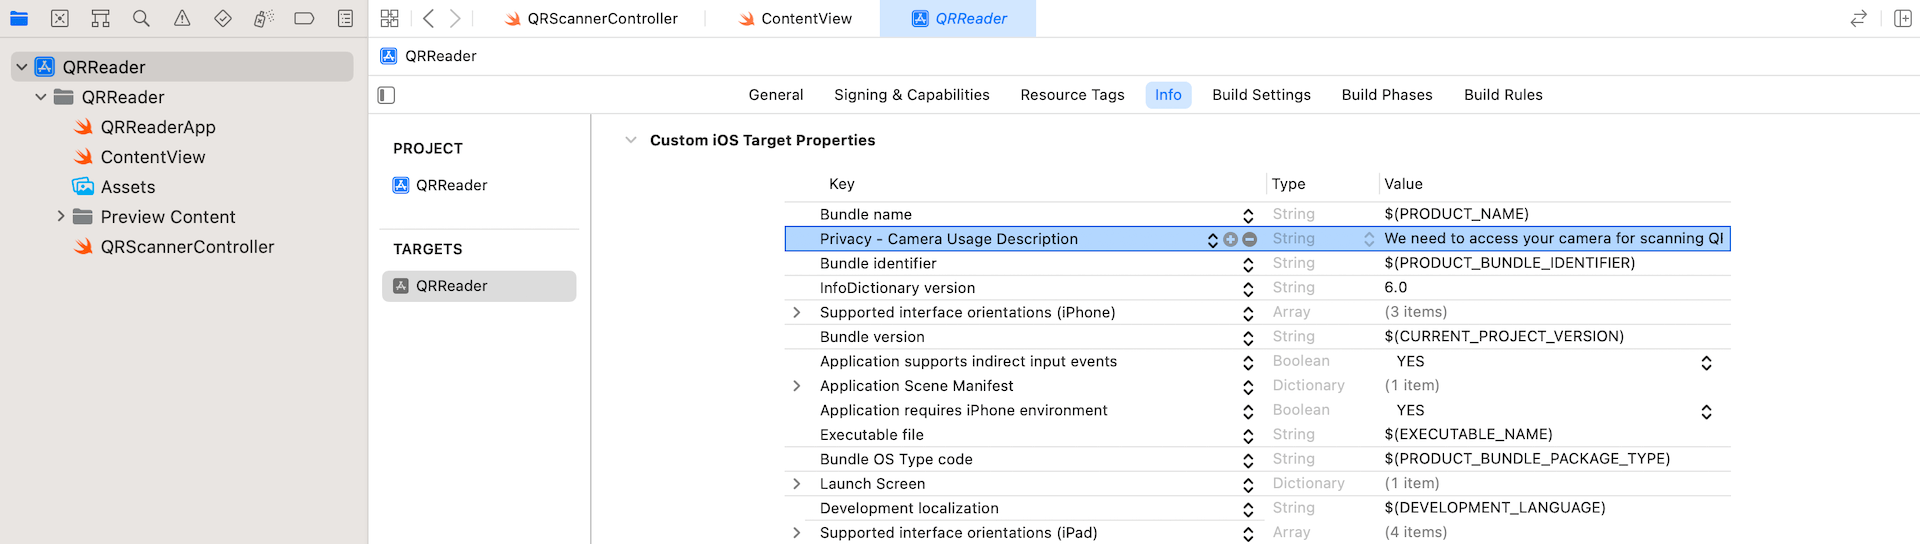
Earlier than you’ll be able to efficiently launch the app, it’s important to add a key named NSCameraUsageDescription within the Data.plist file. Within the venture navigator, choose the venture file and go to the Data part. Add a brand new row and set the important thing to Privateness – Digicam Utilization Description. For its worth, set it to We have to entry your digital camera for scanning QR code.
In case you run the app now, it ought to mechanically entry the built-in digital camera and begin capturing video. Nevertheless, the QR code scanning doesn’t work but.
Dealing with Scan Outcomes
In ContentView, we’ve a state variable to retailer the scan consequence. The query is how can the QRScanner (or QRScannerController) move the decoded data of the QR code again to ContentView?
If you’re not forgetful, we haven’t applied the delegate (i.e. the occasion of AVCaptureMetadataOutputObjectsDelegate) for processing the QR code. The next delegate technique of AVCaptureMetadataOutputObjectsDelegate is required to be applied:
|
optionally available func metadataOutput(_ output: AVCaptureMetadataOutput, didOutput metadataObjects: [AVMetadataObject], from connection: AVCaptureConnection) |
The duty of this delegate is to retrieve the decoded data and move it again to the SwiftUI app. To change knowledge between the view controller object and the SwiftUI interface, we have to present a Coordinator occasion, which additionally adopts the AVCaptureMetadataOutputObjectsDelegate protocol, to deal with these interactions.
First, declare a binding in QRScanner:
|
@Binding var consequence: String |
Subsequent, insert the next code in QRScanner to arrange the Coordinator class:
|
1 2 3 4 5 6 7 8 9 10 11 12 13 14 15 16 17 18 19 20 21 22 23 24 25 26 27 28 |
class Coordinator: NSObject, AVCaptureMetadataOutputObjectsDelegate {
@Binding var scanResult: String
init(_ scanResult: Binding<String>) { self._scanResult = scanResult }
func metadataOutput(_ output: AVCaptureMetadataOutput, didOutput metadataObjects: [AVMetadataObject], from connection: AVCaptureConnection) {
// Verify if the metadataObjects array shouldn’t be nil and it accommodates at the very least one object. if metadataObjects.rely == 0 { scanResult = “No QR code detected” return }
// Get the metadata object. let metadataObj = metadataObjects[0] as! AVMetadataMachineReadableCodeObject
if metadataObj.kind == AVMetadataObject.ObjectType.qr, let consequence = metadataObj.stringValue {
scanResult = consequence print(scanResult)
} } } |
The category has a binding for updating the scan consequence. That is how we move the scan consequence again to the SwiftUI objects.
To course of the scan results of QR codes, we additionally implement the metadataOutput technique. The second parameter (i.e. metadataObjects) of the tactic is an array object, which accommodates all of the metadata objects which have been learn. The very very first thing we have to do is be sure that this array shouldn’t be nil, and it accommodates at the very least one object. In any other case, we set the worth of scanResult to No QR code detected.
If a metadata object is discovered, we examine to see if it’s a QR code and decode the embedded knowledge. The decoded data will be accessed through the use of the stringValue property of an AVMetadataMachineReadableCode object.
As soon as we put together the Coordinator class, insert the next technique to create the Coordinator occasion in QRScanner:
|
func makeCoordinator() –> Coordinator { Coordinator($consequence) } |
Additionally, replace the makeUIViewController technique like beneath. We have now to assign the coordinator object to the controller’s delegate:
|
func makeUIViewController(context: Context) –> QRScannerController { let controller = QRScannerController() controller.delegate = context.coordinator
return controller } |
The venture is nearly full. Now change again to ContentView.swift. Replace QRScanner() like beneath to move the scan consequence:
|
QRScanner(consequence: $scanResult) |
That’s it! You’re able to go! Hit the Run button to compile and check the app on an actual system.