

The default Linux terminal could get your job accomplished but it surely seems to be boring.
Boring doesn’t suggest unhealthy. It is simply … boring.
Need to spice issues up? There are a number of methods to try this:
Sure! The third choice additionally offers you a wholly completely different expertise.
One such well-liked shell is Zsh. You possibly can think about its reputation from the truth that it has turn into the default shell in macOS.
ZSH (Z Shell) permits you to add plugins and themes by which you’ll tweak the entire terminal expertise. This is an instance.

Fairly cool. Proper?
On this tutorial, I will share how one can arrange Zsh to make your terminal seem like the one within the screenshot above.
I’m utilizing Ubuntu within the tutorial however be happy to observe it on different Linux distributions aside from the steps that require bundle set up.
Set up ZSH on Ubuntu
First, let’s set up the Zsh with some stipulations that shall be helpful within the later half:
sudo apt set up zsh git fonts-font-awesomeAs soon as you might be accomplished with the set up, you can begin Zsh with the next command:
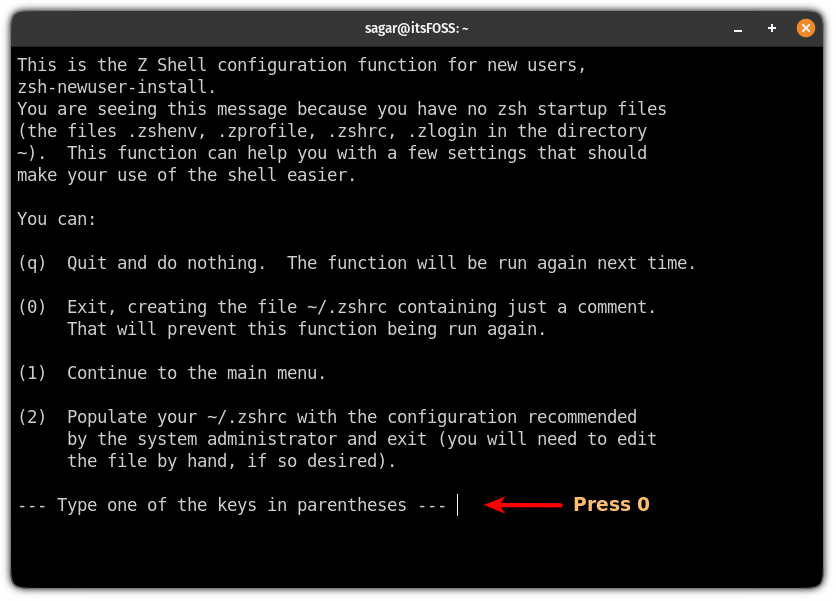
zshAnd it offers you numerous choices to take care of the Zsh config file.
I will configure every little thing from scratch so I’ll go together with the choice 0 to have an empty .zshrc file:
As I went with the empty config file, you’ll get the next immediate:
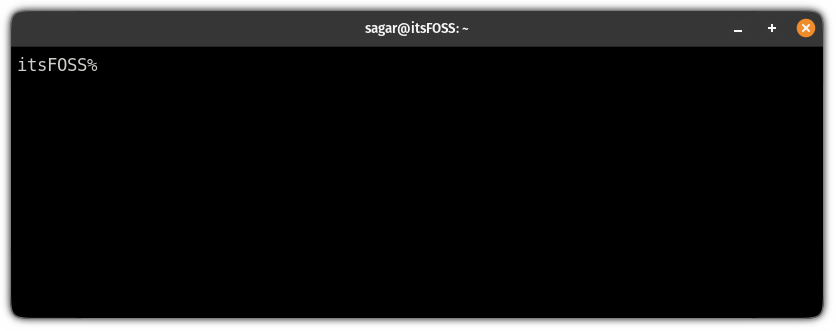
I do know it seems to be fairly uninteresting (worse than bash). However hold on. We’re simply getting began!
Customise ZSH on Ubuntu
For the customization of Zsh, I shall be masking:
- Putting in Oh my Zsh (a framework to handle Zsh)
- Auto suggesting
- Syntax highlighting
- Powerlevel10k (theme for Zsh)
So let’s begin with the Oh My Zsh.
1. Set up Oh My Zsh on Ubuntu
Utilizing Oh My Zsh is the best strategy to handle plugins and themes for Zsh.
So it’ll function a base for plugins and themes that I will share in a second.
To put in Oh My Zsh, all you need to do is execute a easy script:
sh -c "$(wget https://uncooked.github.com/ohmyzsh/ohmyzsh/grasp/instruments/set up.sh -O -)"And it’ll ask you whether or not you need to change your default shell to Zsh or not. I’d advocate you to not change it:
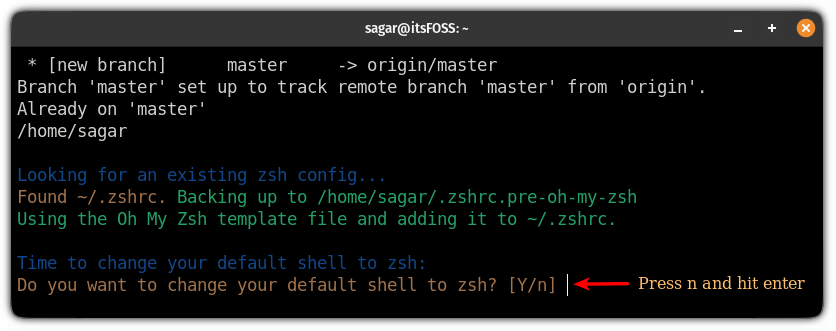
When you press n, it’ll get you into the essential Oh My zsh look:
Fairly minimal by default. Is not it?
2. Allow auto-suggestions on zsh
The auto-suggestion plugin will counsel you the command based mostly in your Zsh command historical past.
And everybody makes use of a few instructions on day by day foundation resembling instructions to replace the repository, record the contents of a listing, and many others.
So as to add the auto-suggestion plugin, first, use the given command to clone the repository:
git clone https://github.com/zsh-users/zsh-autosuggestions ${ZSH_CUSTOM:-~/.oh-my-zsh/customized}/plugins/zsh-autosuggestionsNow, to activate the auto-suggestion plugin, open the zshrc file:
nano ~/.zshrc And add zsh-autosuggestions within the plugins:
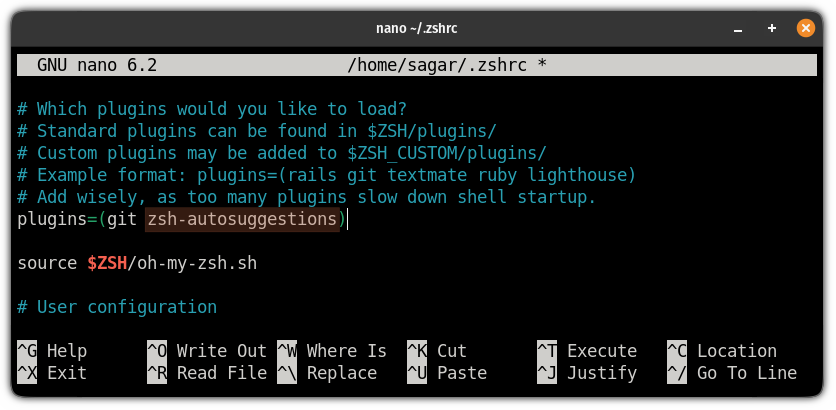
Save adjustments and exit from the nano textual content editor.
Now, restart your terminal and begin Zsh:
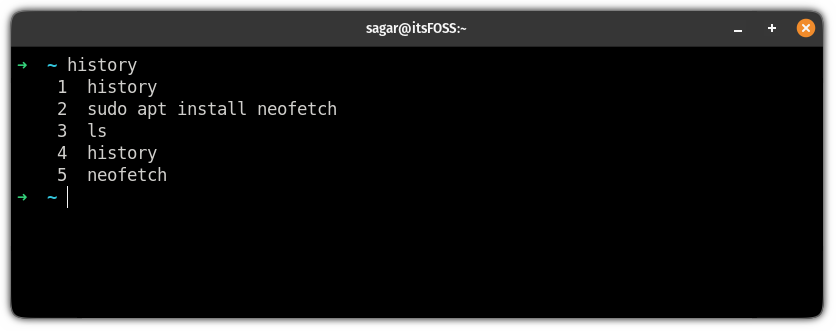
zshAnd it’ll allow the auto-suggestion:

Once you kind a command and get the best suggestion, you possibly can auto-complete that half utilizing the best arrow key.
3. Allow syntax highlighting on Zsh
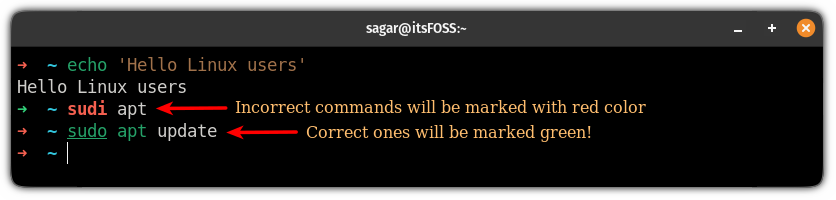
The most effective a part of utilizing syntax highlighting is that you already know whether or not the command you might be writing is appropriate.
However aside from command, it’s also useful whereas programming.
So as to add the syntax highlighting on Zsh, first, you need to clone the repository utilizing the given command:
git clone https://github.com/zsh-users/zsh-syntax-highlighting.git ${ZSH_CUSTOM:-~/.oh-my-zsh/customized}/plugins/zsh-syntax-highlightingSubsequent, open the zshrc file:
nano ~/.zshrcAnd add zsh-syntax-highlighting to plugins as proven:
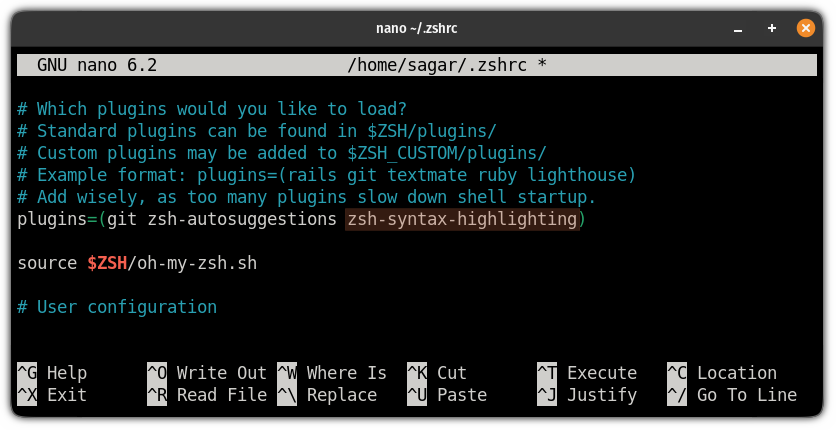
Now, save adjustments by Ctrl + O, hit enter, and press Ctrl + X to exit from the nano textual content editor.
Subsequent, restart the terminal and begin the Zsh to allow syntax highlighting:
zshAnd the syntax-highlighting ought to provide the following impact:
4. Customise Zsh with Powerlevek10k theme
From right here, you will notice main visible adjustments in your terminal.
So step one is to clone the Powerlevel10k repository:
git clone --depth=1 https://github.com/romkatv/powerlevel10k.git ${ZSH_CUSTOM:-$HOME/.oh-my-zsh/customized}/themes/powerlevel10kNow, you’ll have to change the default theme (which got here with Oh My Zsh). And to alter that, first, open the zshrc file:
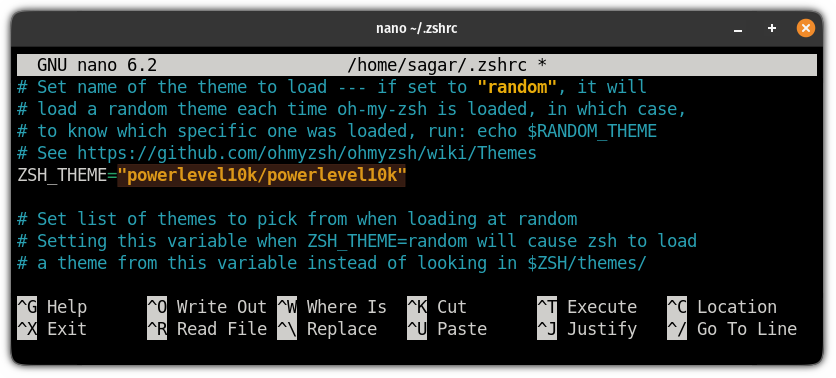
nano ~/.zshrcOne can find the presently utilized theme on the line beginning with ZSH_THEME
Right here, the default theme shall be named robbyrussell which must be modified with powerlevel10k/powerlevel10k:
Save adjustments and restart your terminal.
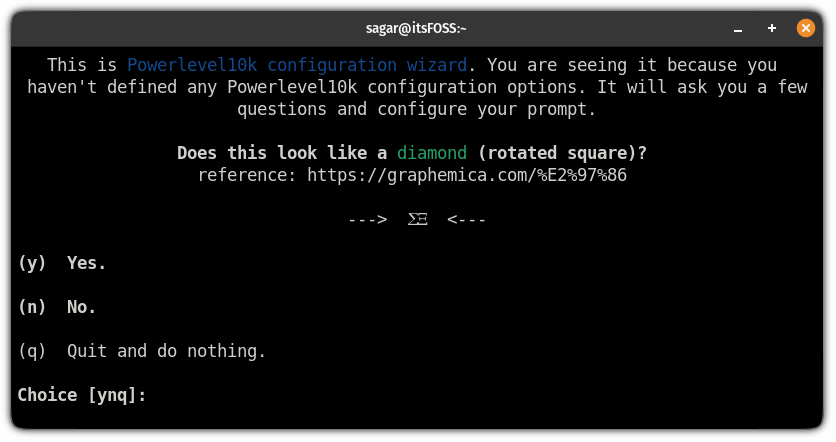
Begin the Zsh occasion and you’ll be met with the configuration wizard for the powerlevel10k theme:
zshRight here, it’ll ask you sure questions. It would begin with Does this seems to be like a diamond (rotated sq.)? For me it does not:
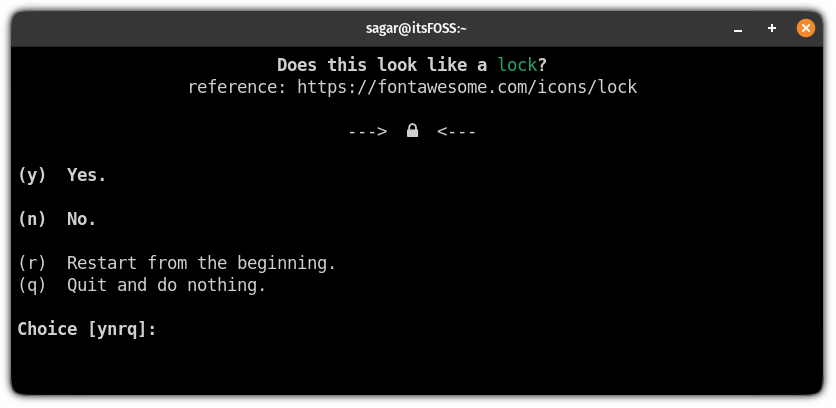
Subsequent, it’ll ask the identical query however for the lock. To me, it seems to be like one so I’ll go together with Sure (y):
Subsequent, it’ll ask whether or not the icons match between crosses. To me, it does not, so I am going with No (n):
When you reply all of the questions, it’ll get you into immediate type alternatives the place you need to select the way you need your terminal to seem like:
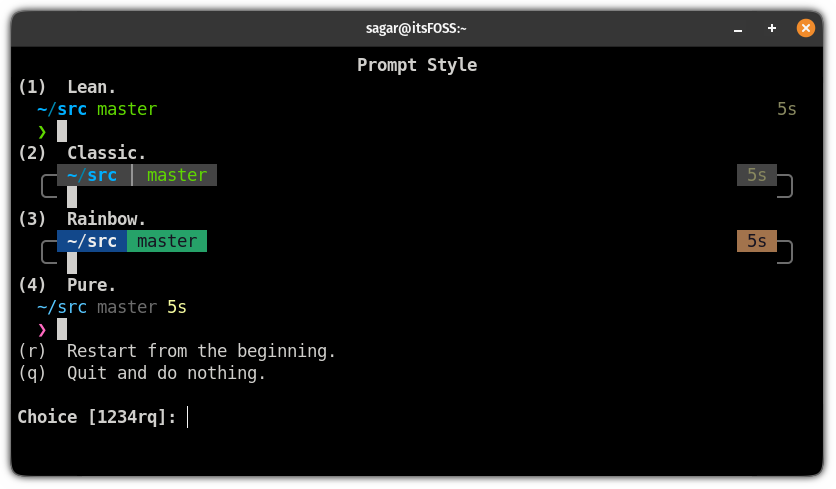
From right here on, it’ll get you numerous choices to select from. Choose as per your choice.
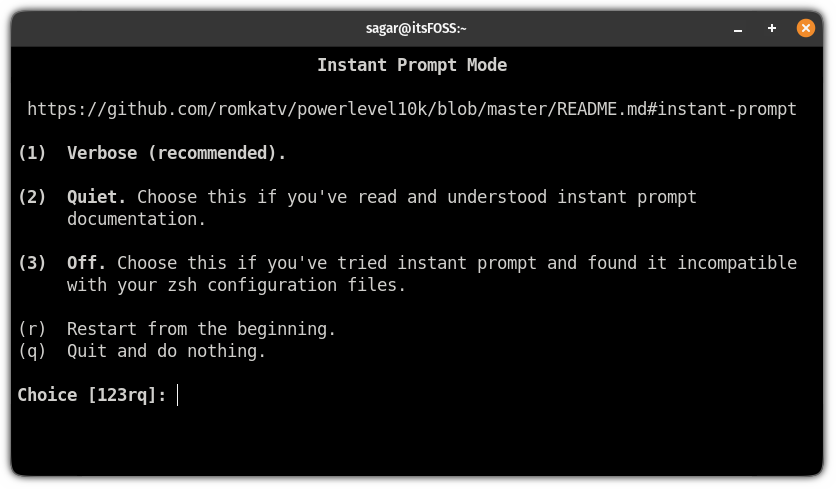
And as soon as you might be accomplished selecting the immediate type, it’ll get you into the moment immediate mode.
Right here, I’d advocate going with the Verbose choice as it’ll create a backup config file:
And eventually, press y to use adjustments to the zshrc file:
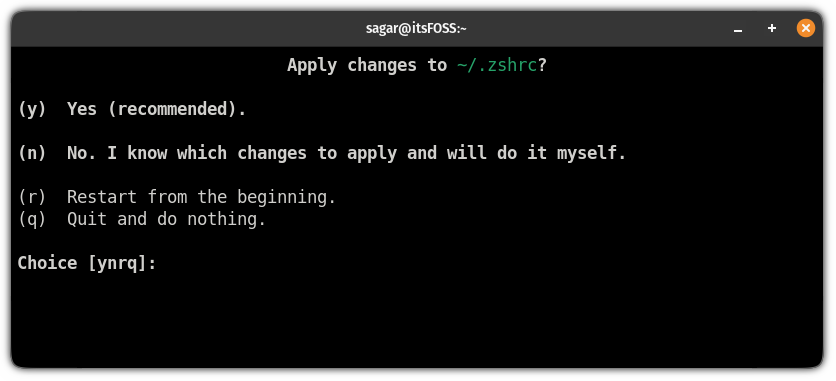
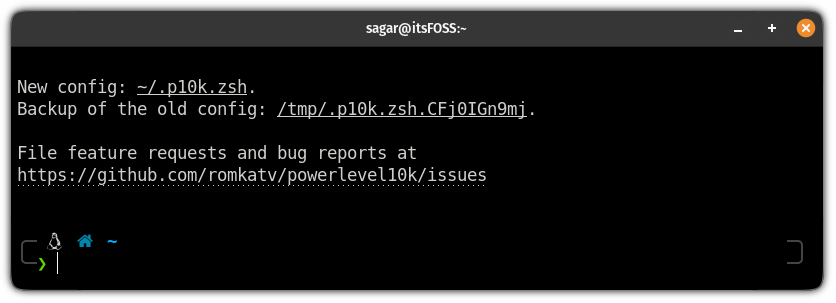
When you apply the adjustments, it’ll present the situation of the brand new and backup config file:
Not pleased with the alternatives you made? You possibly can configure the powerlevel10k theme from the beginning utilizing the next command:
p10k configureChange default shell to Zsh on Ubuntu
As soon as you might be comfy with the customizations, you possibly can set the Zsh as your default shell.
To alter your default login shell, first, execute the given command:
chshAnd to alter your default shell, enter the next path of Zsh and press enter:
/bin/zsh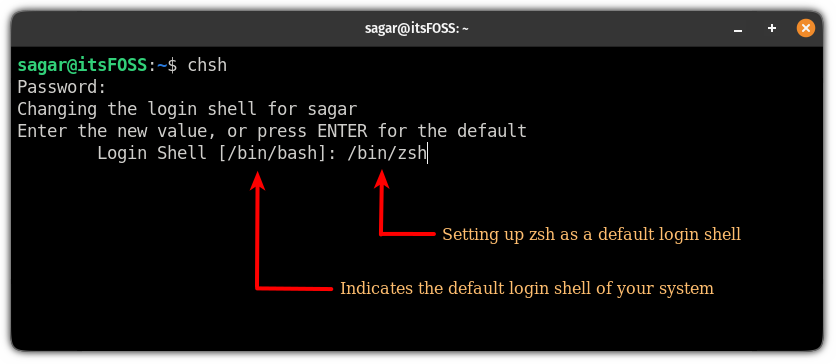
However in case you keep in mind, this may function a primary setup so if you wish to strive one thing else, you possibly can choose from numerous zsh themes from GitHub.
Need to strive lesser-known shells? Right here you might have it
Like me in case you like to discover numerous instruments, we have now a devoted information on 9 lesser-known shells that you may strive:
Past Bash: 9 Lesser-Identified Linux Shells and Their Capabilities
You in all probability already know in regards to the well-liked shells like bash and zsh. Allow us to discover some attention-grabbing and distinctive shells.
I hope the given information will allow you to to reinforce the best way you talk together with your terminal and can allow you to to embrace the terminal.
Let me know if I missed something or need me to cowl one thing else.